Accurately setting Brightness is a fundamental step in TV calibration, ensuring the display delivers its full dynamic range in the intended viewing environment. The Brightness control determines the display’s black level, the minimum amount of light produced when rendering black signal levels. Setting this correctly is essential for preserving shadow detail without lifting or crushing blacks.
Brightness is typically adjusted using a PLUGE (Picture Line-Up Generating Equipment) pattern, available from a variety of test pattern sources. All PLUGE patterns include three key elements:
- Blacker-than-black (below digital 16)
- Reference black
- Just-above-black
The goal is to lower the display’s black level until the black and blacker-than-black bars visually merge, while the just-above-black bar remains barely visible.
Note: For the most accurate results, match the room lighting to the intended viewing conditions for the display’s selected picture mode.
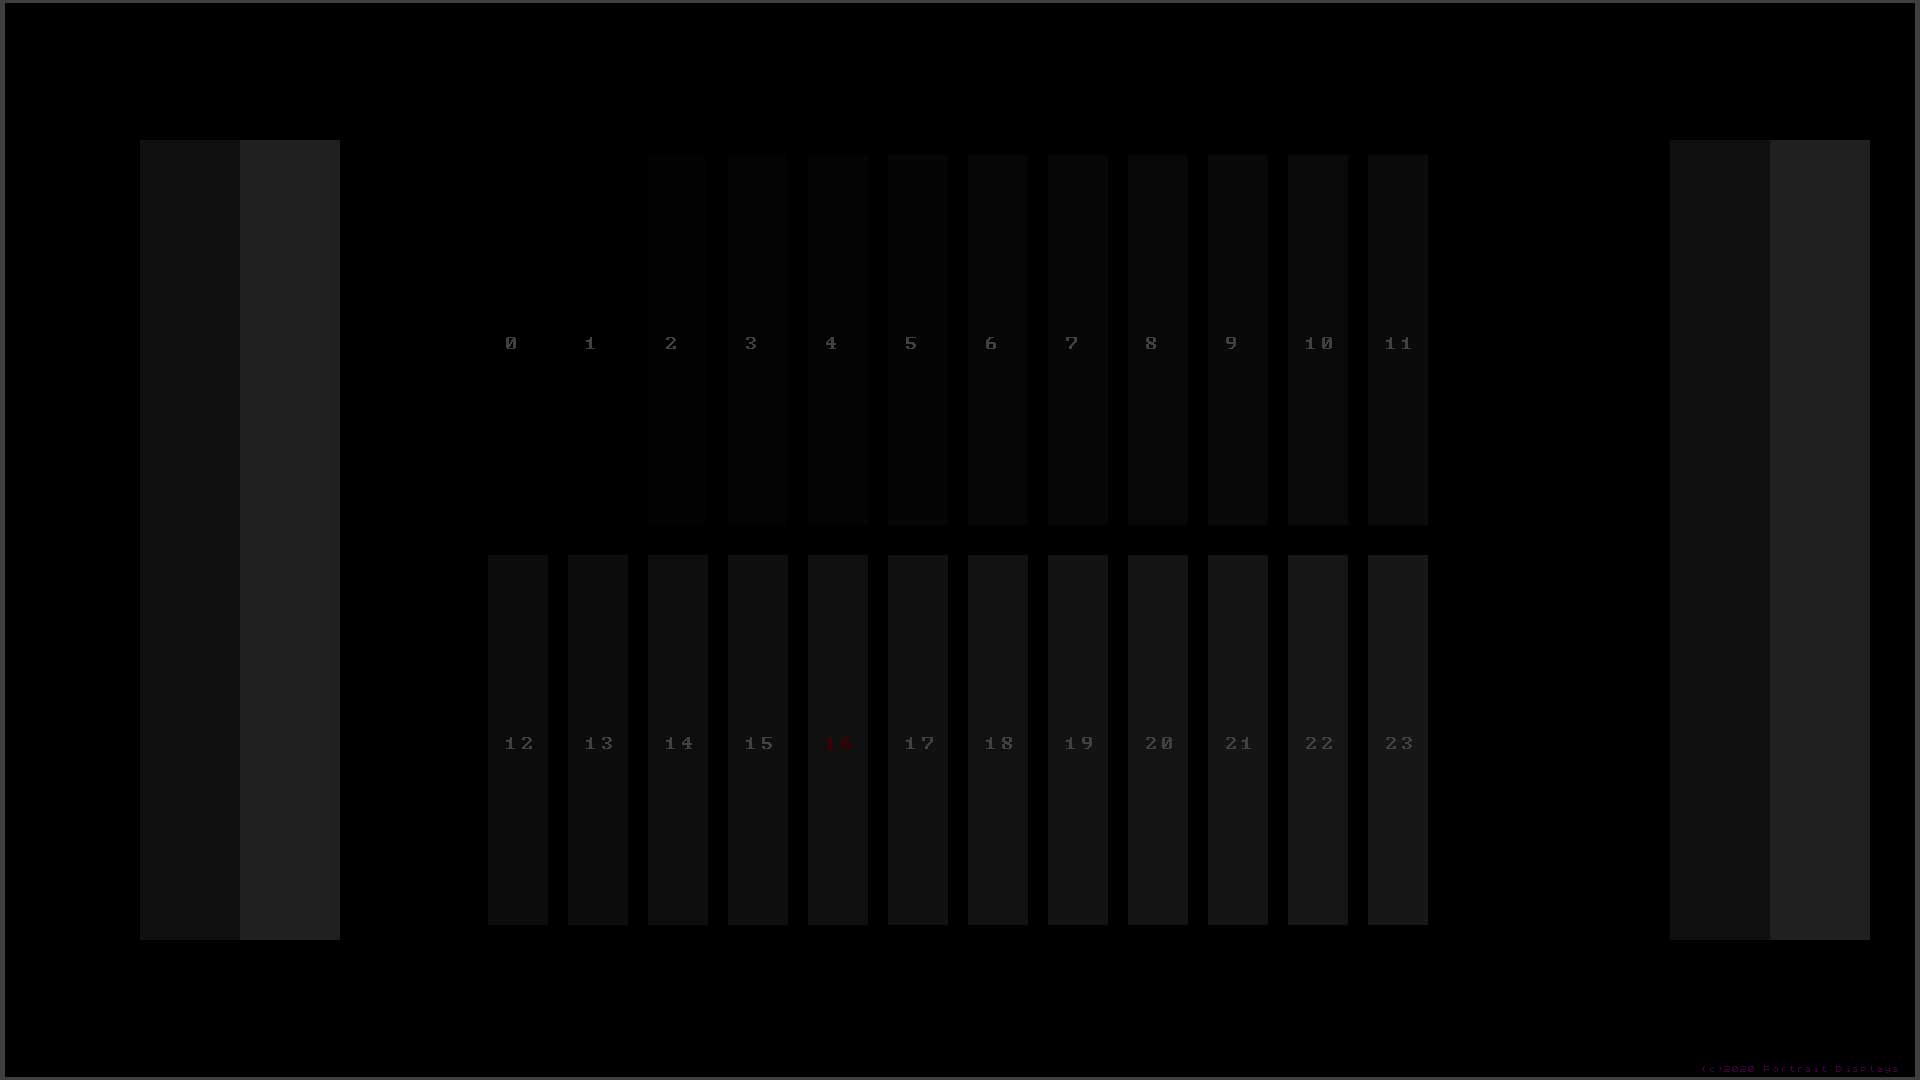
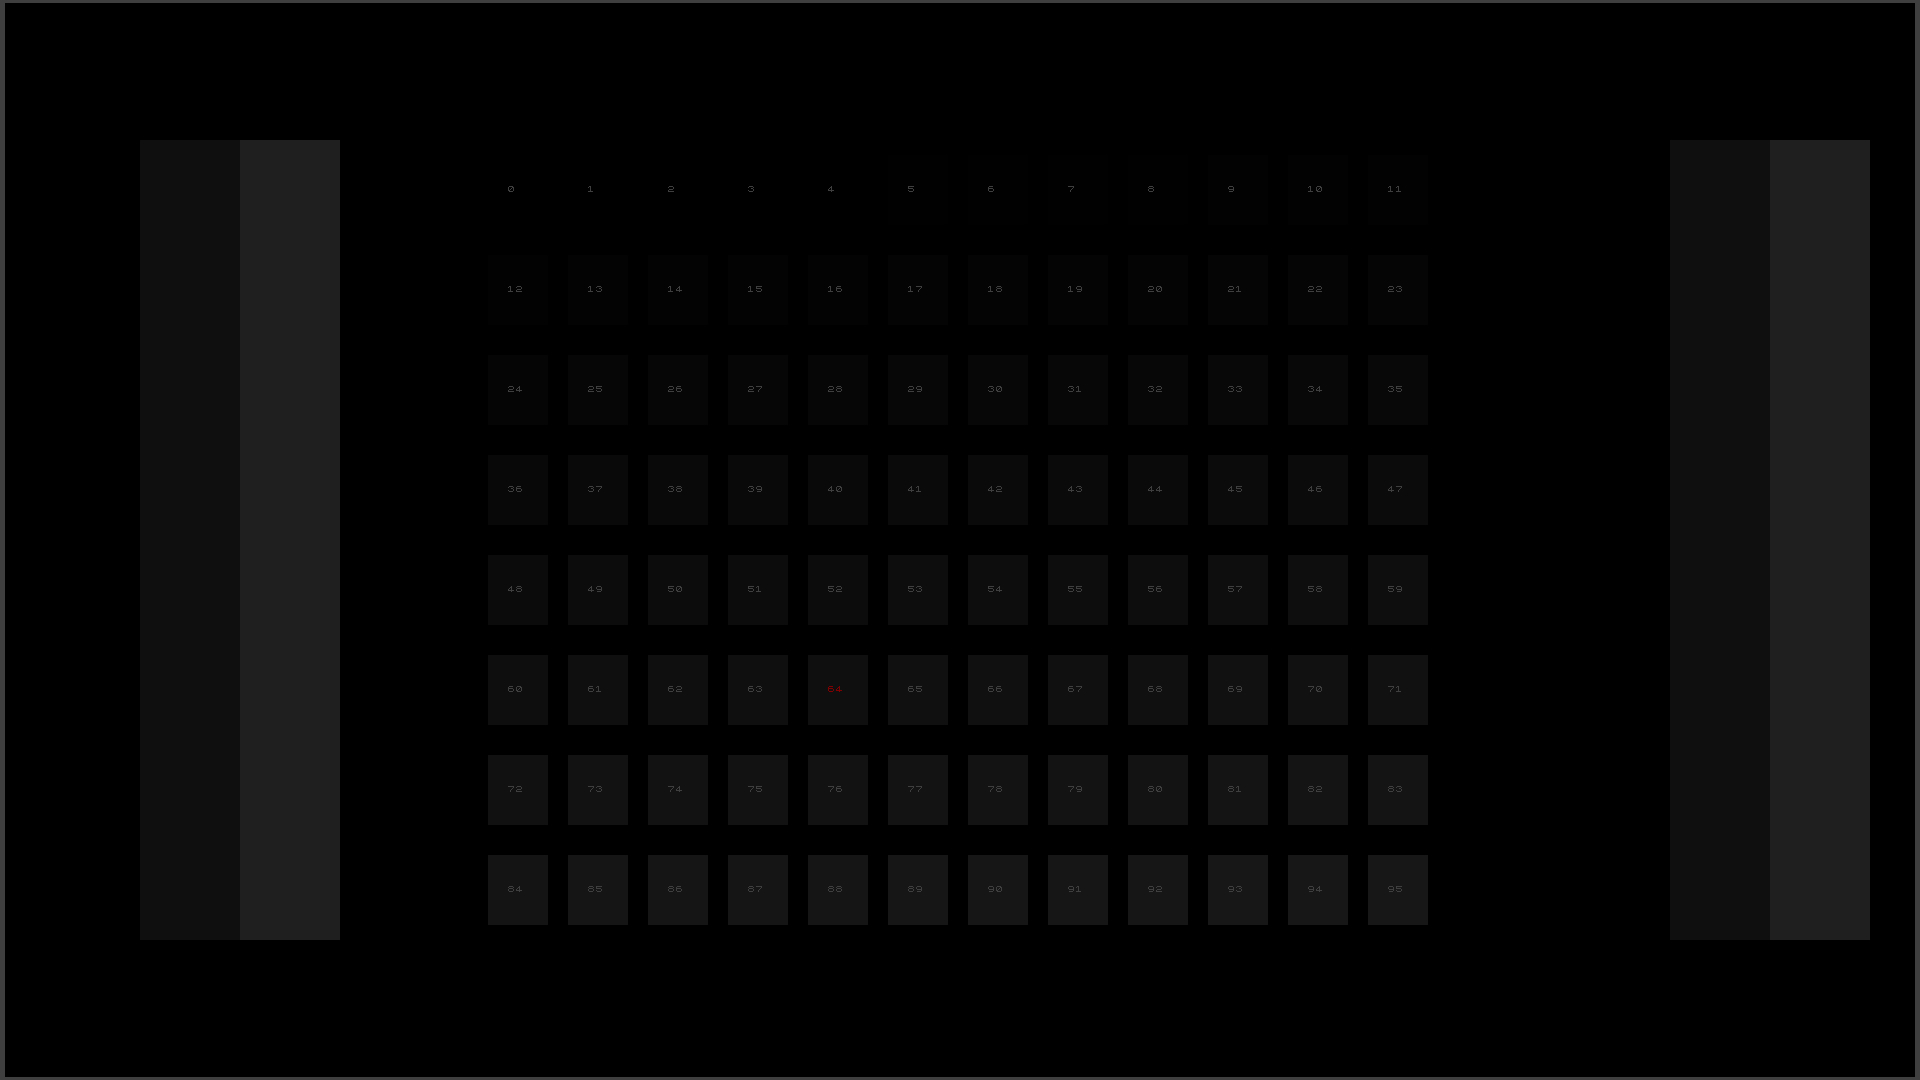
Below are examples of the Brightness patterns included on the Portrait Displays G1, they will vary slightly based on the output bit level. Other Brightness PLUGE patterns will be constructed similarly
 |
 |
| Brightness Pattern (8-bit) | Brightness Pattern (10-bit) |
How to use:
- Adjust your TVs Brightness control until you reach the goals below:
- 8-bit: If brightness (black level) is set correctly, you should only be able to see 7 distinct steps starting from Level 16 marked red. If you see more or less, Brightness (black level), is set incorrectly.
- 10-bit: If brightness (black level) is set correctly, you should only be able to see steps starting from Level 64 marked red. If you see more or less, the Brightness (black level), is set incorrectly.
- The Brightness pattern is rendered differently in 10-bit to show the same information, but at greater precision with four times as many steps