The Sharpness control on modern TVs was originally designed to make low-resolution content appear clearer by enhancing the edges of objects in a scene. This works by adding subtle artificial halos: a thin dark halo on the bright side of an edge and a thin bright halo on the dark side. These edge enhancements create the perception of more detail.
While many viewers prefer a perceptually sharp image, excessive Sharpness often introduces visible artifacts. Over-sharpening can make images look harsh, overwrite fine details, and reduce the actual detail visible in the picture. For high-resolution content, unsharpened cinema-style images may appear softer at first but actually retain more true detail.
On modern displays, Sharpness may still help lower-resolution content on smaller screens, but for high-resolution images, it is generally best to minimize edge enhancement. However, some TVs may slightly soften the image at the lowest Sharpness setting, so the goal is to find a balance: a setting that neither adds noticeable edge halos nor blurs fine details. In most cases, this is achieved at or near the lowest Sharpness setting that preserves natural edge clarity.
Below is the Sharpness included on the Portrait Displays G1, other sharpness patterns will have similar elements. If the sharpness setting on your display is set too high, you will see a white halo or the boundary of where the black lines meet the gray background.
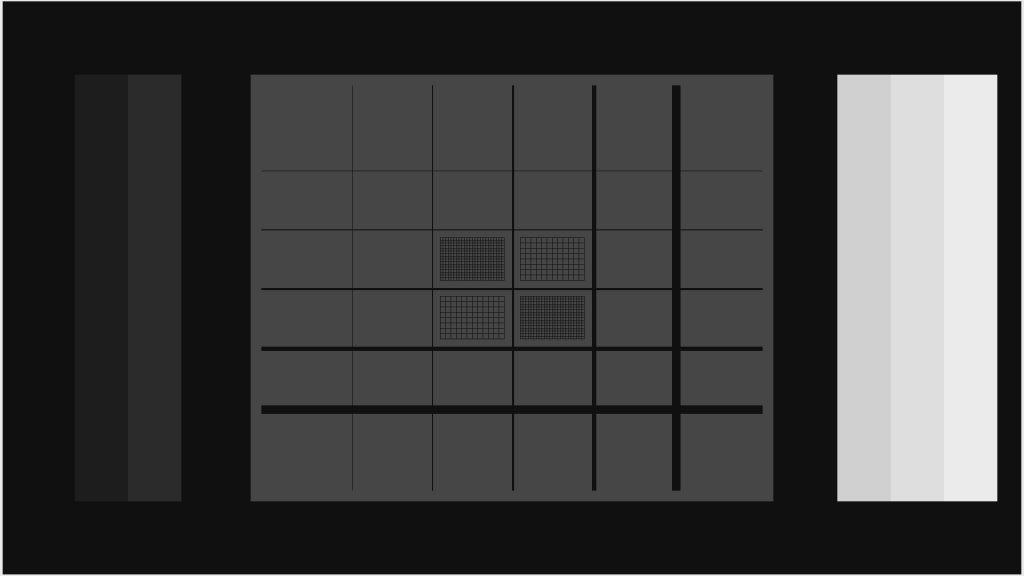
Adjusting the Sharpness Control
- Display a Sharpness or MultiBurst test pattern on your TV.
- Gradually increase the Sharpness setting to observe the edge enhancement effect around thin black lines or the finest details in the multiburst bars.
- Gradually decrease the Sharpness setting to reduce visible edge halos, but stop before the image edges start to blur.
- If the lowest Sharpness setting does not introduce any edge softening, it is typically the optimal setting.