This workflow is designed for automatic calibration of compatible LG TVs using Calman Ultimate. It guides users through configuring the setup to enable fully automated calibration of SDR, HDR10, and Dolby Vision picture modes—requiring no manual input during the process. Once configured, Calman performs all measurements and adjustments to ensure accurate and consistent image quality across all viewing modes.

![]()
Calman Required Version
- Calman Ultimate v5.16.6 or higher
Hardware Requirements
- Calman Compatible Meter
- Calman Compatible Pattern Generator
- Calman Compatible LG TV:
|
Year |
Processor |
OLED Models |
LCD Models |
|
2025 |
Alpha 7 |
– |
QNED80, QNED82, QNED82A, NANO80, NANO90,UA77A, UA75Z, UA77 |
|
|
Alpha 8 |
B5, B5A |
QNED92, QNED90A, QNED90, QNED85, QNED85A, UA90, UA90A |
|
|
Alpha 9 |
C5, C5A |
QNED9M |
|
|
Alpha 11 |
M5, G5 |
– |
|
2024 |
Alpha 5 |
– |
QNED80, NANO80, UT90, UT80, UT73, LR60 |
|
Alpha 8 |
B4 |
QNED90, QNED85, 86Nano80 |
|
|
Alpha 9 |
C4 |
QNED99 |
|
|
Alpha 11 |
M4, G4 |
– |
|
|
2023 |
Alpha 7 |
A3, B3 |
QNED80, QNED80UQA, QNED90, NANO85, NANO90, NANO91 |
|
Alpha 9 |
C3, G3, M3, R3 |
QNED99, NANO99, NANO97 |
|
|
2022 |
Alpha 9 |
C2, G2, M2, R2, Z2 |
QNED99, NANO99, NANO97 |
|
Alpha 7 |
A2, B2 |
QNED80, QNED80UQA, QNED90, NANO85, NANO90, NANO91 |
|
|
2021 |
Alpha 9 |
C1, G1, M1, R1, Z1 |
QNED99, QNED95, NANO99, NANO95 |
|
Alpha 7 |
A1, B1 |
QNED90, NANO90, NANO85 |
|
|
2020 |
Alpha 9 |
CX, GX, WX, ZX |
NANO99, NANO97, NANO95 |
|
Alpha 7 |
BX |
NANO90, NANO85 |
|
|
2019 |
Alpha 9 |
R9, Z9, W9, W9S, E9, C9 |
NanoCell SM99 |
|
Alpha 7 |
B9 |
NanoCell LCD Models |
Step 1
- From the Calman Menu in the top-left, choose Open Workflow Template -> Calman Ready and then LG.

- When “Automation” is selected, Calman will automatically run the entire workflow for you.
- Select the Year, Display Technology, and Model of your LG TV.
- Click Next to proceed.
Step 2
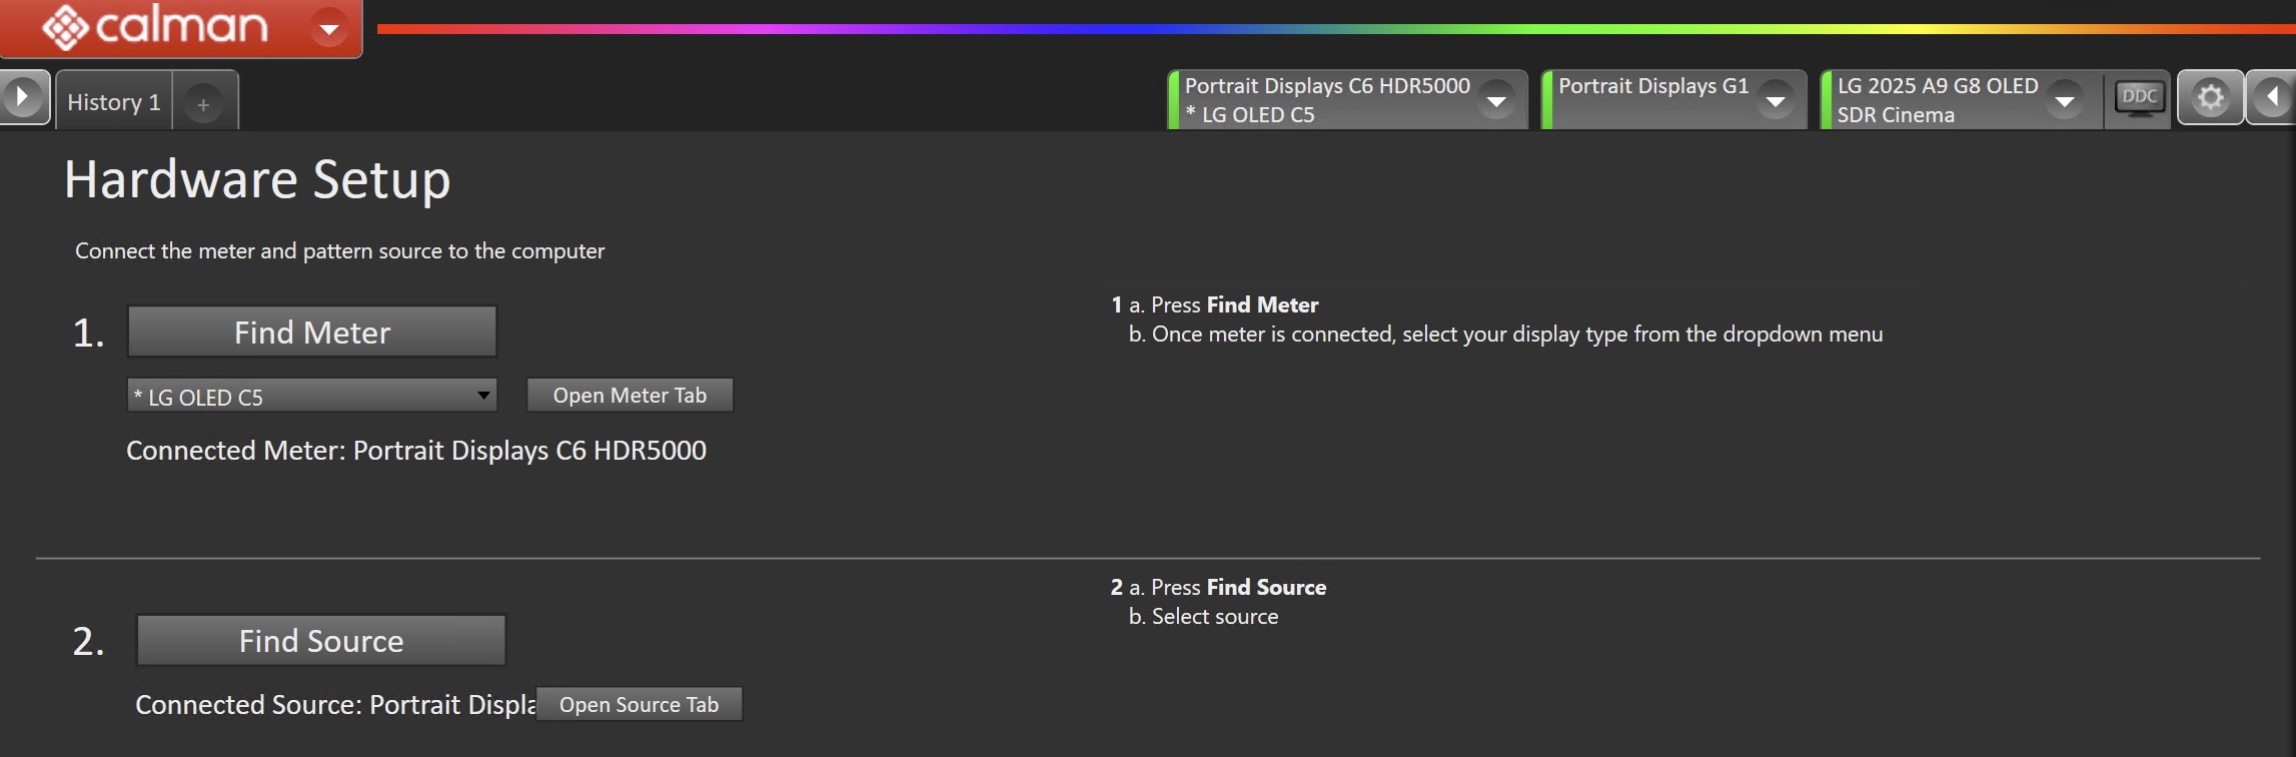
- Plug your meter into a USB port on the computer and press the Find Meter button on the left.
- When your meter is connected, select your display type from the dropdown
- Connect Pattern Source to your computer.
- Click the Find Source button, then select your source
- Note: Automation has been optimized for the Portrait Displays G1 and VideoForge Pro pattern generators. Other generators may cause issues with the automated process. If you’re experiencing issues with the automated process, proceed with a manual calibration
- Click Next to proceed.
(Optional) Current State Measurements
- This workflow page is intended to document the monitor’s current operational state before establishing any DDC connection or selecting a calibration mode.
- This step can be skipped if documenting the current state is not needed. Another set of Pre-Calibration measurements will be taken in later steps.
- Configure the Picture Modes and targets that you wish to perform current state measurements on, and click Next to proceed.
Step 3
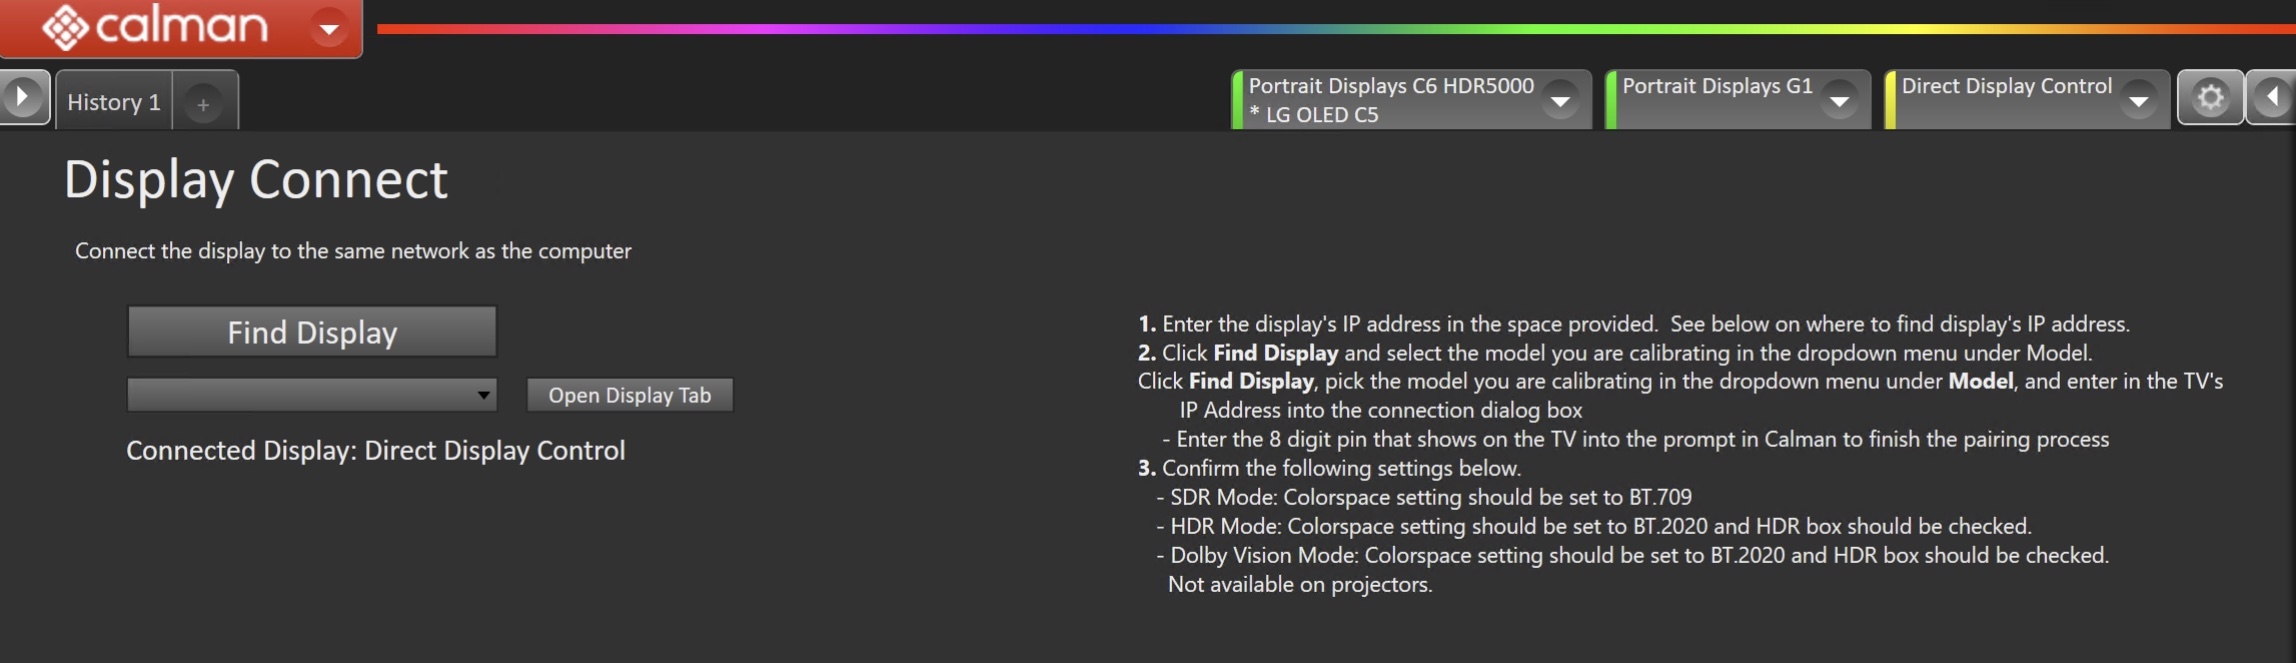
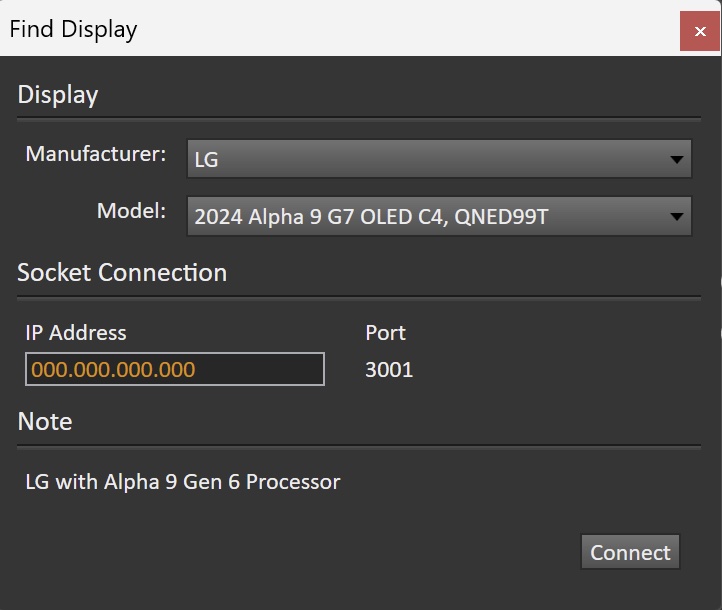
- Connect to your LG TV
- Click the Find LG TV Button
- Pick the LCD or OLED Model you are calibrating in the drop-down under Model.
- Enter your TV’s IP Address into the connection dialog box, and click Connect.
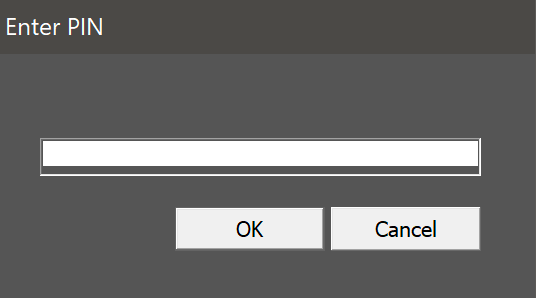
- When prompted, enter the 8-digit passcode displayed on the TV (Will only appear on the first connection)
- Click Next to proceed.
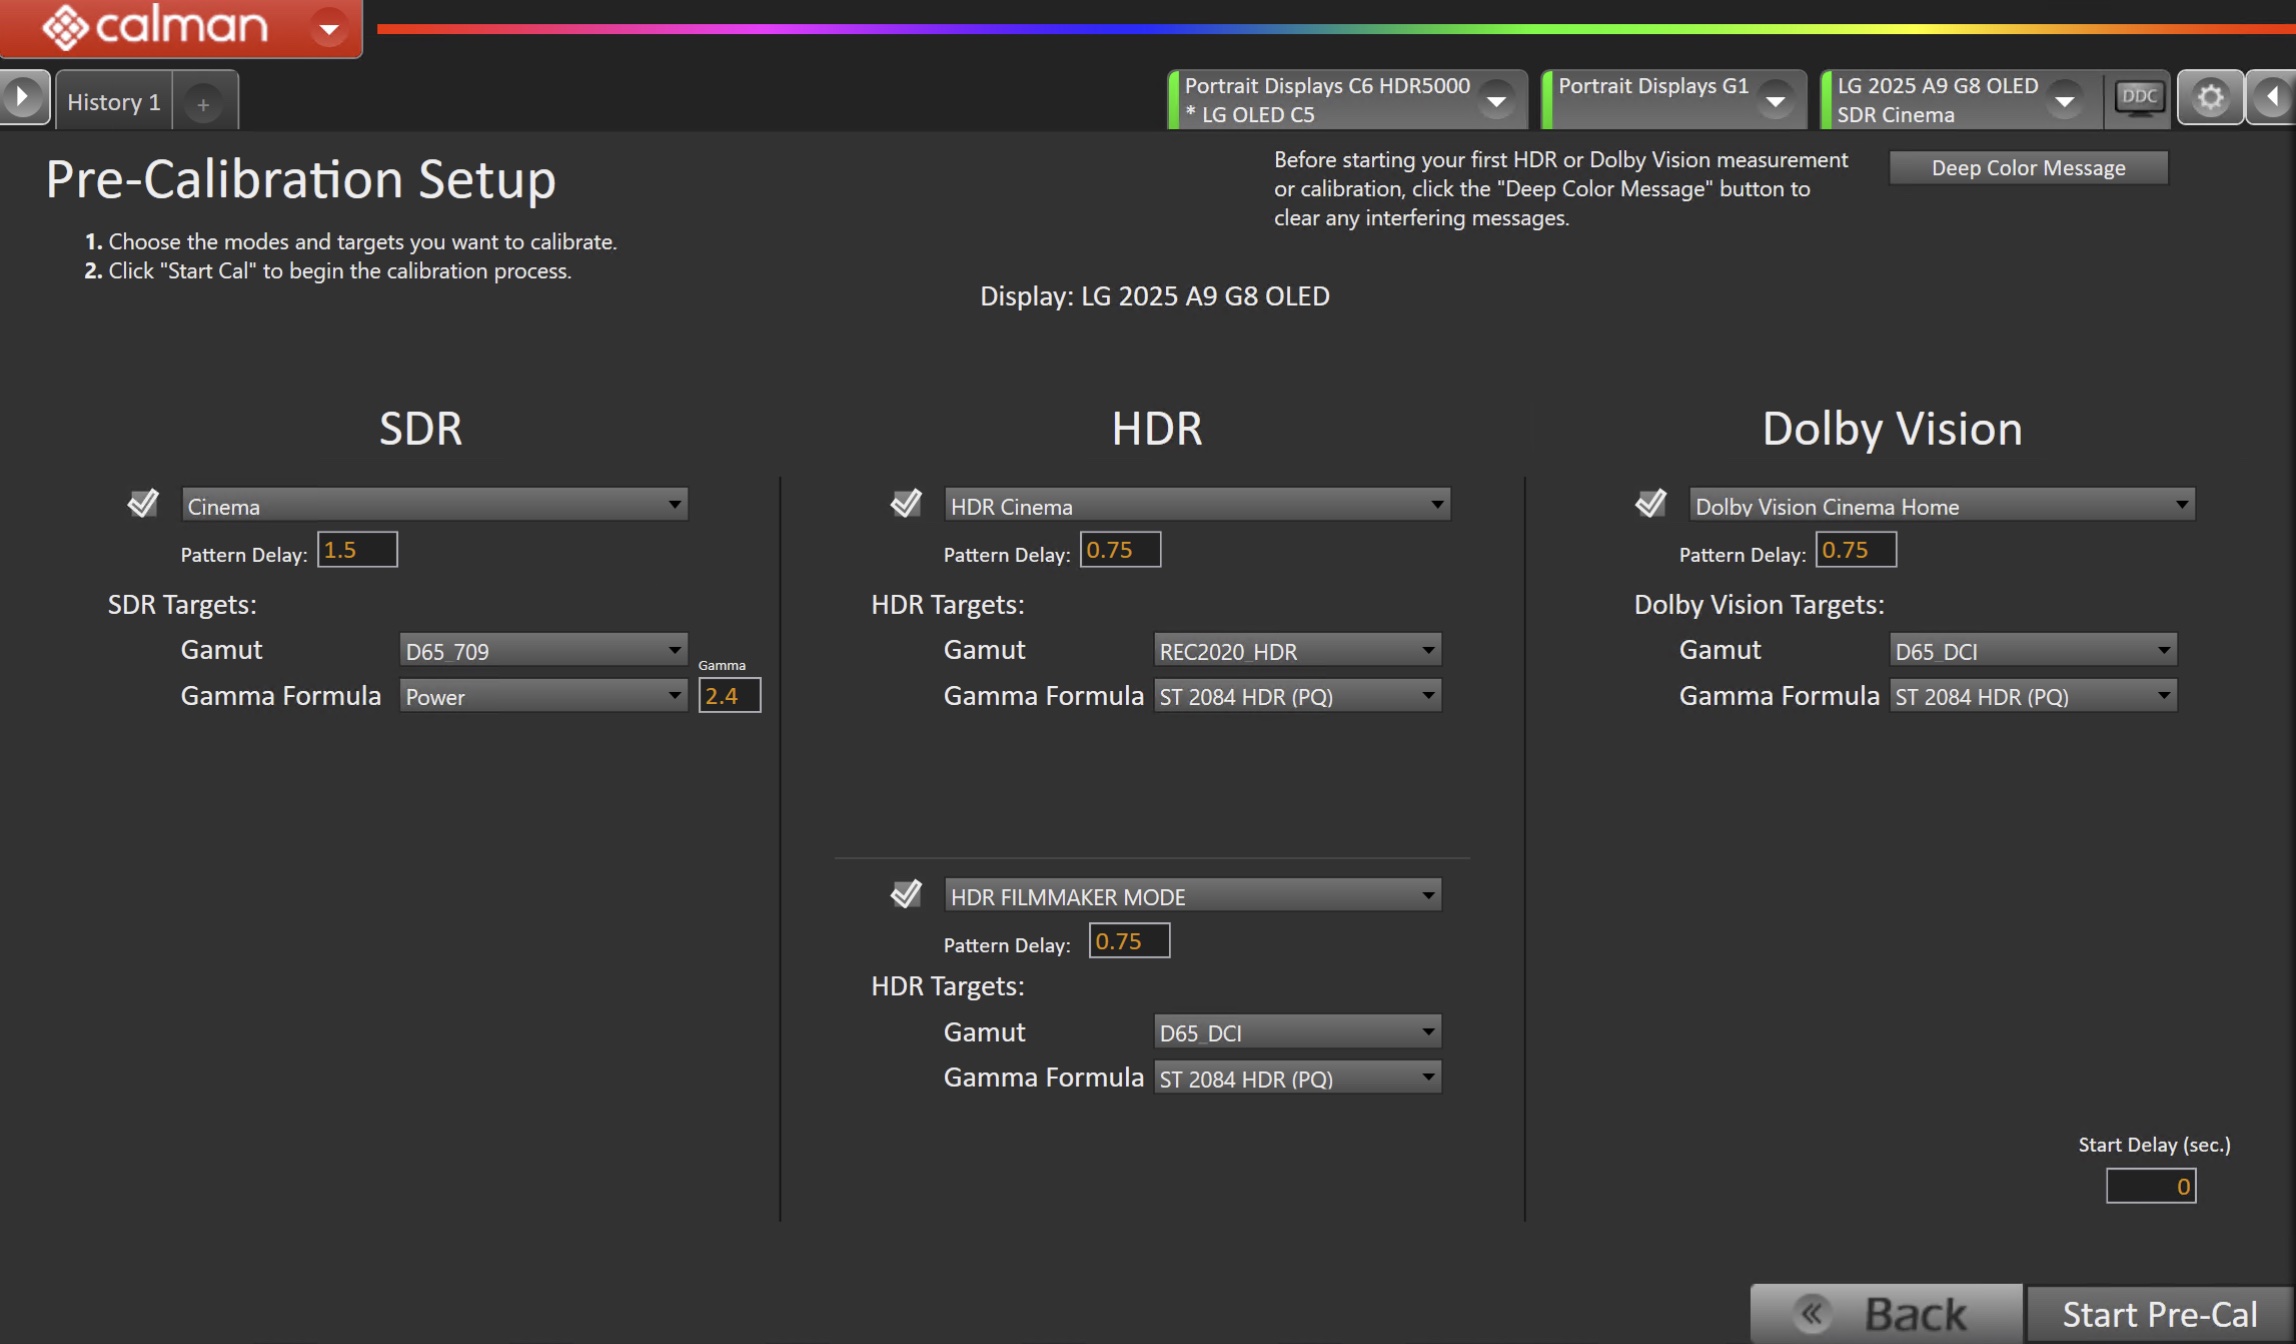
Step 4
- This workflow page is intended to document the target picture modes prior to calibration.
- Select the Picture Modes and targets that you wish to perform current state measurements on, and click Start Pre-Cal
Step 5
- Here you can configure your target picture modes for each colorspace, as well as the 1D and 3D LUT generation methods used during calibration
- Calman has multiple methods for creating a 3D LUT. For information about these LUTs see THIS ARTICLE.
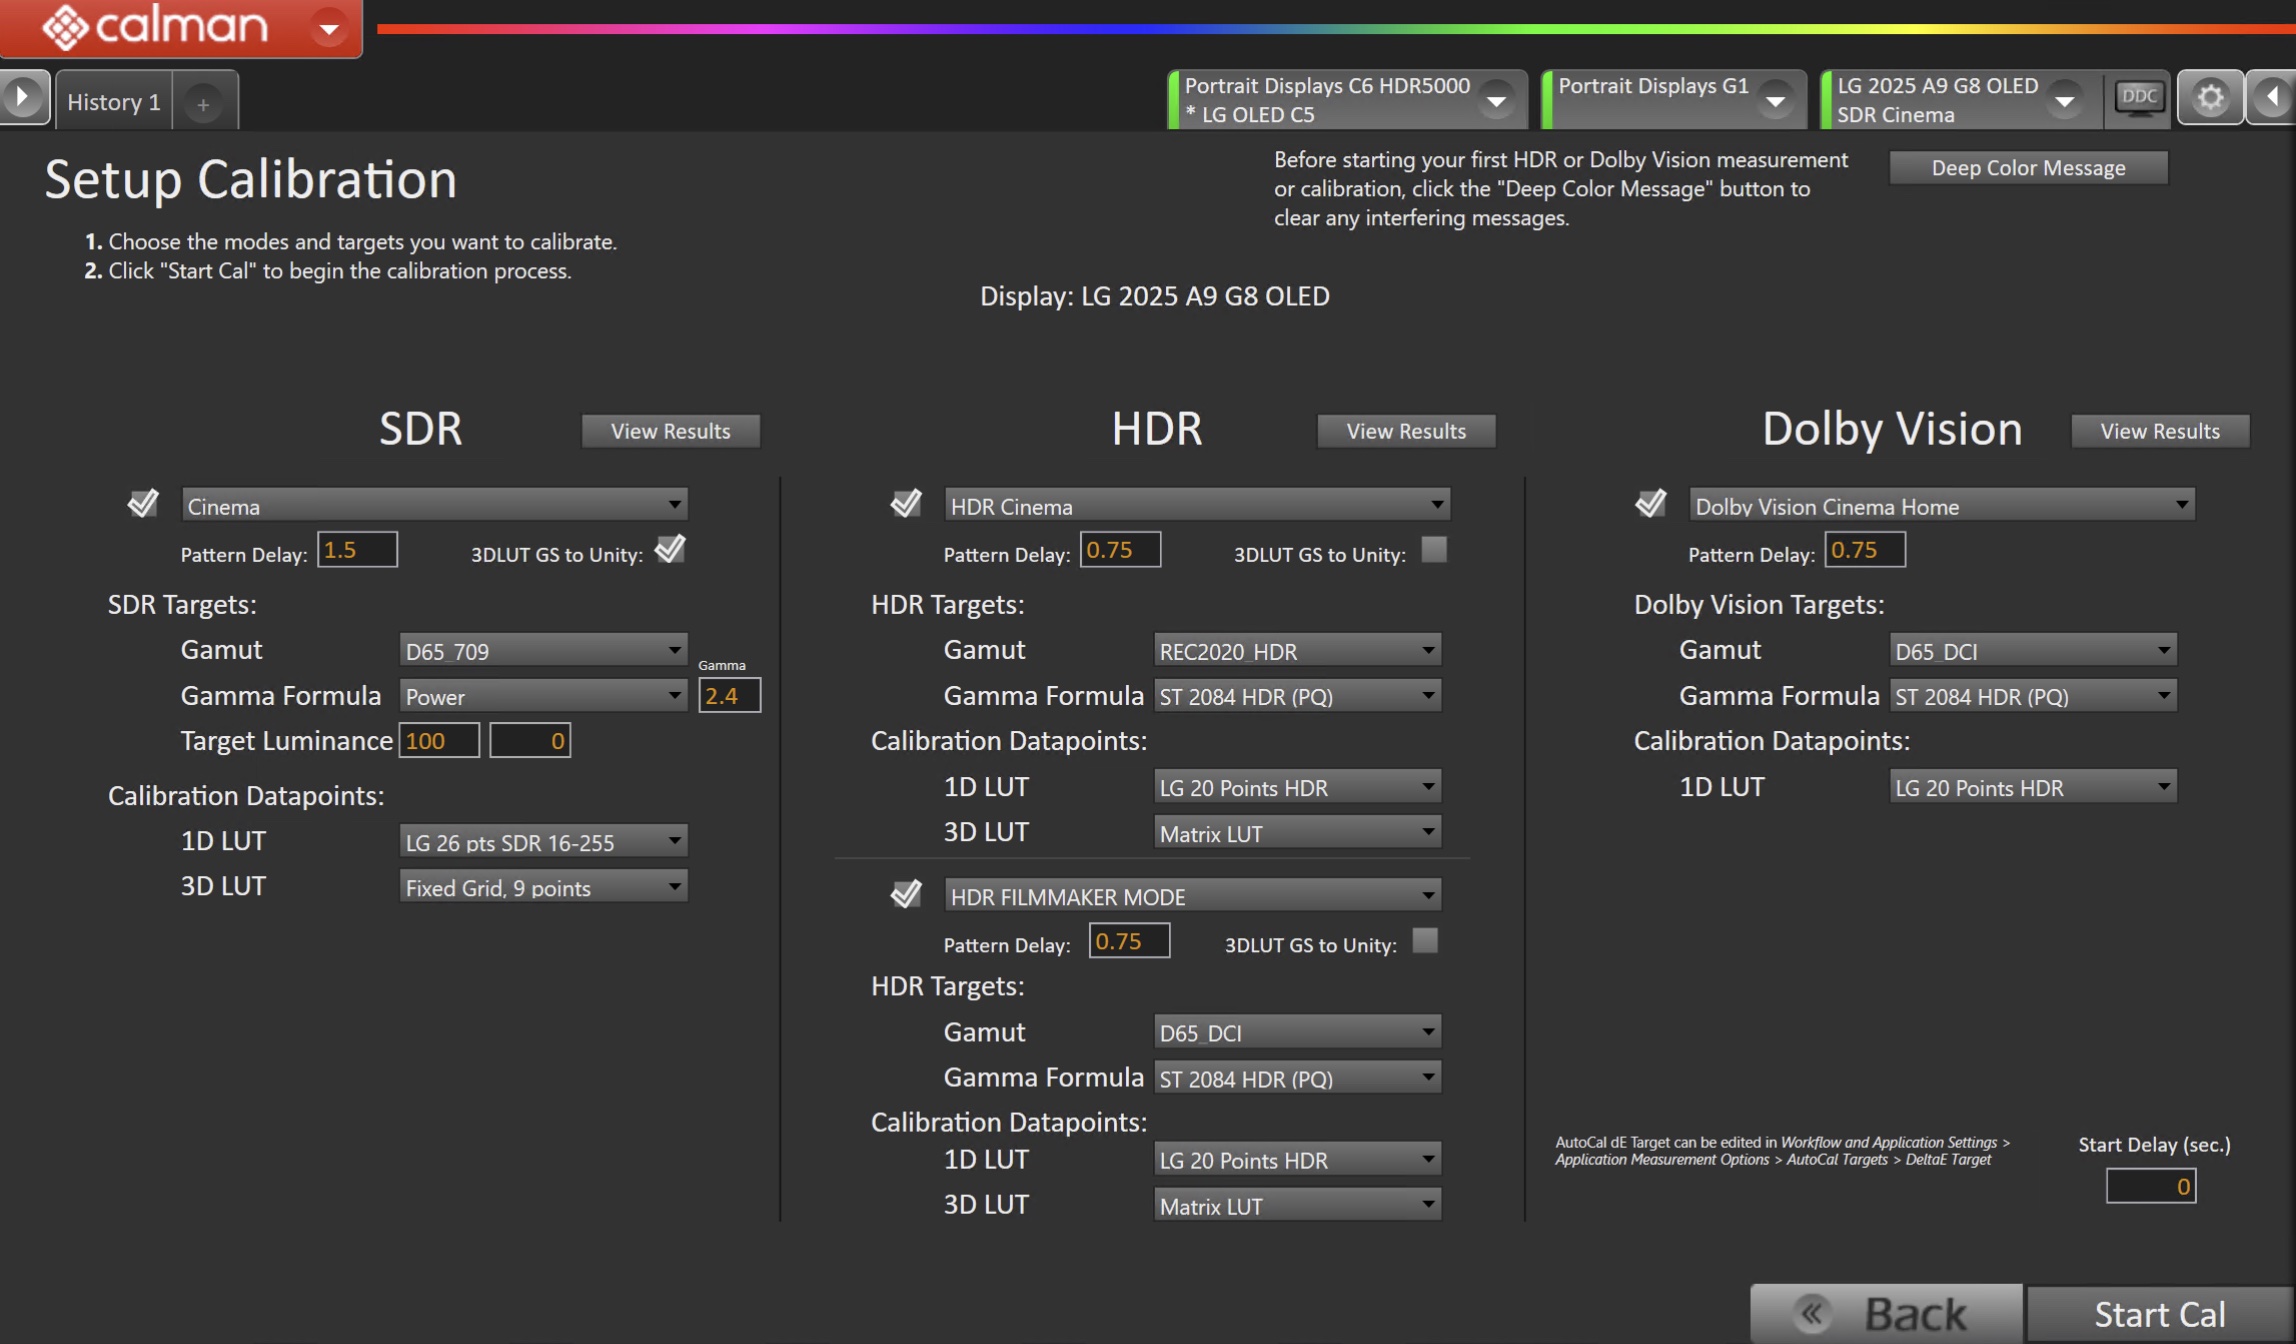
- Once all options are configured as intended, click Start Cal to begin
- Note: Some 3D LUT options will result in a very lengthy calibration. For calibration times around 1-2 hours, choose Matrix or Lightning LUTs.
Step 6
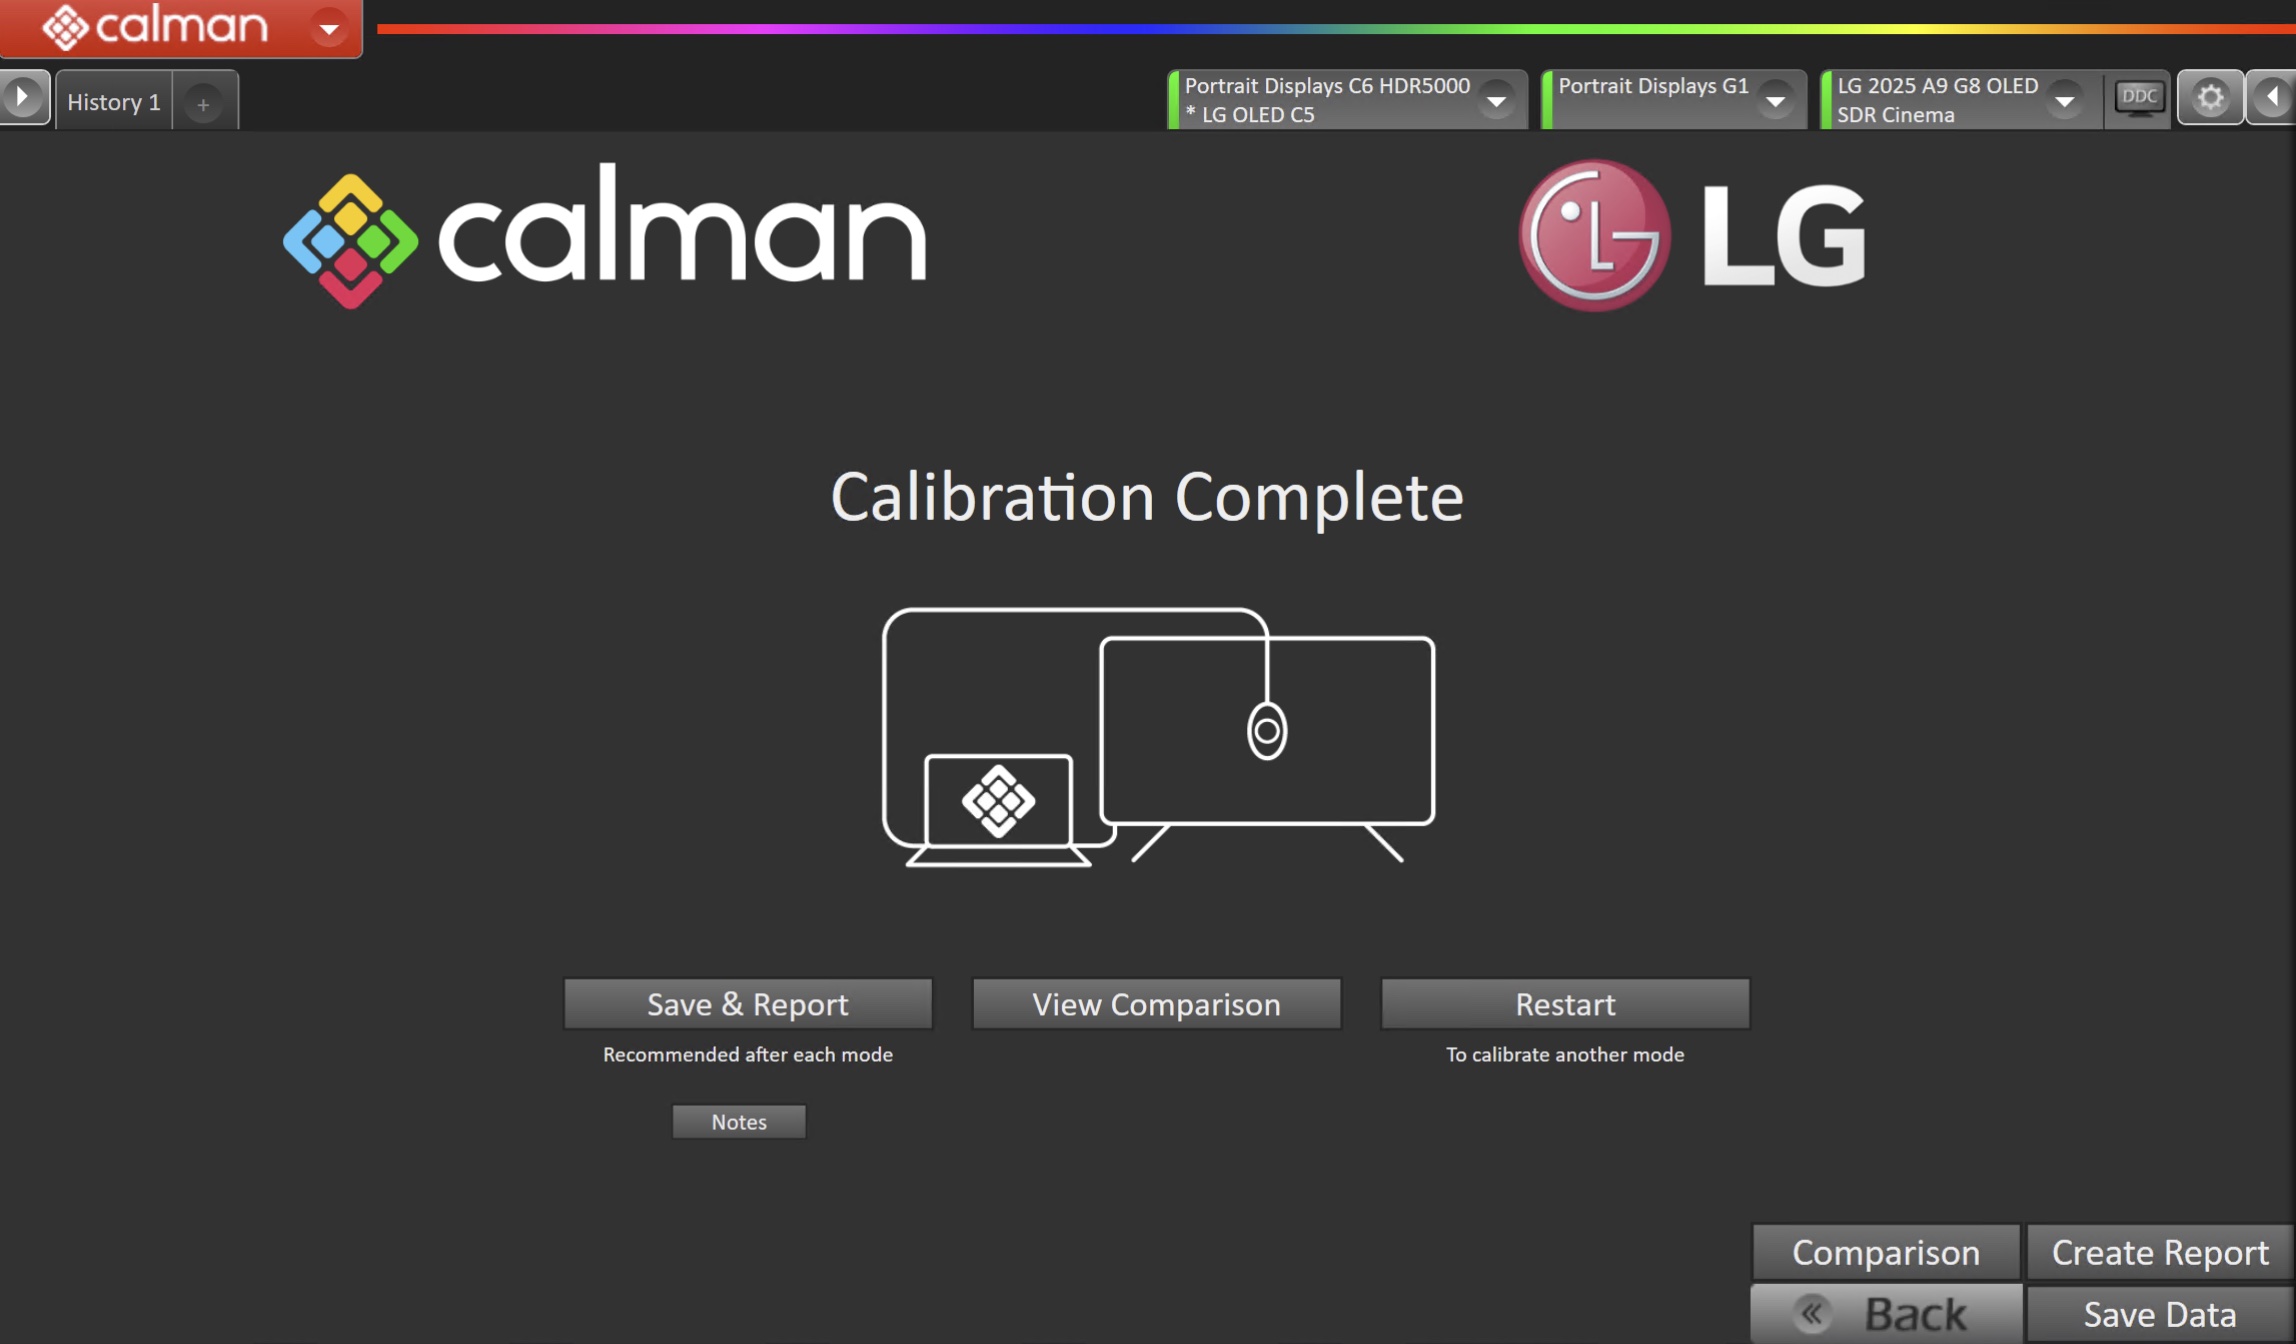
- On the Calibration Complete page, you can choose to…
- Save and Report
- Select Save and Report to generate the calibration report
- View Comparison
- Displays Pre and Post Calibration measurements of the calibrated mode side-by-side
- Restart
- Returns to the beginning of the workflow where a new mode or colorspace can be selected
- Note: Does not save workflow data
- Save and Report