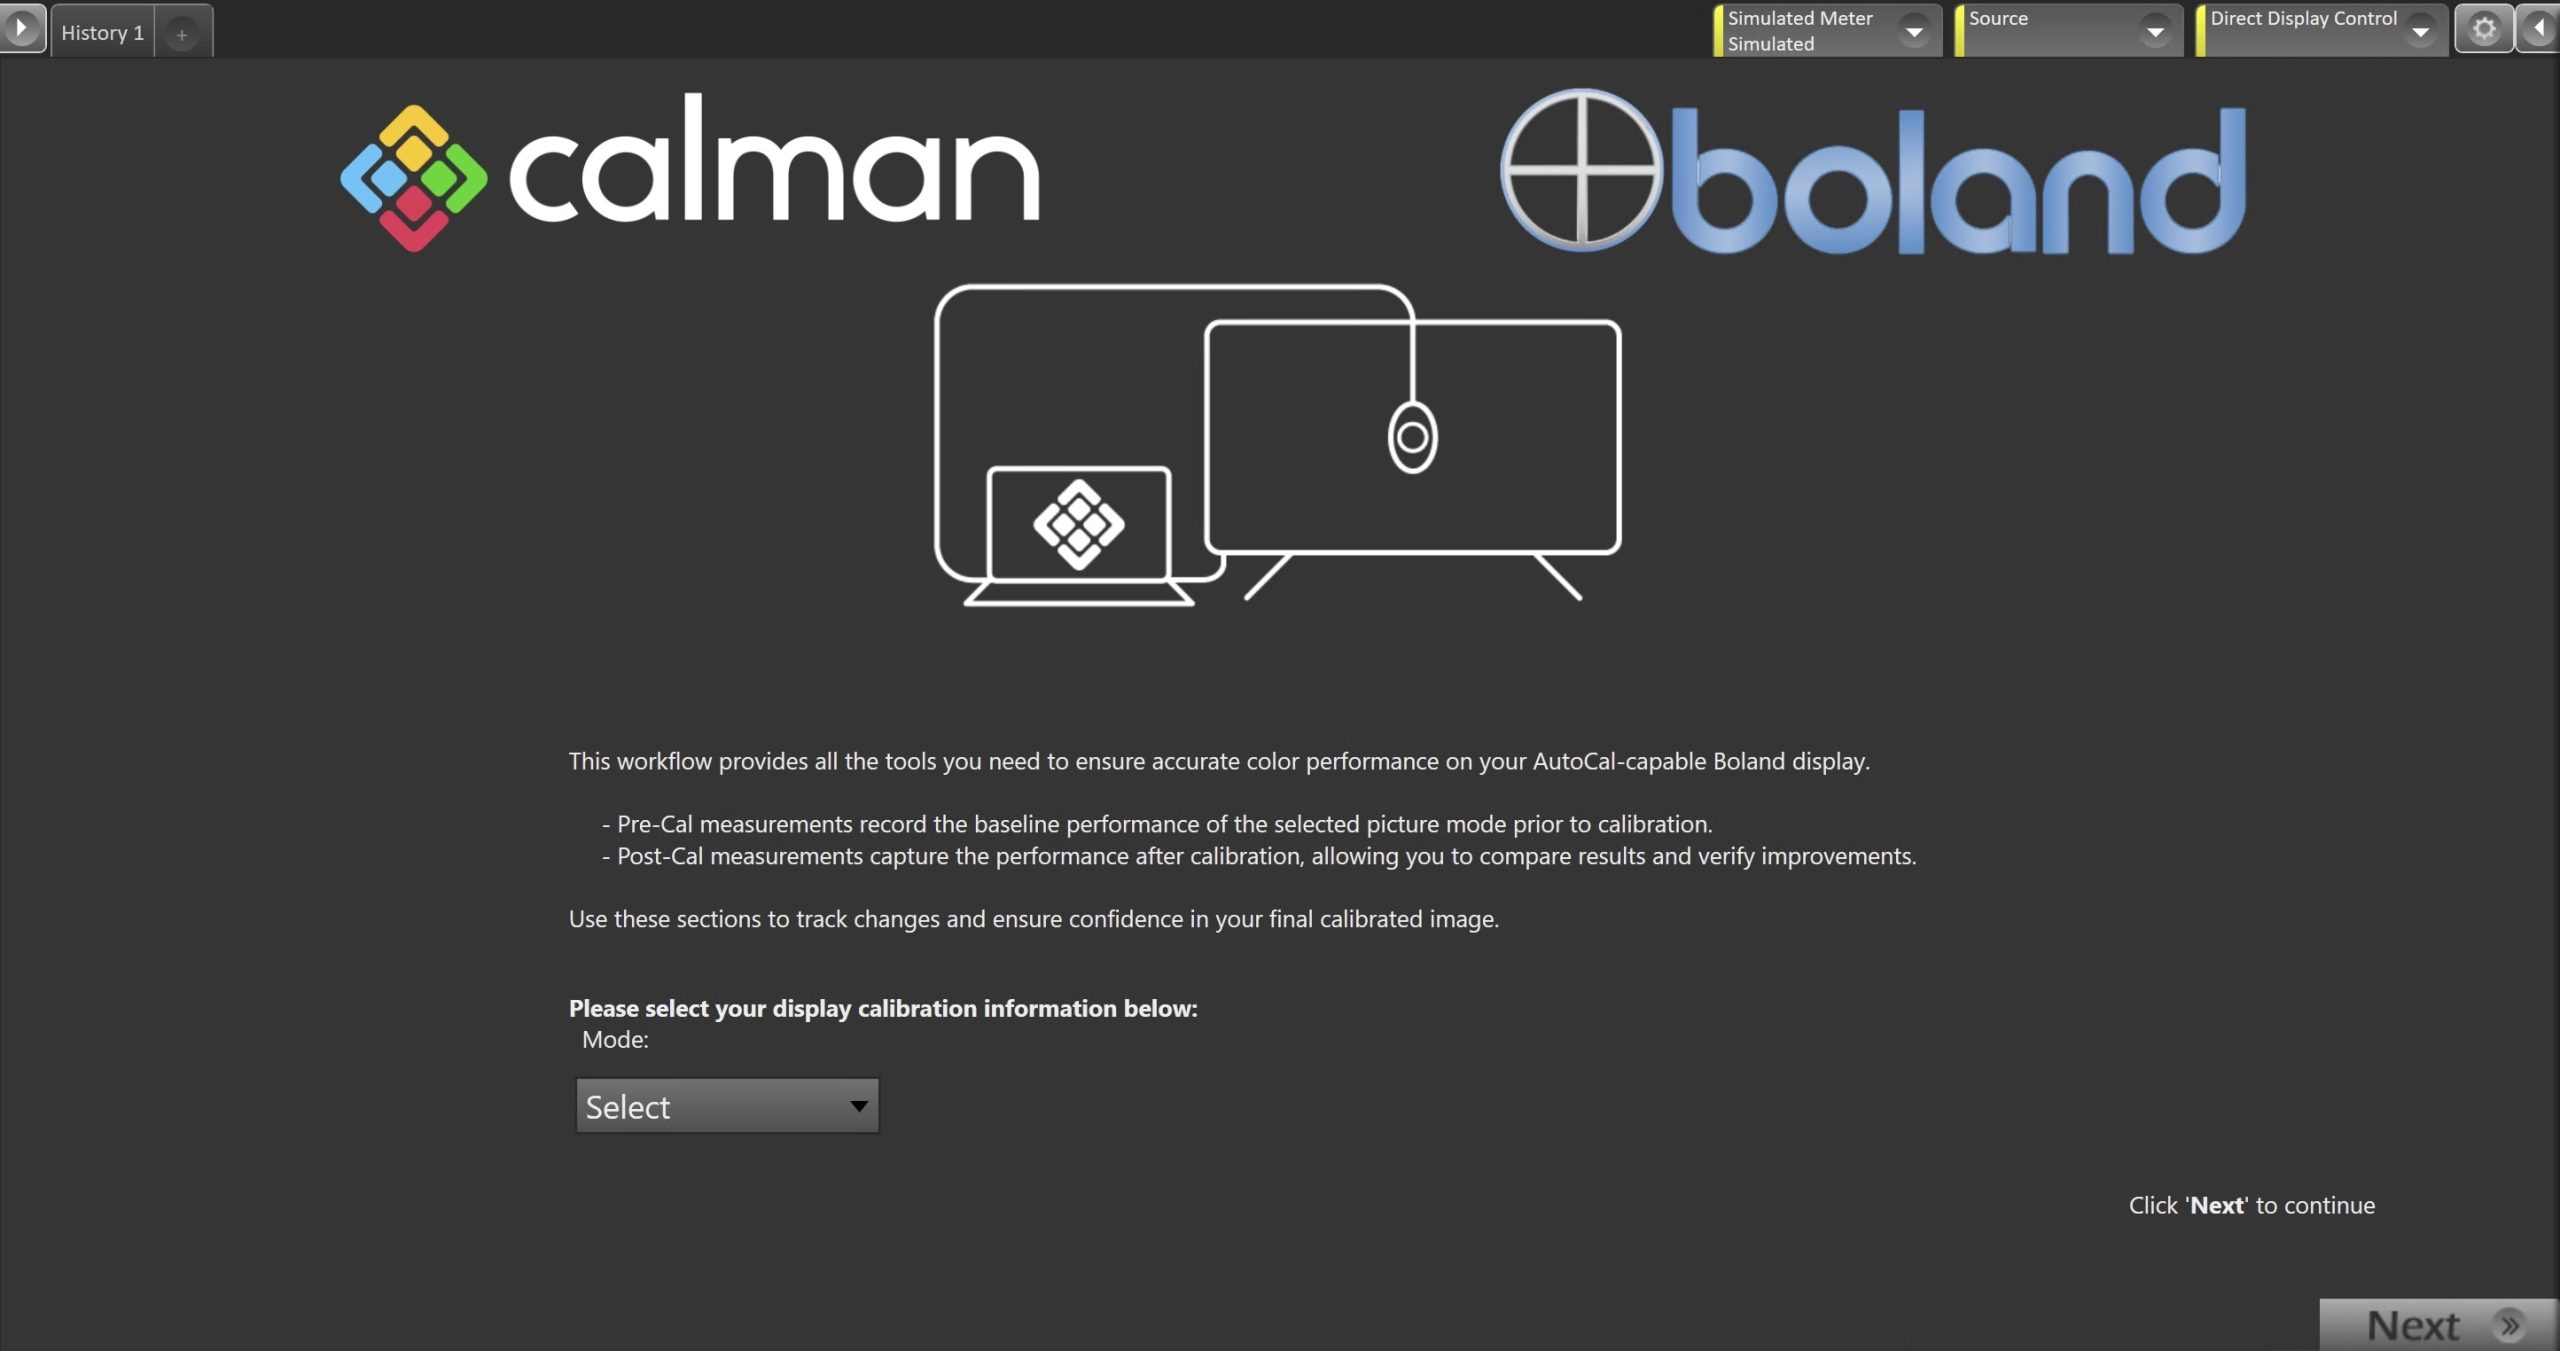
Calman offers a streamlined workflow for calibrating Boland Monitors, ensuring precise color accuracy and optimal image quality. This guide covers the steps to properly calibrate your Boland display, helping you achieve consistent and reliable results for professional-grade color performance.
Calman Required Version
- Calman Studio or Ultimate v5.17.1 or higher
Hardware Requirements
-
- Boland 4K HDR and BHB-HDR series monitors
- Firmware version 07.030 / 004.0024 or higher
- Calman Compatible Meter
- Calman Compatible Pattern Generator
- Boland 4K HDR and BHB-HDR series monitors
Step 1
- From the Calman Menu in the top-left, choose Open Workflow Template -> Calman Ready and then Boland.
- On the introduction screen, select your calibration target (SDR/HDR) from the dropdown and click Next to proceed to calibration setup
Step 2
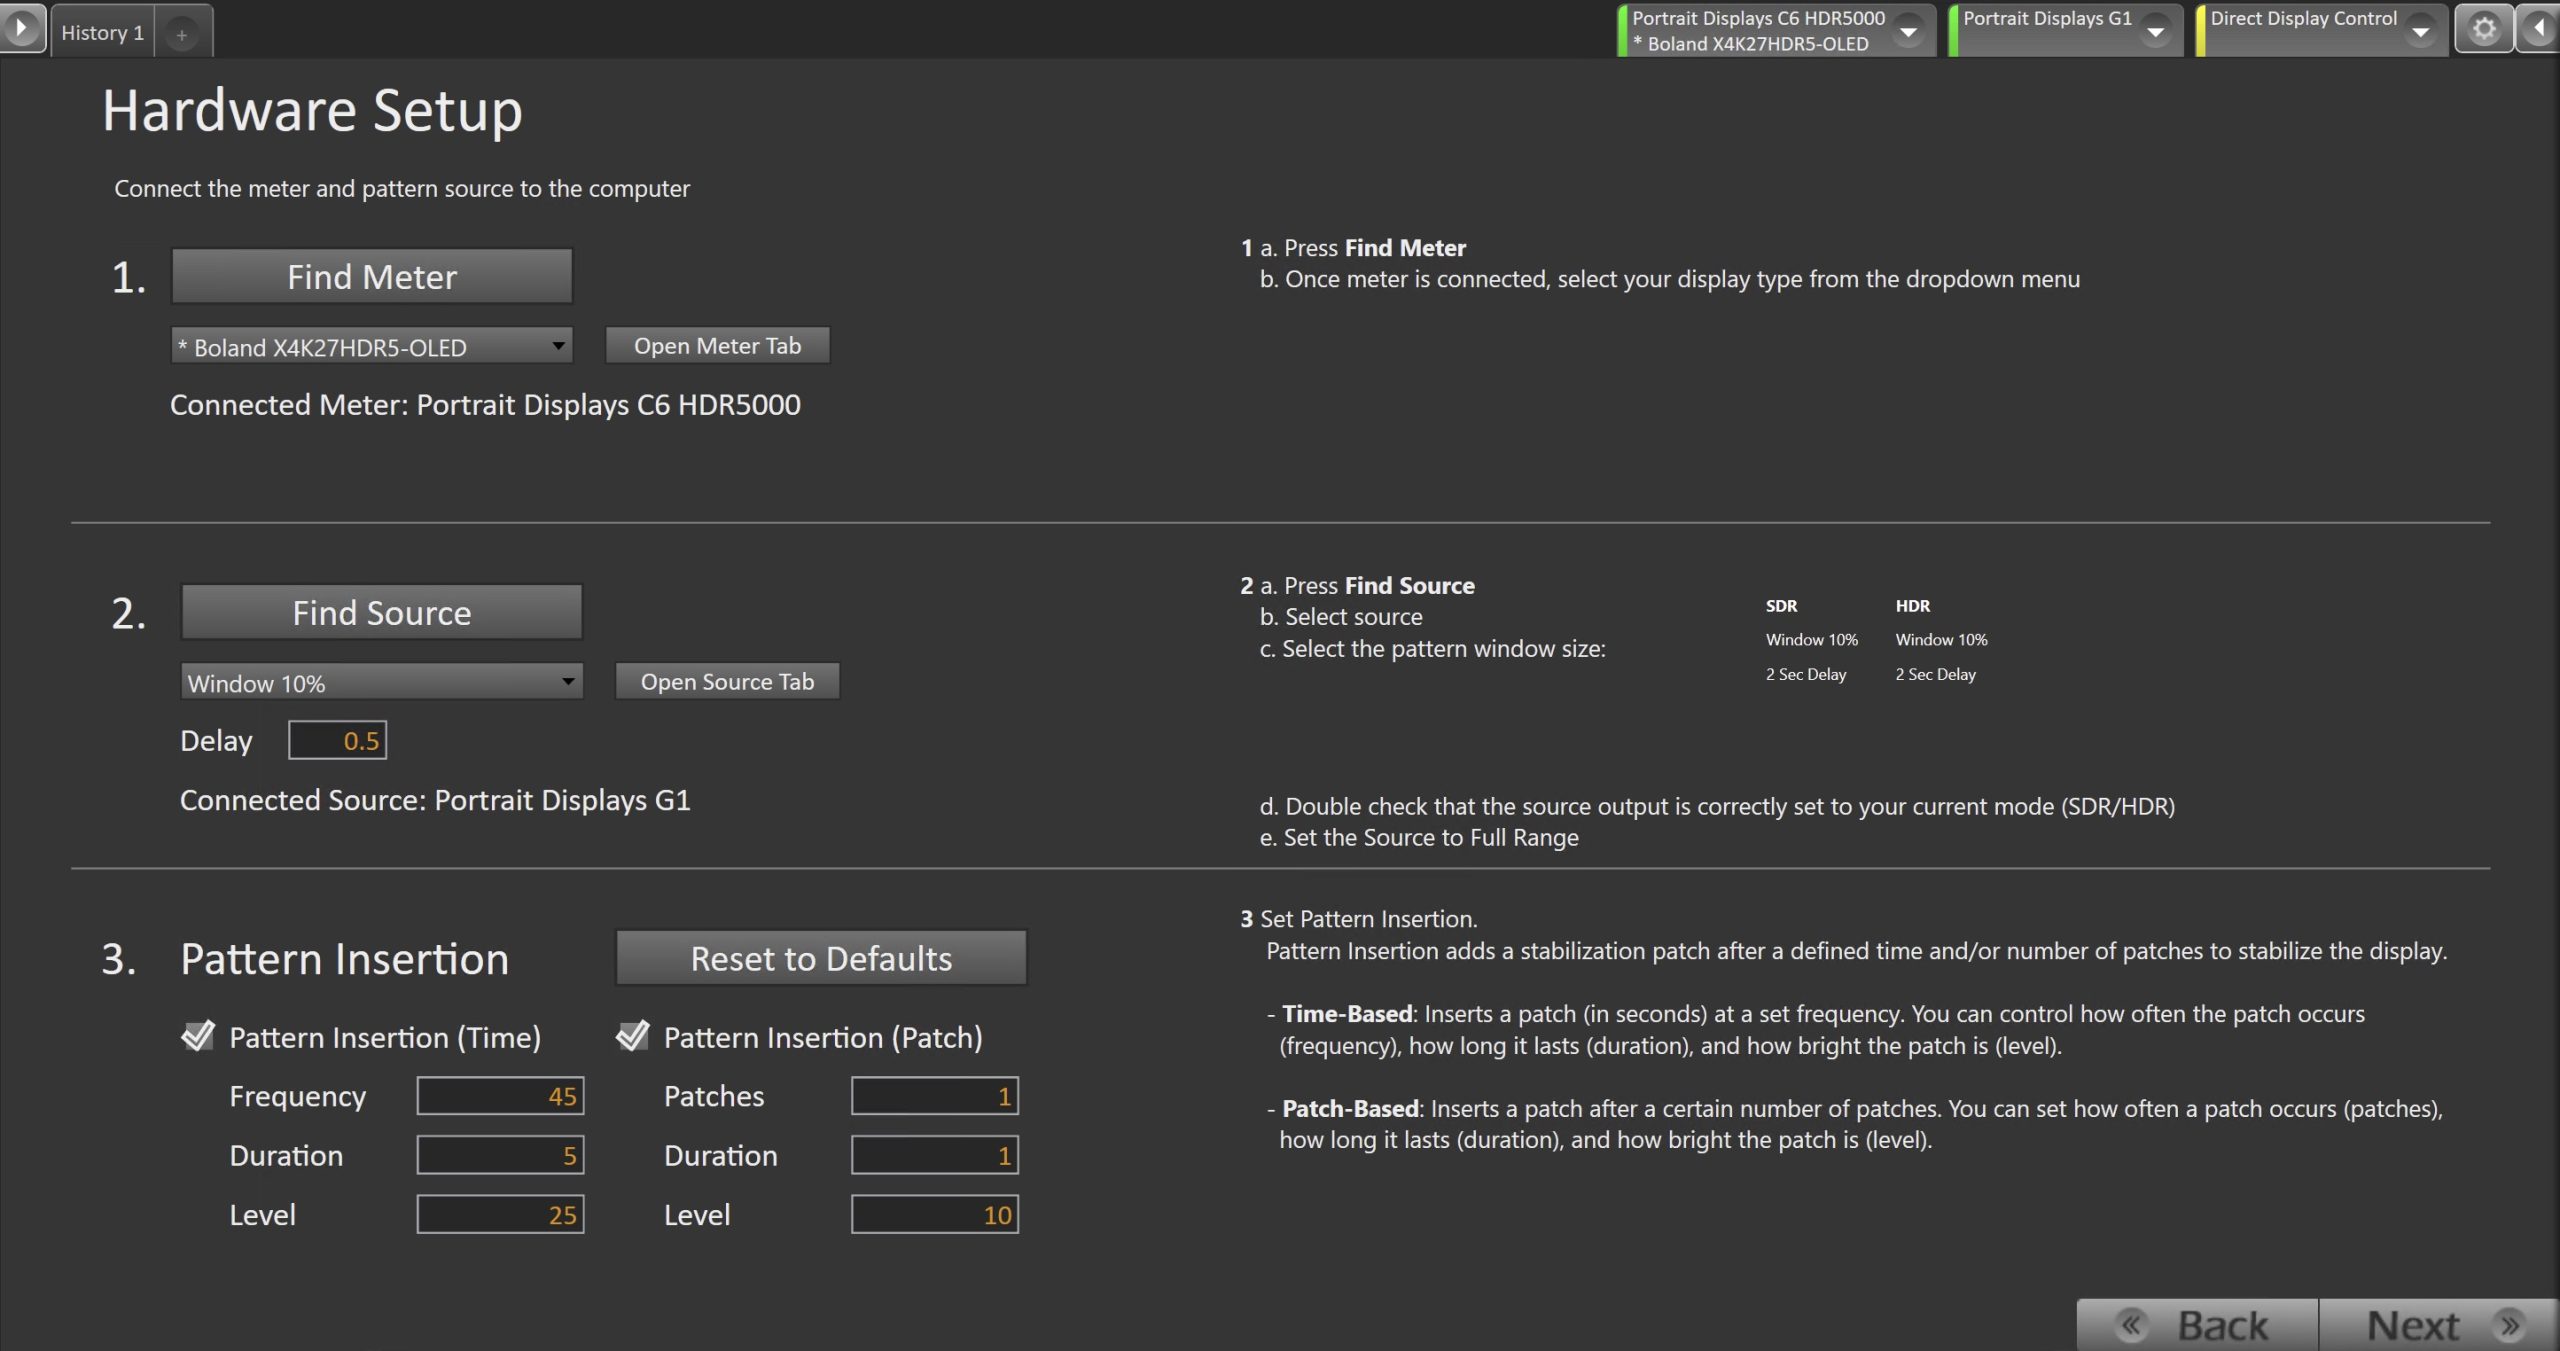
- Plug your meter into a USB port on the computer and press the Find Meter button on the left.
- When your meter is connected, select your display type from the dropdown
- Connect Pattern Source to your computer.
- Click the Find Source button, then select your source
- Select the pattern window size and delay
- Window 10%
- 2-second delay
- Ensure your source is set to SDR or HDR corresponding to your choice in Step 1
- Set Pattern insertion
- Click the Reset to Defaults button to set the appropriate pattern insertion for the display and calibration type in Step 1
- SDR
- Insertion: 45/5/25
- Stabilization 1/1/10
- HDR
- Insertion: 5/5/25
- Stabilization 1/1/10
- SDR
- Click the Reset to Defaults button to set the appropriate pattern insertion for the display and calibration type in Step 1
- Click Next to proceed
Step 3

- Connect your Boland Monitor
- Click the Find Display Button
- Select Boland – Monitors from the dropdown
- Enter the IP address assigned to the monitor
- To find the IP address: Via the displays OSD – Menu → Setup → IP Config
Step 4
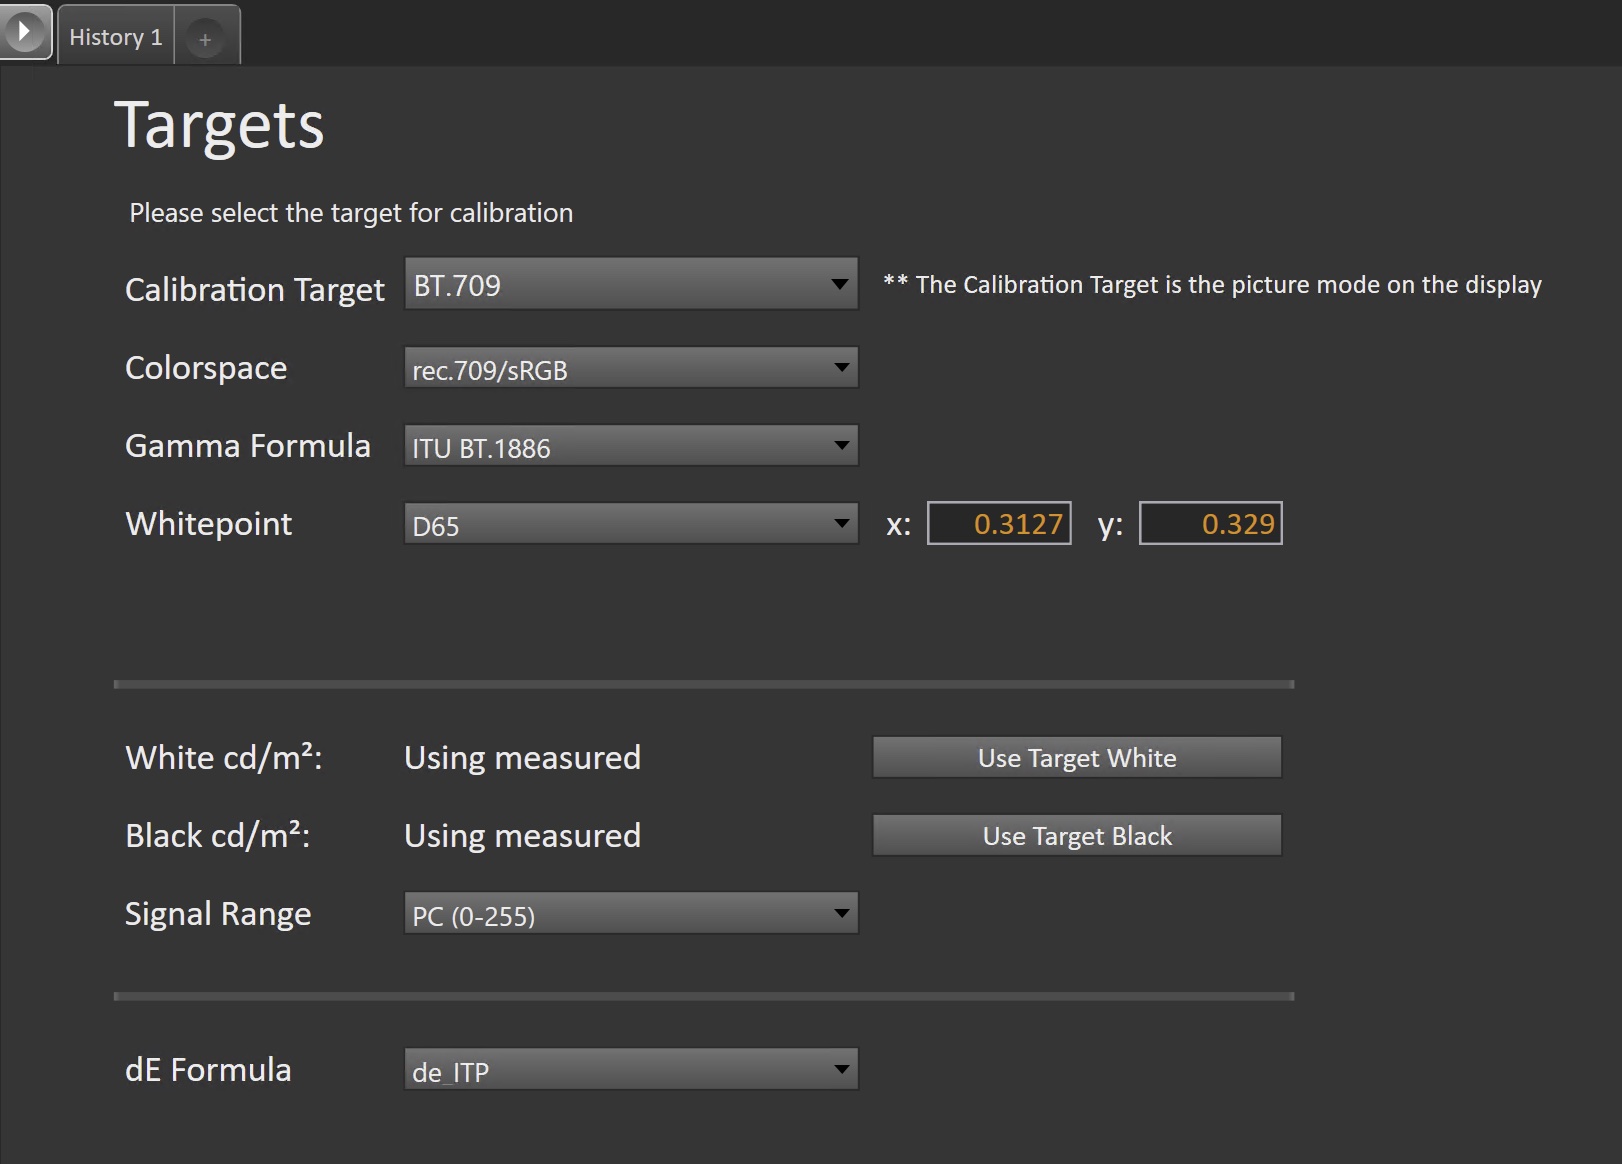
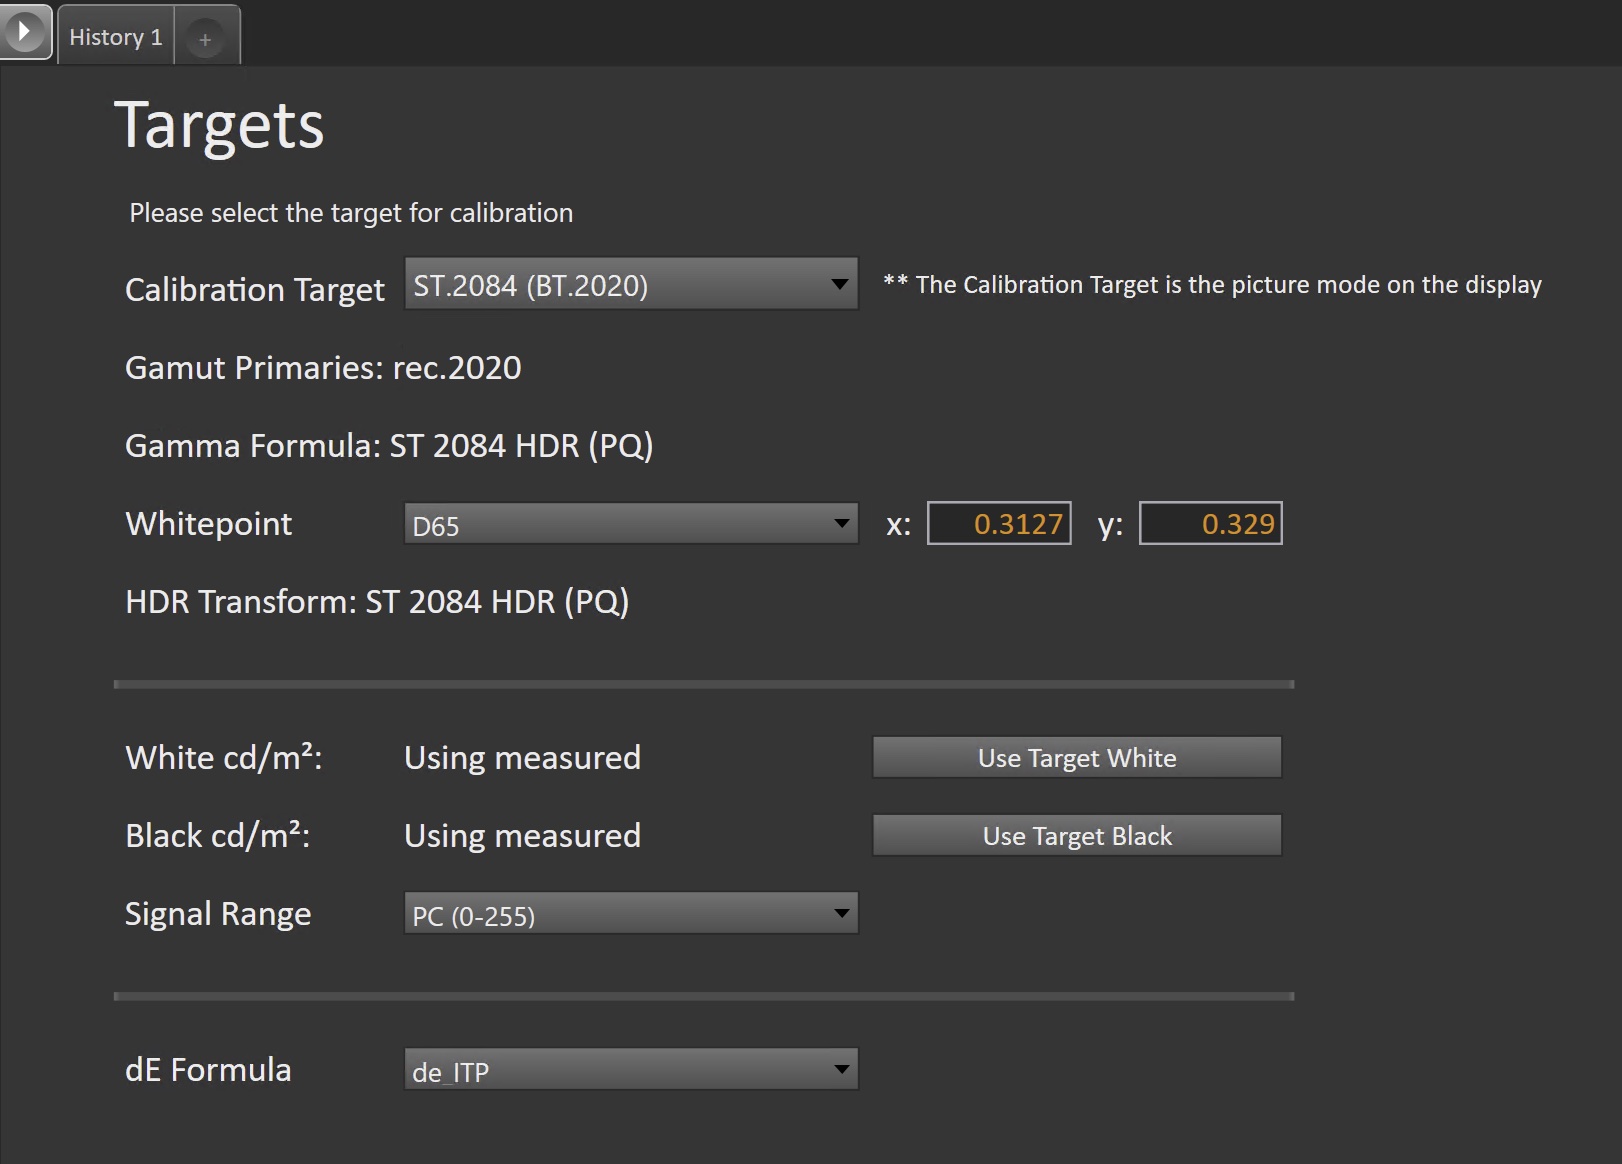
- Select your desired calibration targets, these will vary based on your SDR or HDR choice in Step 1
- SDR Targets:
- BT.709
- D-Cinema
- BT.2020 (SDR)
- User1
- User2
- HDR Targets:
- ST.2084 (BT.2020)
- ST.2084 (p3-D65)
- HLG
- SDR Targets:
- Confirm/configure your calibration targets. These will be automatically set to common defaults by the options from Step 1
- Configuration Examples:
| SDR | HDR |
 |
 |
- Confirm your targets, and click Next to proceed
Pre-Calibration Measurements
- This workflow page is intended to document the target picture mode prior to calibration.
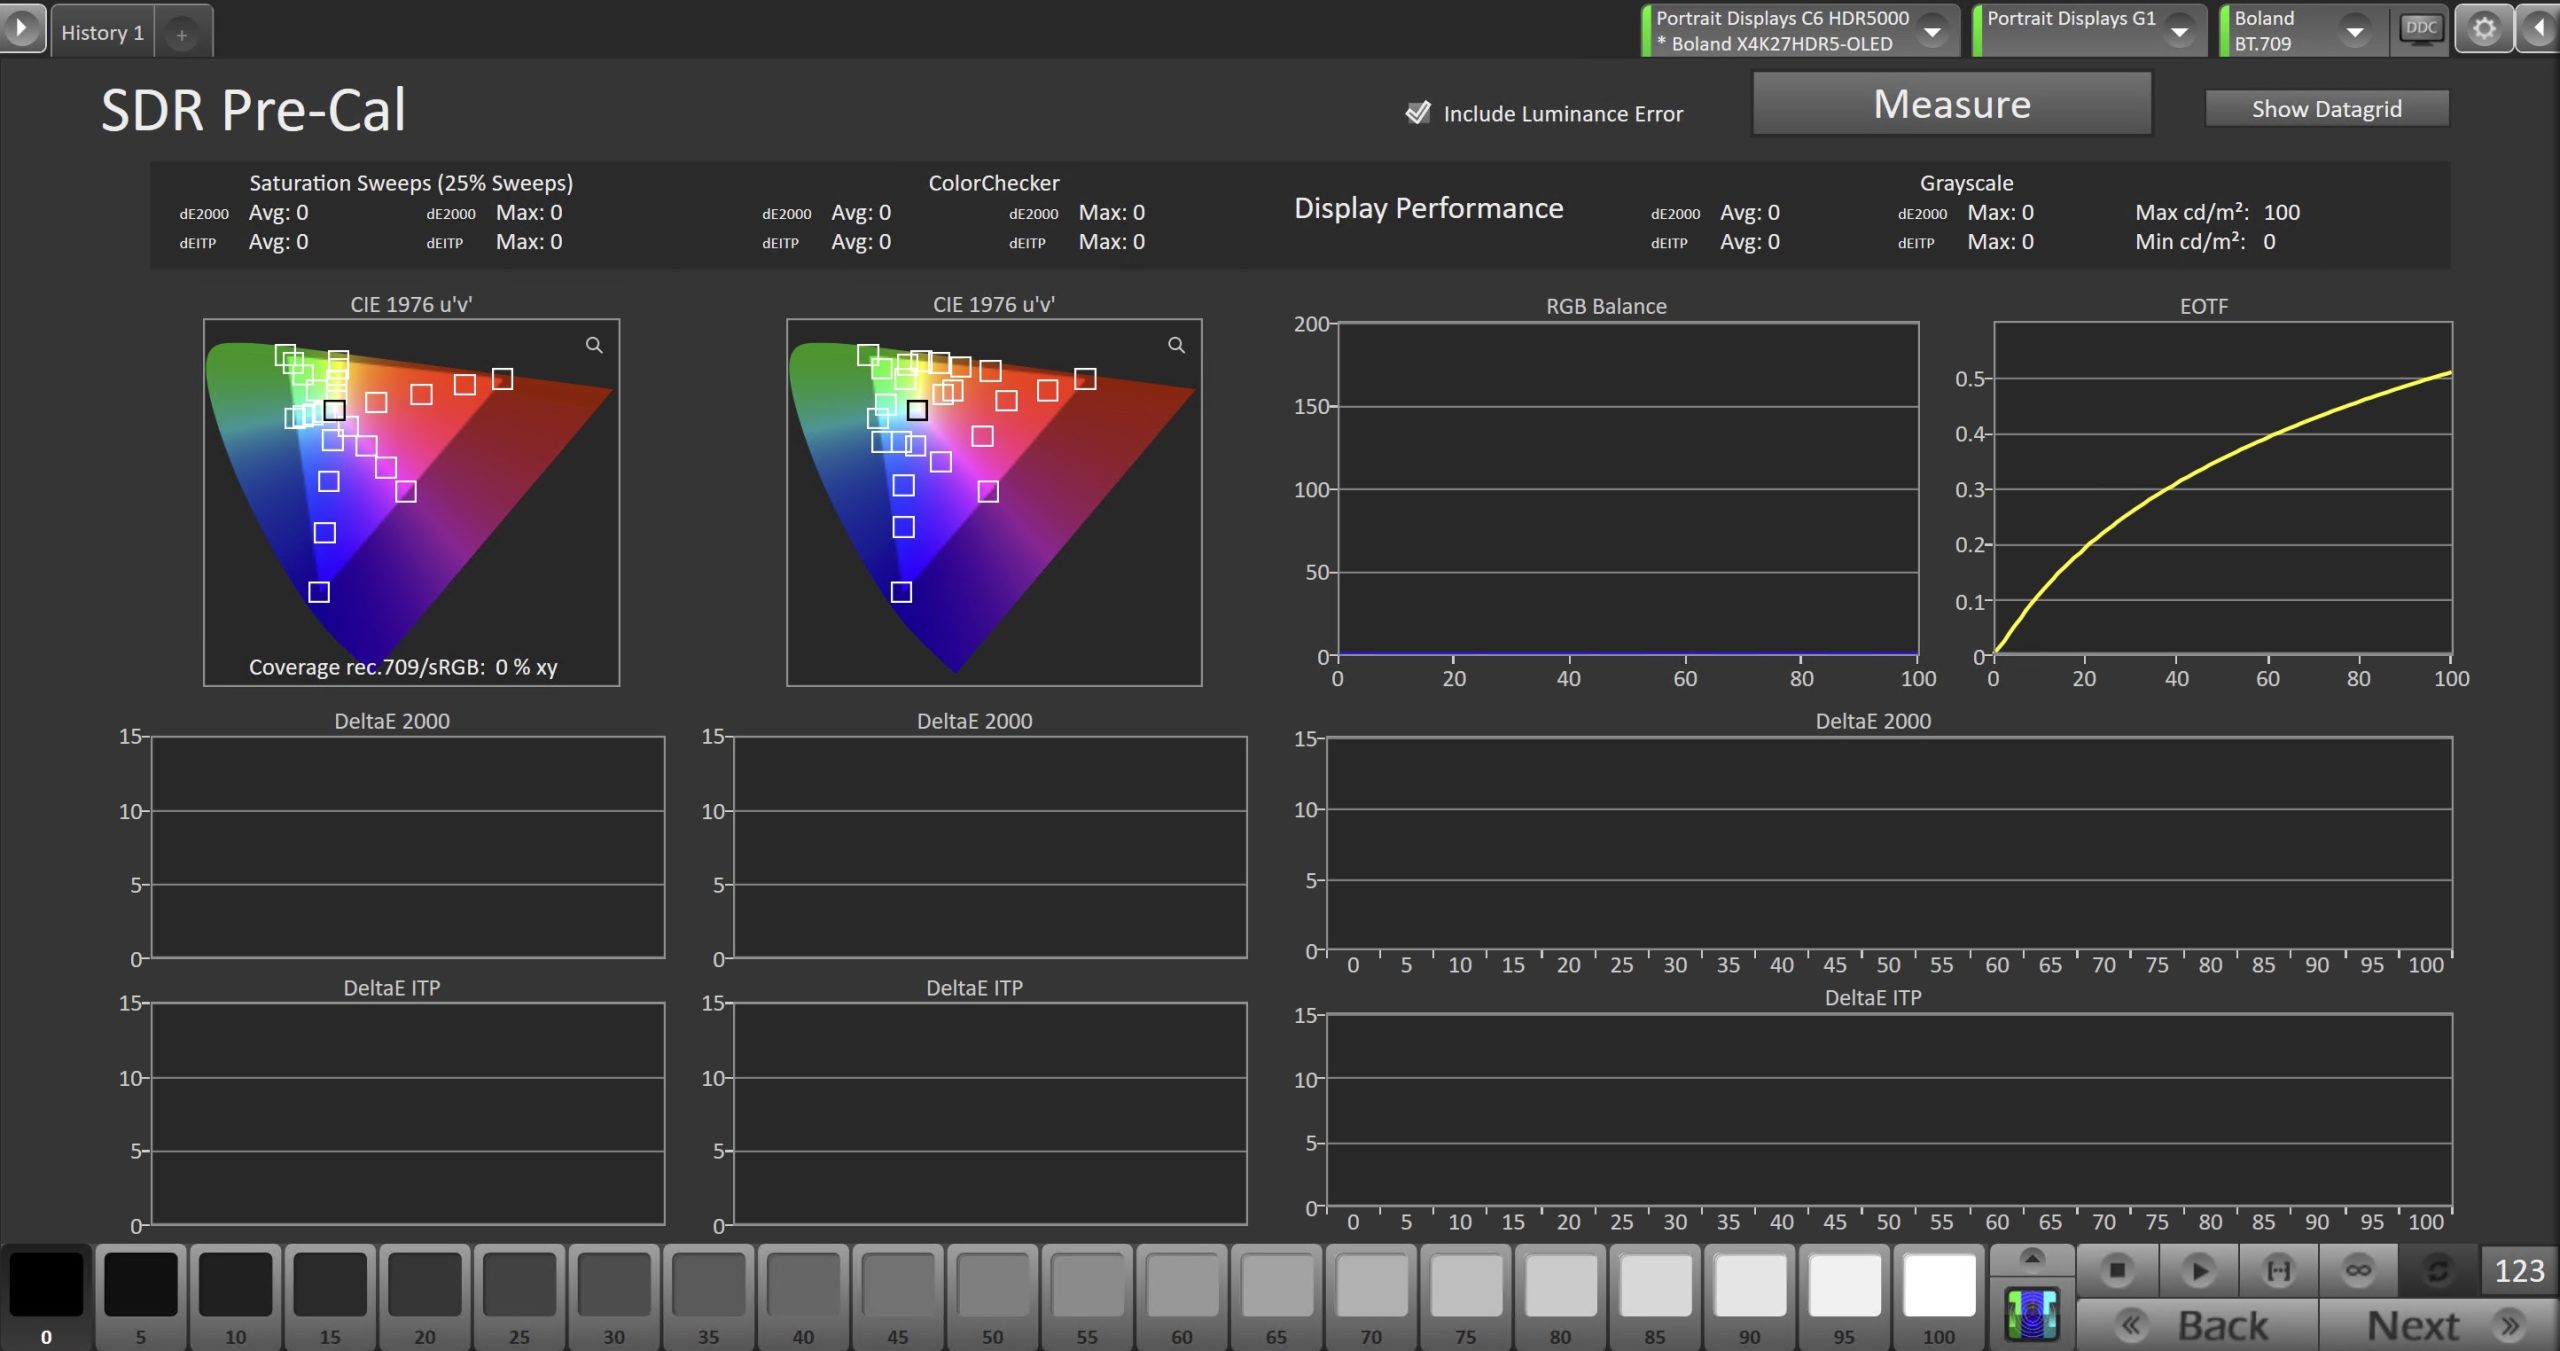
- To take Pre-Calibration Measurements, click the Measure button to measure the display’s rayscale and color response.
- This will provide a point of reference to compare the calibration results
- Click Next to proceed
Step 5
- Here, the Calman picture mode will be reset to prepare for calibration.

- Click the Reset button. This resets and prepares the picture mode for calibration.
- Click Next to proceed
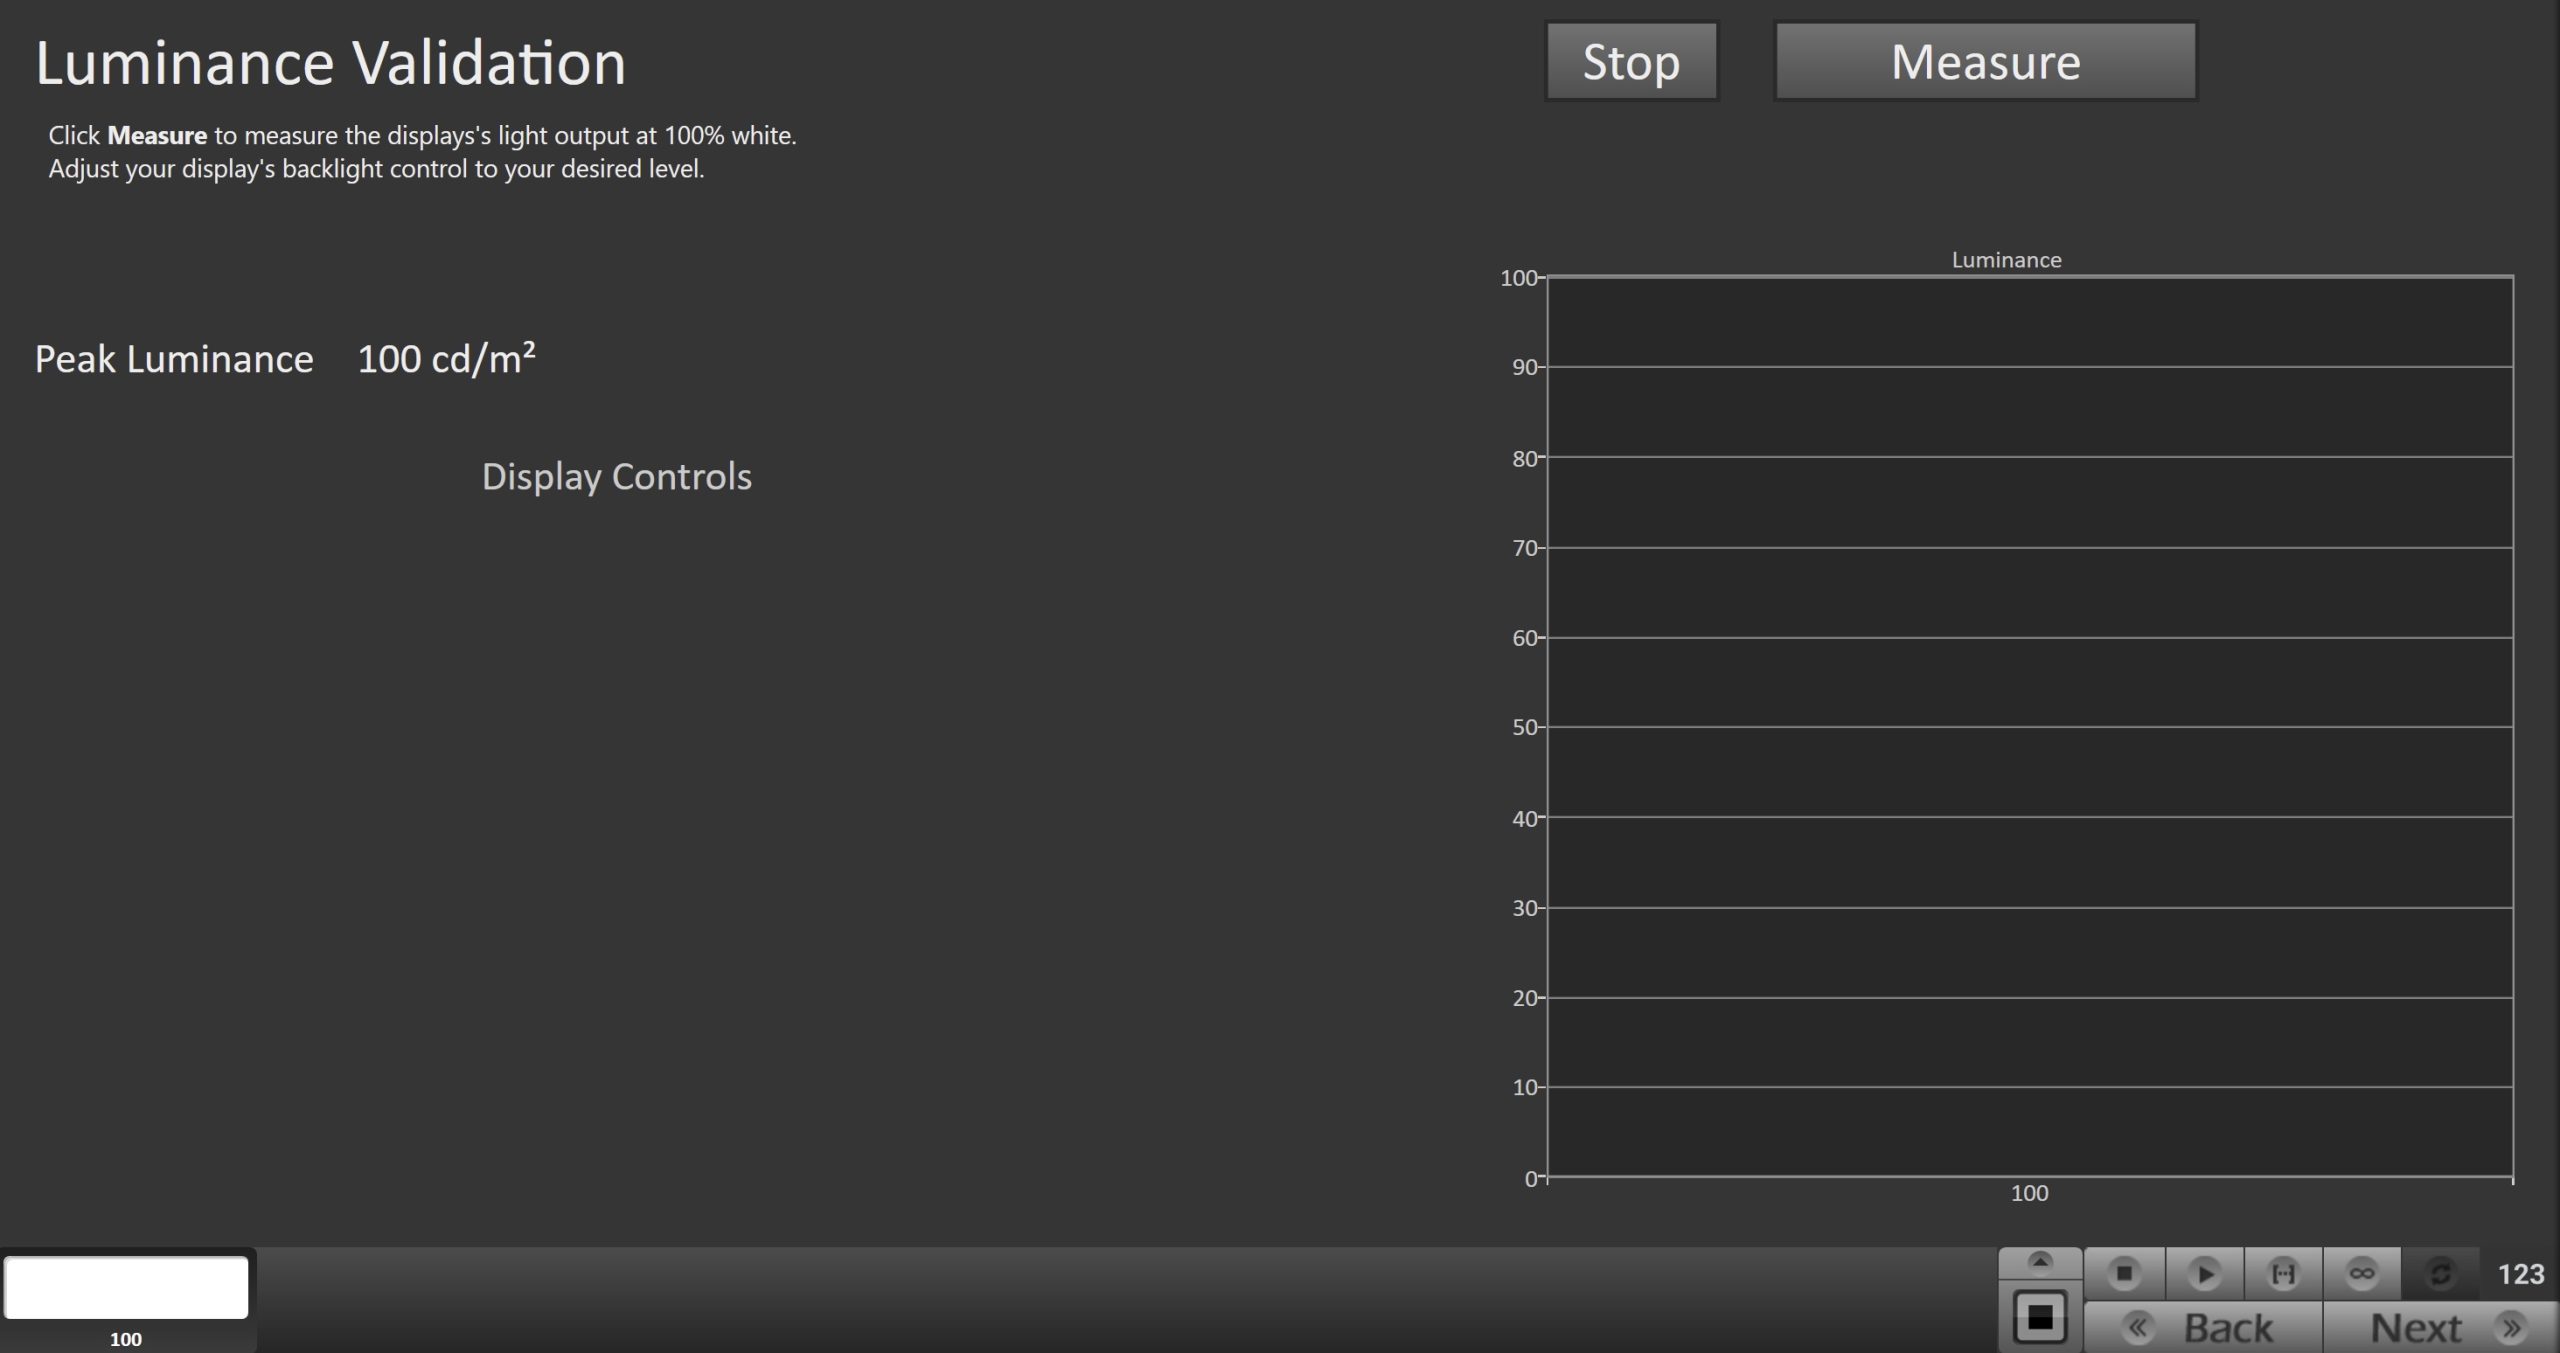
SDR Only – Measure and set Luminance
- Here, you can adjust the display’s Backlight setting to one that meets or exceeds your target luminance
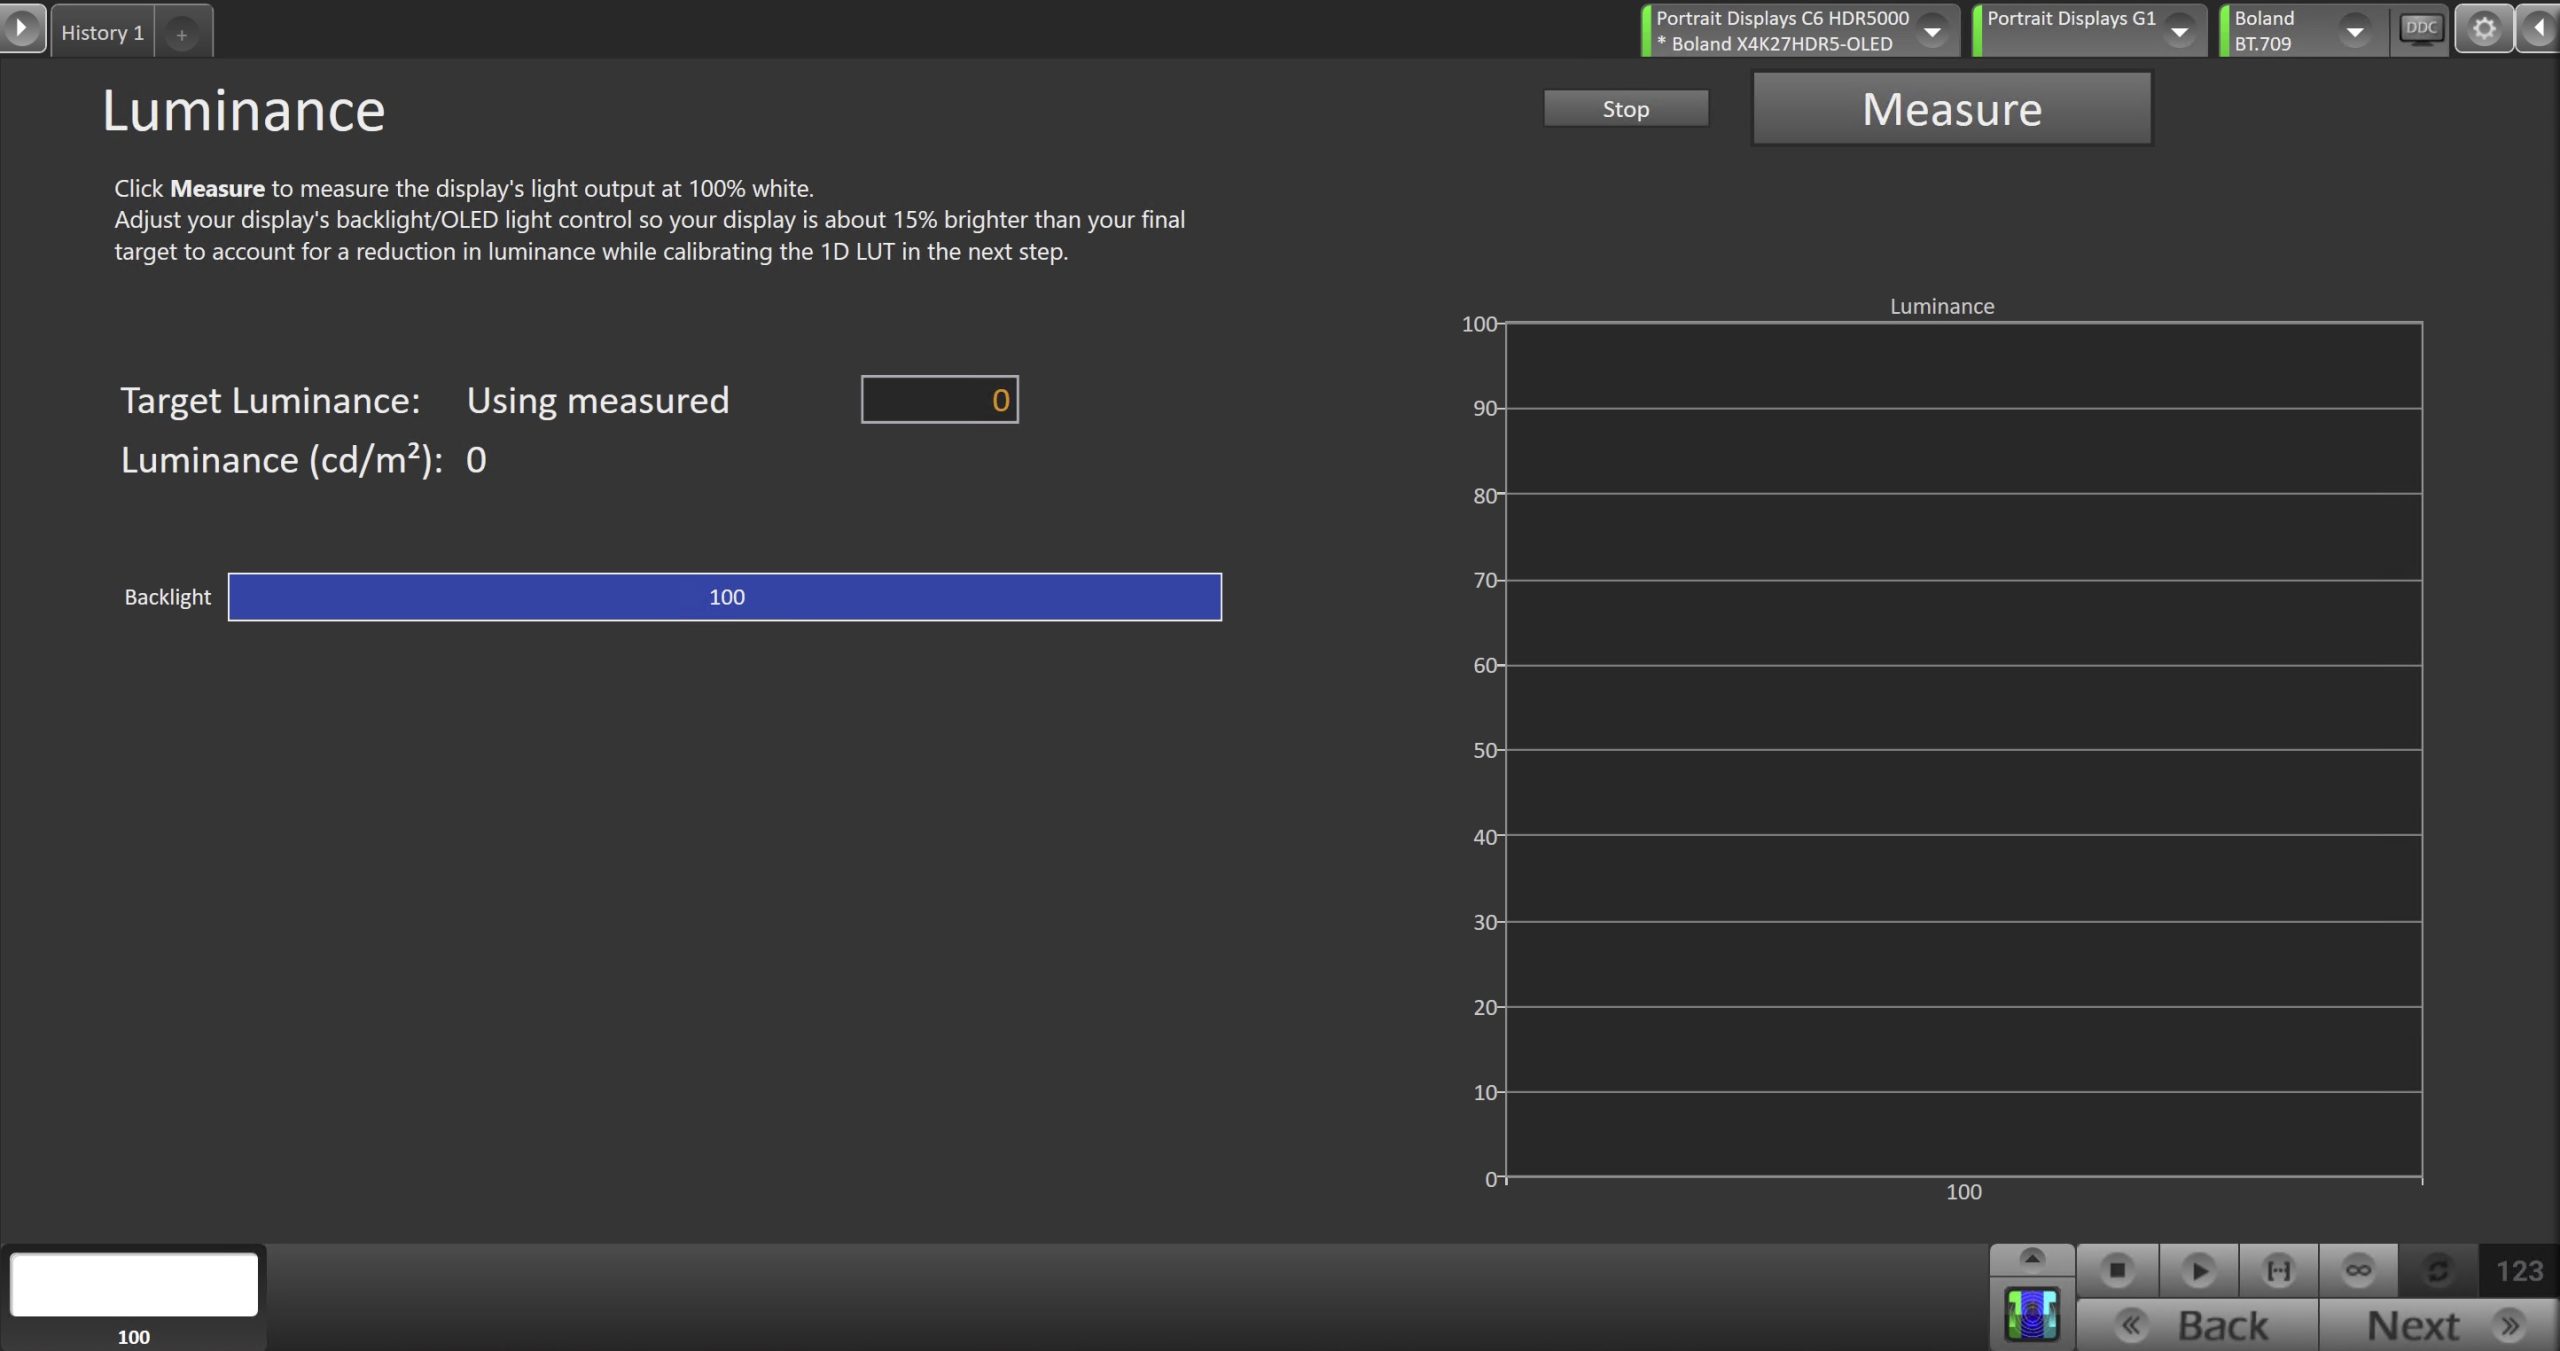
- Click Measure and adjust the Backlight slider as needed.
- Click Next to proceed
Step 6
- Here, Calman will adjust the Multipoint Greyscale.
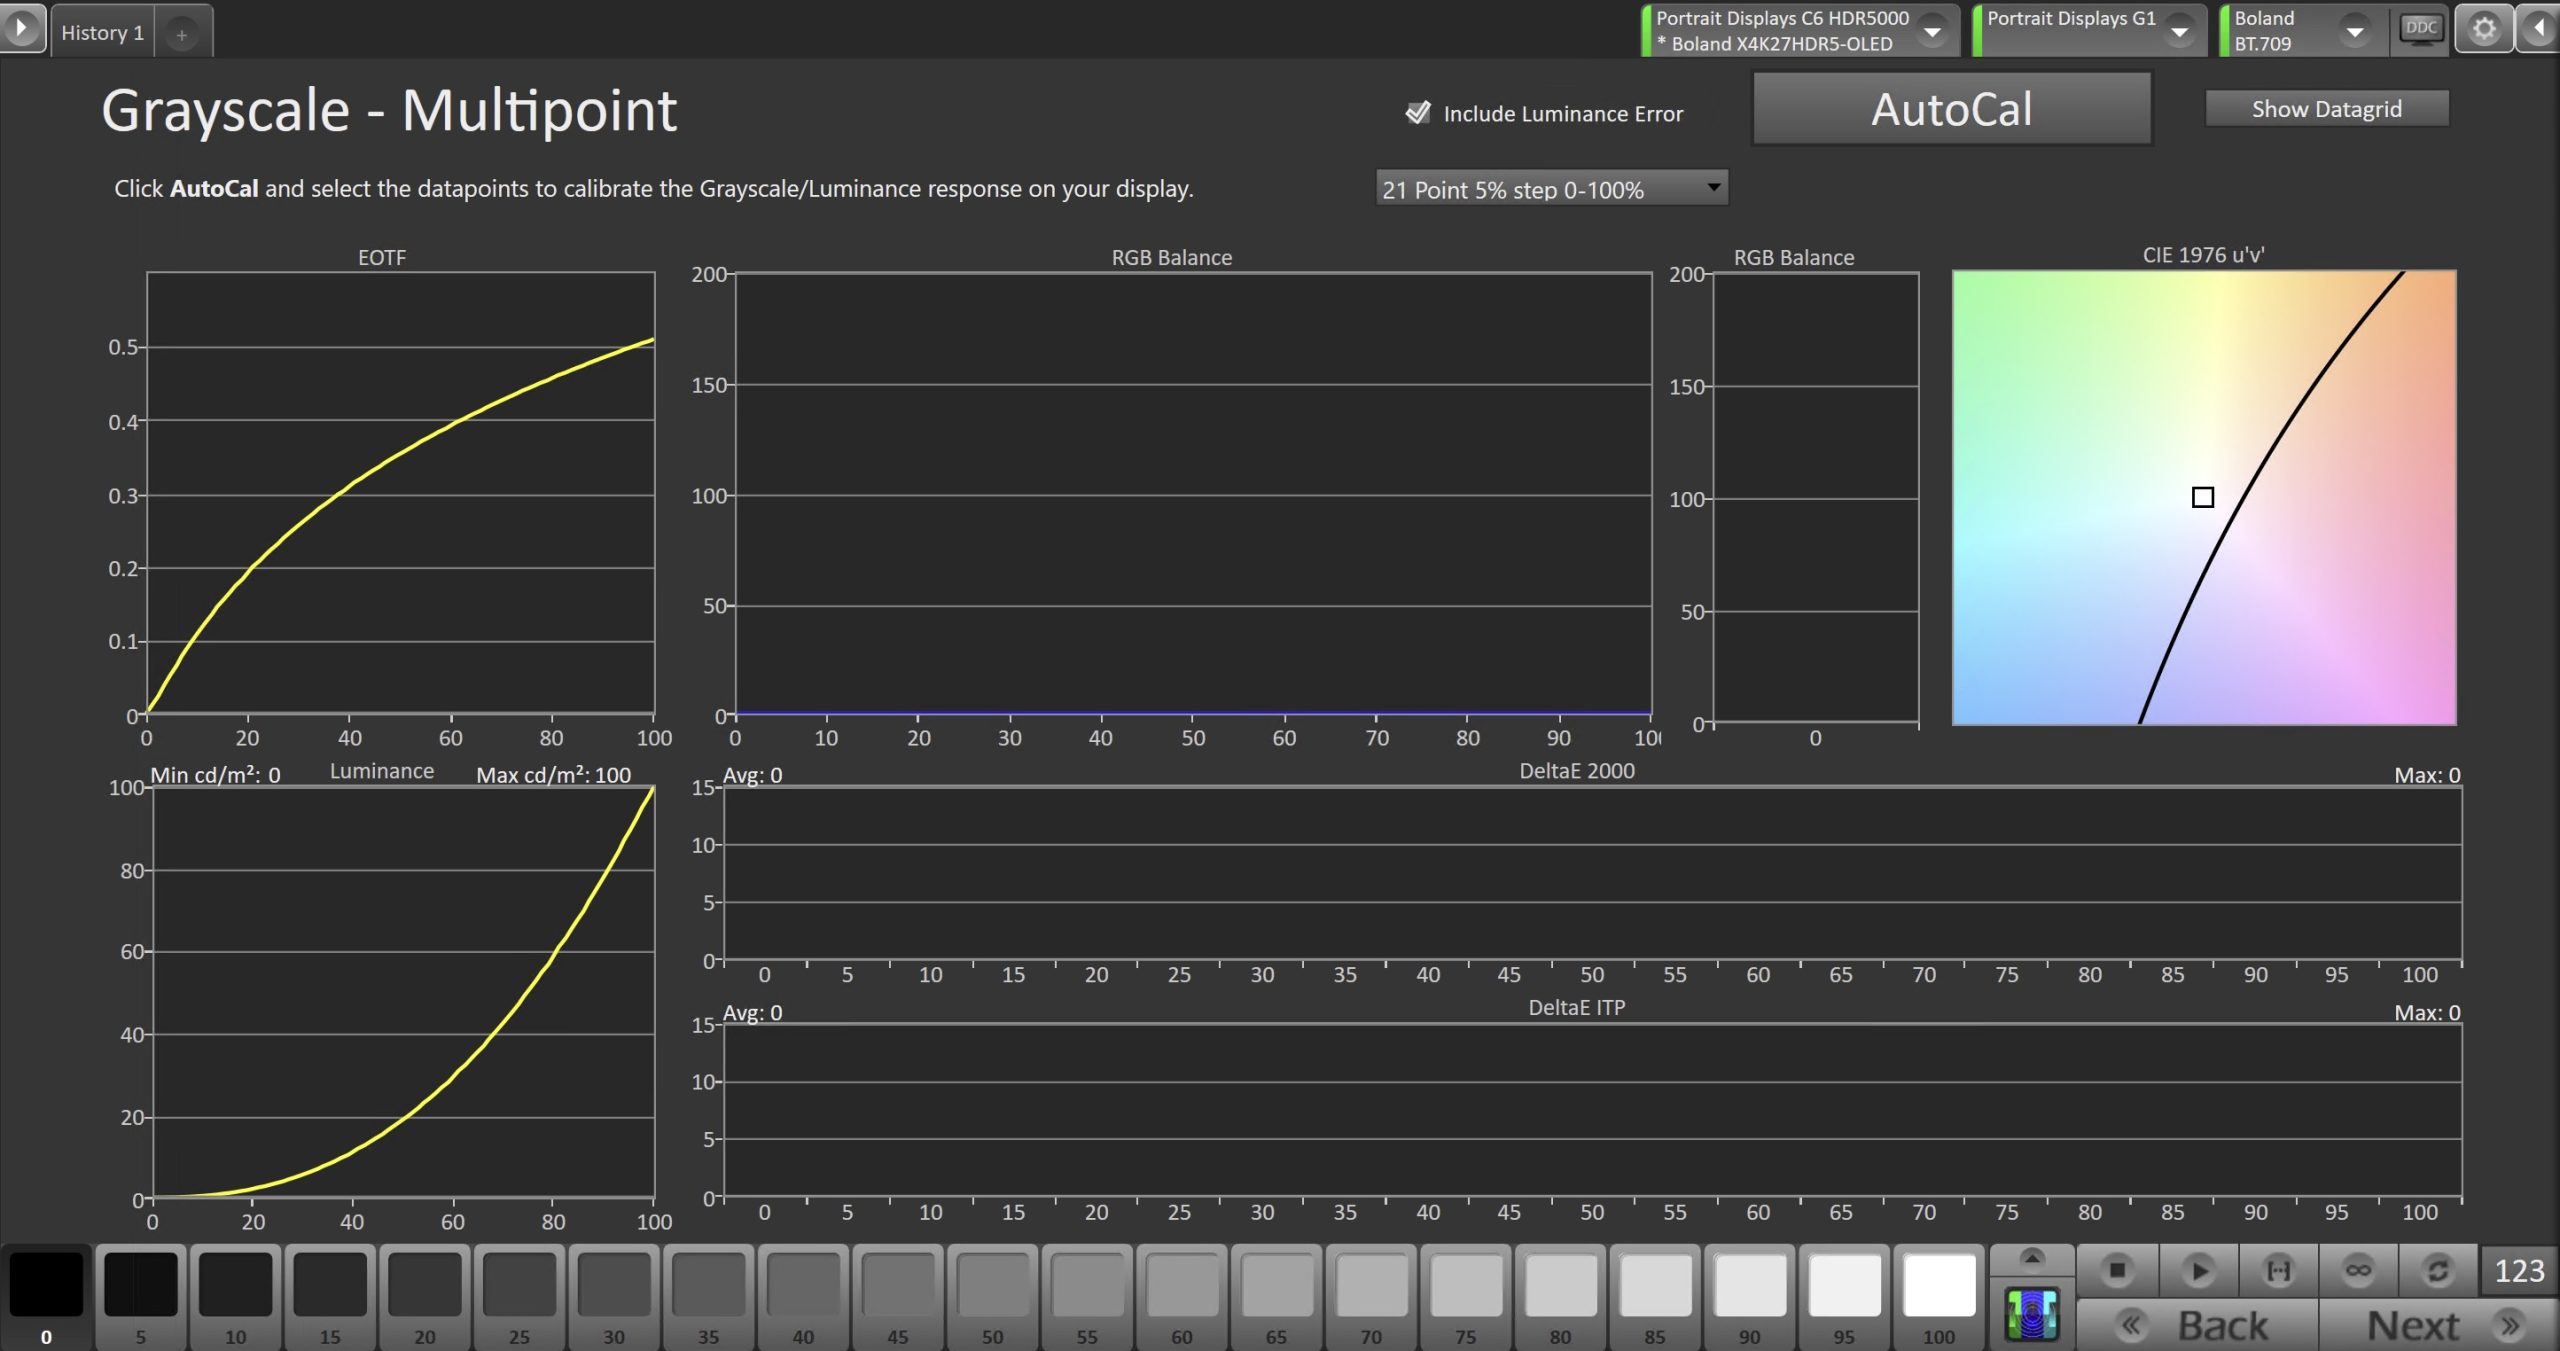
- Click the AutoCal button and select the correct data points in the AutoCal Dialog to auto-calibrate the Grayscale/Luminance response on the display.
- This should match the video range you chose in Step 1.
- Click OK to begin greyscale AutoCal.
- When AutoCal is complete, click the Next button to proceed.
Step 7
- On this page, Calman will calibrate the Color Gamut using a 3D LUT.
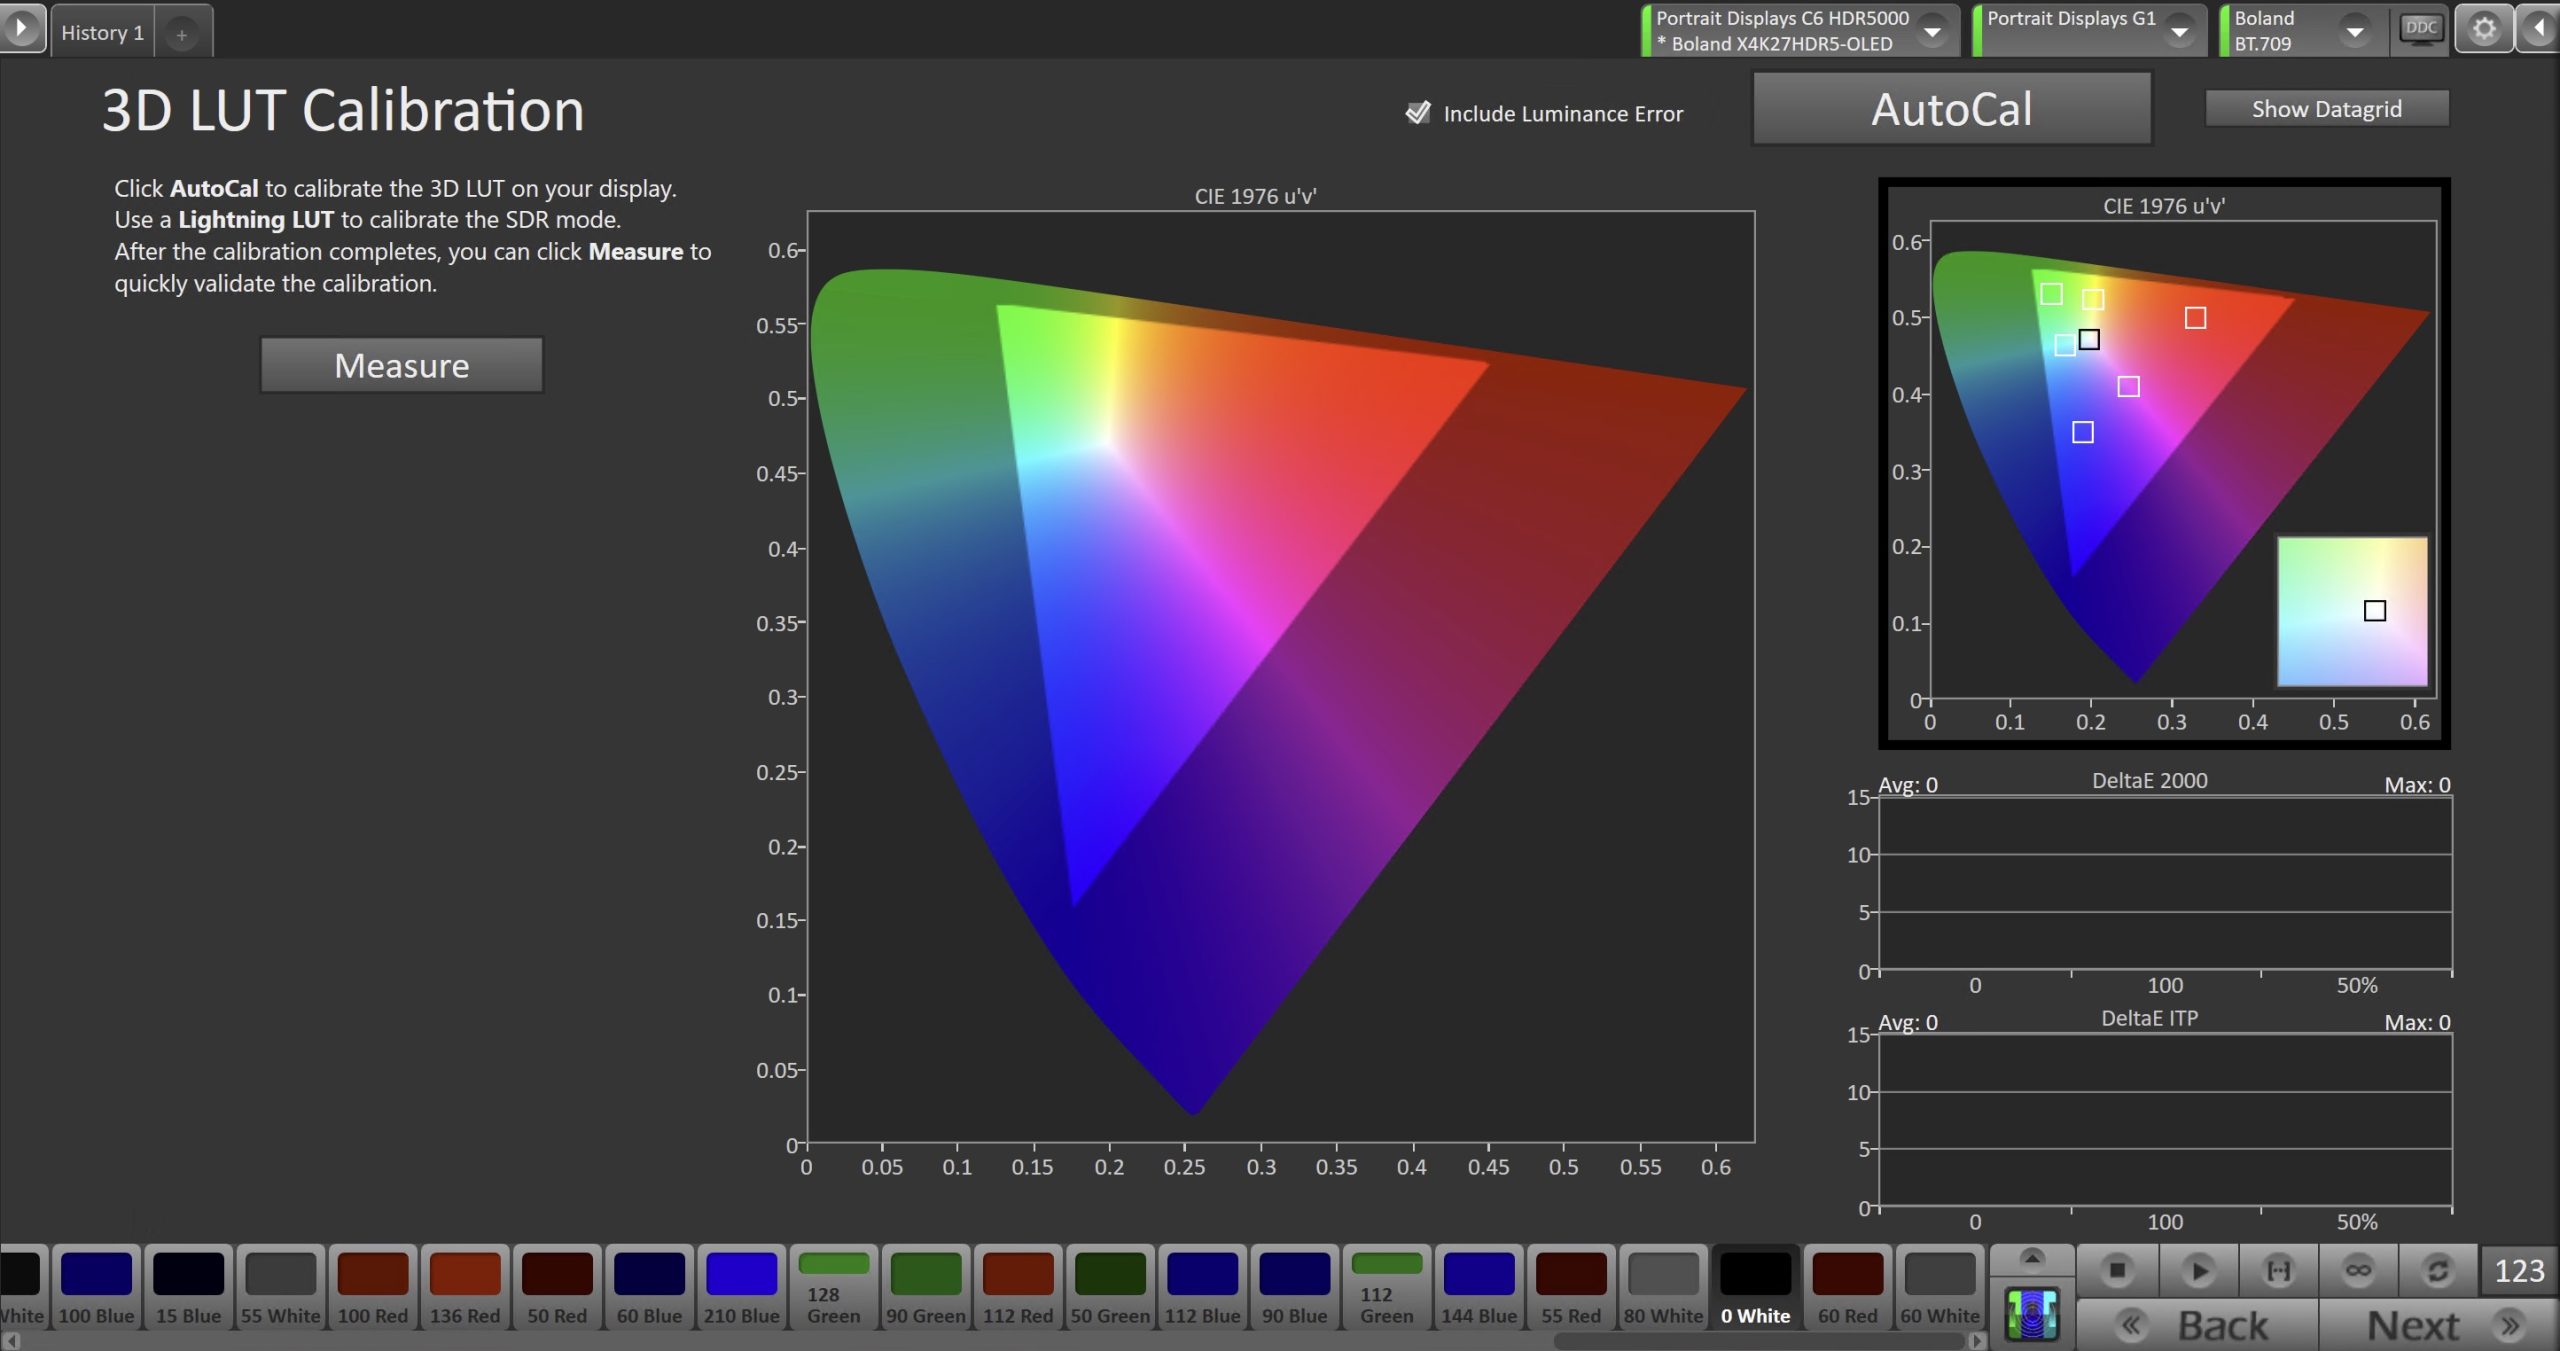
- Press the AutoCal button to open the AutoCal dialog
- Calman has multiple methods for creating a 3D LUT. For information about these LUTs see THIS ARTICLE.
- Confirm that 3D LUT Grayscale to Unity is checked
- Click OK to begin the colorspace AutoCal process
- When AutoCal is complete, press the Next button to proceed
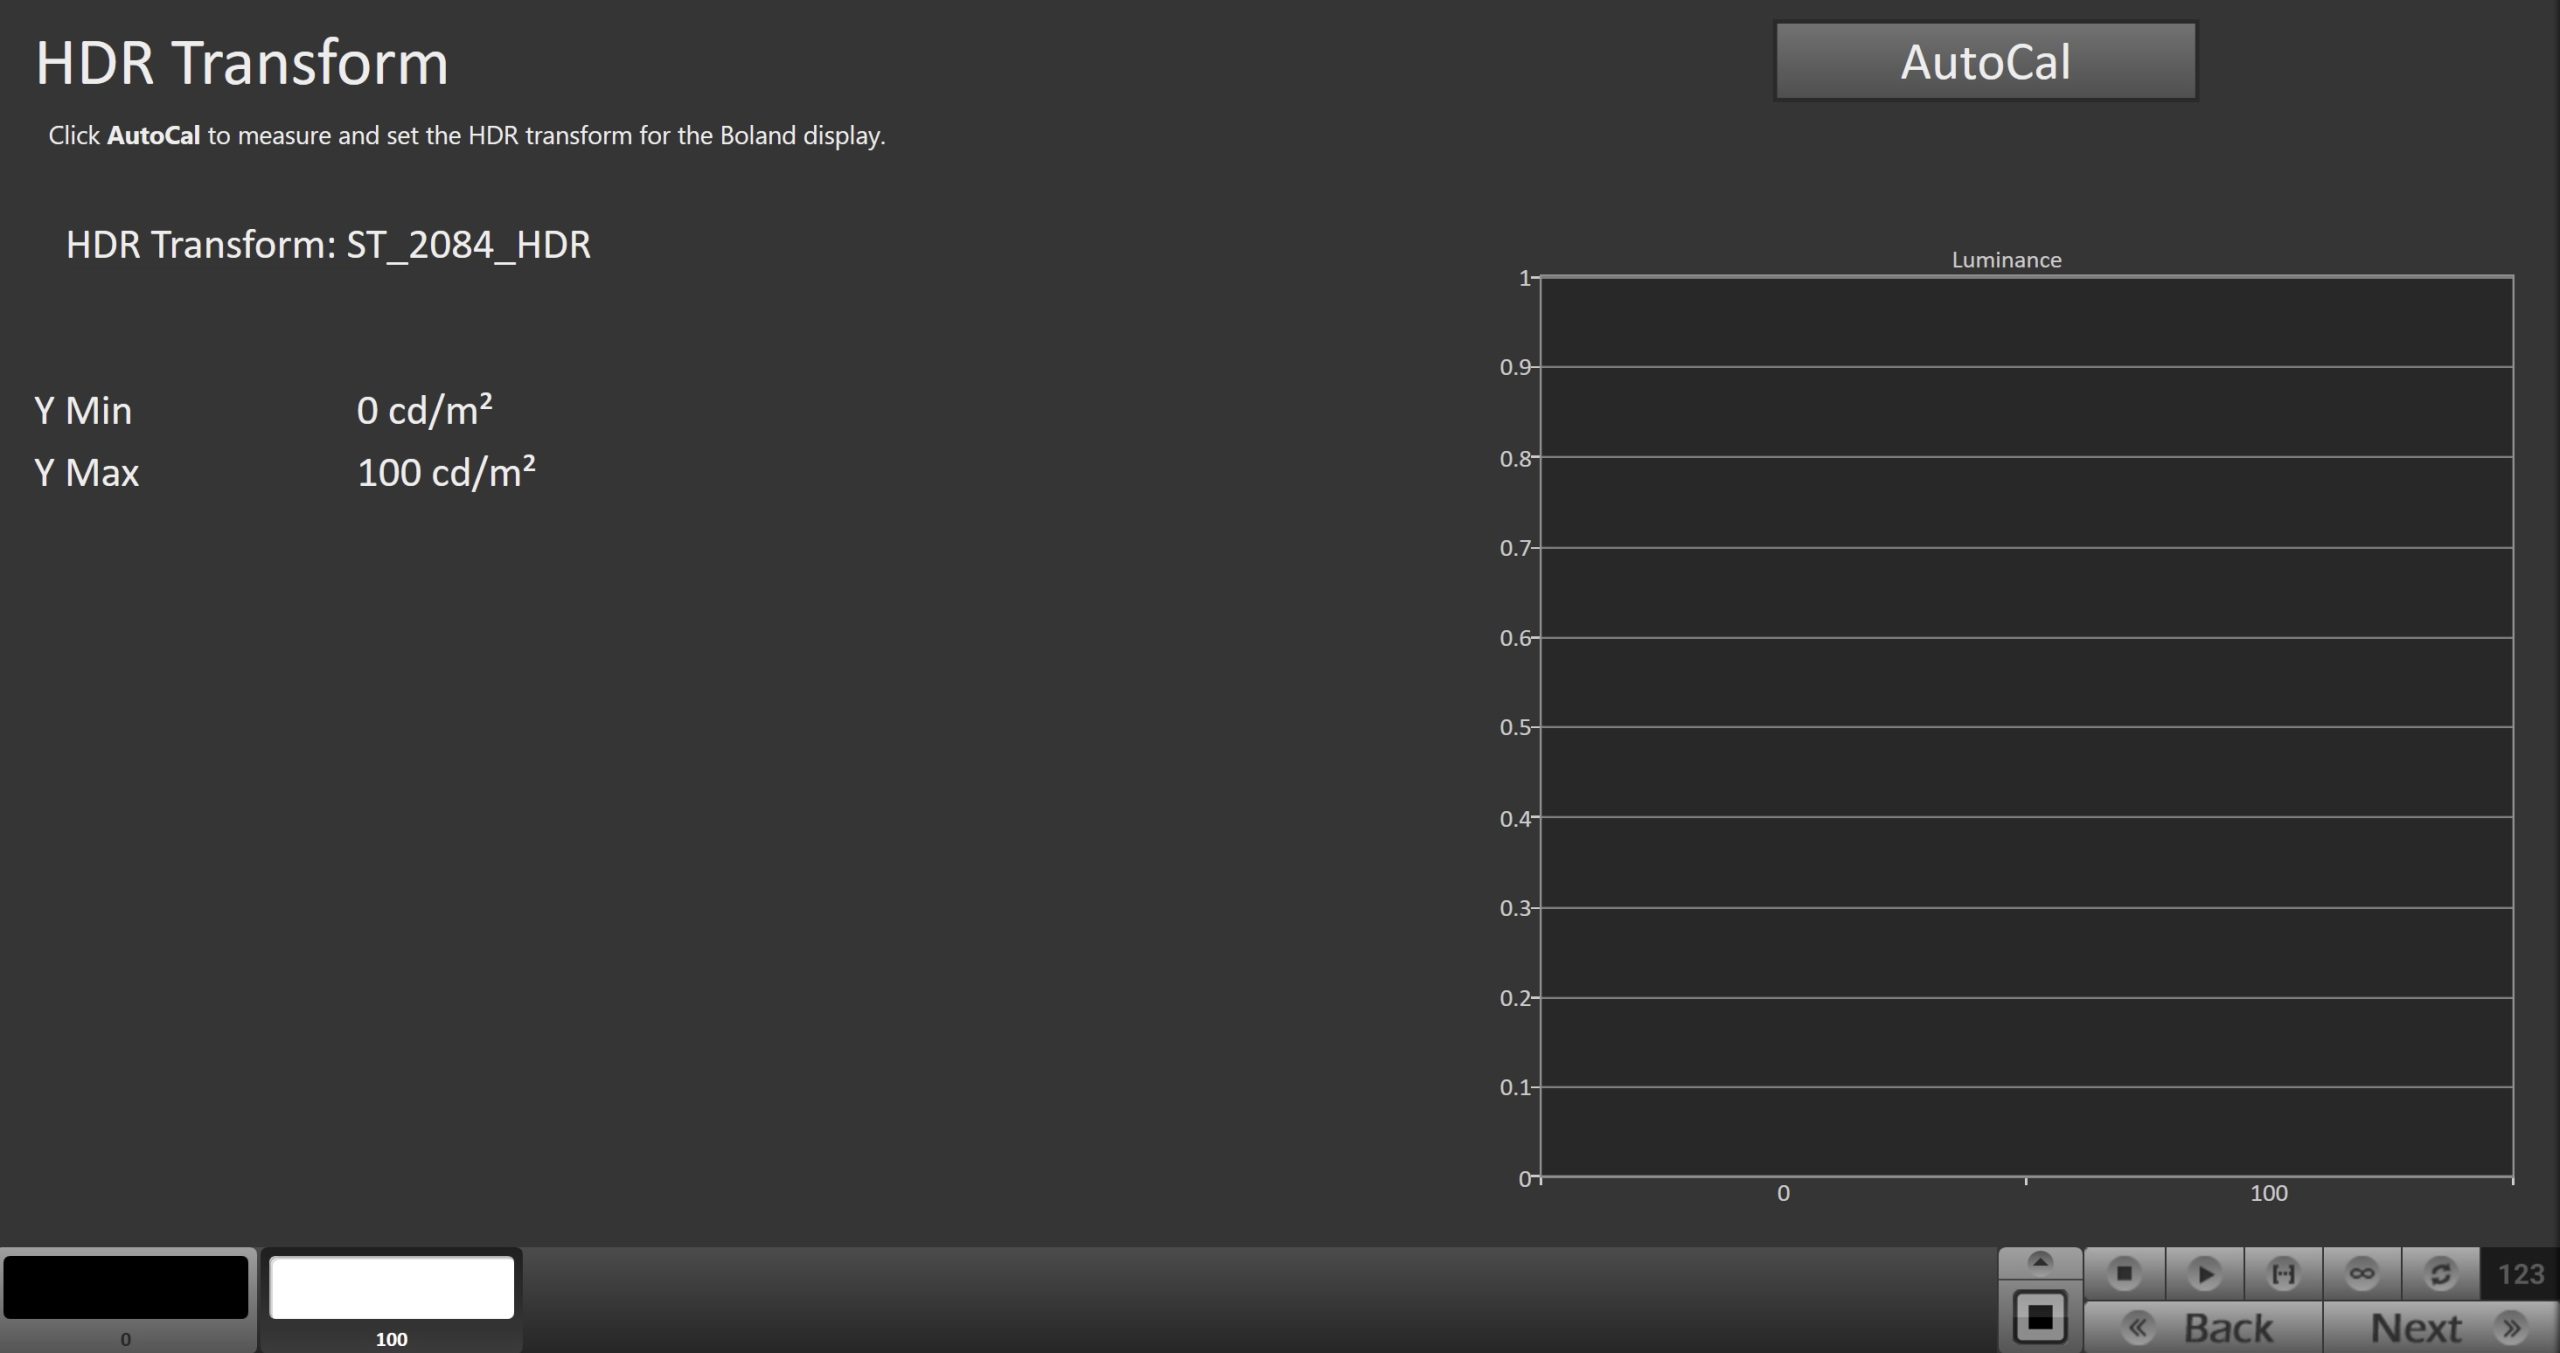
Step 8
This step will vary depending on your choice of SDR or HDR in Step 1
SDR |
HDR |
|
|
|
Step 9
- In this step, you’ll take measurements of the calibration results.
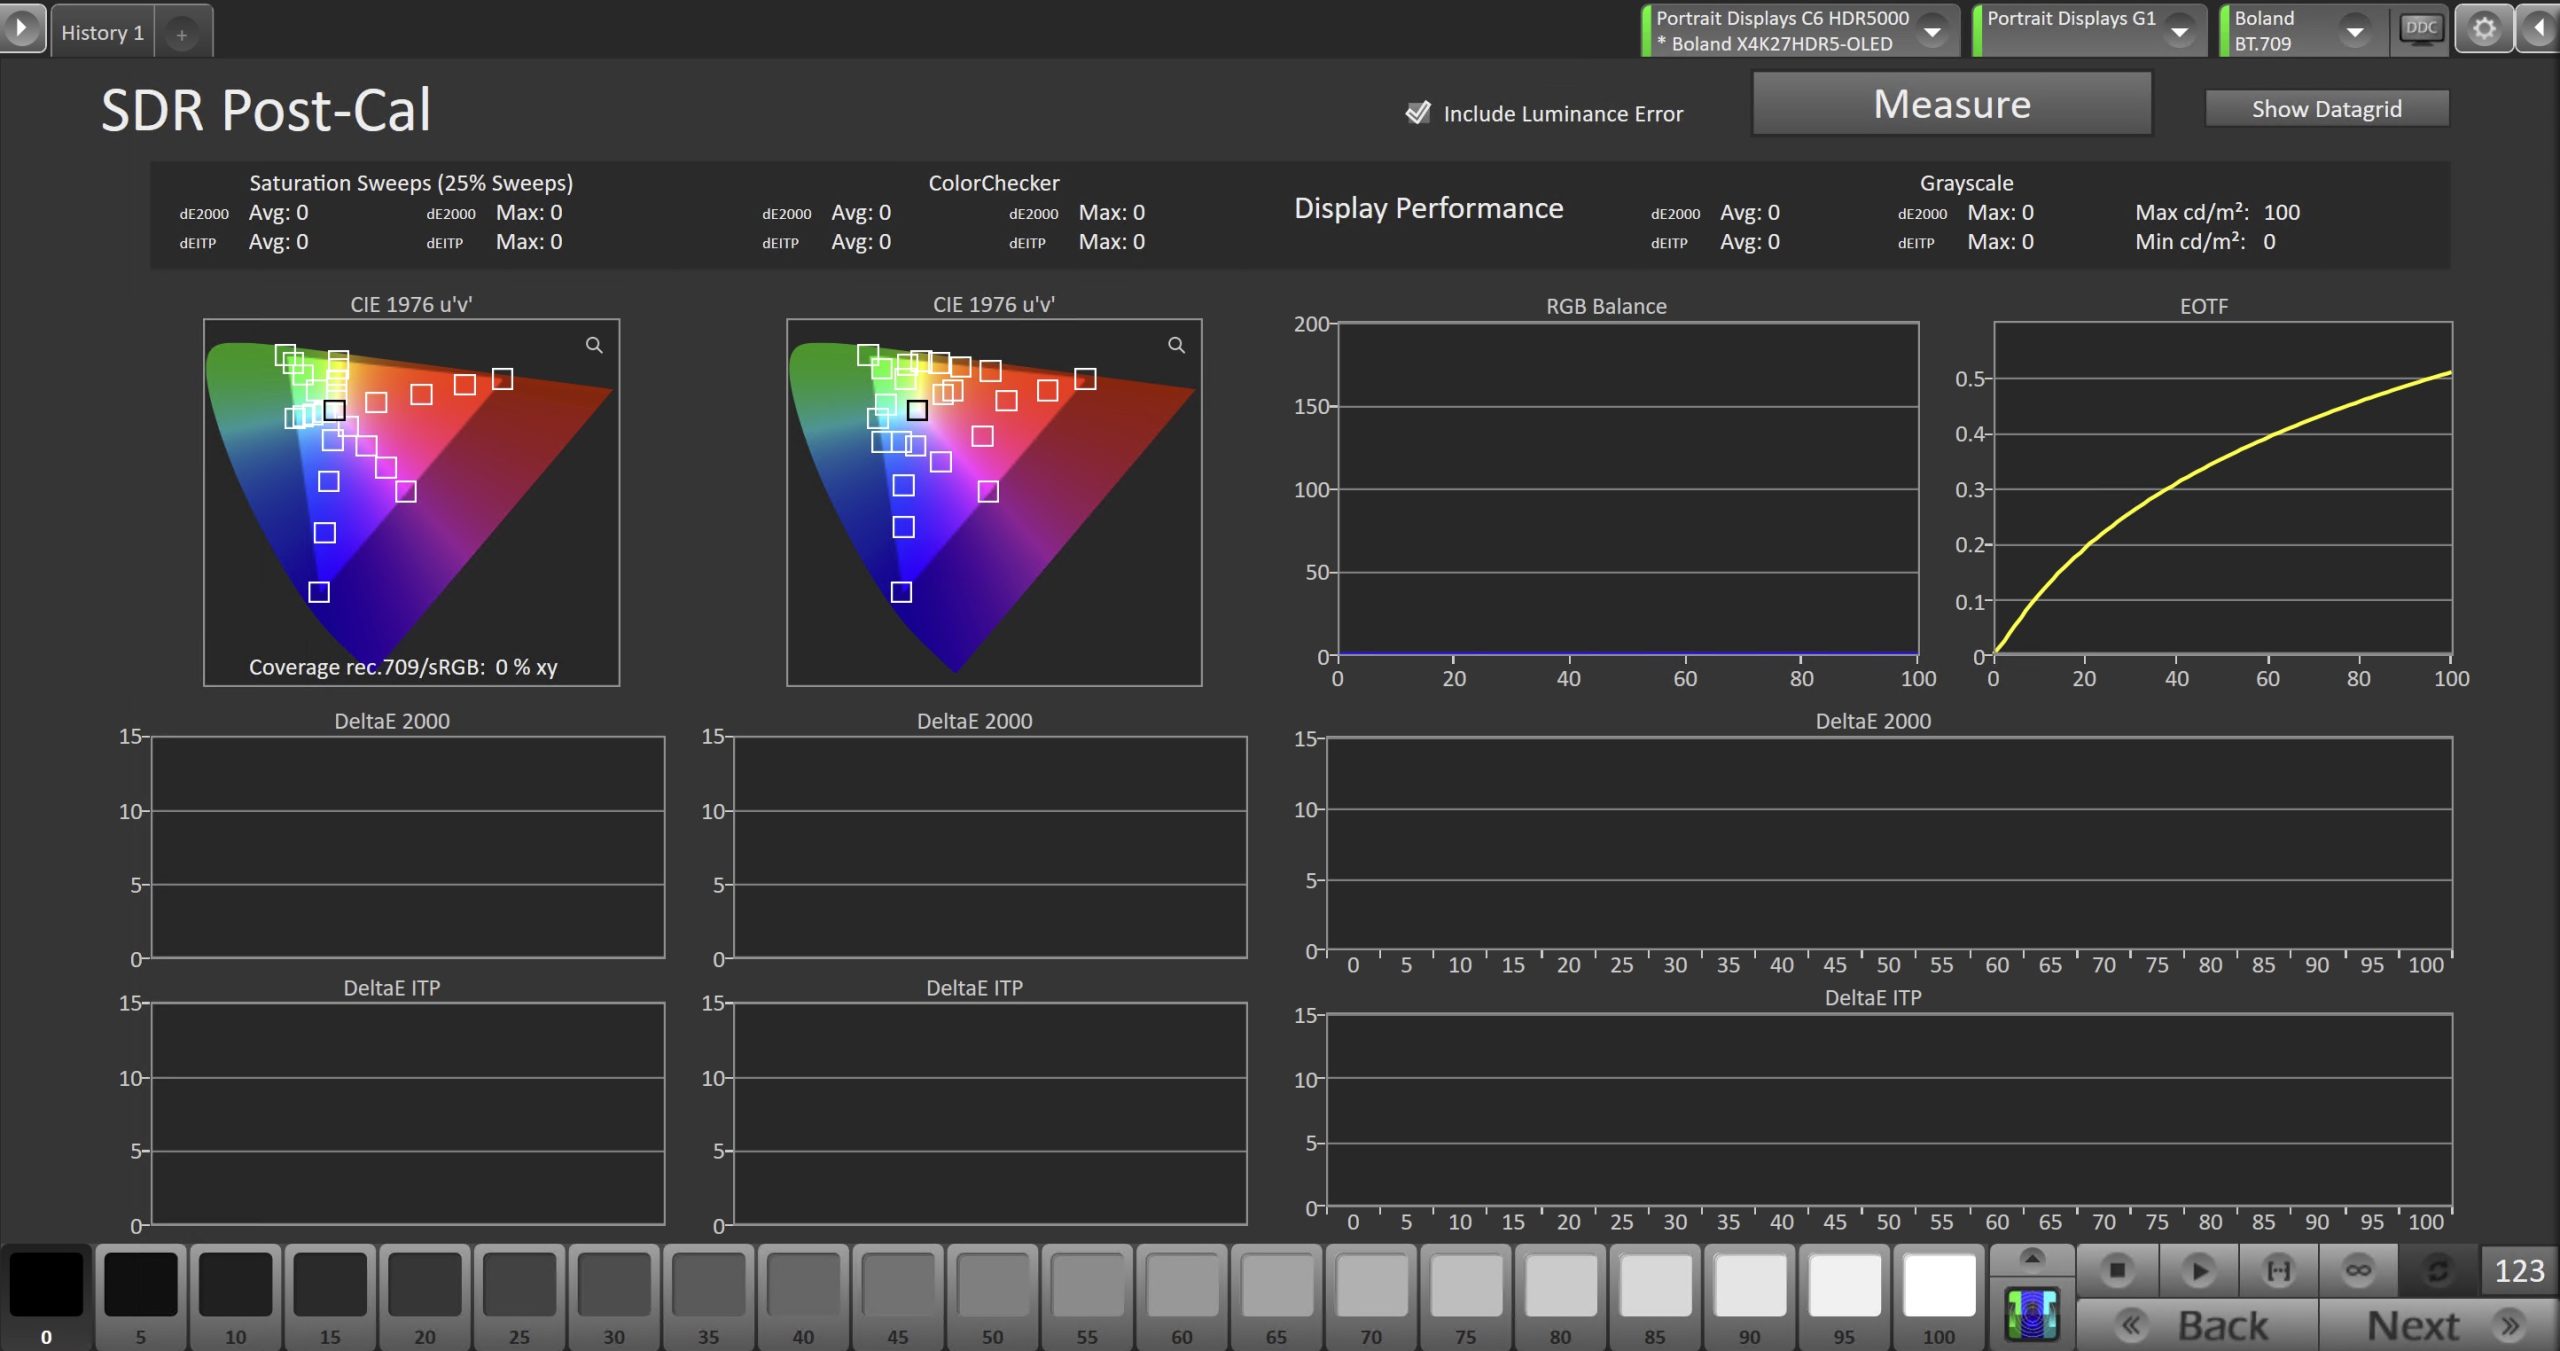
- To take Post-Calibration Measurements, click the Measure button to measure the display’s grayscale and color response.
- Click Next to proceed
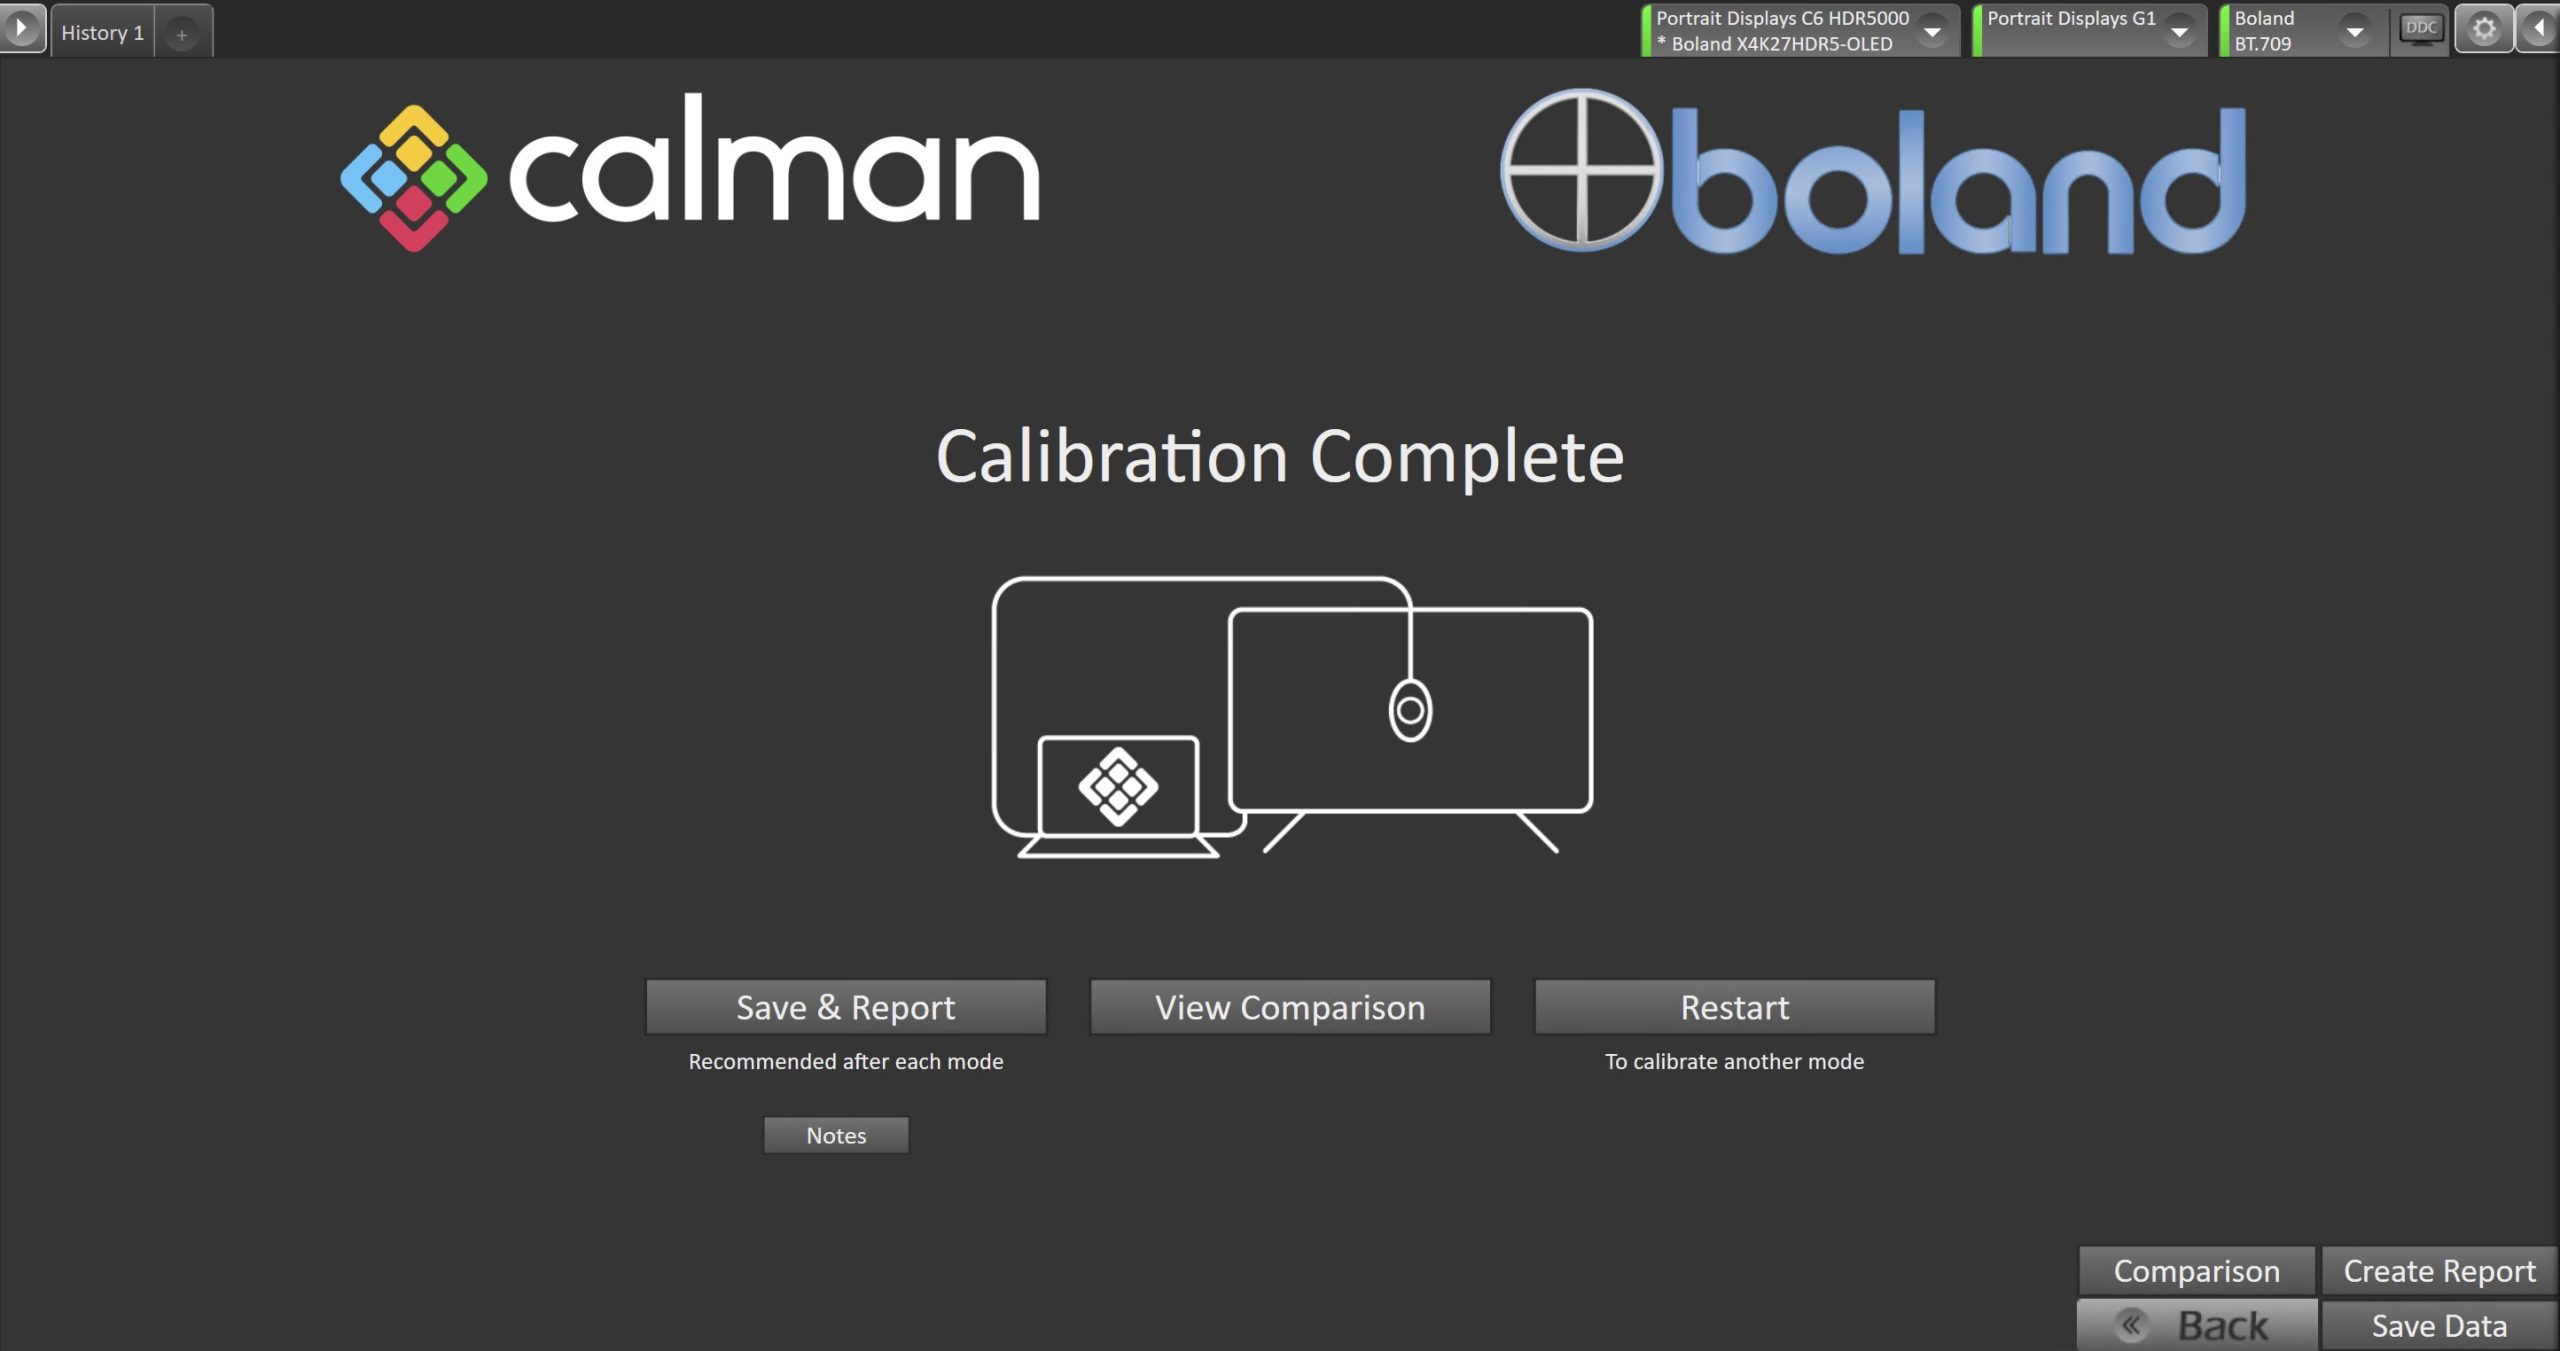
- On the Calibration Complete page, you can choose to…
- Save and Report
- Select Save and Report to generate the calibration report
- View Comparison
- Displays Pre and Post Calibration measurements of the calibrated mode side-by-side
- Restart
- Returns to the beginning of the workflow where a new mode or colorspace can be selected
- Note: Does not save workflow data
- Save and Report