The Panasonic AutoCal Fire workflow for Calman Home provides all the tools needed to ensure color accuracy on your AutoCal-capable display. It is designed to allow users to automatically adjust their color settings with confidence, ensuring accurate image presentation.

Each step of this workflow has been optimized to display relevant information and automatically configure common settings. Both Pre-Calibration and Post-Calibration measurement steps are included for comparing pre- and post-performance.
Note: For best results, the workflow steps should be performed in order, as many steps include automation designed to be performed in order
- Calman Required Version
- Calman Home for Panasonic v5.16.3 or newer
- Required Hardware
- HDR Compatible Pattern Generator
- A hardware pattern generator like the Portrait Displays G1 or VideoForge Pro must be used for HDR Calibration
- HDR Compatible Meter
- For information, see Calman Compatible Meters
- Calman Compatible Panasonic TV
- Firmware Version:
- Japan only: RS8141/3011 or later.
- Other regions: RS8141/3009 or later.
- 2024
- W90A Series LCD
- W95A Series LCD
- Z85A Series OLED
- Z90A Series OLED
- Z95A Series OLED
- 2025
- W90B Series LCD
- W95B Series LCD
- Z90B Series OLED
- Z95B Series OLED
- Firmware Version:
- HDR Compatible Pattern Generator
Step 1
- From the Calman Menu in the top-left, choose Open Workflow Template -> Display Specific, and then Panasonic Autocal Fire
- Note: The 2024 and newer Panasonic models use a different workflow than previous models.
- For 2024 and newer models, use Panasonic Autocal Fire
- For 2013-2023 models, use Panasonic Autocal and see our guide.
- Note: The 2024 and newer Panasonic models use a different workflow than previous models.
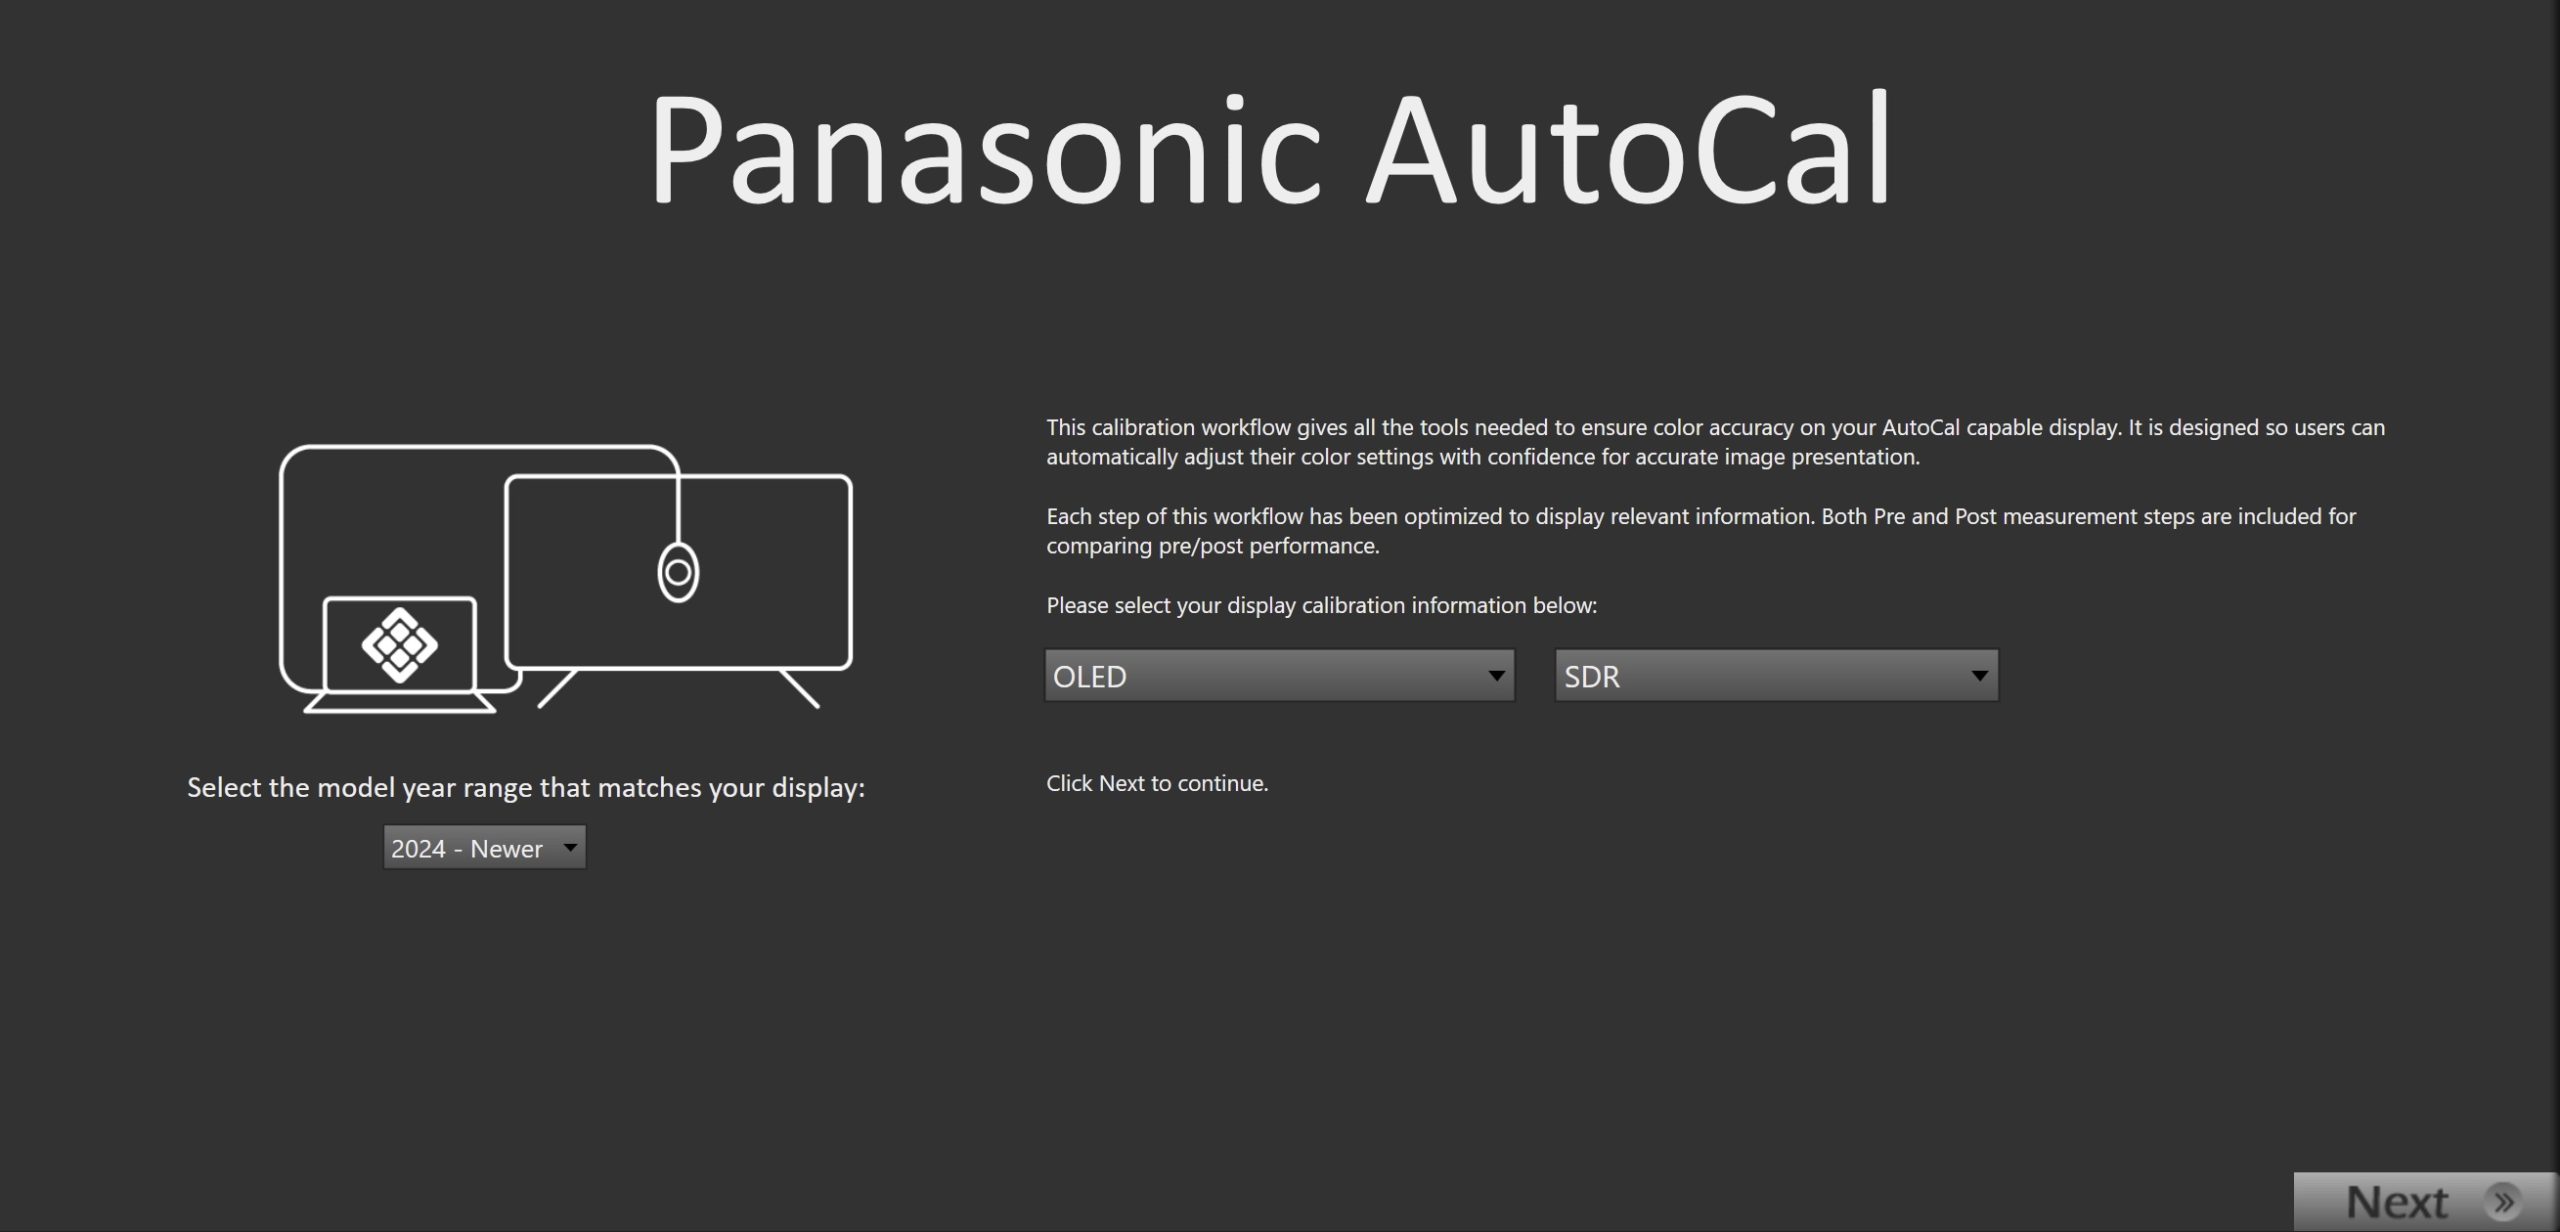
- On the introduction screen, choose your Display Technology (OLED/LCD) and Colorspace Target (SDR/HDR)
- This pre-configures the workflow for the desired targets.
- At the end of the selected workflow, you will have the chance to proceed to another color space target.
- Click Next to proceed.
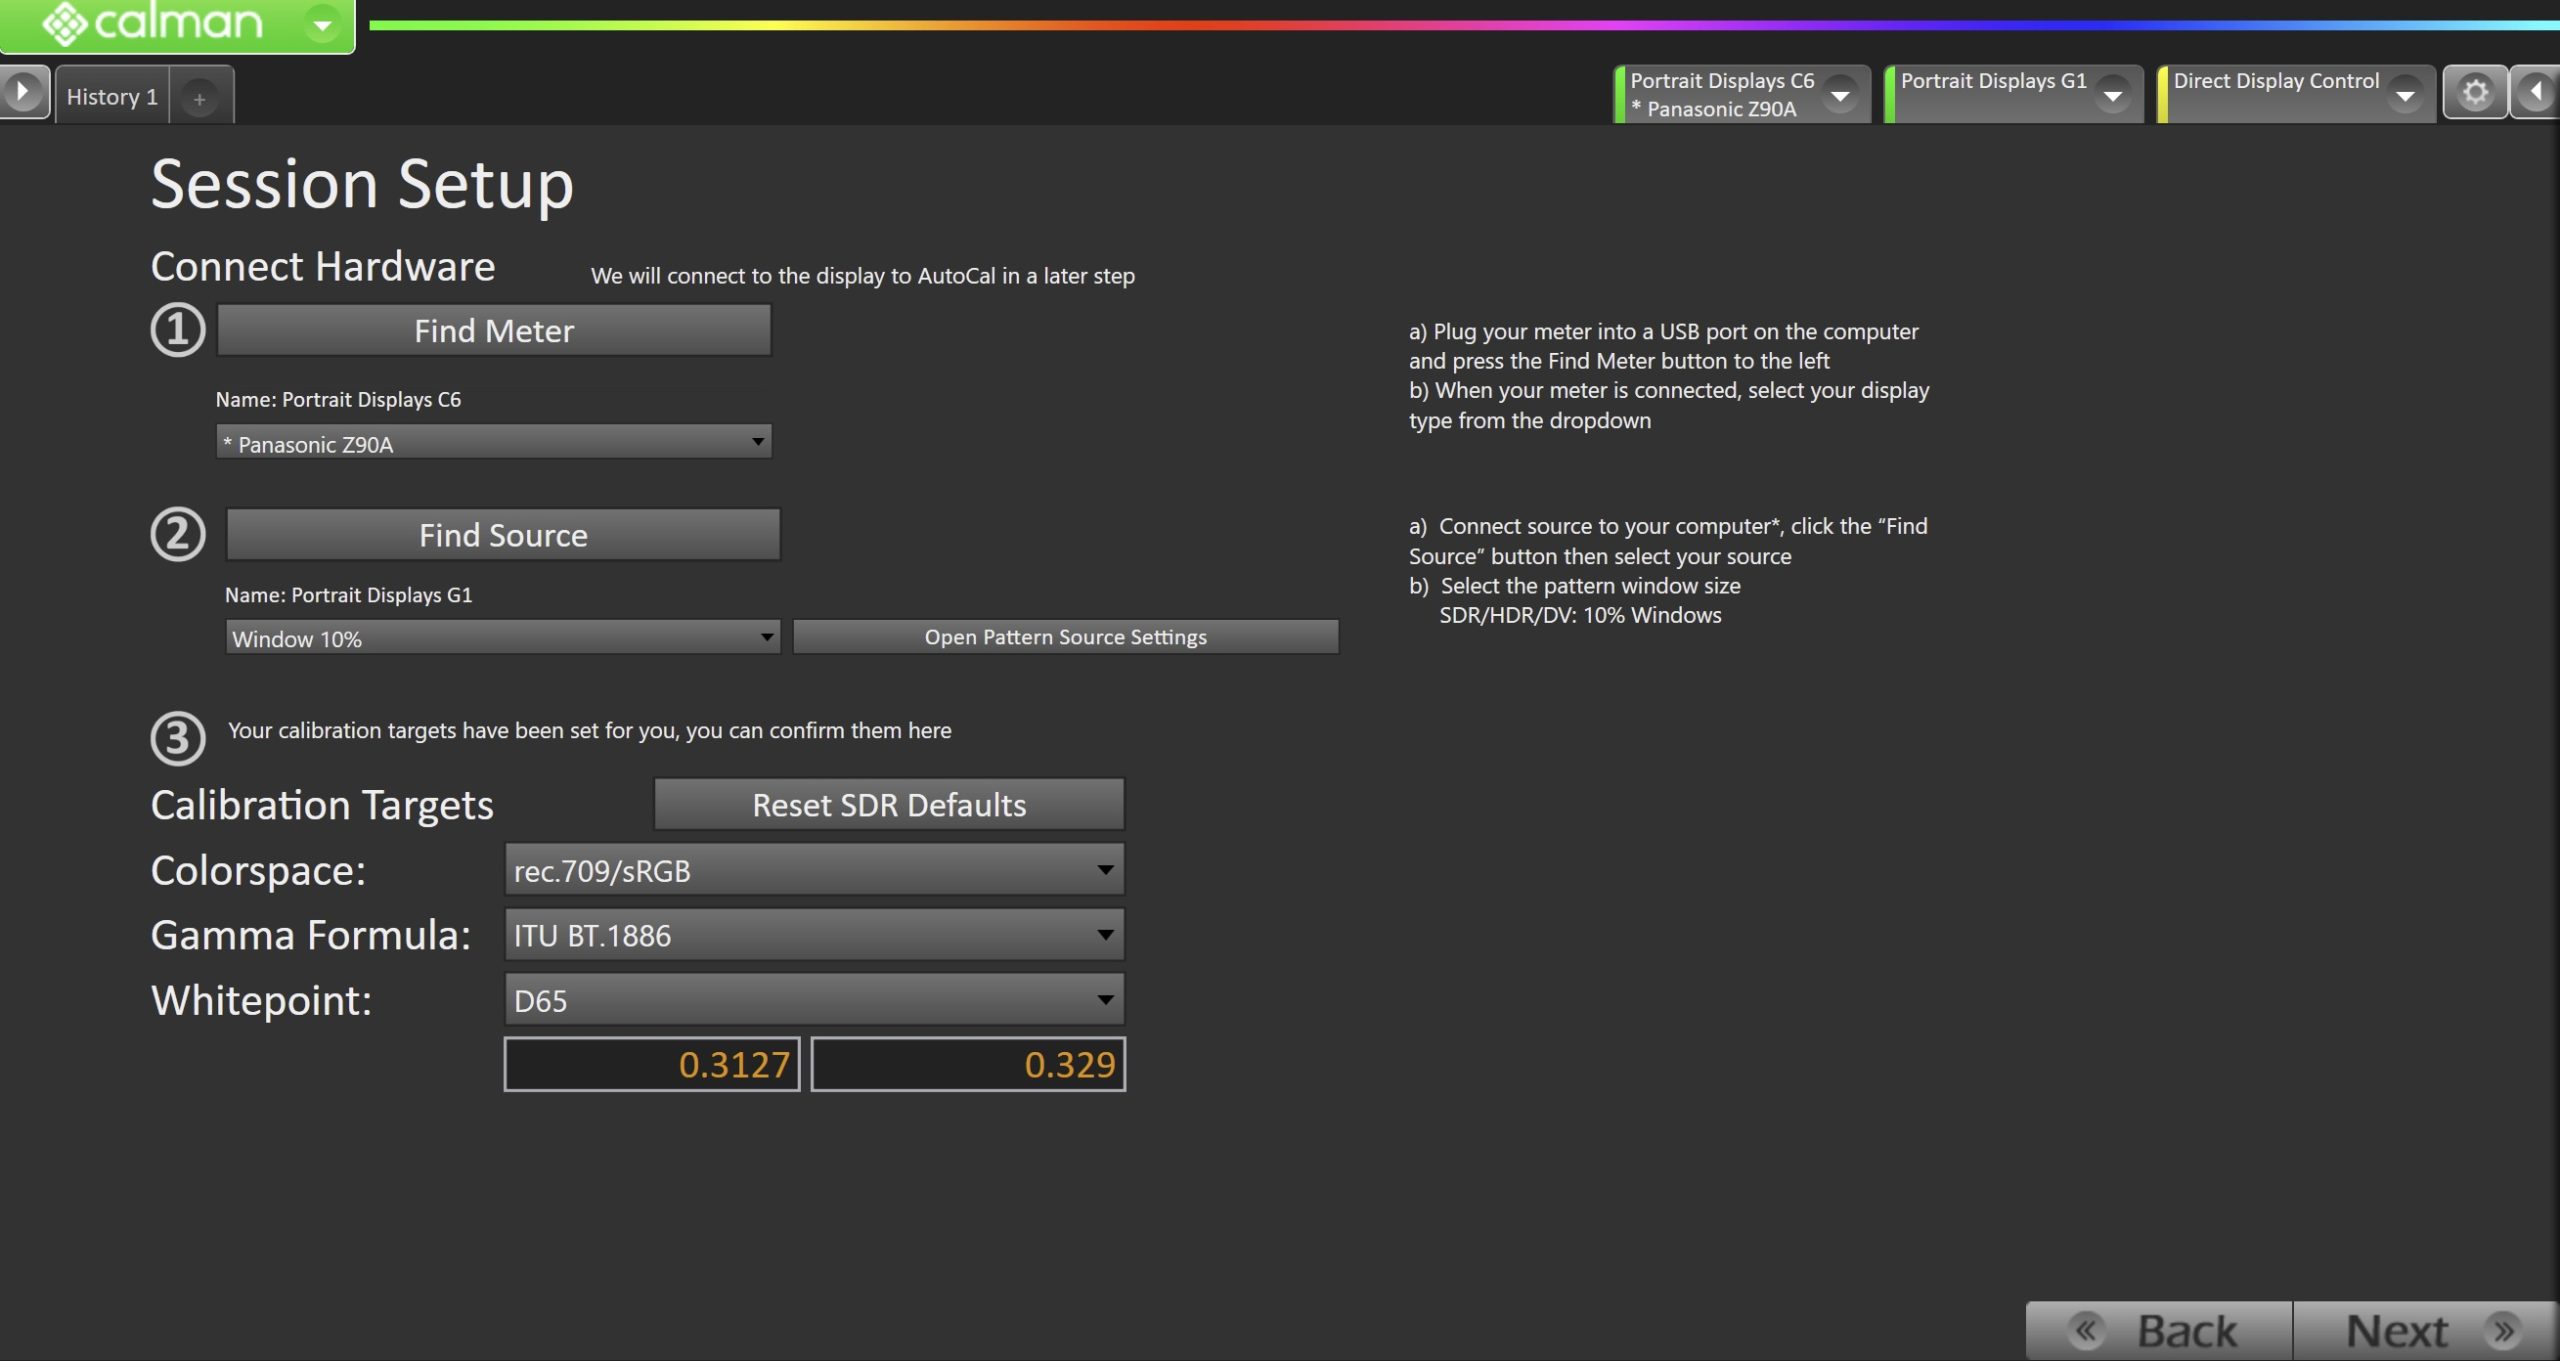
- Plug your meter into a USB port on the computer and click the Find Meter button on the left.
- When your meter is connected, select your display type from the dropdown (this will vary by meter and display in use)
- Connect Pattern Source to your computer.
- Click the Find Source button, then select your source
- Select the pattern window size
- OLED models: 10% Window
- LCD models: 18% APL
- Select the pattern delay
- 1 Second
- Confirm Calibration Targets and Application Settings:
| SDR | HDR | Dolby Vision | |
| Colorspace | Rec.709 | BT.2020 | DCI P3 |
| Gamma | BT.1886 | ST.2084 | ST.2084 |
| Whitepoint | D65 | D65 | D65 |
- Click Next to proceed.
Step 2
- In this step, you’ll take measurements of the display before the calibration. These will be used to compare the calibration results.
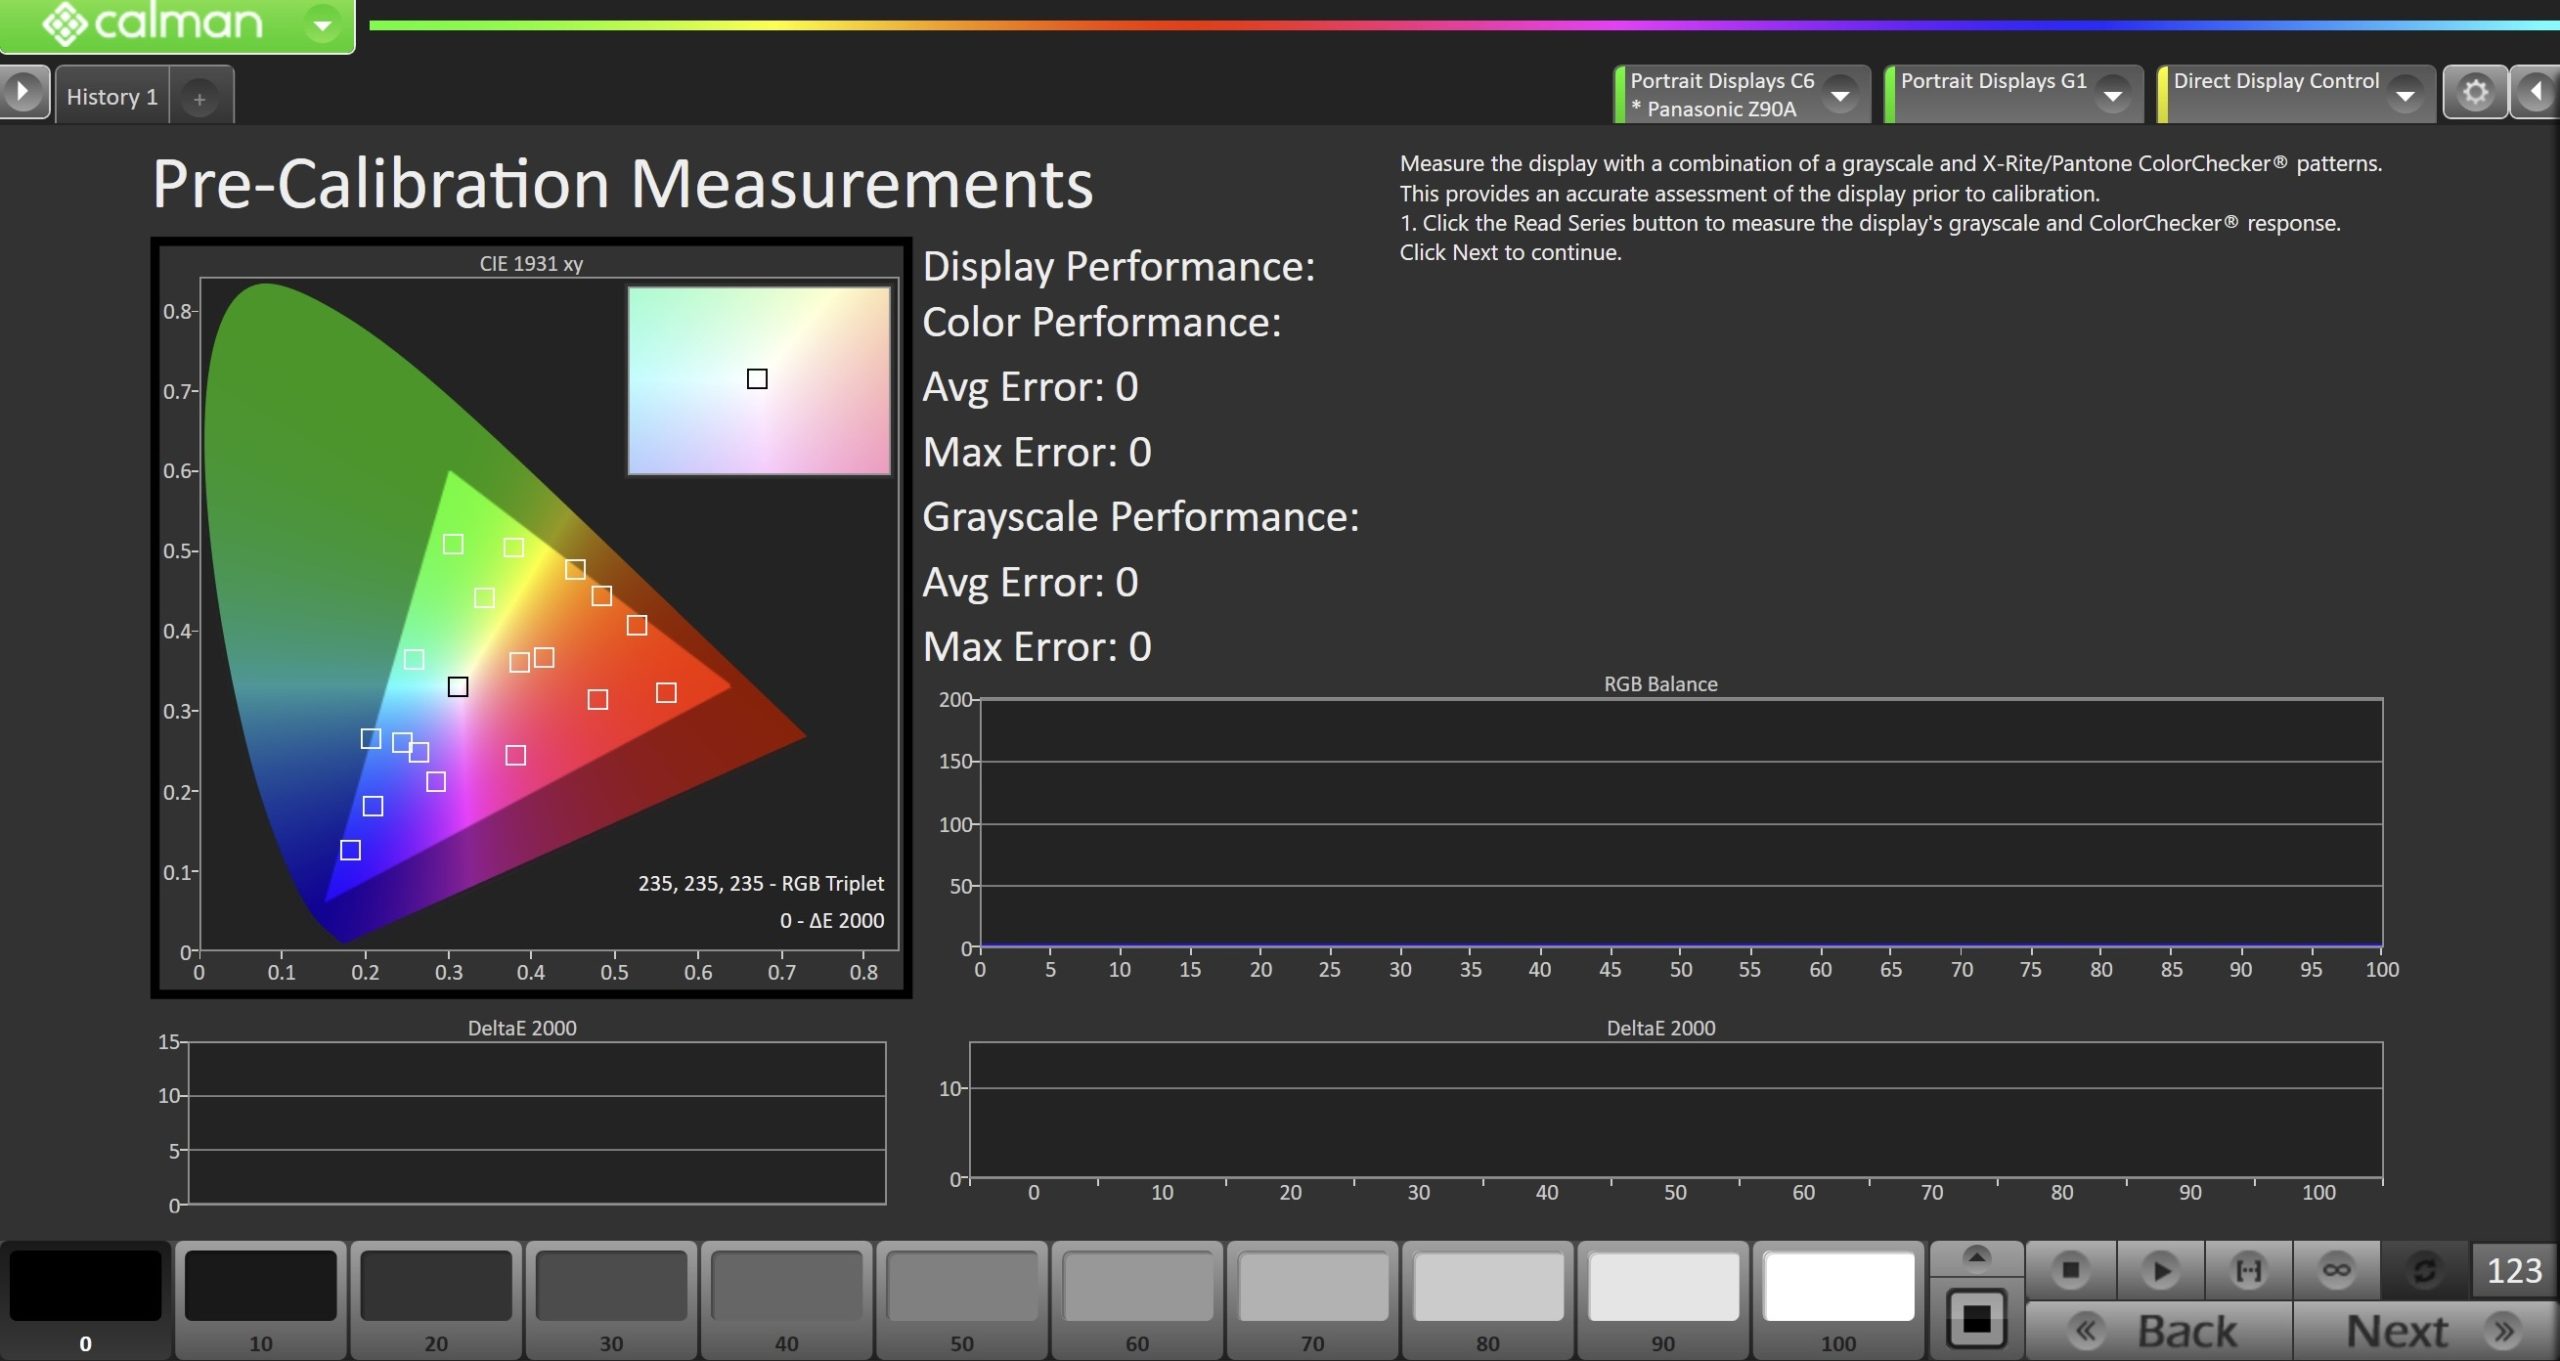
- To take Pre-Calibration Measurements, click the Read Series […] button to measure the display’s grayscale and ColorChecker response
- This will provide a point of reference to compare the calibration results
- Click Next to proceed
Step 3
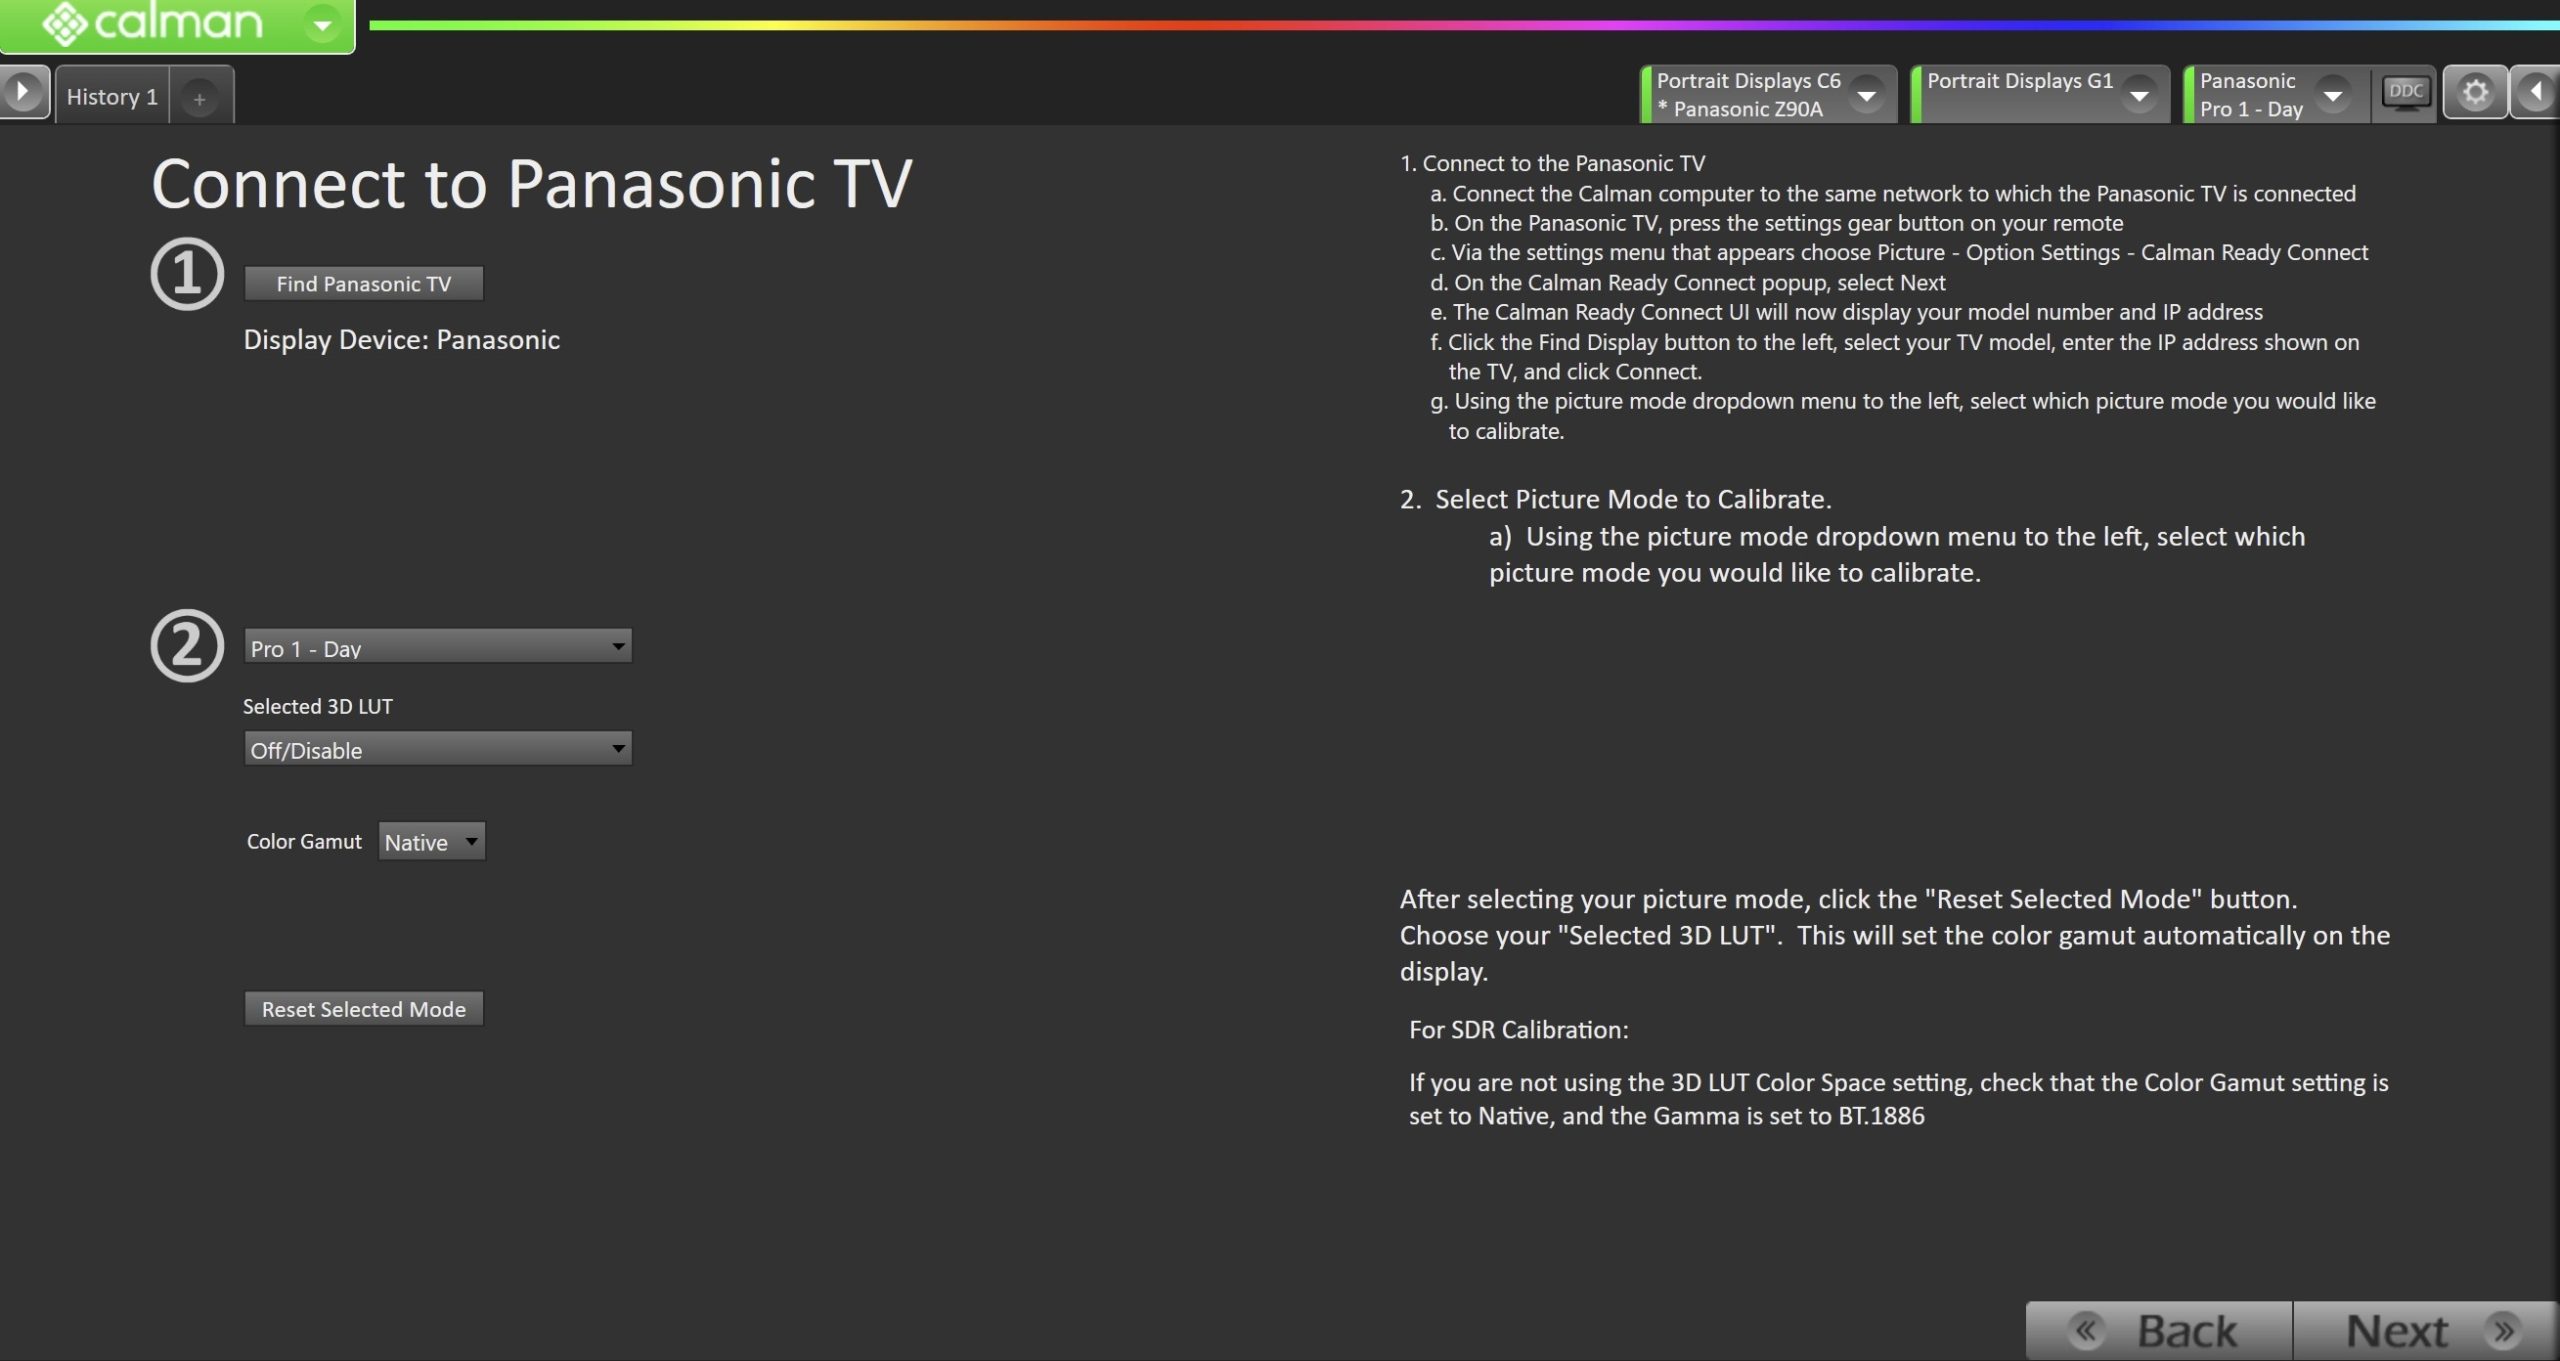
- Connect your TV to Calman
- On your Panasonic TV:
- Select an HDMI input from the inputs menu
- Once video is displayed, press the Settings Gear ⚙ button on your remote and choose Picture – Option Settings – Calman
Ready Connect - On the Calman Ready Connect popup, select Next
- The Calman Ready Connect UI will now display your model number and IP
address
- In Calman:
- Click the Find Display Button
- Choose the year and model you are calibrating in the drop-down under Model.
- Enter the IP address shown on the TV, and click Connect.
- On your Panasonic TV:
- Select Picture Mode to Calibrate.
- Each Picture Mode is a separate memory slot for calibration data. Calibrations to one mode and colorspace do not affect the other picture modes.
- Picture Mode will contain calibration data for Luminance, Grayscale, and other basic calibration controls, while Selected 3D LUT will contain Color Gamut calibration
- Using the picture mode dropdown menu, select which picture mode you would like to calibrate.
- SDR/HDR Picture Modes:
- Pro 1 – Day
- Pro 2 – Night
- True Game (Note: Will be renamed to “Calibrated Game” after calibration)
- True Cinema (Note: Will be renamed to “Calibrated Cinema” after calibration)
- Filmmaker Mode
- Dolby Vision Picture Modes:
- Dolby Vision Dark
- Dolby Vision IQ
- Dolby Vision Game
- SDR/HDR Picture Modes:
- After selecting the picture mode, click the Reset Selected Mode button. This resets and prepares the picture mode for calibration.
- SDR/HDR 3D LUT Selection
- 2024 and newer Panasonic TVs include support for 3D LUT calibration, which is done by selecting one of the 3D LUT slots presented on the Hardware Connection page
- Notes:
- Be aware not to overwrite 3D LUTs from previous calibrations, if applicable.
- It’s best to pair a 3D LUT with a specific Picture Mode (i.e., Professional 1, True Game, etc.) as the greyscale and luminance calibration will take place as part of the Picture Mode calibration
- Notes:
- 2024 and newer Panasonic TVs include support for 3D LUT calibration, which is done by selecting one of the 3D LUT slots presented on the Hardware Connection page
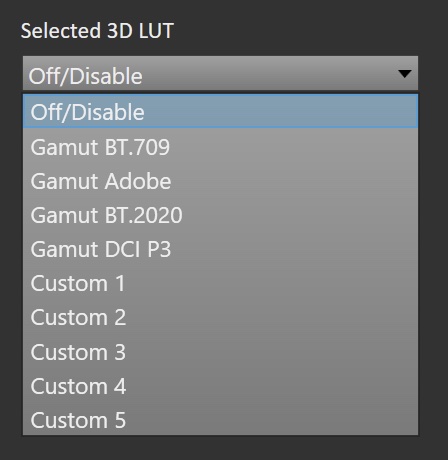
- The choices are:
- Off/Disable
- Note: This will bypass all color gamut calibration
- When disabled, the color gamut will be defined by the TV’s preconfigured Color Gamut control below the LUT dropdown
- Gamut BT.709
- Uses the TV’s preconfigured BT.709 gamut settings
- Gamut Adobe
- Uses the TV’s preconfigured Adobe gamut settings
- Gamut BT.2020
- Uses the TV’s preconfigured BT.2020 gamut settings
- Gamut DCI P3
- Uses the TV’s preconfigured DCI P3 gamut settings
- Custom (1-5)
- Uses the TV’s native gamut, allowing you to use the Calman gamut target to define your 3D LUT
- Off/Disable
- Once configured, click Next to proceed
Step 4 (SDR Only)
- In this step, you will be able to adjust the Luminance of the display to match your desired target.
- Note: You will also be asked to verify this at the end of the calibration steps
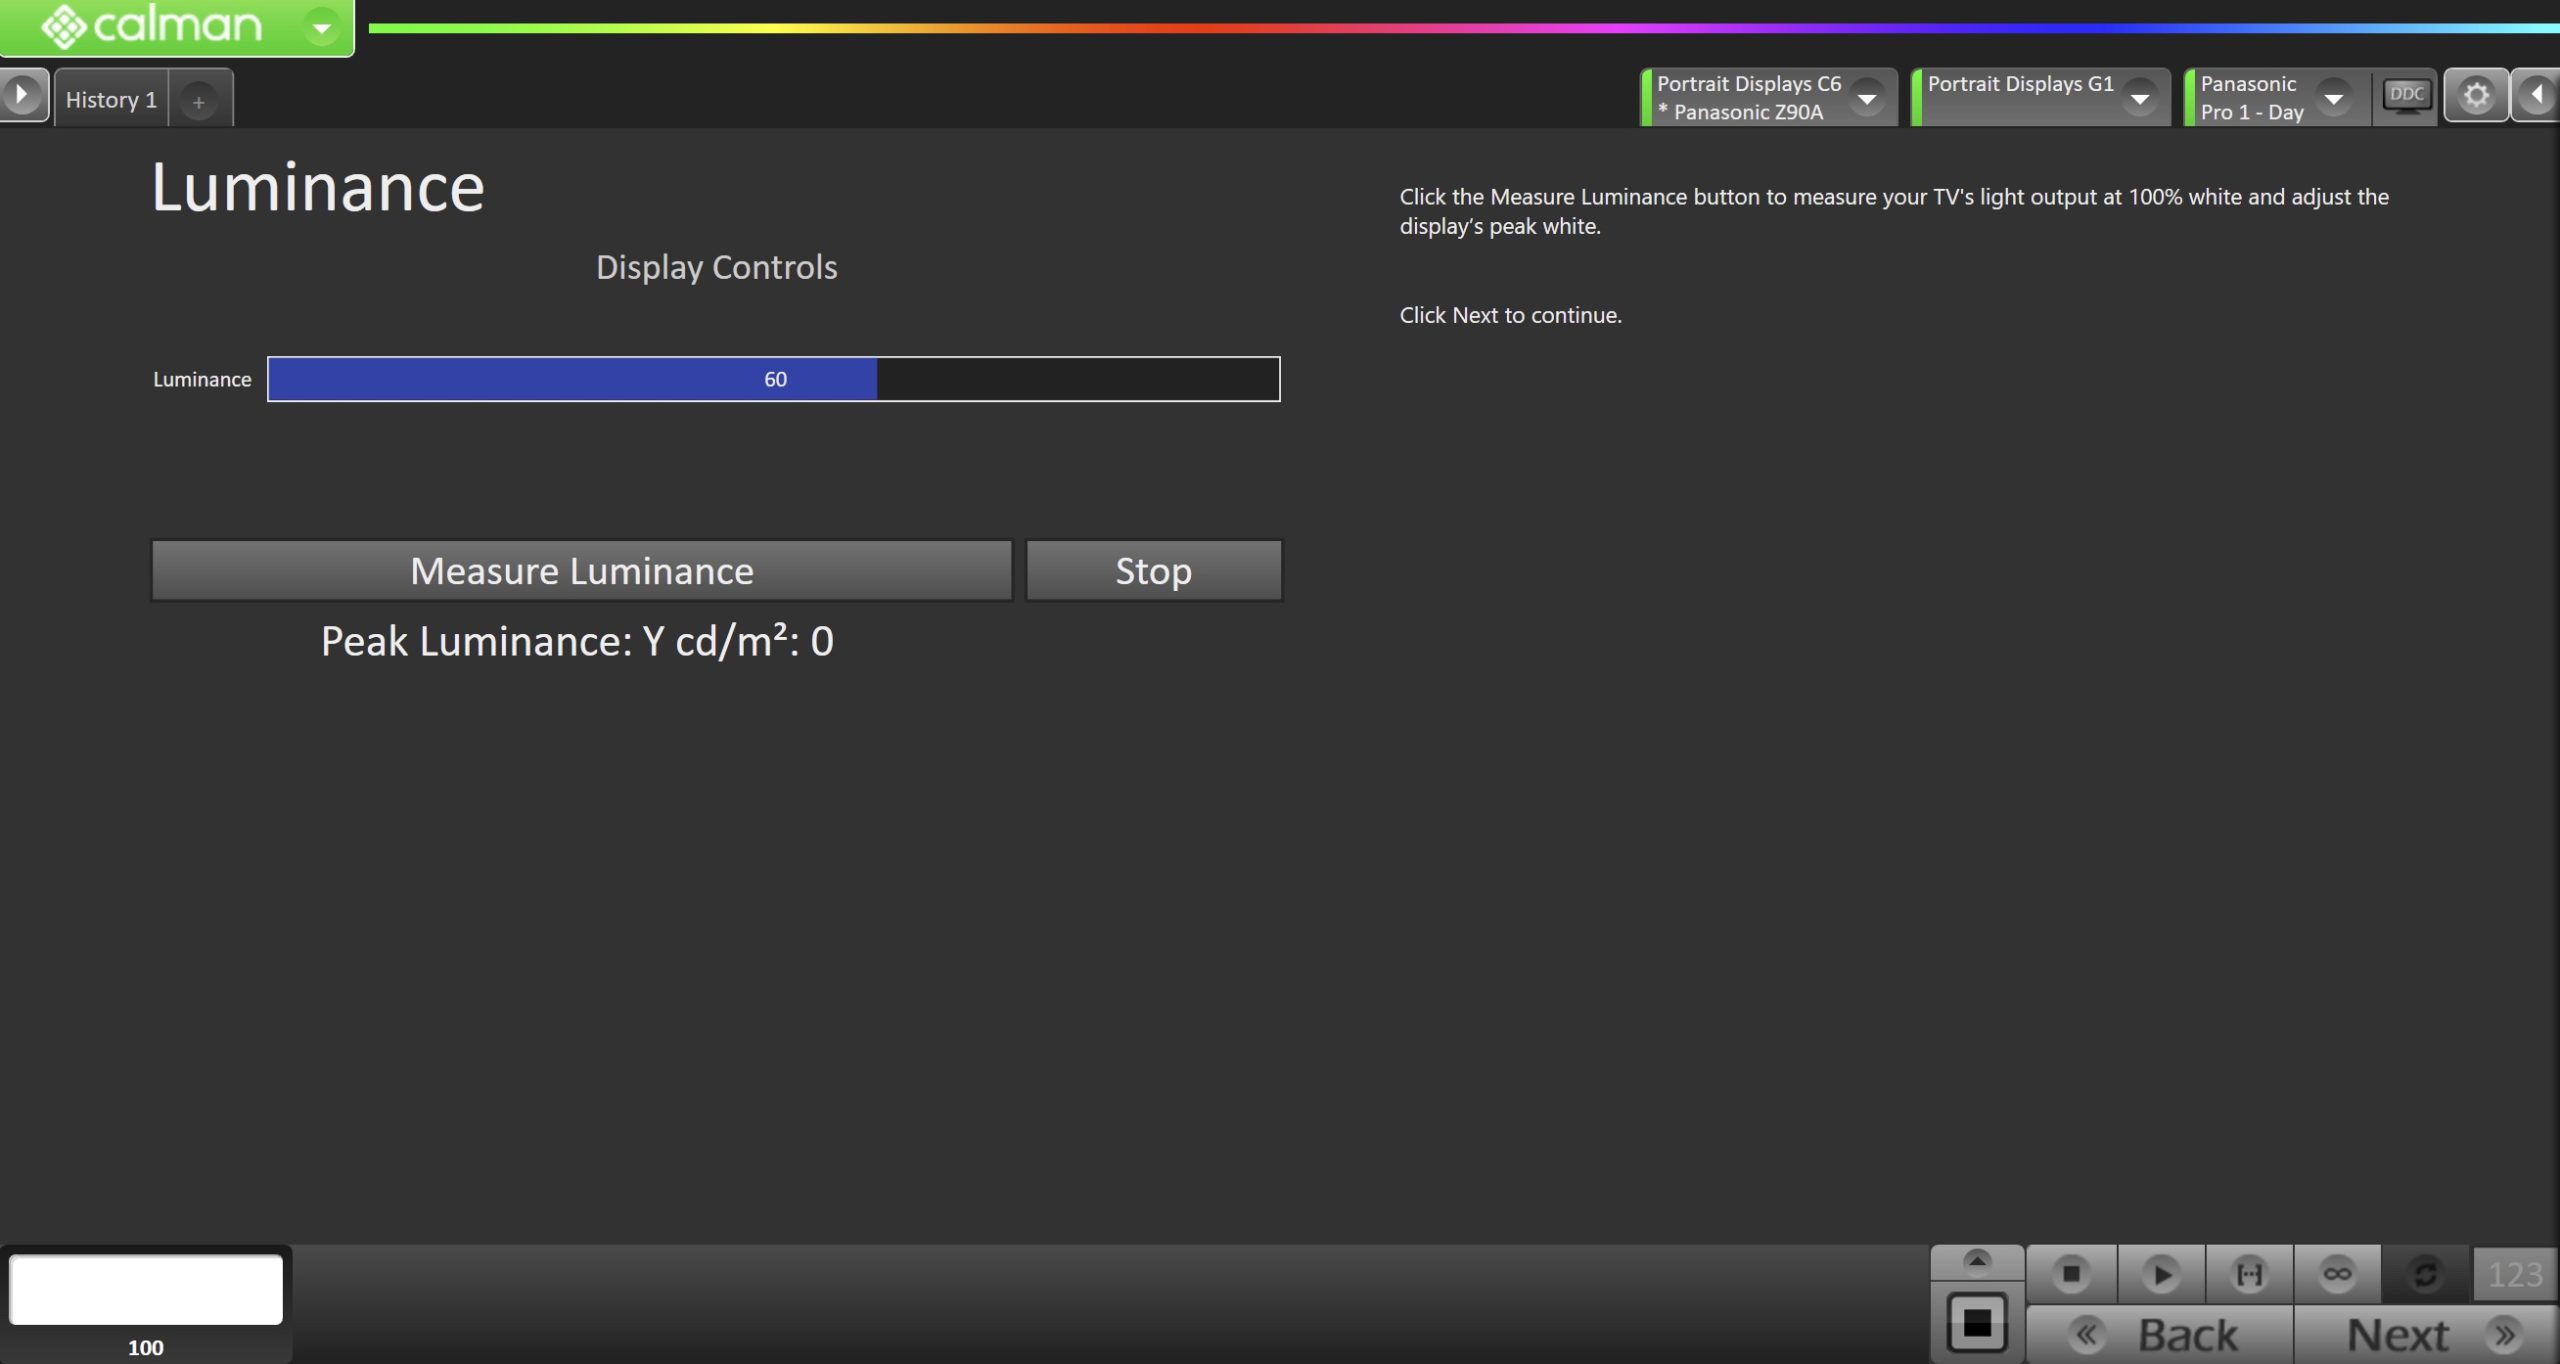
- Click the Measure button to measure your TV’s light output at 100% white and adjust the display’s peak white to the desired luminance.
- Luminance is a subjective target. SDR reference luminance is 100nits, but you may need to target higher to account for the ambient light in your environment.
- Adjust your TV’s Luminance control so that your TV is approximately 15% brighter than your final target to account for the reduction in luminance that occurs when calibrating the grayscale in the next step.
- Click Stop when the luminance adjustment is complete, and click Next to proceed
Step 5
- On this page, Calman will adjust your display’s White Balance
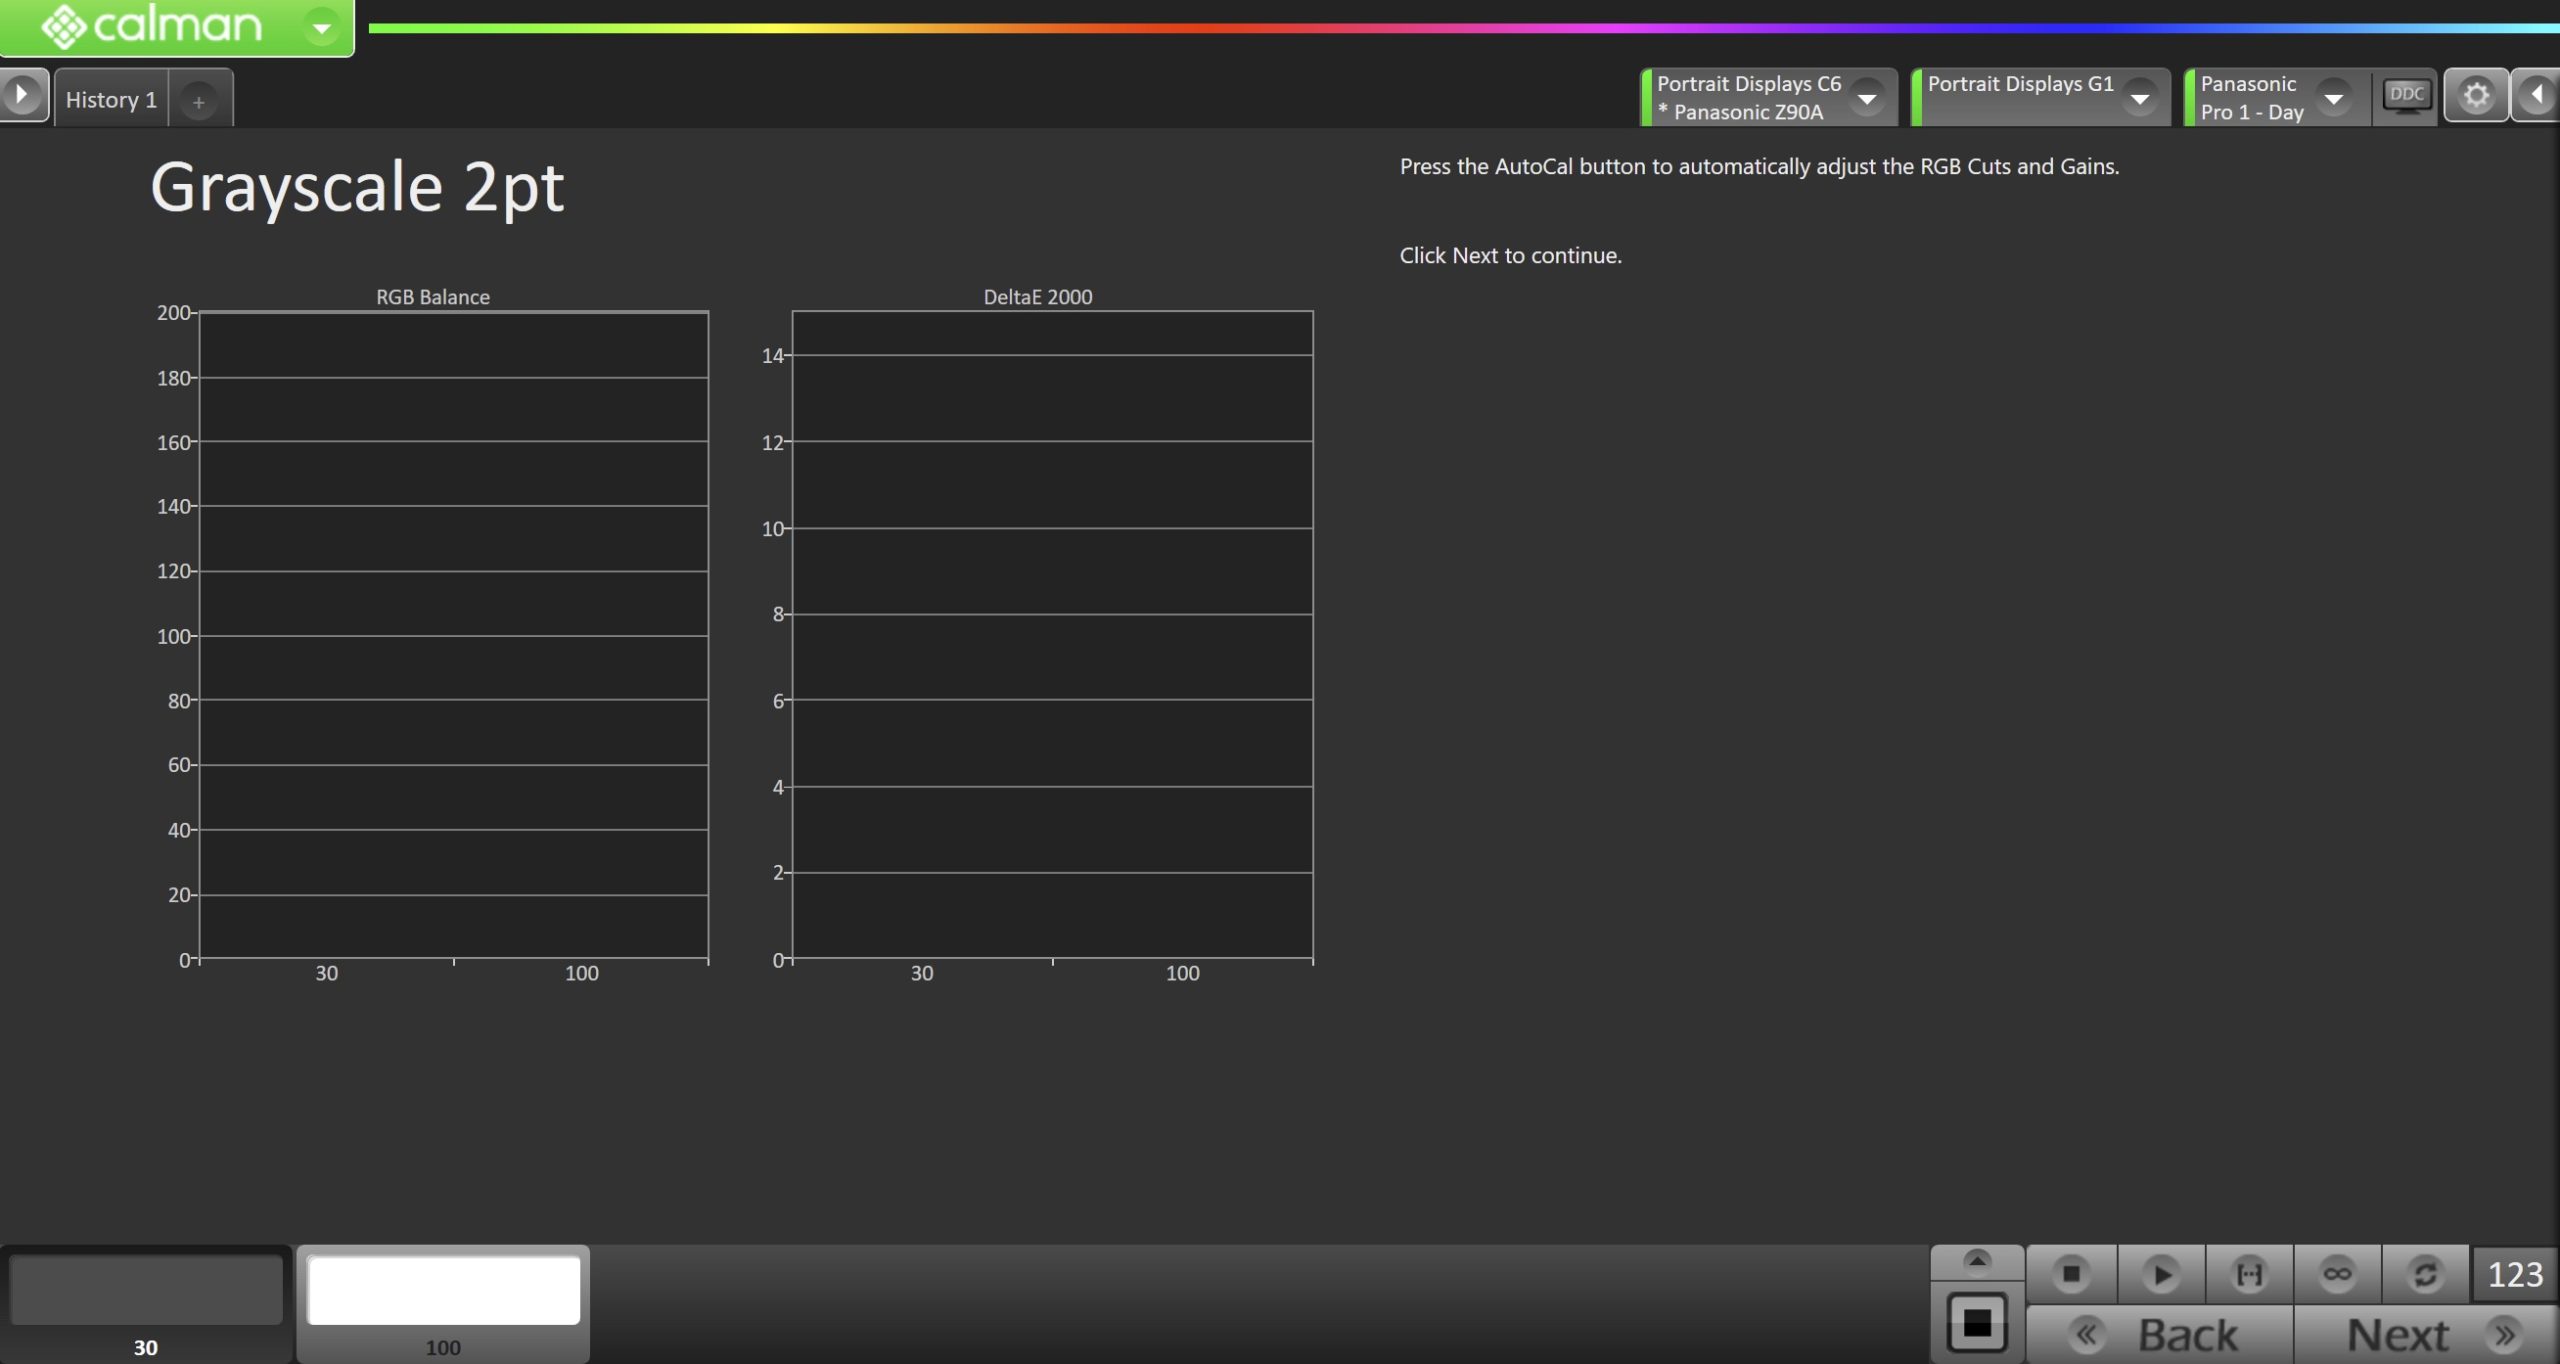
- Click the AutoCal button to perform the 2pt greyscale AutoCal
- Click Next after AutoCal has completed
- Note: In SDR you’ll be asked to confirm that the gamma response and settings of your TV align with your targets
Step 6
- Here, Calman will adjust the Multipoint Greyscale of the display.
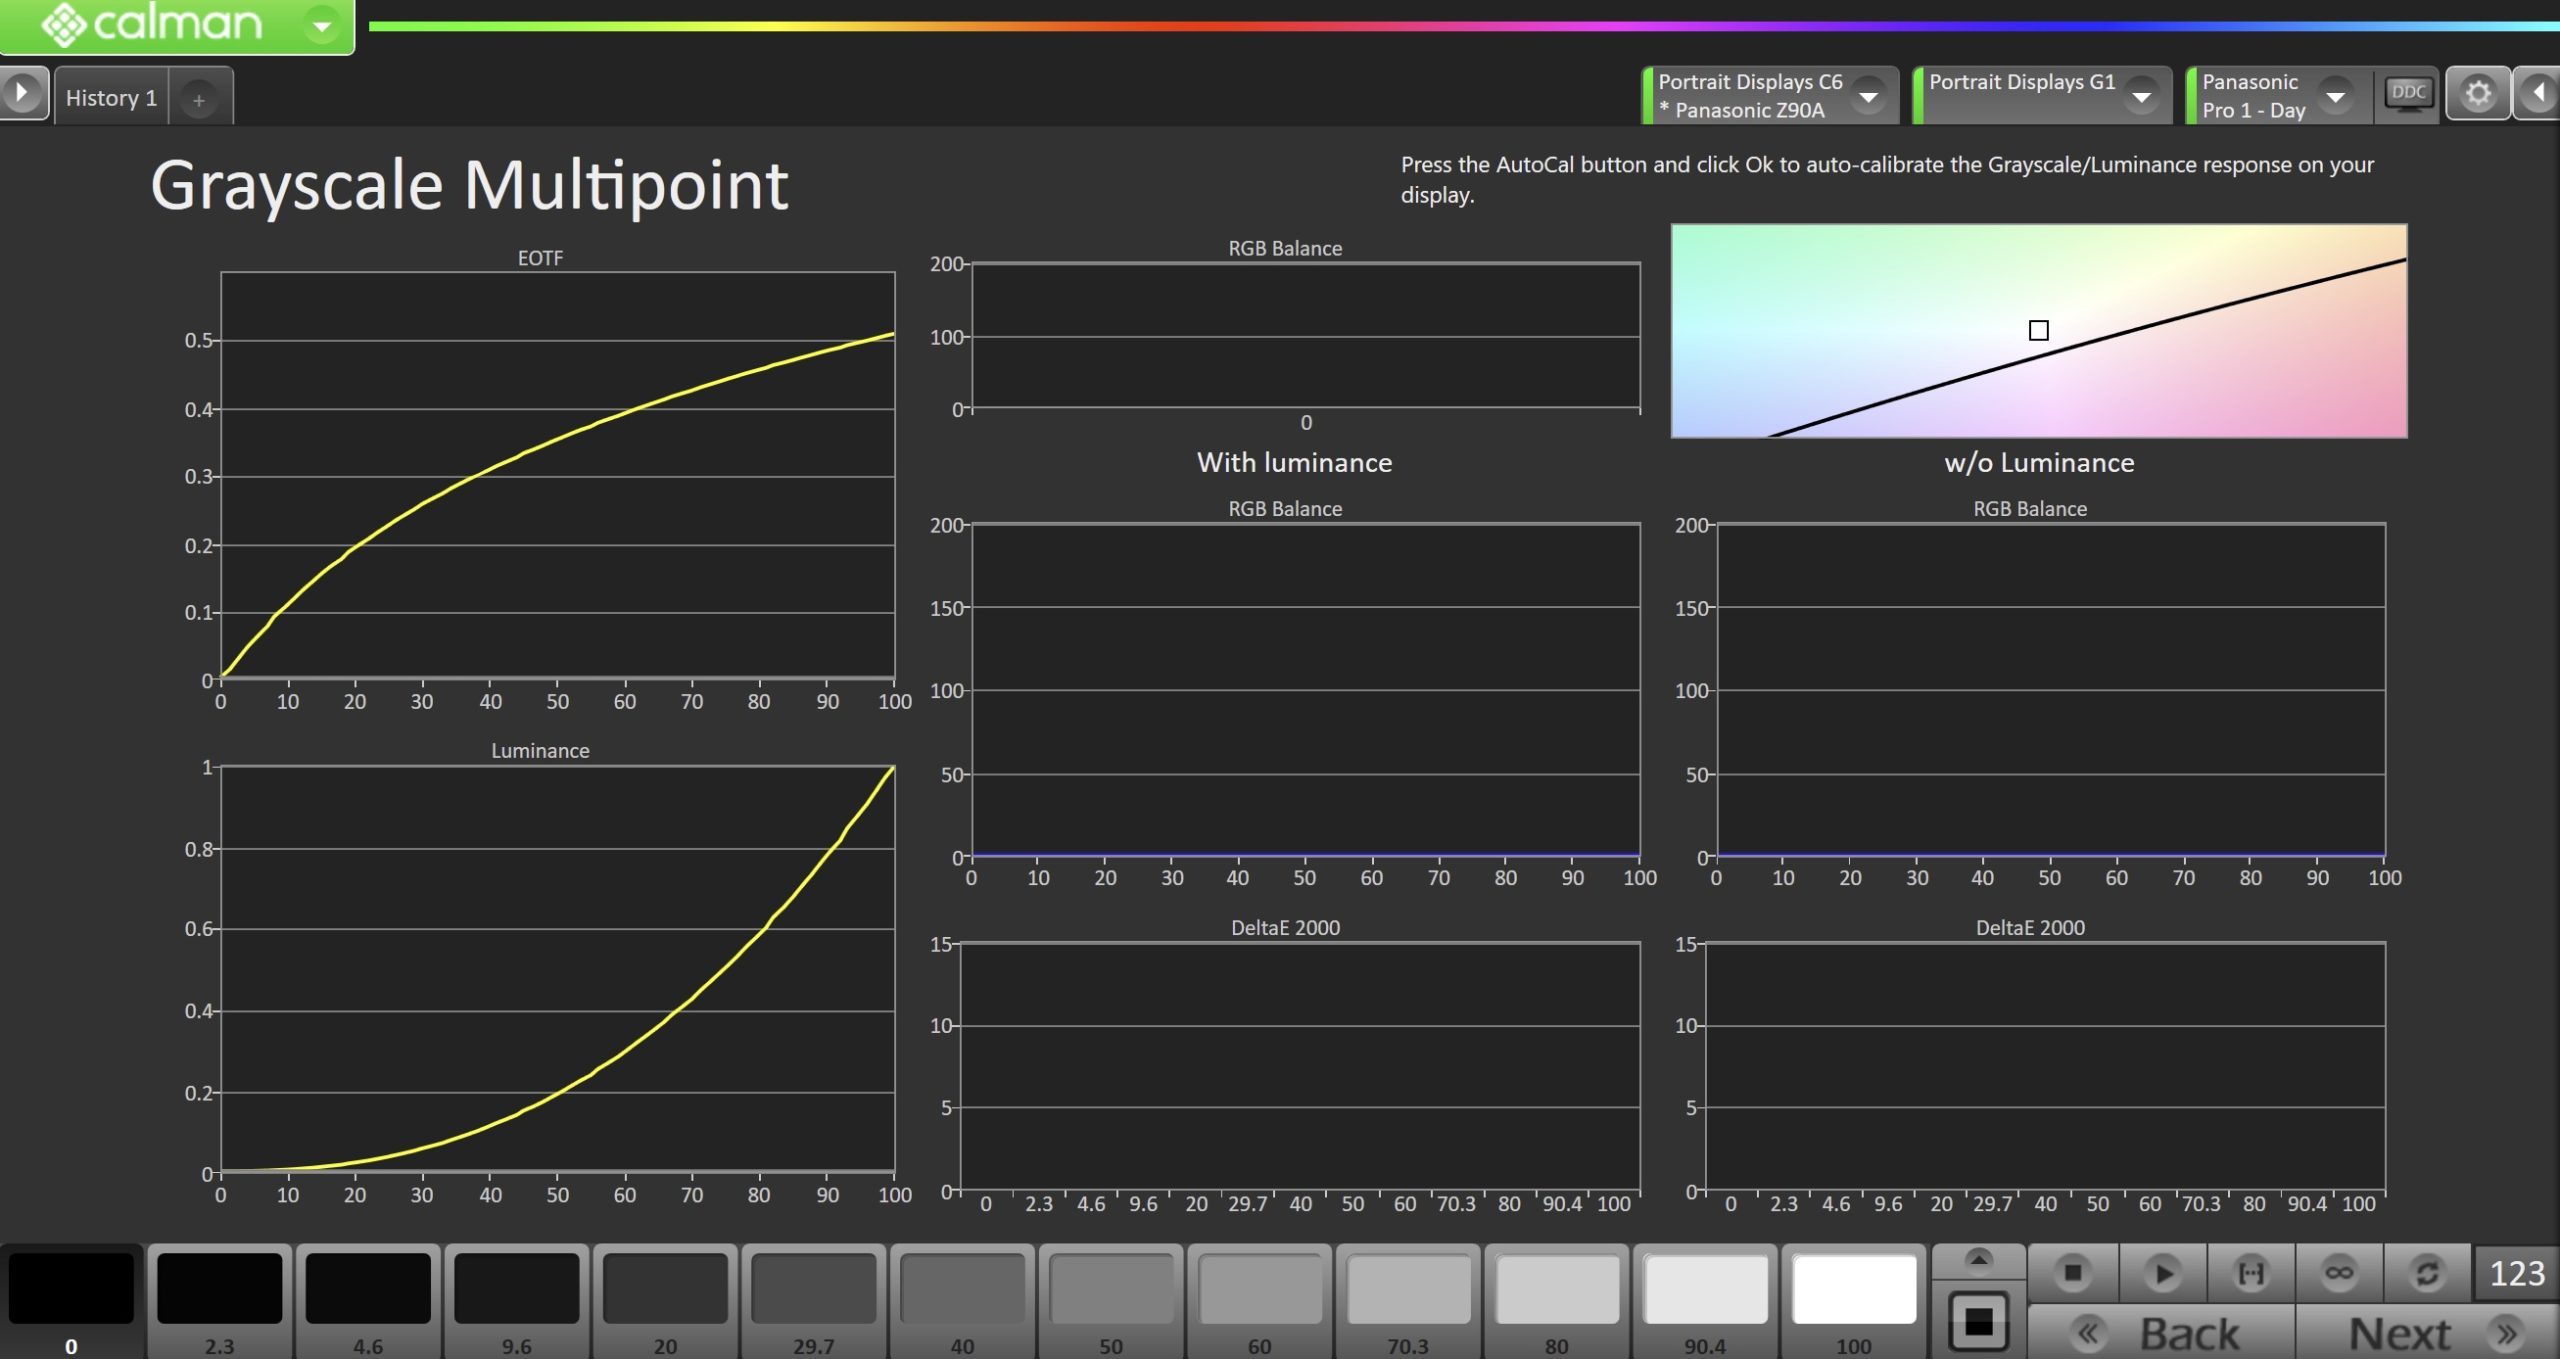
- Press the AutoCal button and select the greyscale points on the AutoCal dialog
- 12 Points – Recommended for most calibrations
- 14 Points with Dark Detail – Adds additional points near black. Should only be used with a high-end colorimeter or spectro.
- After AutoCal has completed, click Next to proceed.
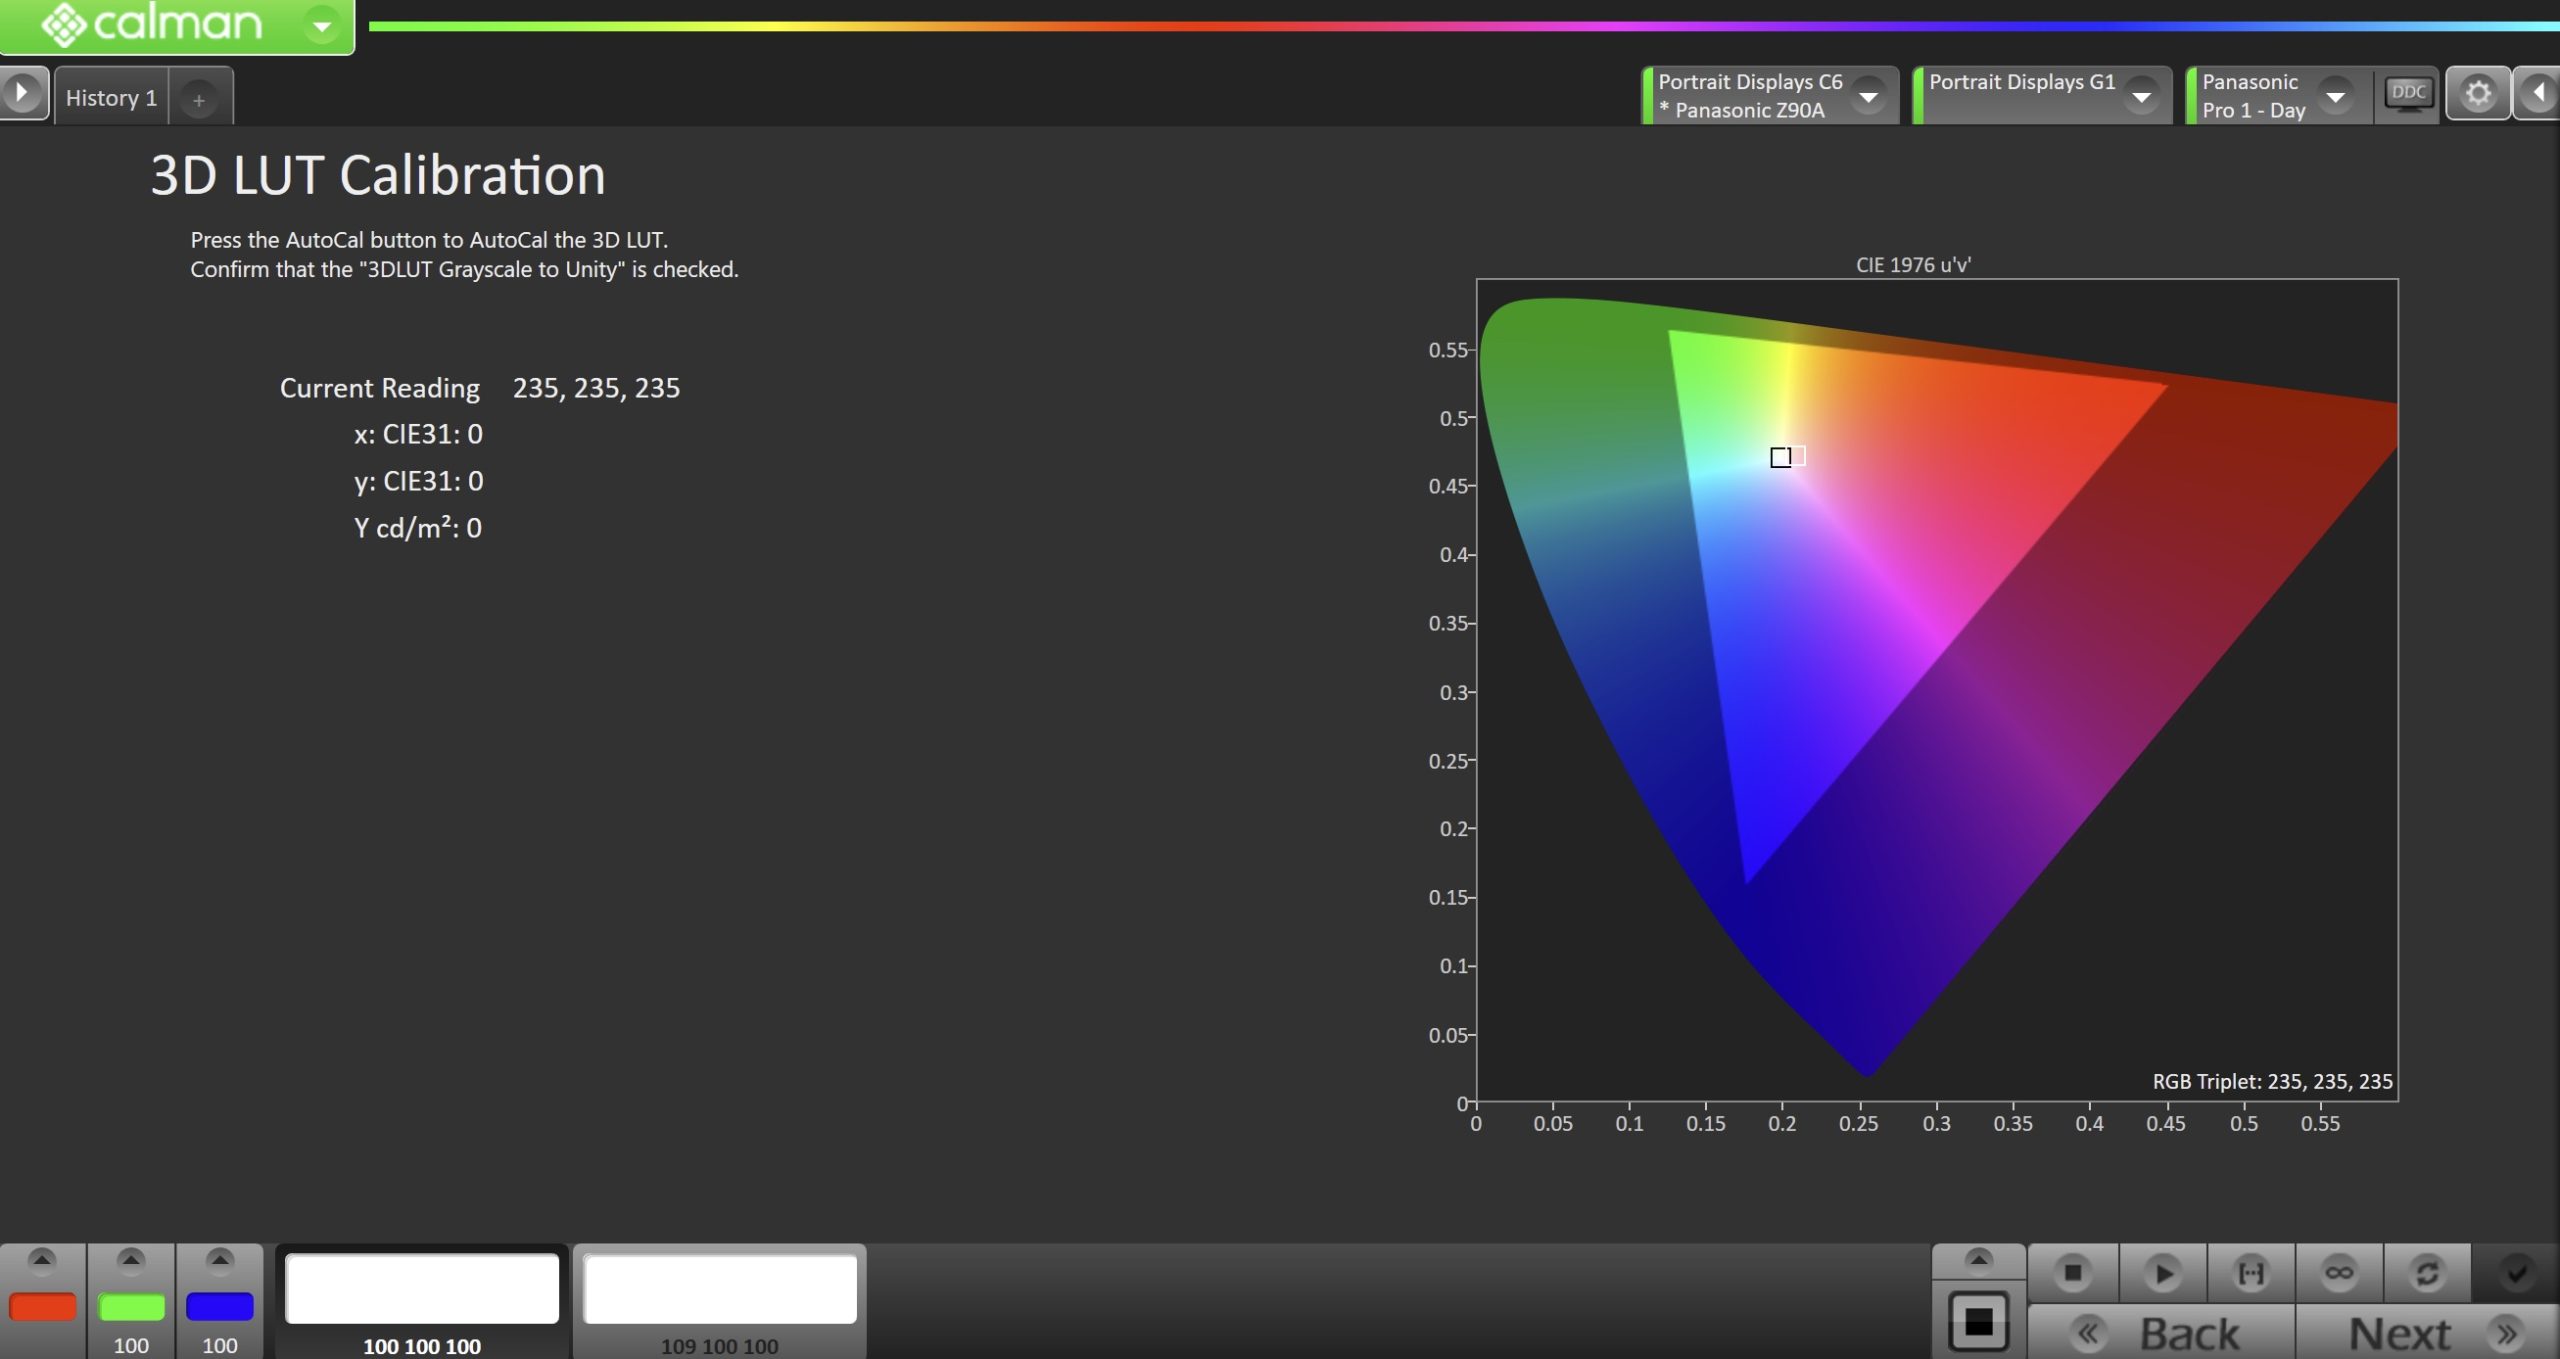
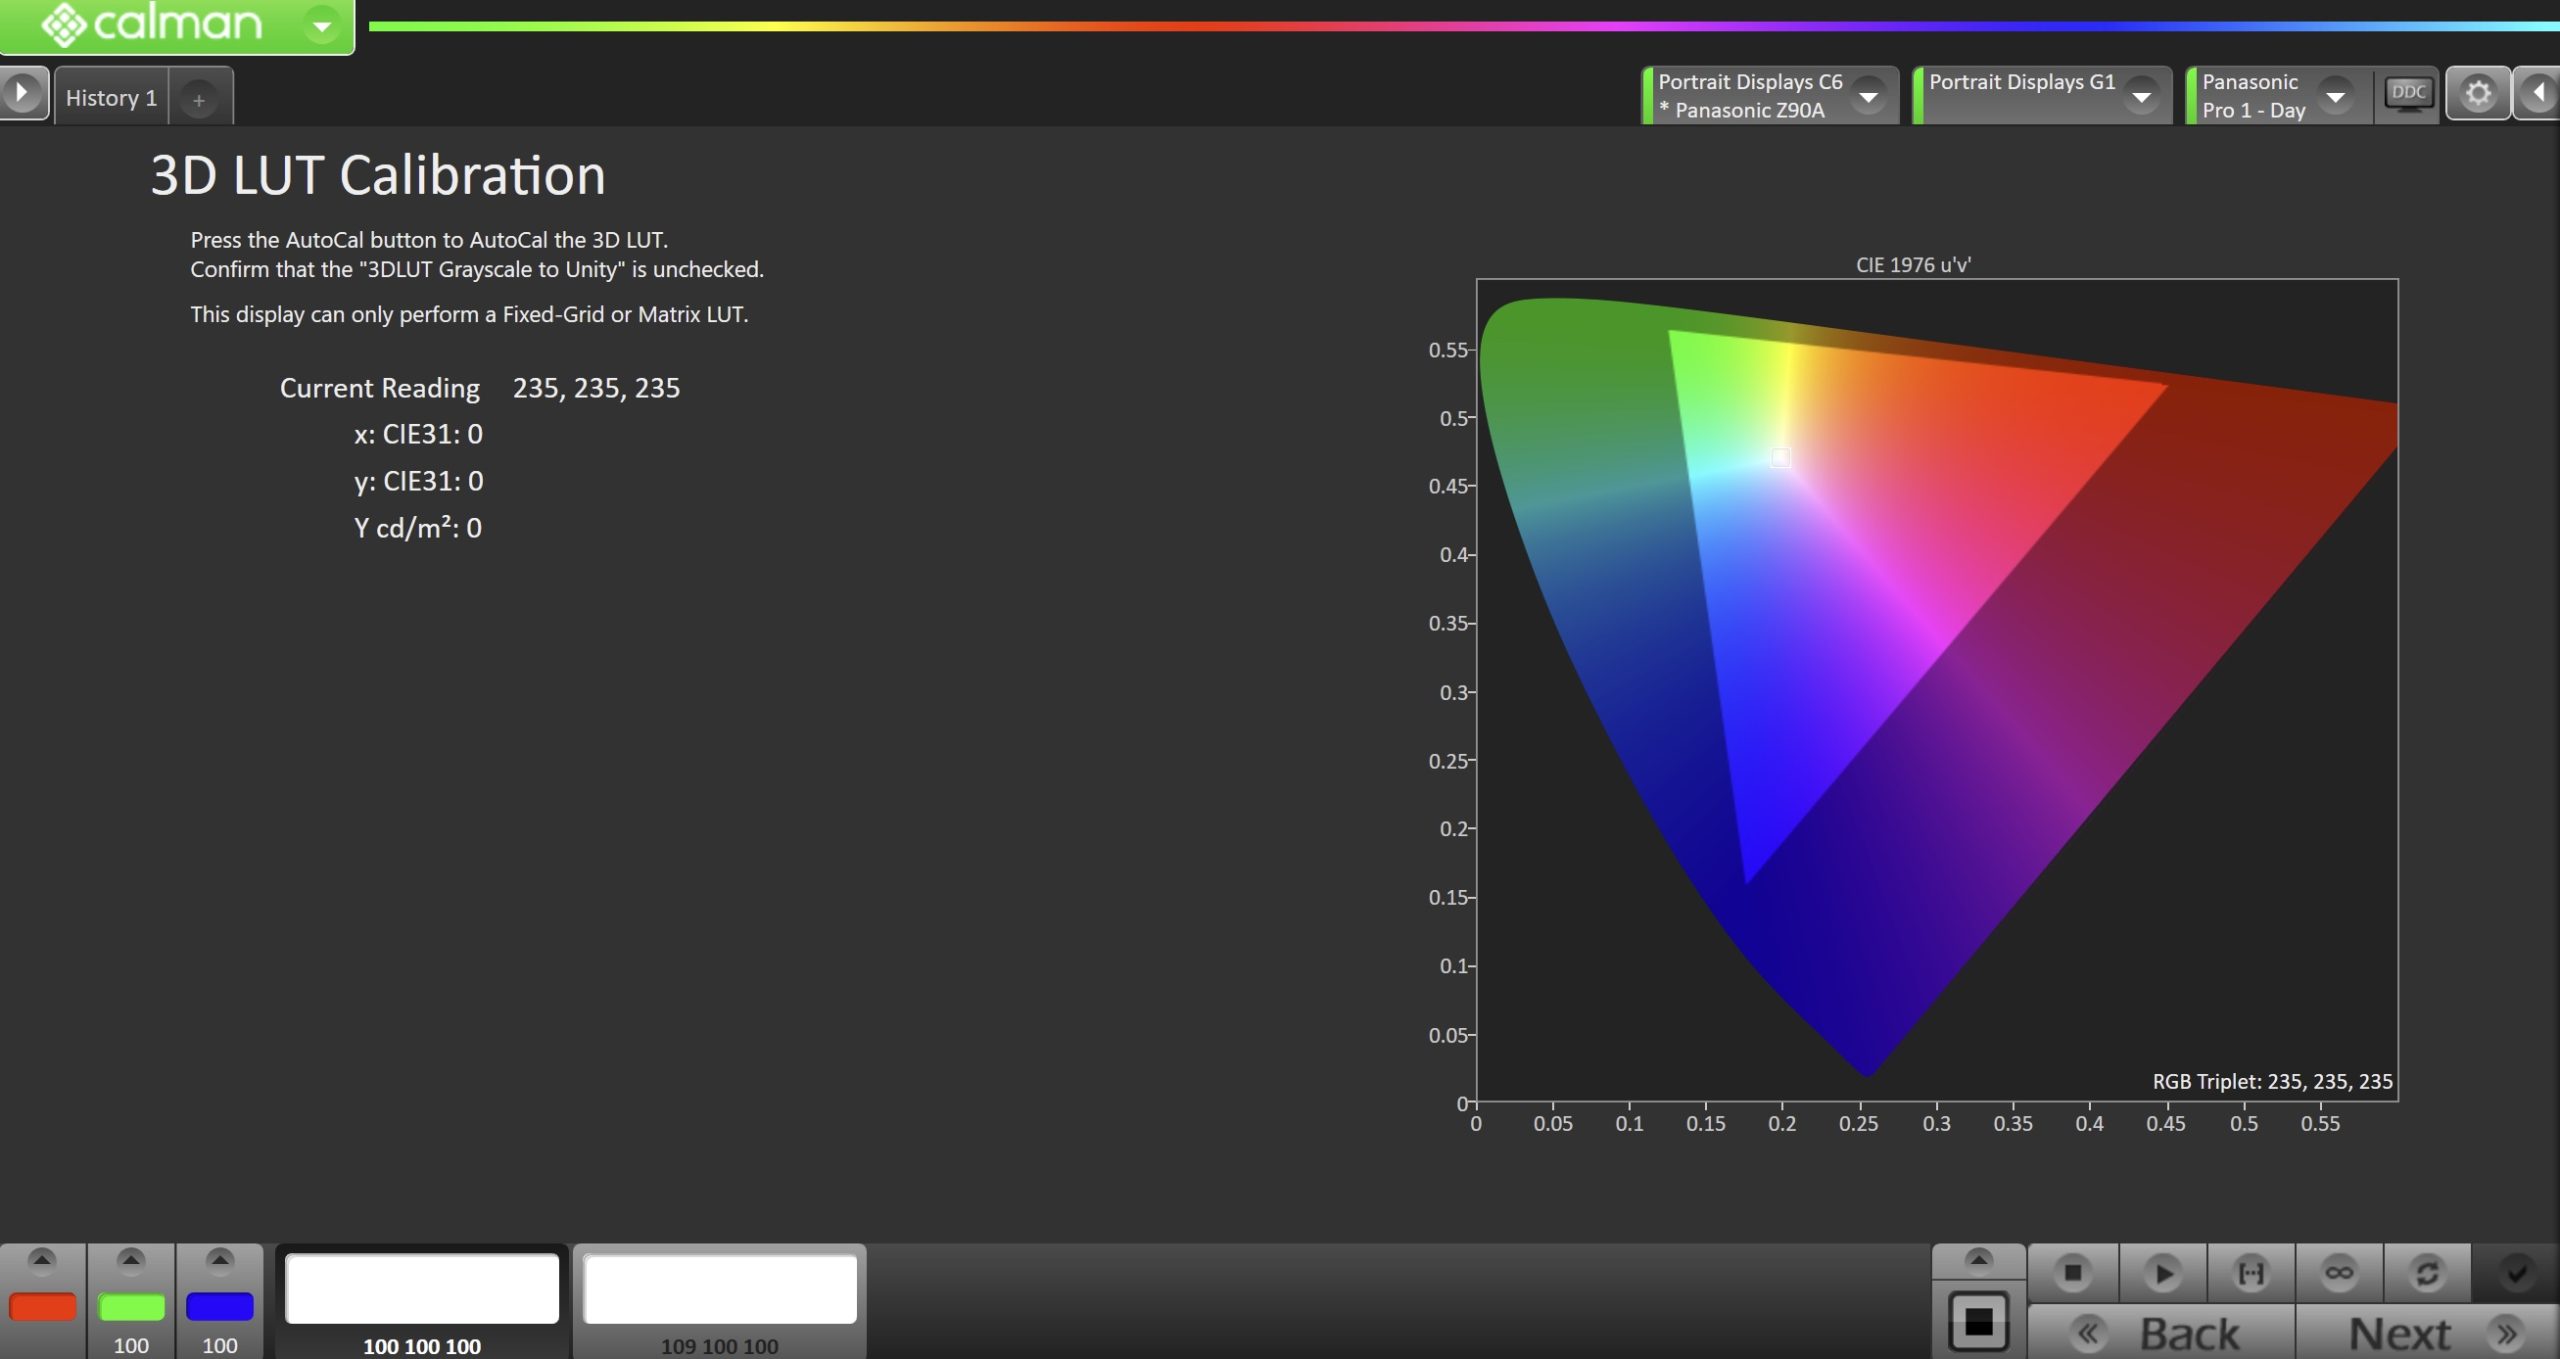
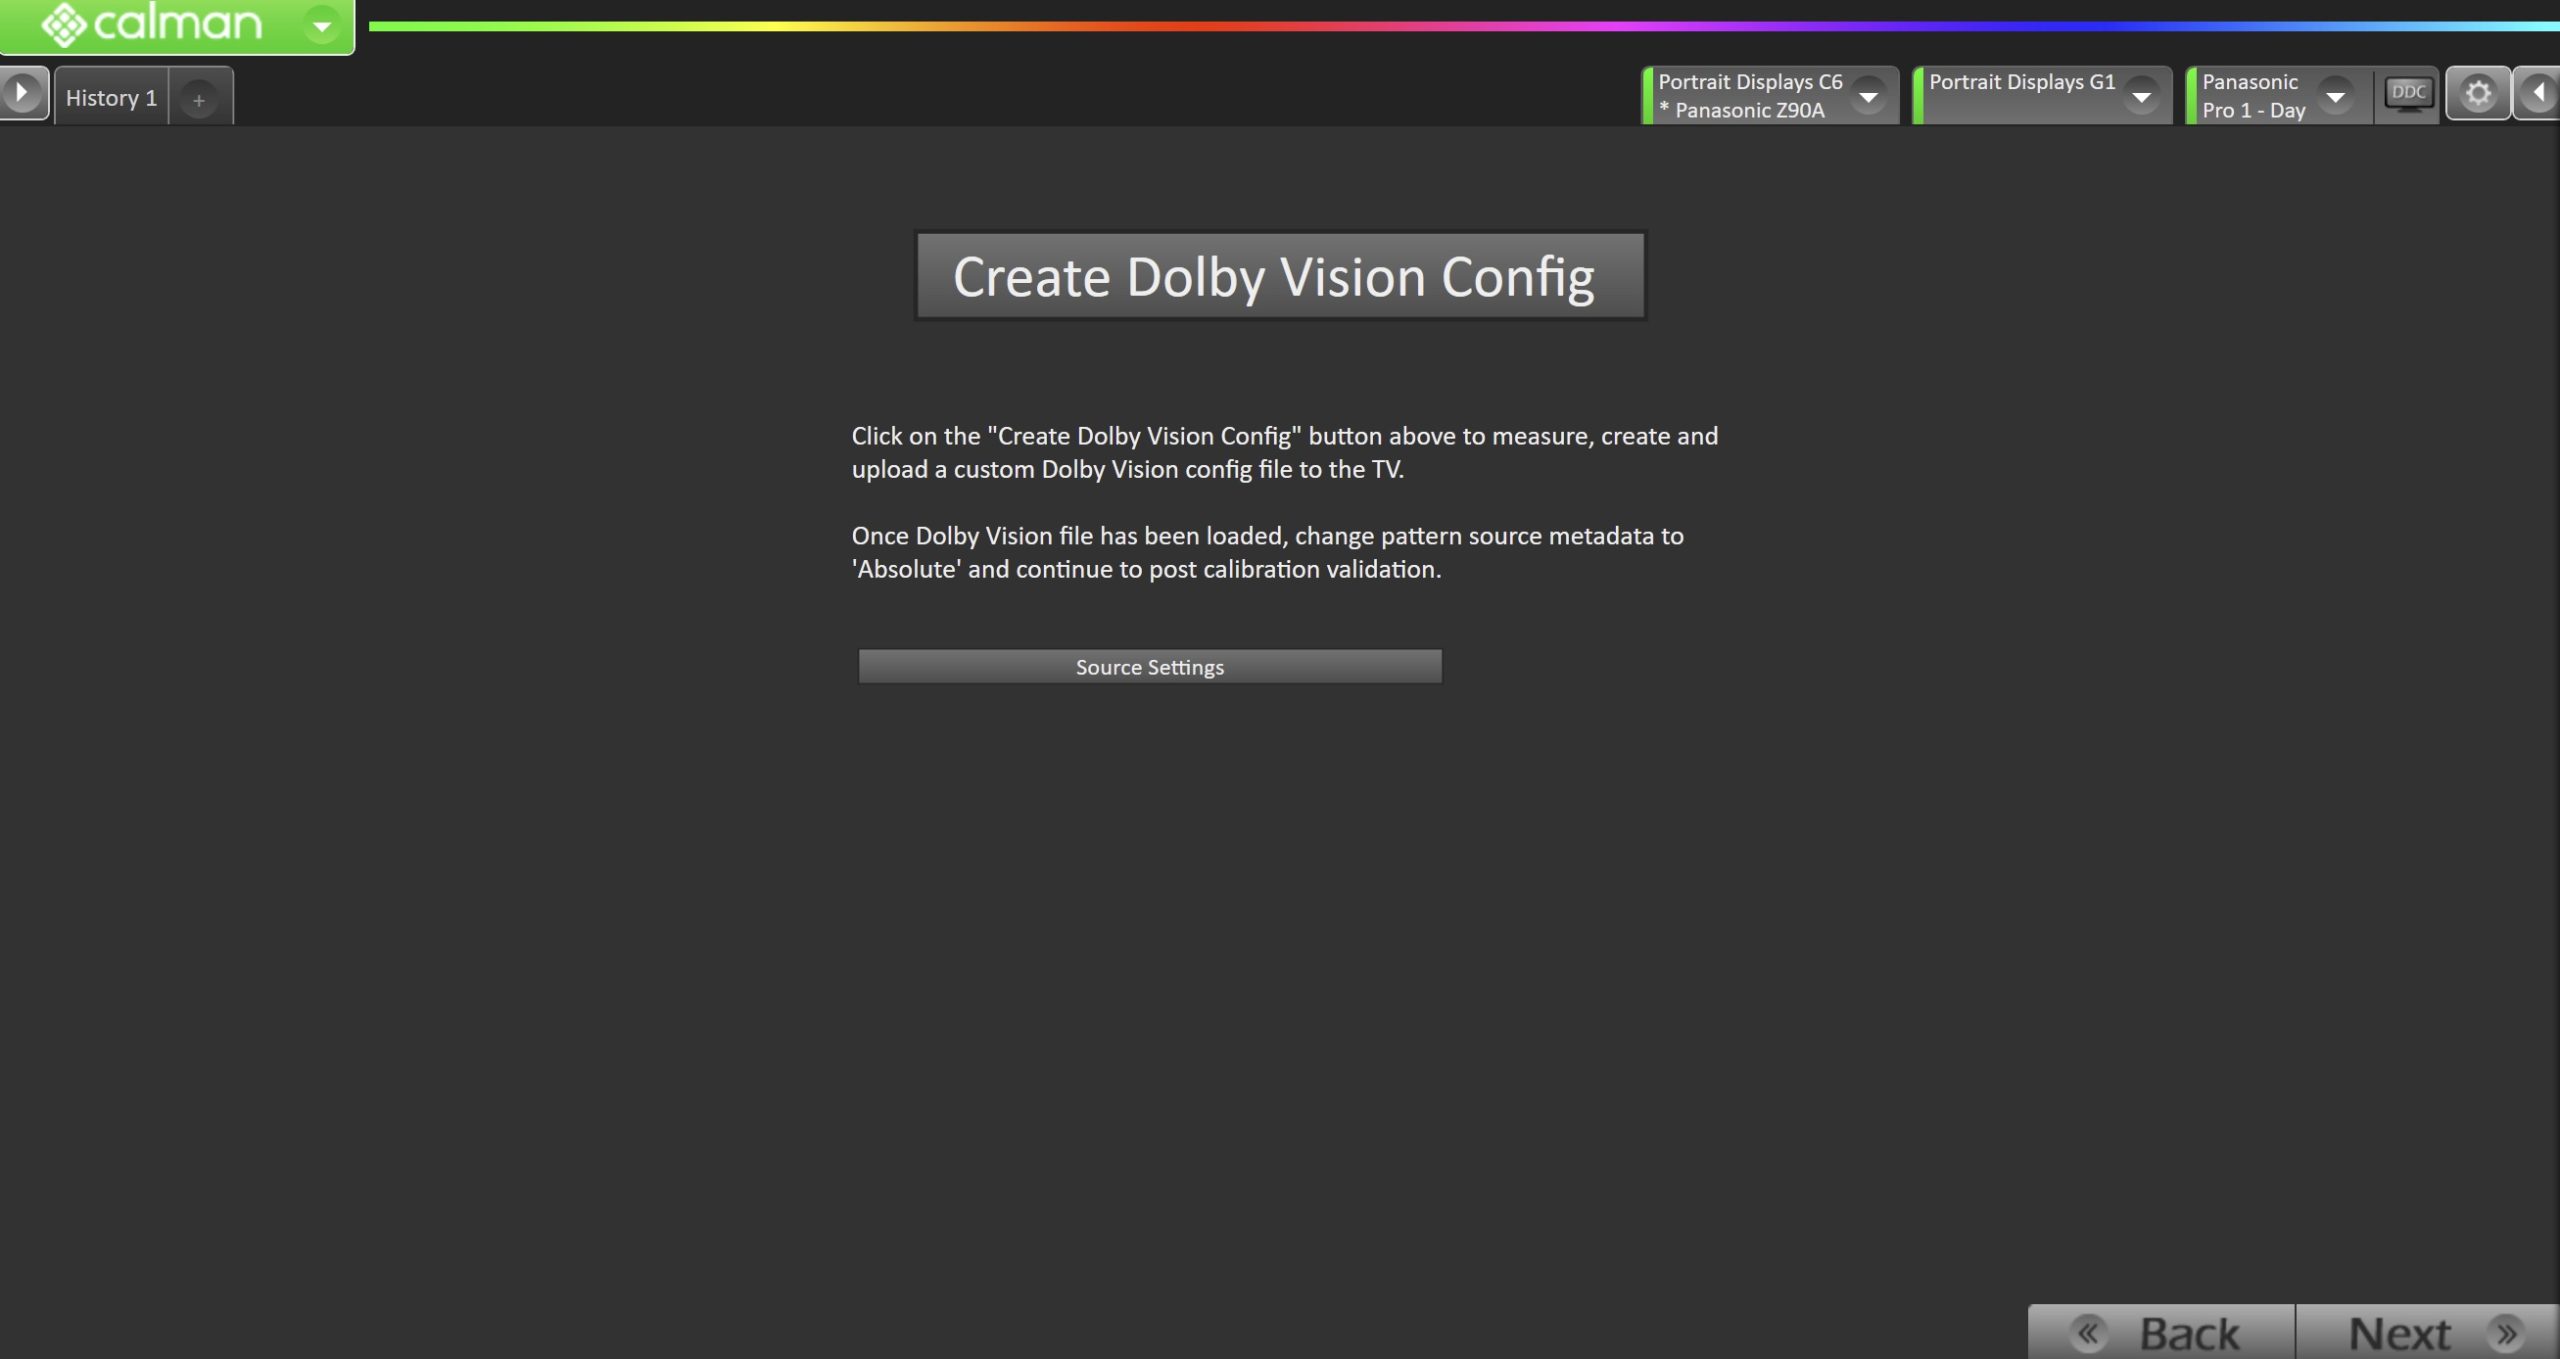
Step 7
- On this page, Calman will calibrate the Color Gamut using a 3D LUT in SDR and HDR, or a Dolby Vision Configuration file.
| SDR | HDR | Dolby Vision |
 |
 |
 |
|
|
|
- When AutoCal is complete, click the Next button to proceed
Step 8
- Post-calibration readings are to document the post-calibration condition of the display.
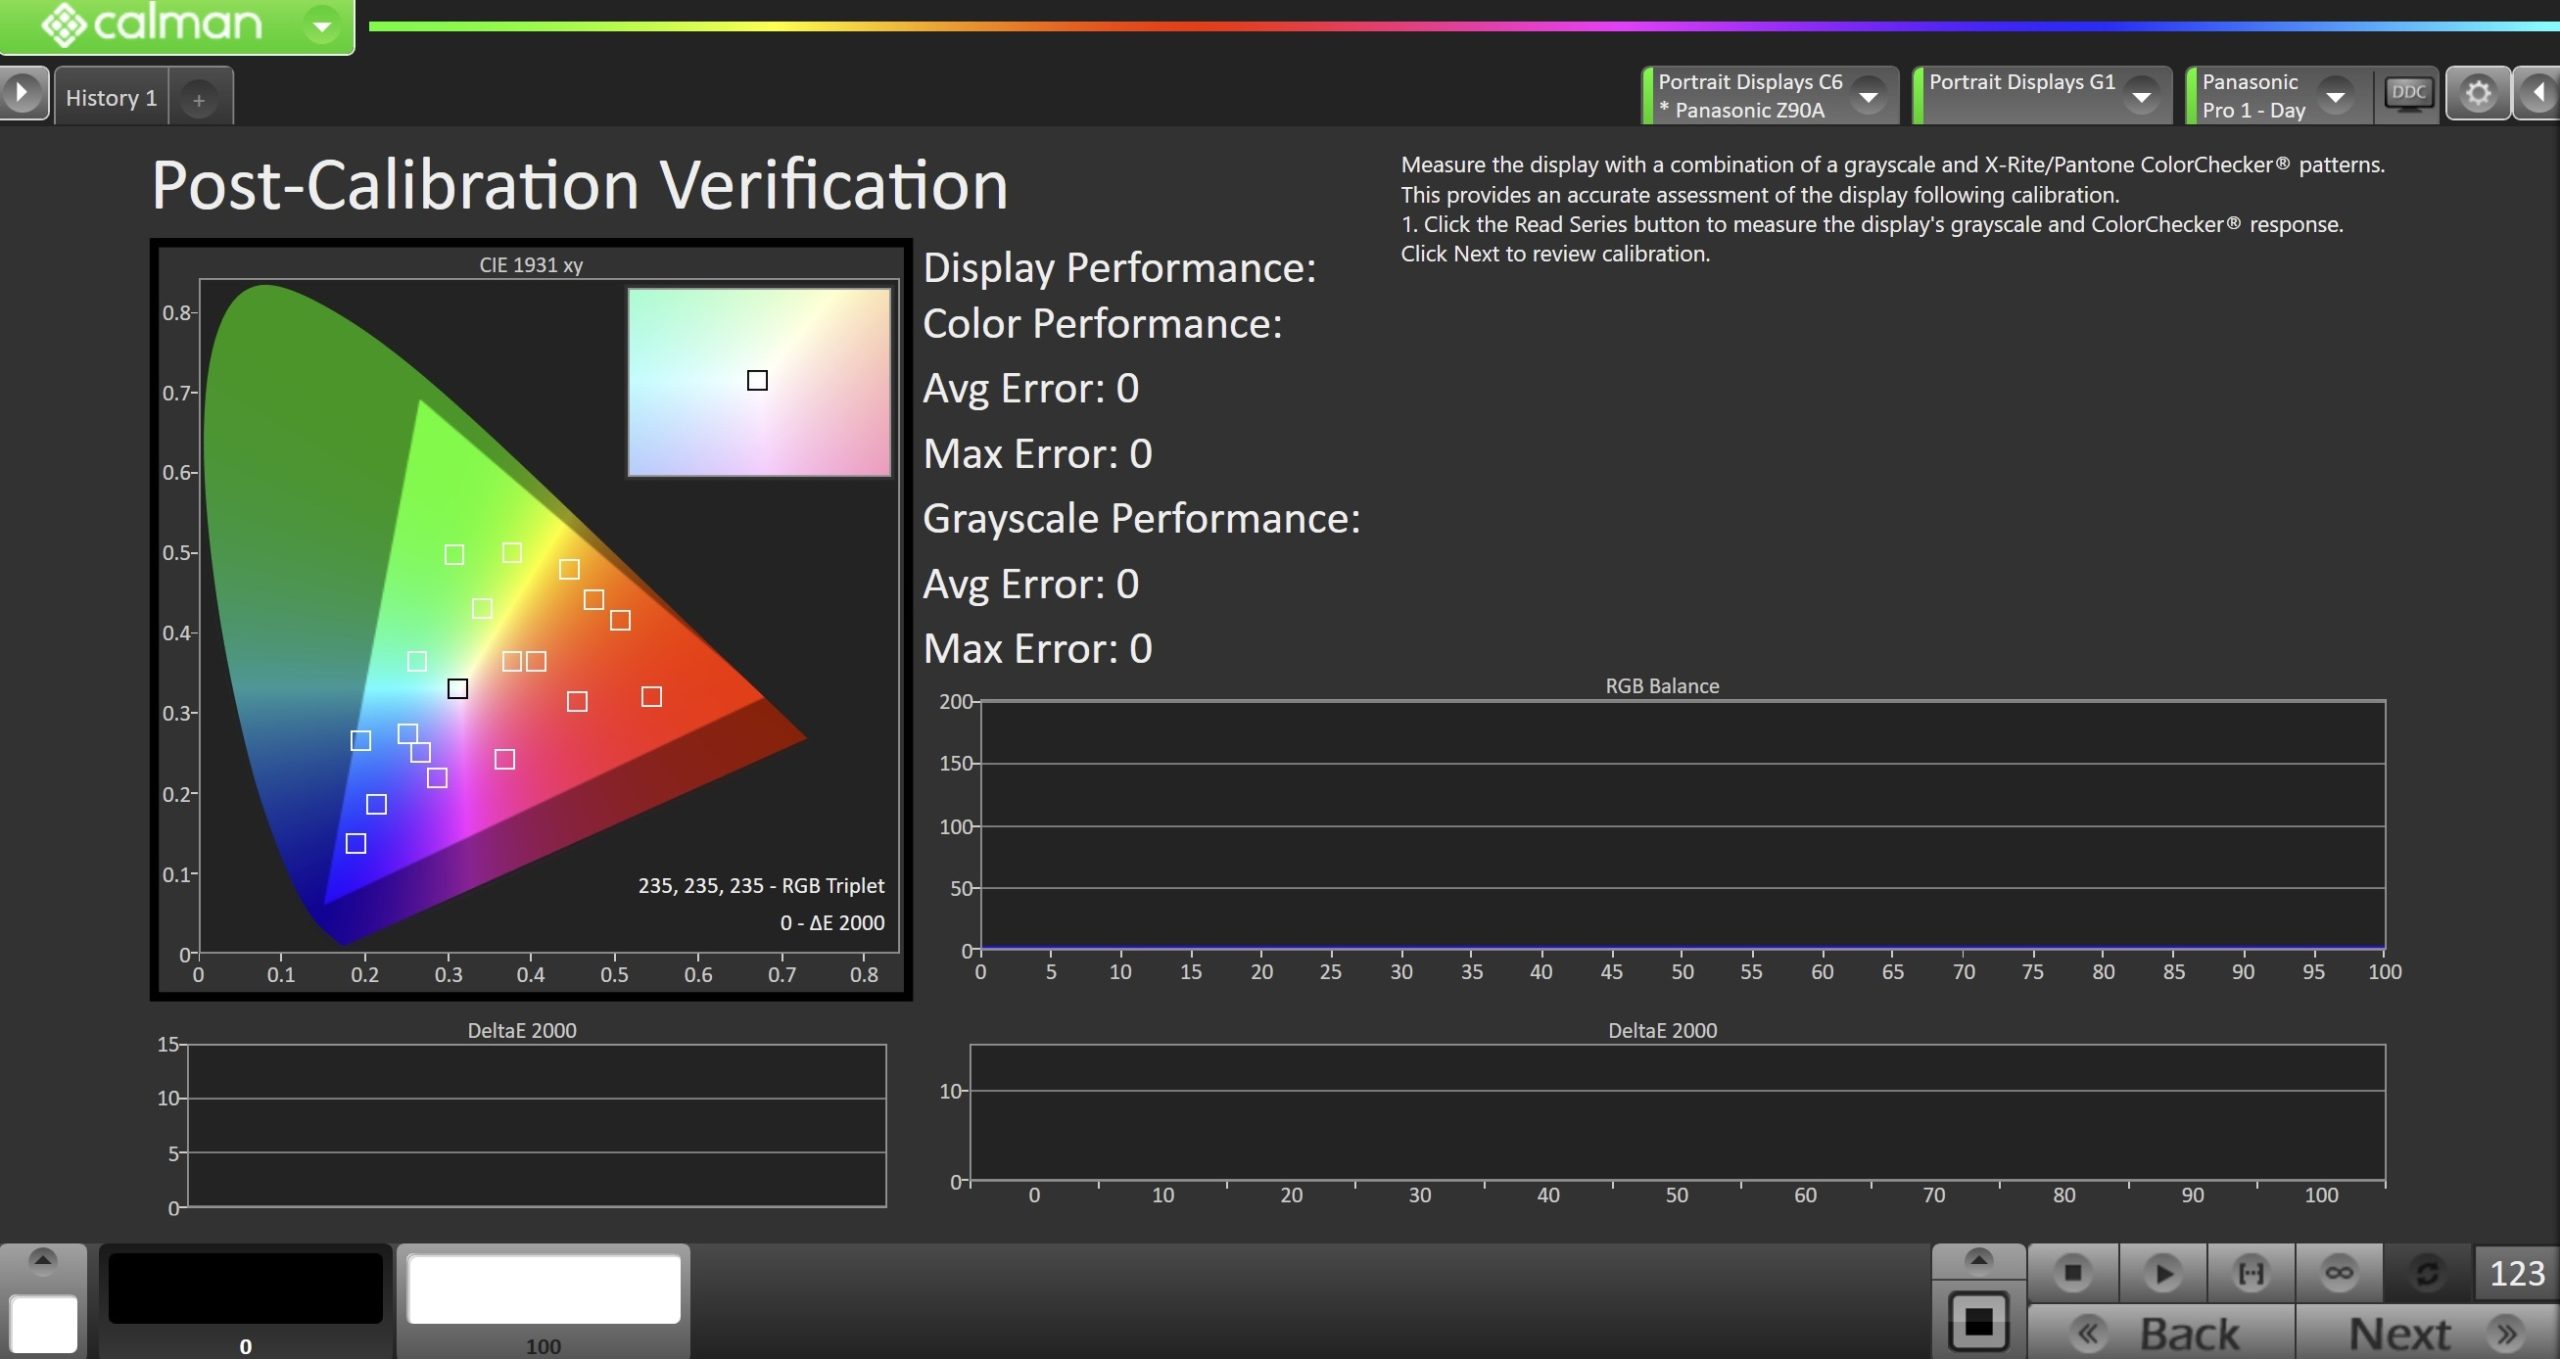
- Click the Read Series […] button to measure the display’s grayscale and color gamut response.
- Click Next to proceed to compare your Pre-Calibration and Post-Calibration states.
Calman Calibrated Logo (Optional)
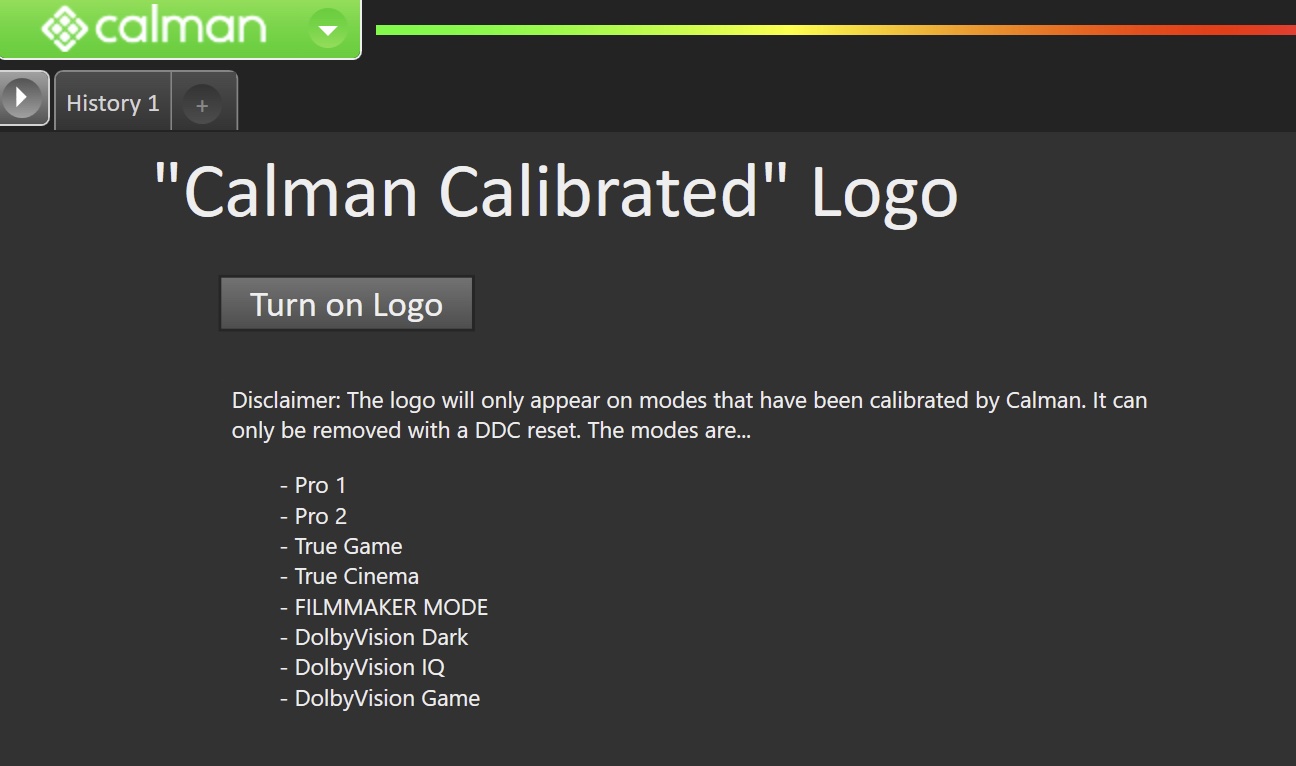
- Click Turn on Logo to add a “Calman Calibrated” logo next to the calibrated picture mode name.
Step 9
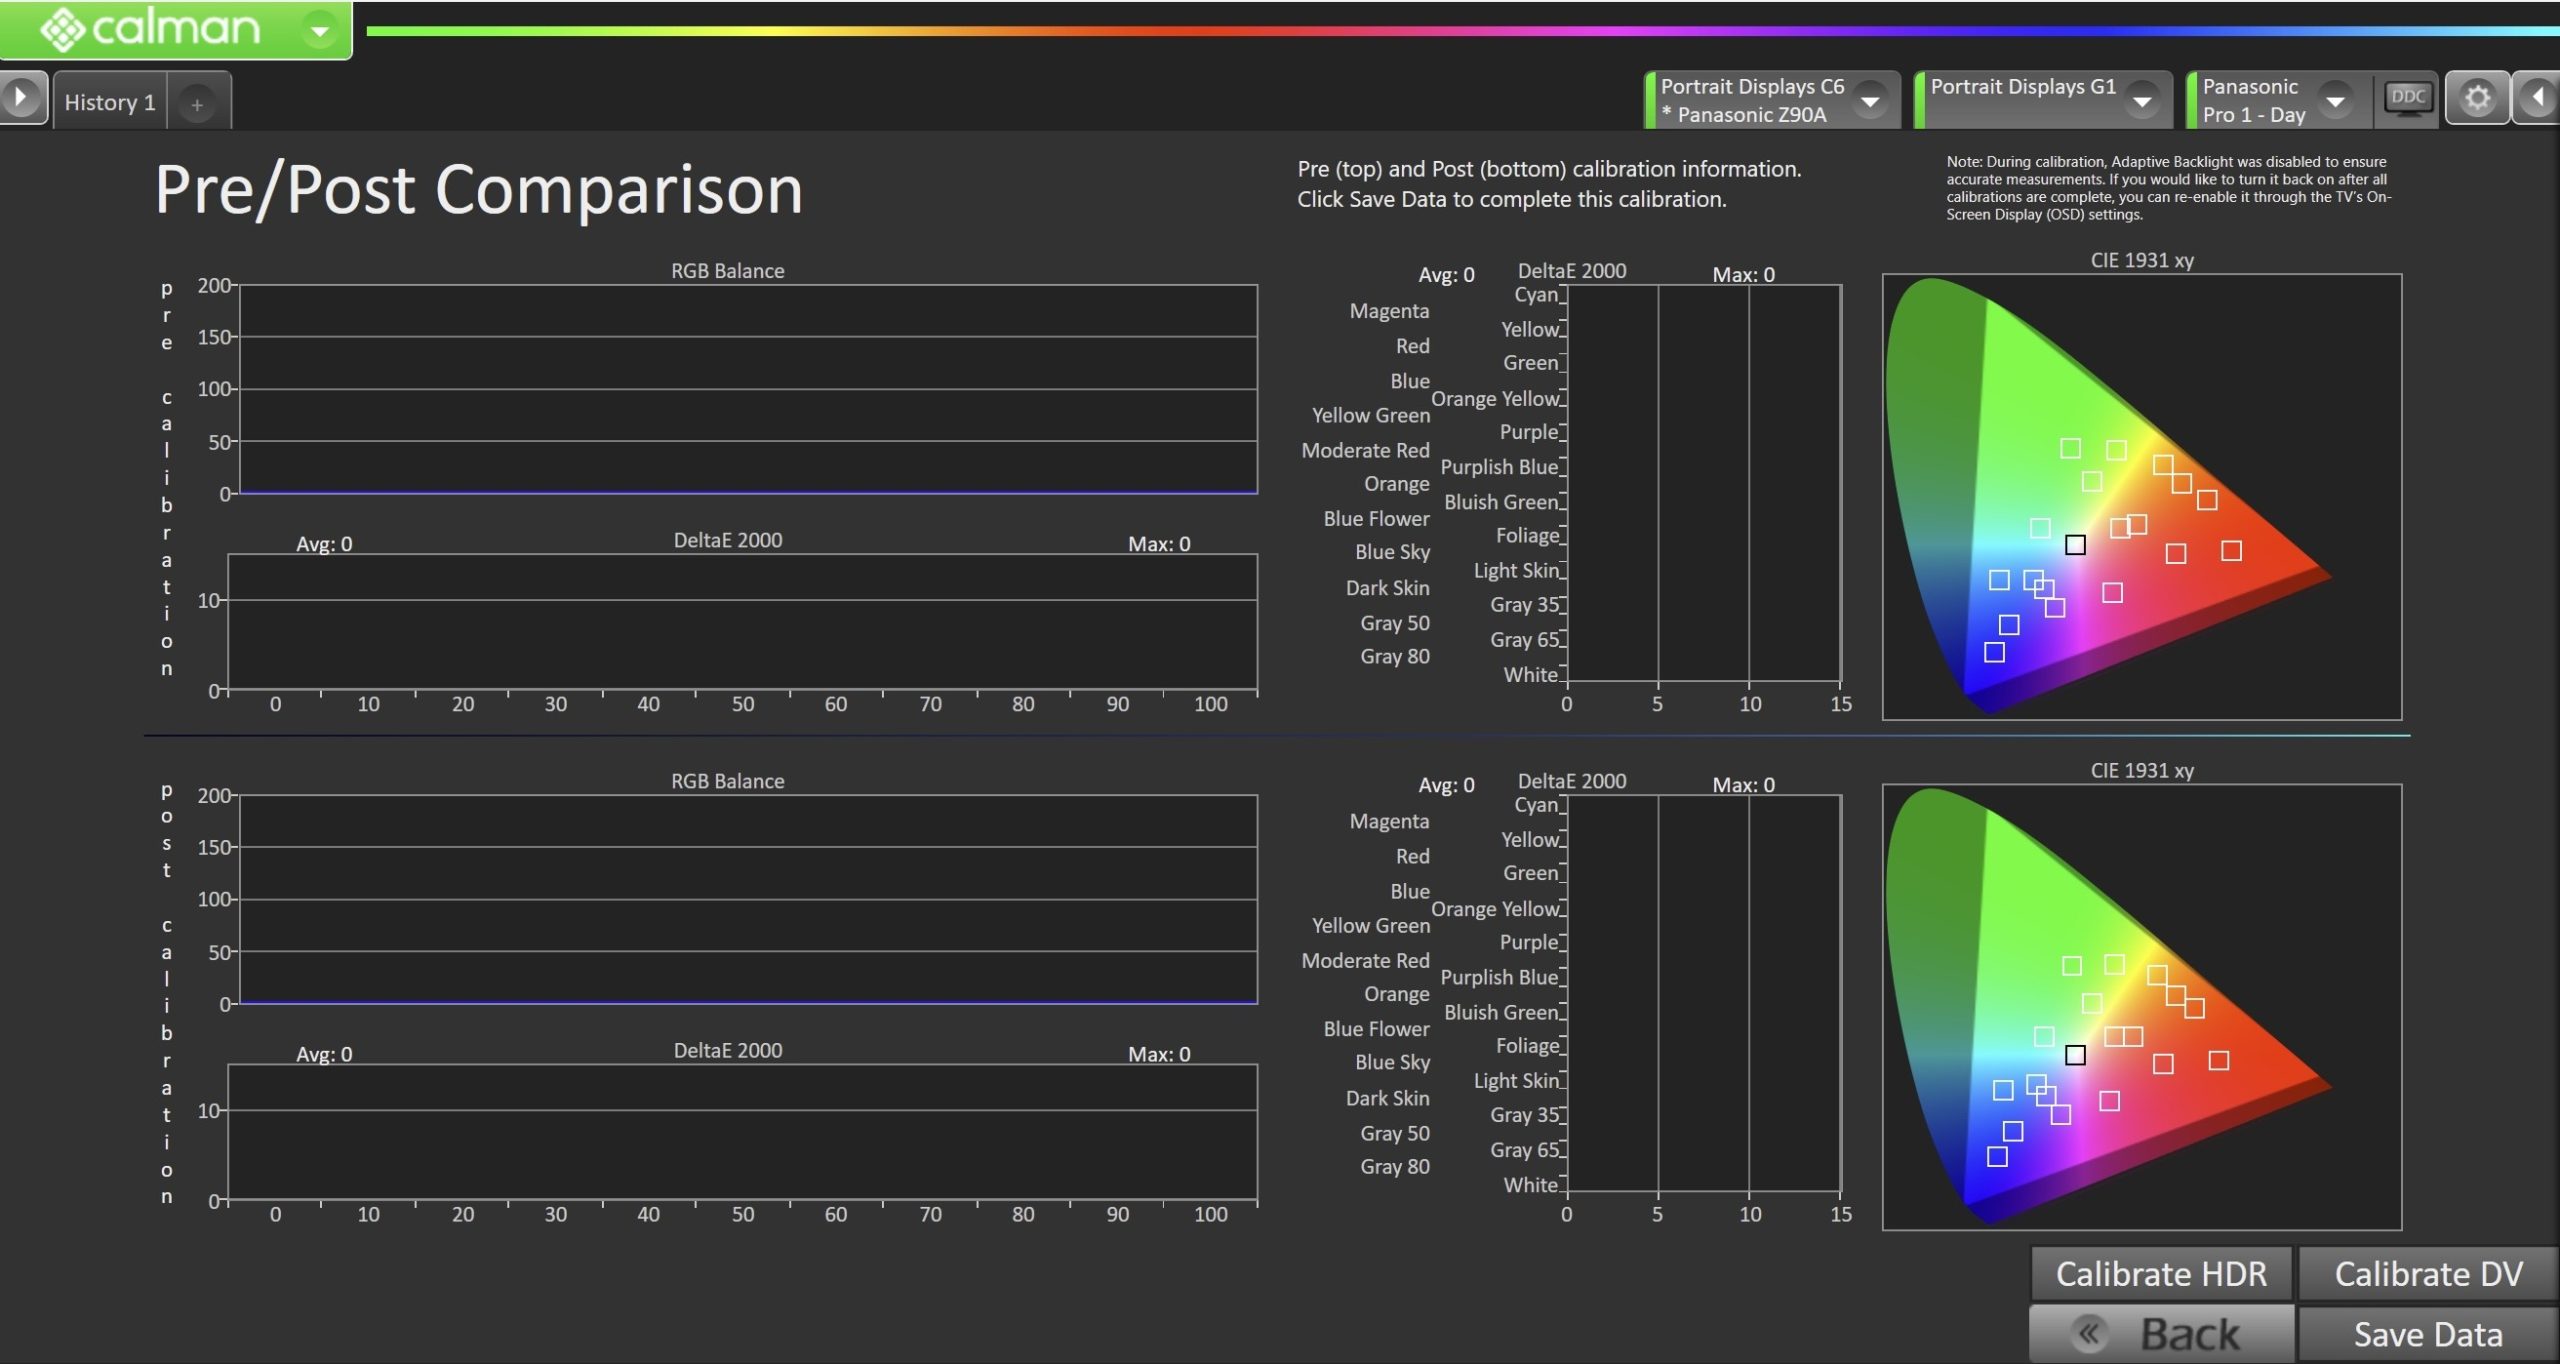
- Pre (top) and Post (bottom) calibration information will show the calibration results.
- Click Calibrate SDR/HDR/DV to return to the introduction page, where you can choose to calibrate a new picture mode and/or colorspace
- Click Save Data to complete this calibration.