Calman can guide the calibration of the Dell UltraSharp 27 4K PremierColor Monitor (UP2720Q), delivering accurate color and luminance performance using a 1D and 3D LUT. The UP2720Q features a 27″ IPS panel with 100% Adobe RGB and 98% DCI-P3 coverage, making it well-suited for color-critical workflows.

![]()
Calman Required Version
- Calman Studio or Ultimate v5.15.3 or higher
Hardware Requirements
- Dell UltraSharp 27 4K PremierColor Monitor (UP2720Q)
- Calman Compatible Meter
- Dell Internal Pattern Generator
- For external generators: Calman Compatible Pattern Generator
Step 1
- From the Calman Menu in the top-left, choose Open Workflow Template -> Calman Ready and then Dell U2720Q Calibration.
- Click Next to begin.
Step 2
- Connect to the monitor, its built-in colorimeter and pattern generator:
- Connect the monitor to your computer using a USB-C to USB-C (Thunderbolt/USB4) or USB-C to USB-A cable.
- Click the Find Dell Monitor button to connect the monitor for calibration, using its built-in pattern generator.
- Connect to either UltraSharpUP2720Q 3DLUT (USB) or UltraSharpUP2720Q Matrix (USB)
- 3D LUT is more detailed, but will extend the calibration time needed
- Matrix mode will calibrate faster, but may not be as accurate overall
- Connect your external meter:
- Connect the meter to the computer running Calman.
- Press Connect External Meter.
- (Optional) To use an external pattern generator:
- Press Find External Source and follow the prompts to connect to the pattern source.
- After connecting, use a Window 10% pattern with a 1 second delay for best results.
- Press Find External Source and follow the prompts to connect to the pattern source.
- Click Next to begin calibration
Step 3
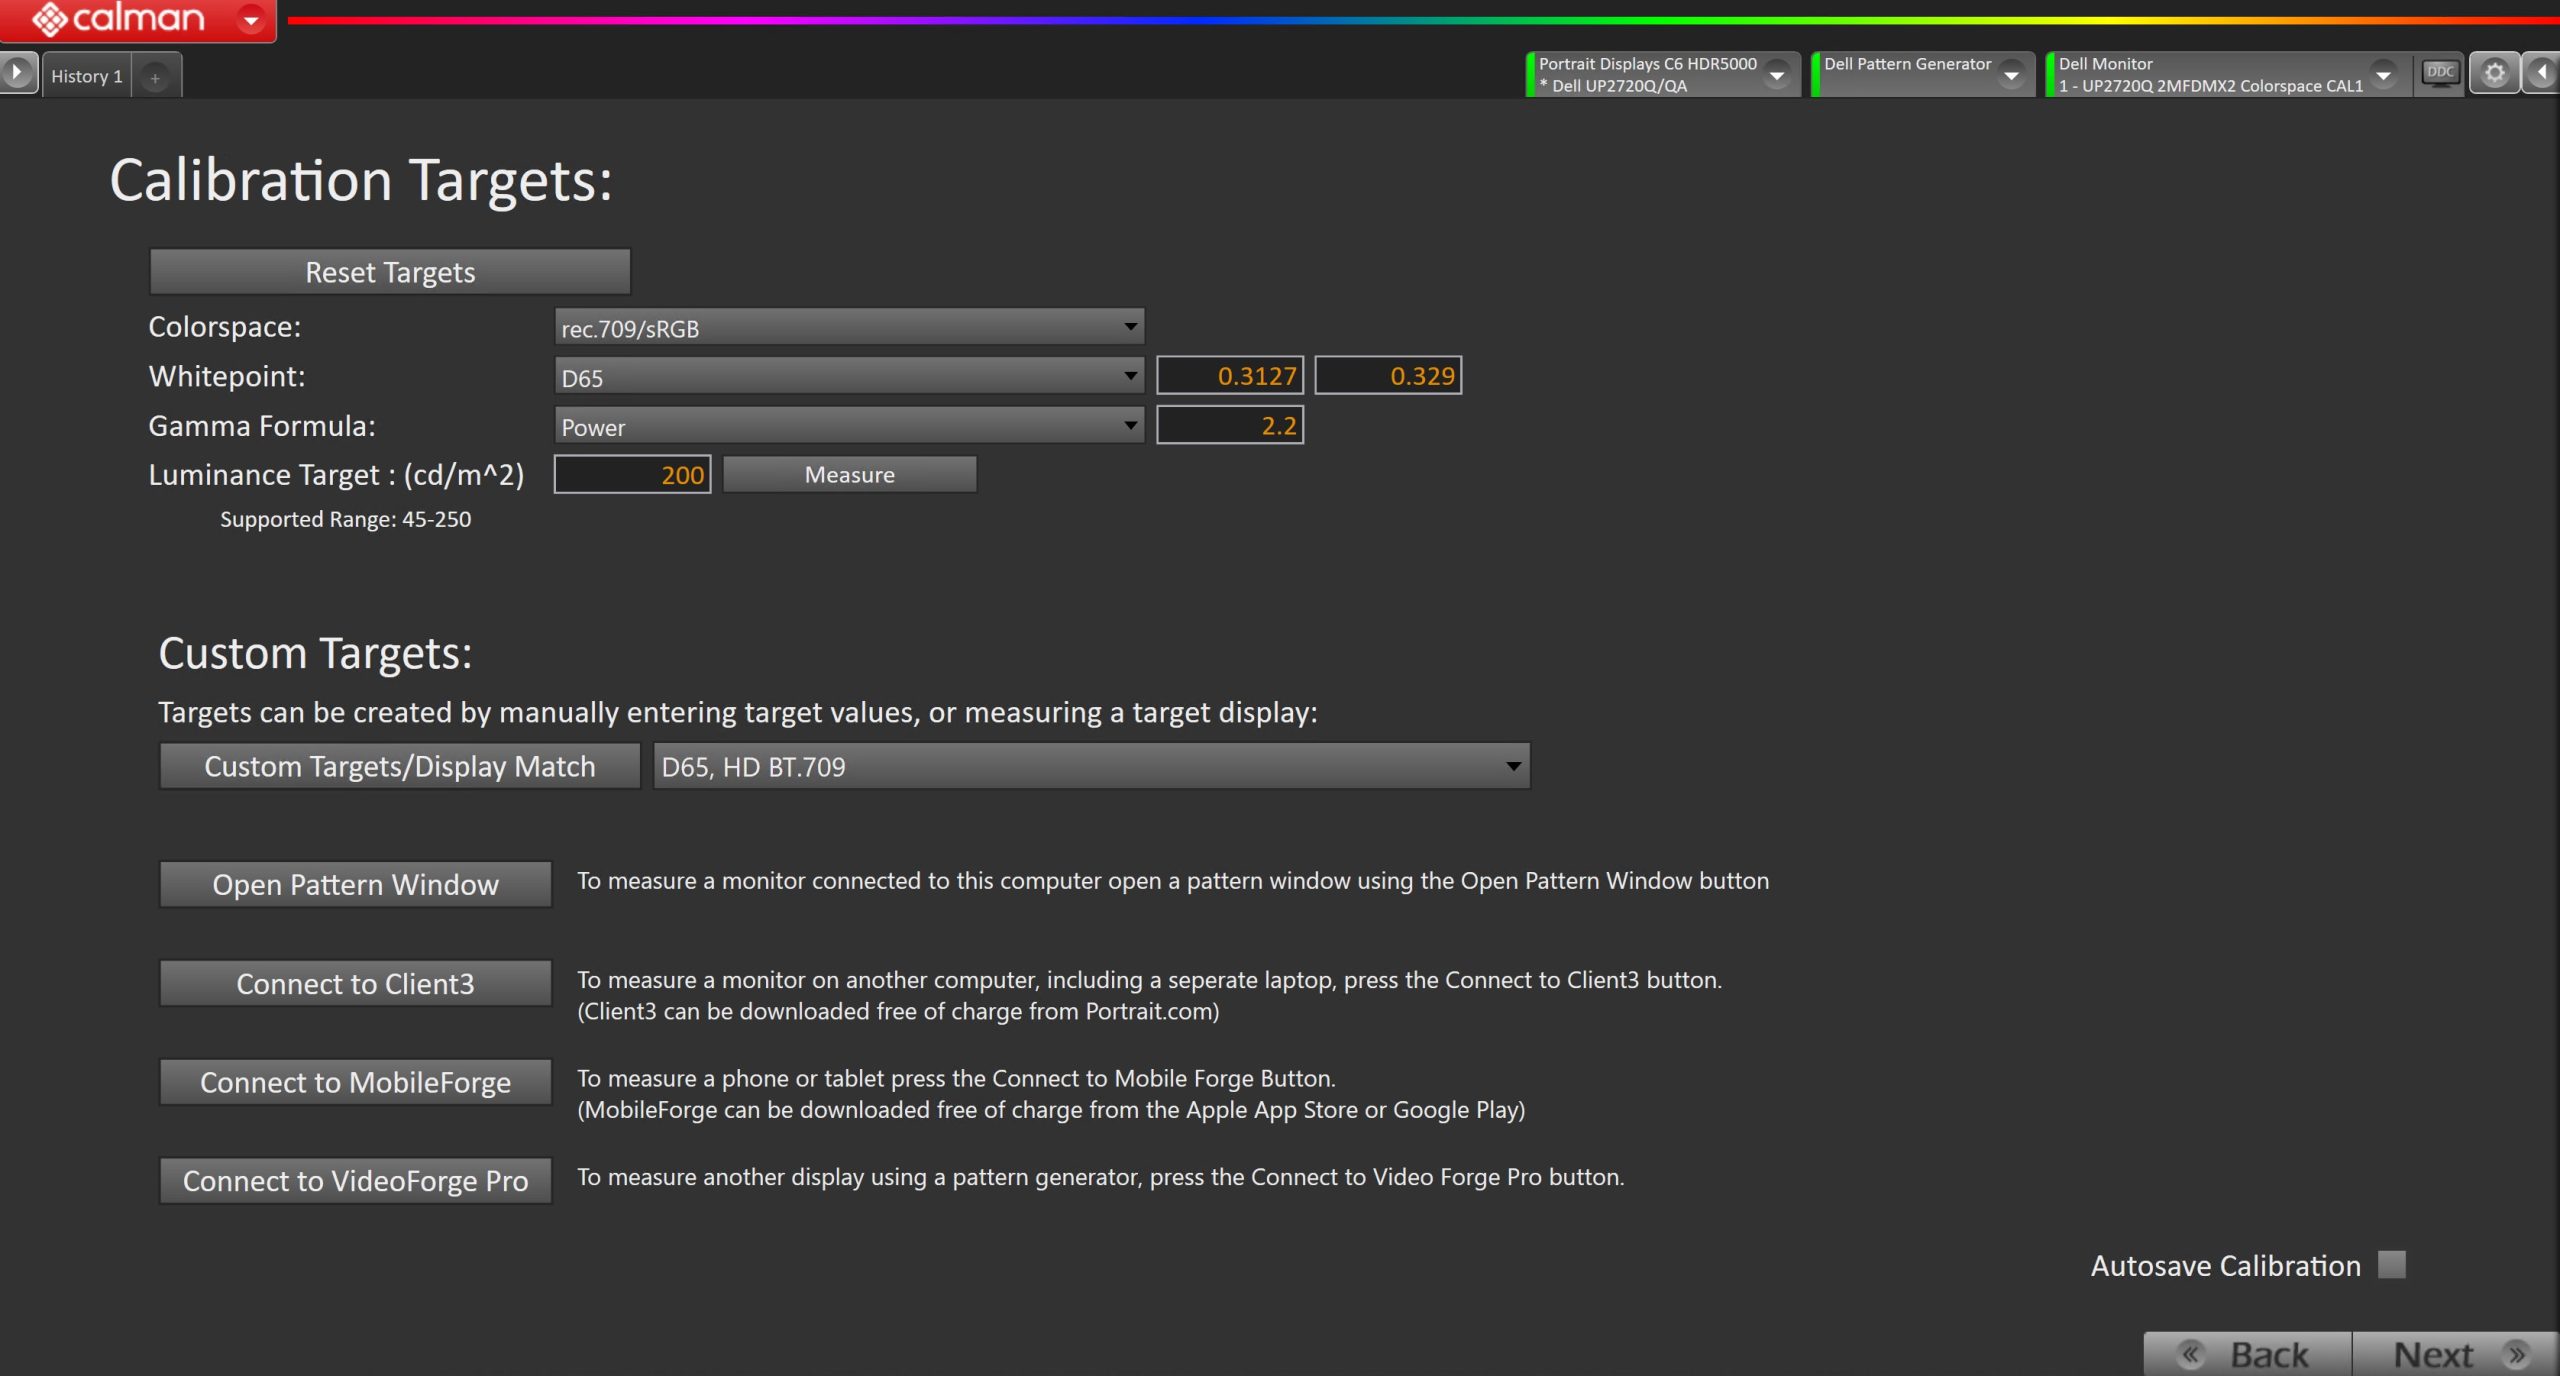
- Confirm or adjust your calibration targets, then click Next to proceed.
- Colorspace – Preconfigured at Rec.709/sRGB.
- Note: UP2720 only supports SDR calibration
- Whitepoint – Preconfigured at D65.
- Gamma Formula – Preconfigured at Power 2.2.
- Luminance Target – Preconfigured at 200 cd/m². Supported range is 45–250 cd/m².
- Dim room: 80–120 cd/m²
- Overhead lights: 120–160 cd/m²
- Bright room: 200+ cd/m²
- Colorspace – Preconfigured at Rec.709/sRGB.
- (Optional) Custom Targets – Targets can be created by manually entering values or by measuring a reference display.
- Open Pattern Window – Measures a monitor connected to the same computer.
- Connect to Client3 – Measures a monitor connected to a separate computer. Client3 can be downloaded free of charge from Portrait.com.
- Connect to VideoForge Pro – Measures another display via a pattern generator.
Step 4
- This workflow page is intended to document the target picture mode prior to calibration.
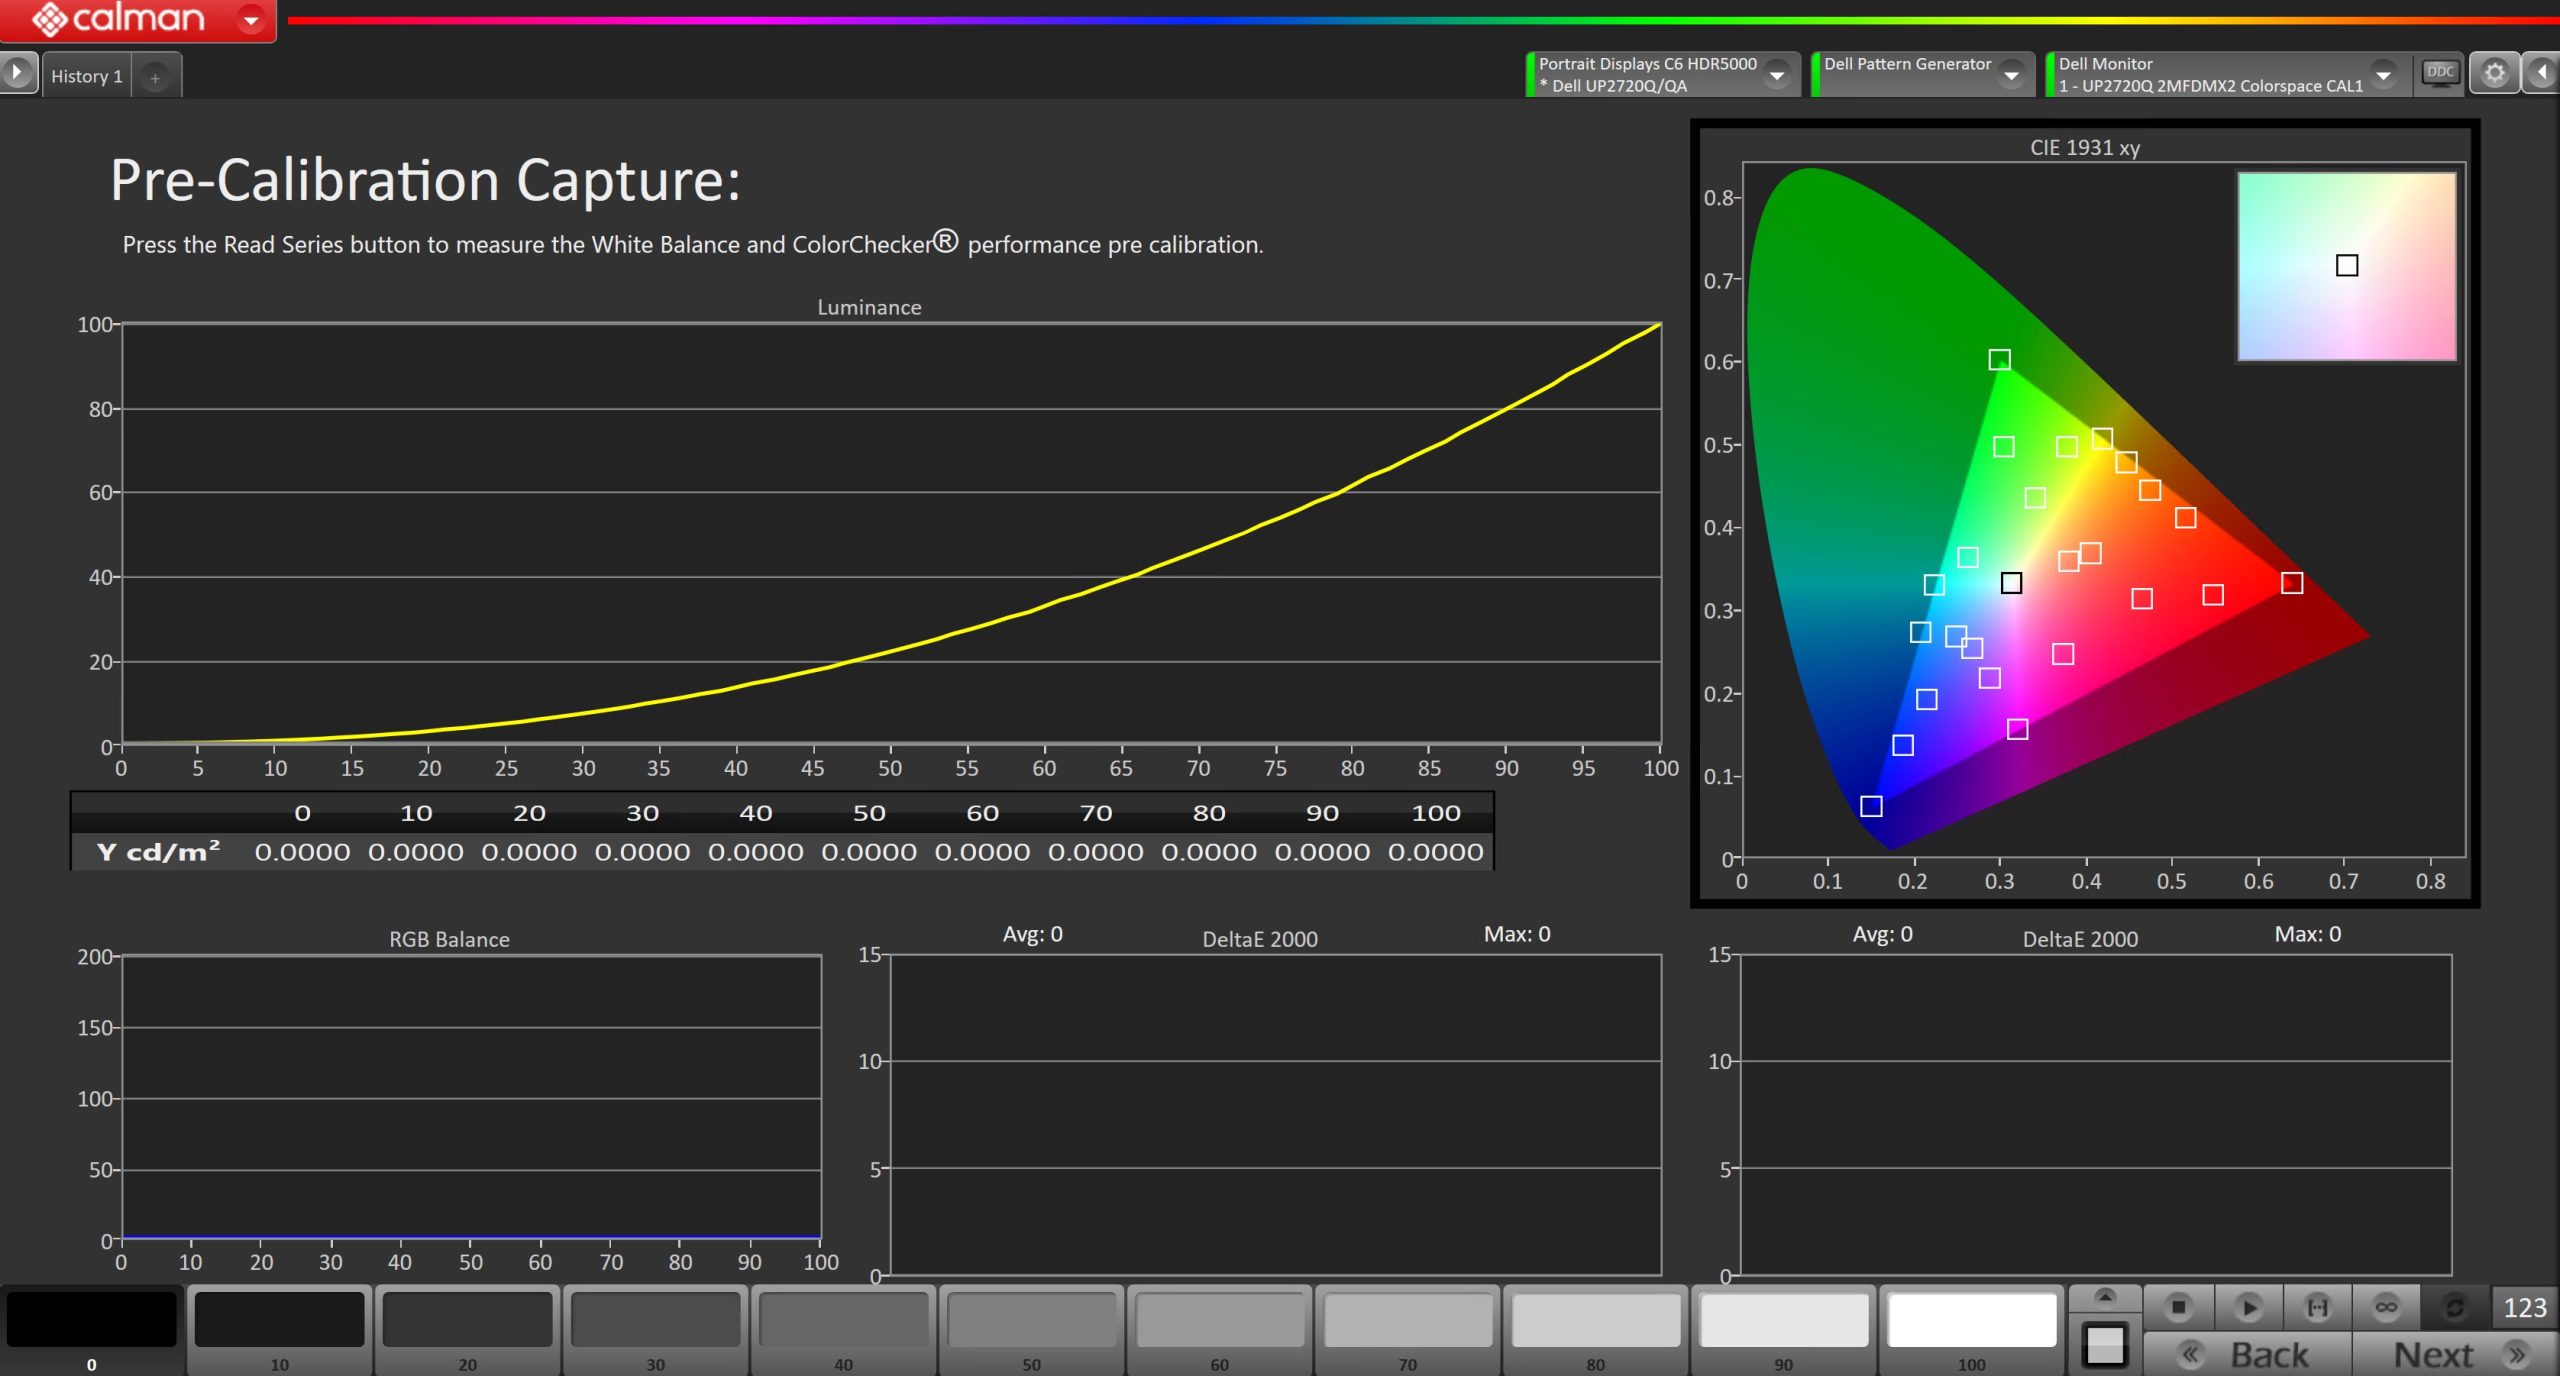
- To take Pre-Calibration Measurements, click the Measure button to measure the display’s grayscale and color response.
- This will provide a point of reference to compare the calibration results.
- Click Next to proceed
Step 5
- Depending on the calibration type (3D LUT or Matrix) chosen in Step 2 this step will vary slightly
| 3D LUT | Matrix |
 |
 |
|
|
- Once complete, click Next to proceed.
Step 6
- In this step, you’ll take measurements of the calibration results.
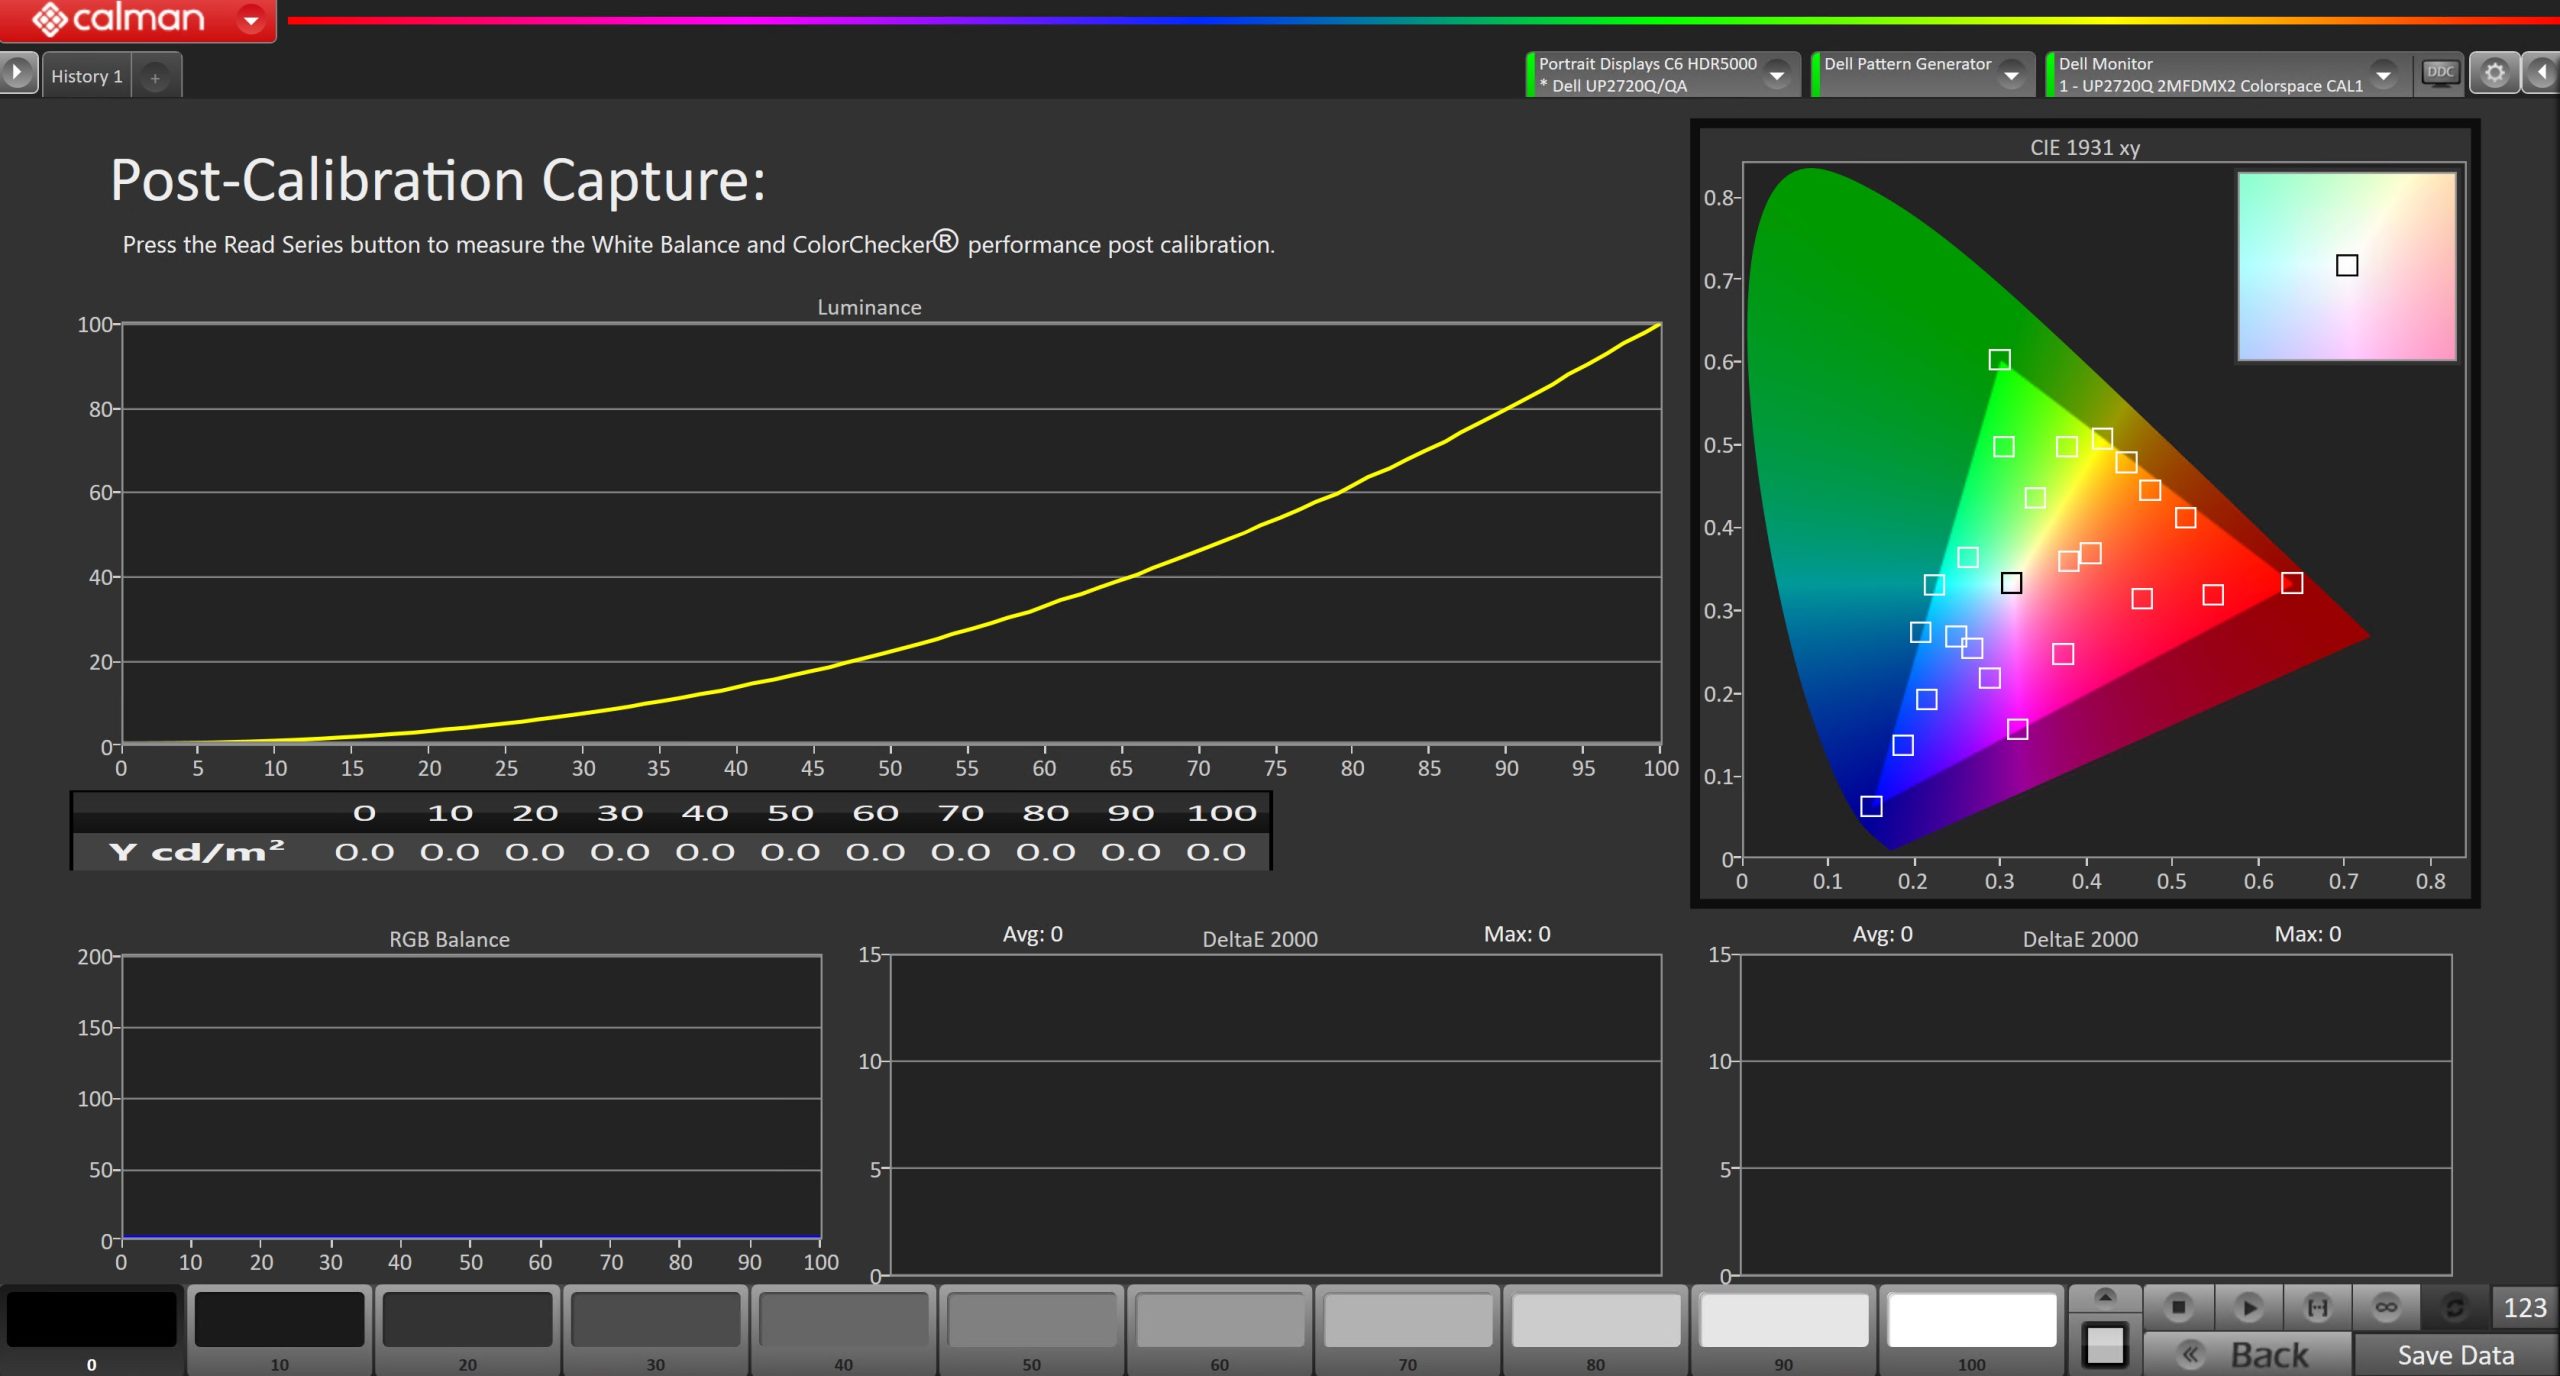
- To take Post-Calibration Measurements, click the Read Series button to measure the display’s grayscale and color response.
- After the full Post-Calibration measurement has been completed, an additional set of measurements will be taken and uploaded to the monitor’s internal validation service. Please wait for this to complete before proceeding.
- Calibration is now complete. If you wish to save your calibration session for later reference, click Save Data in the bottom-right corner.