
![]()
The Sony BRAVIA workflow is used to calibrate Sony’s upper-end Android LCD, MiniLED, and OLED models with Calman. This workflow will walk you through the process step-by-step, and pre-configures the most needed Calman Settings.
Calman Required Version
- Calman Home, Studio, or Ultimate v5.17.0 or higher
Hardware Requirements
- Calman Compatible Meter
- Calman Compatible Pattern Generator
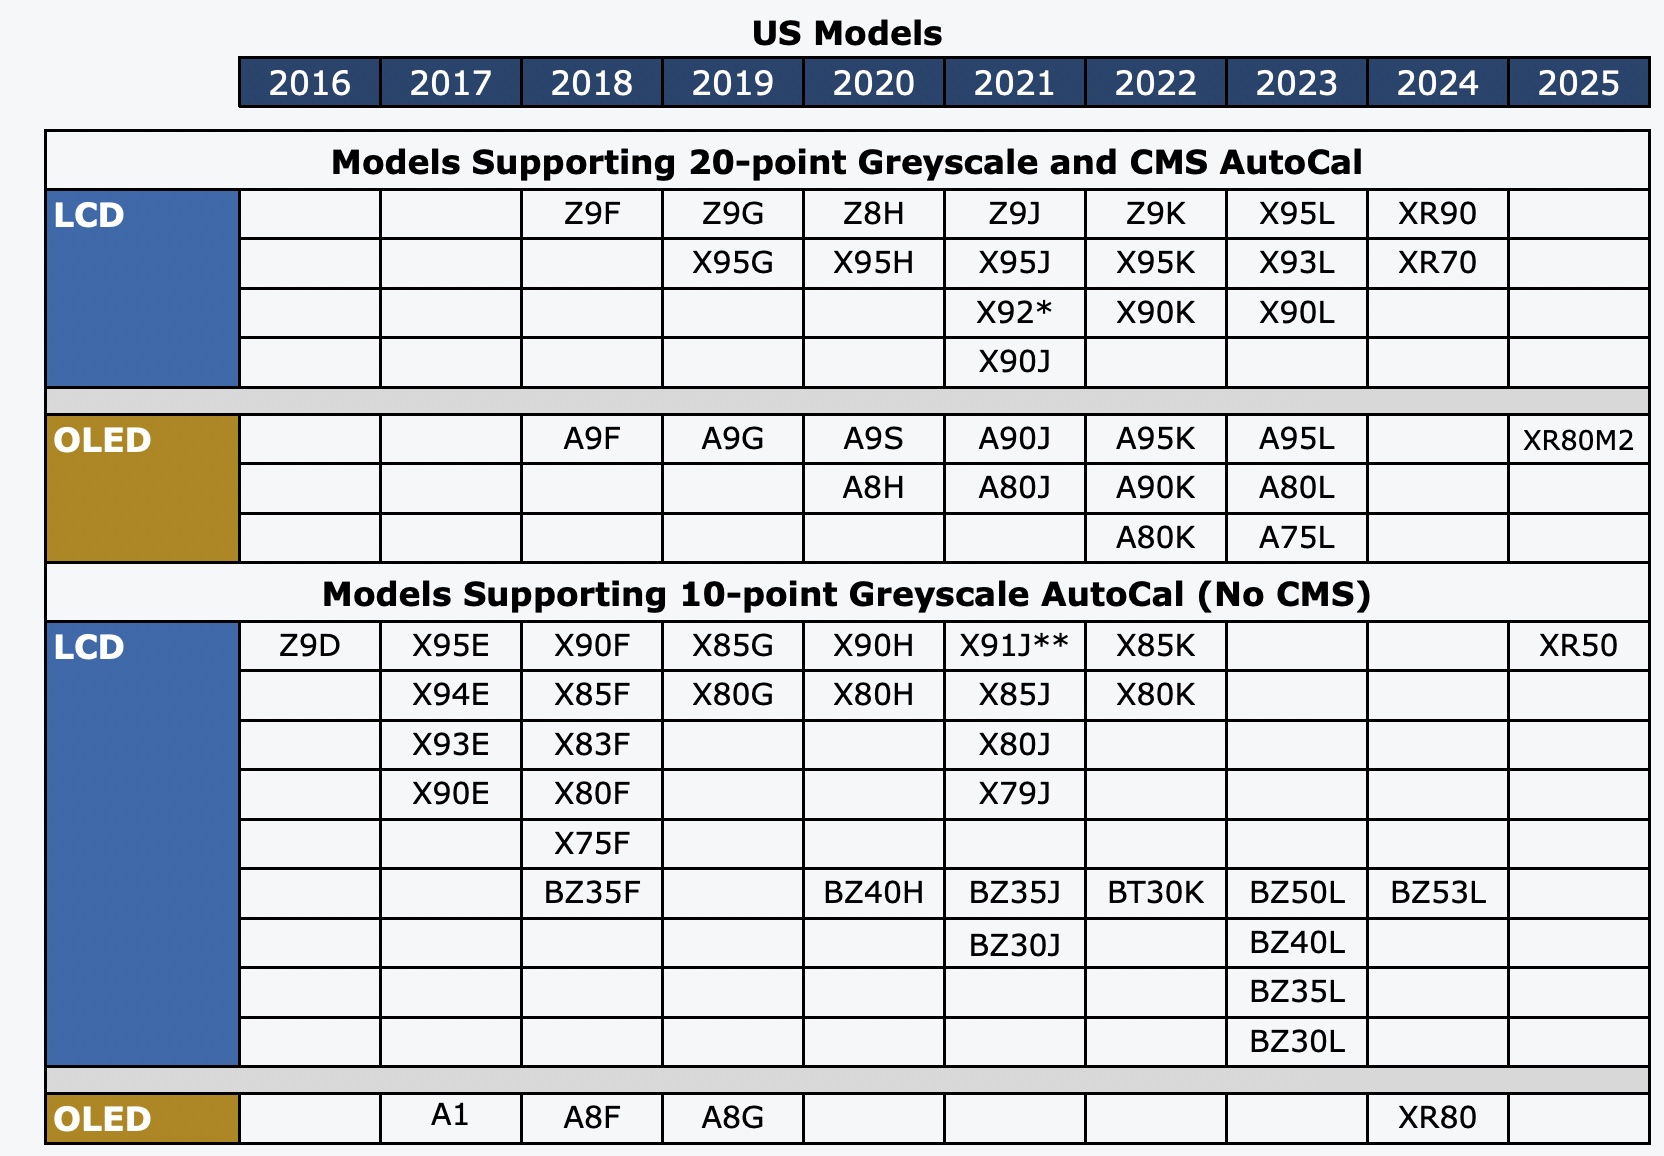
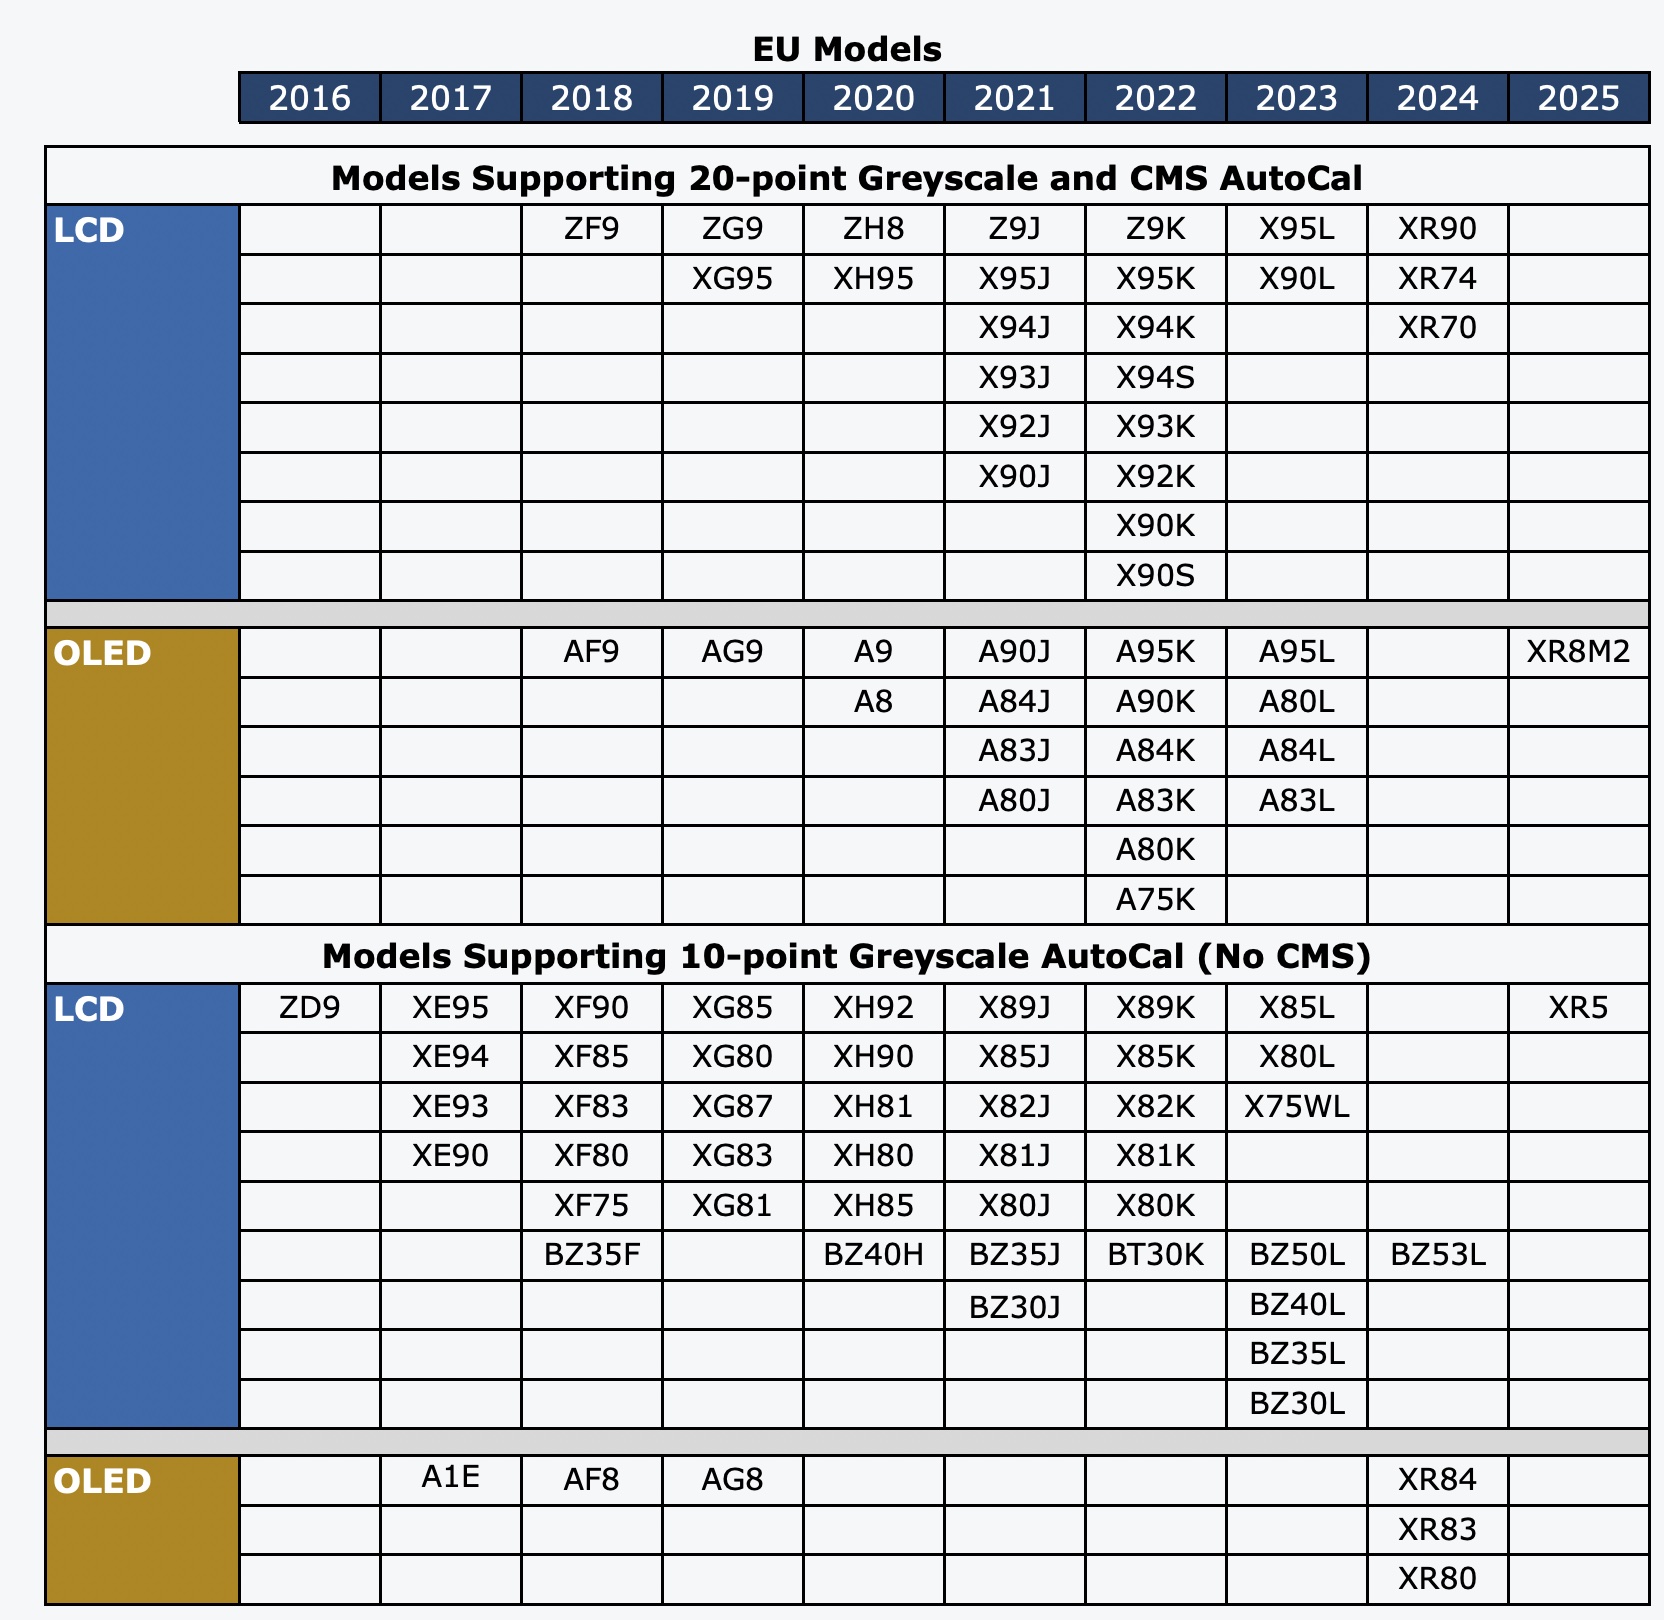
- Calman Compatible Sony TV:
Compatible US Models
Compatible EU Models
Step 1
- From the Calman Menu in the top-left, choose Open Workflow Template -> Calman Ready and then Sony BRAVIA
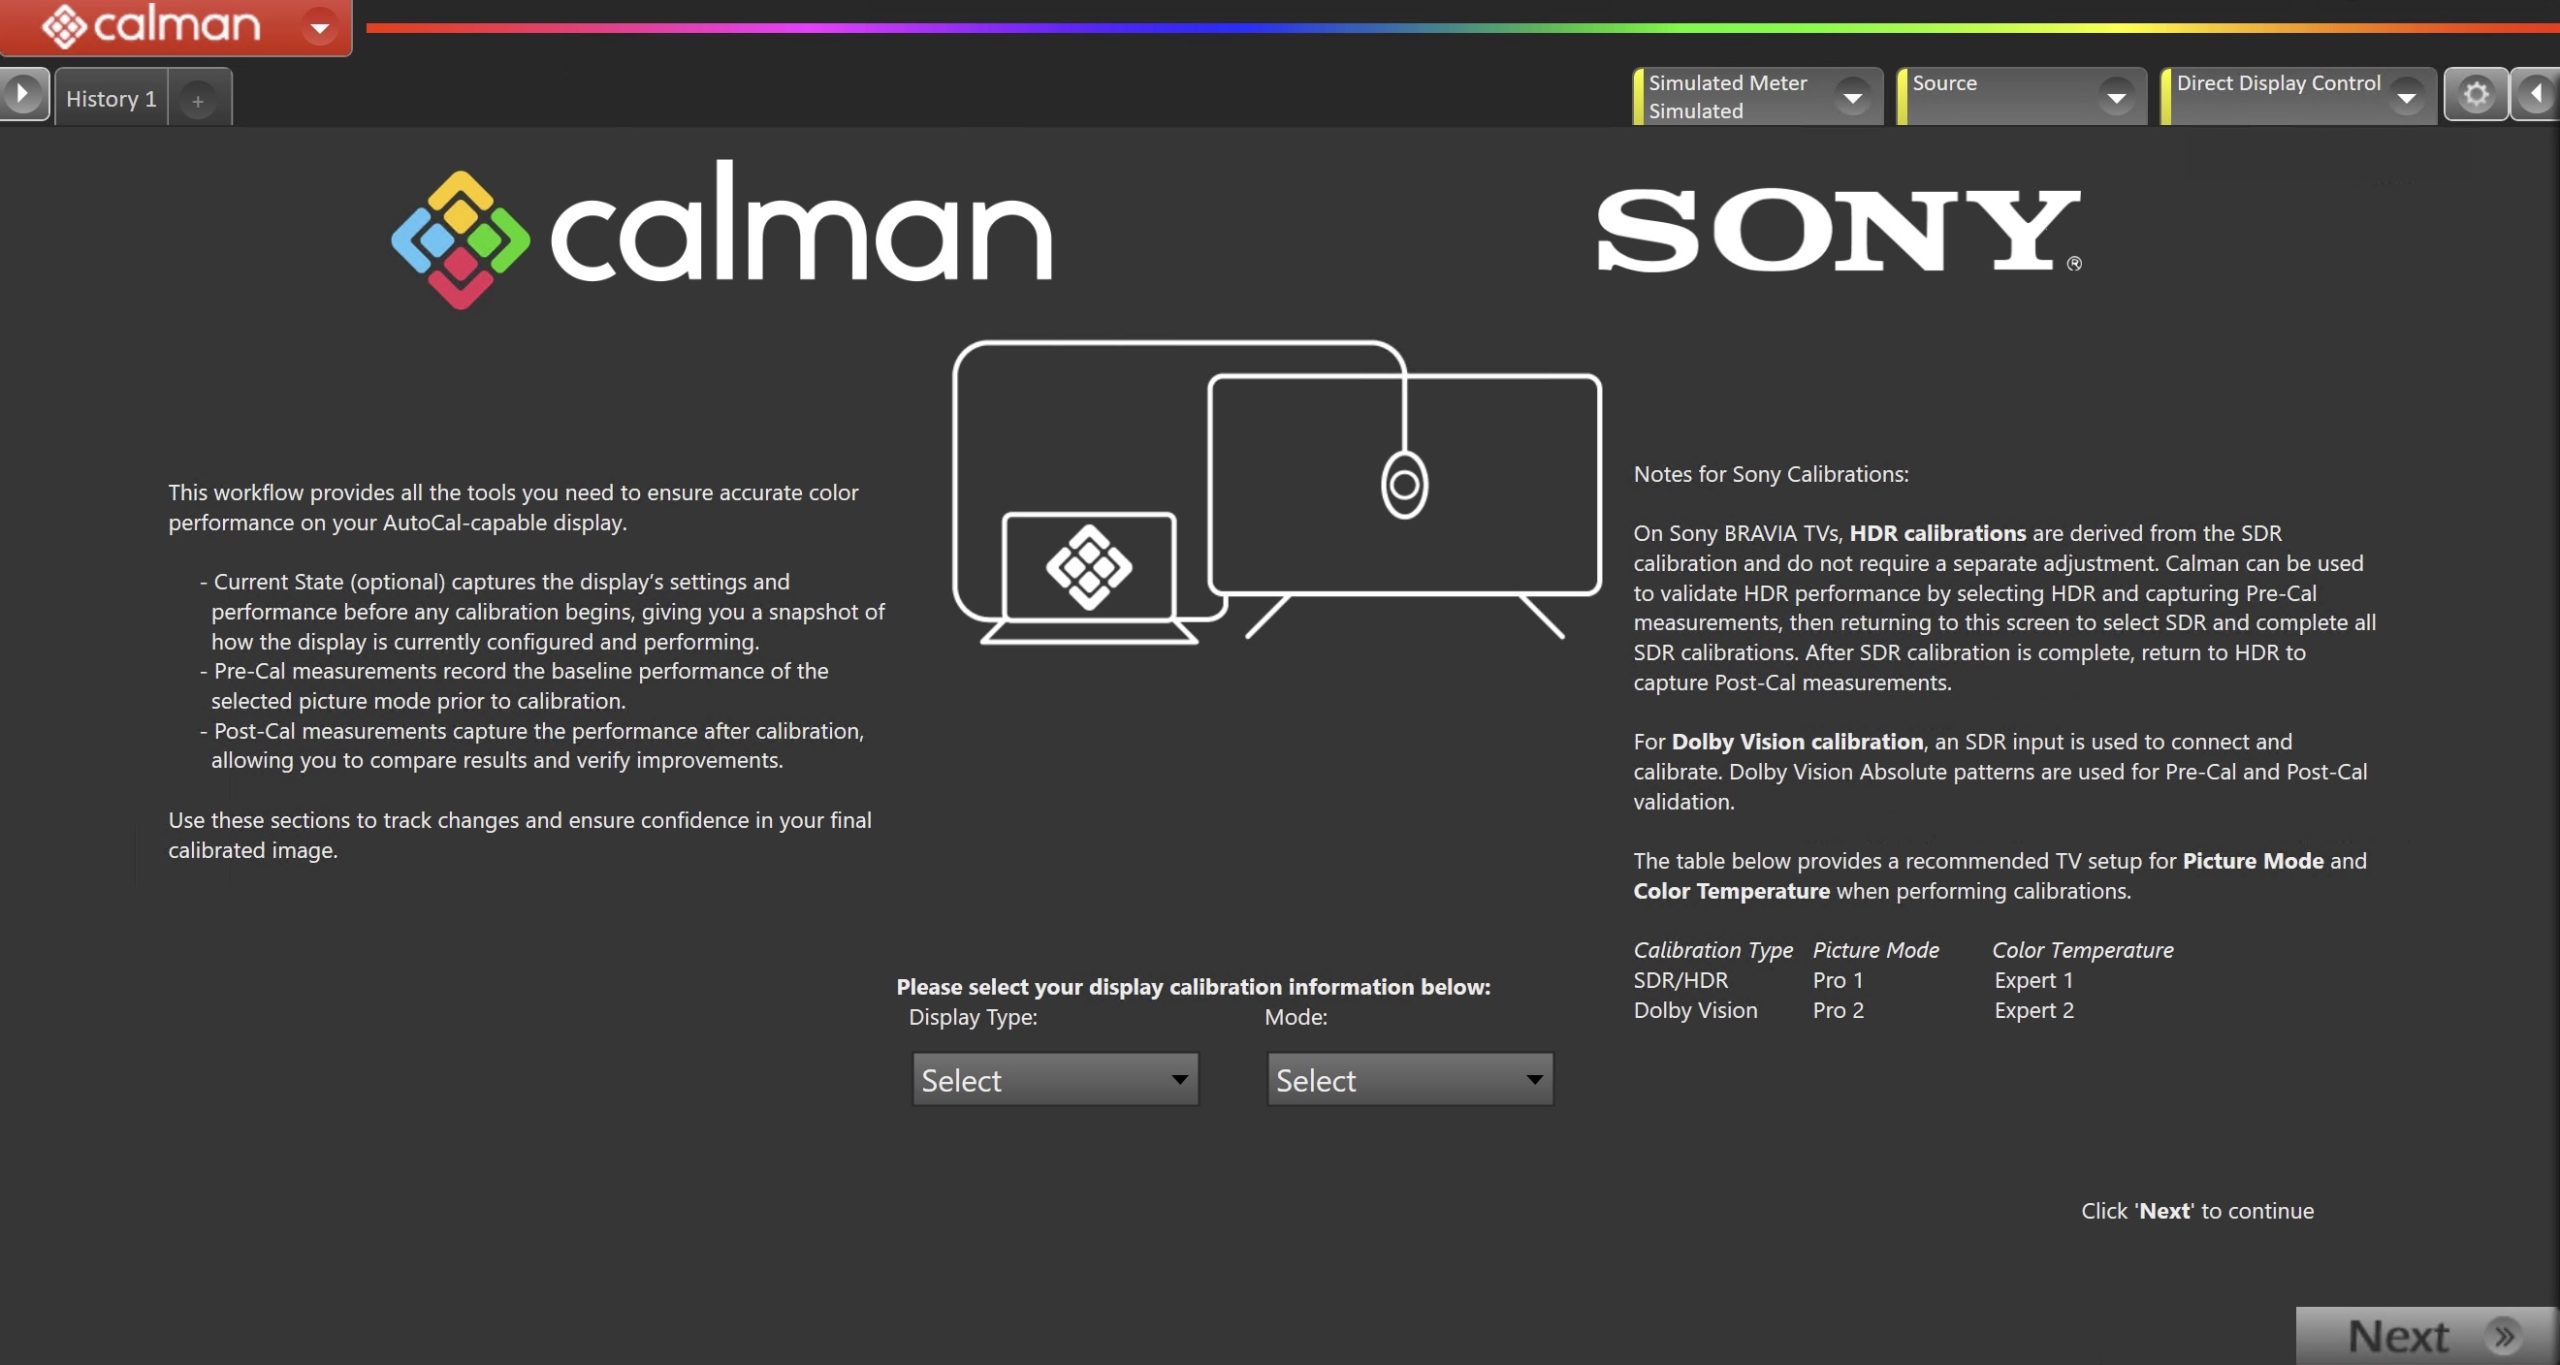
- On the introduction screen, select your display type (LCD/OLED) and calibration mode (SDR/HDR/Dolby Vision) from the dropdown and click Next to proceed to Hardware Setup
- Notes:
- On Sony BRAVIA TVs, HDR calibrations are derived from the SDR calibration and do not require a separate adjustment. Calman can be used to validate HDR performance by selecting HDR and capturing Pre-Cal measurements, then returning to this screen to select SDR and complete all SDR calibrations. After SDR calibration is complete, return to HDR to capture Post-Cal measurements.
- For Dolby Vision calibration, an SDR input is used to connect and calibrate. Dolby Vision Absolute patterns are used for Pre-Cal and Post-Cal validation.
- To preserve individual calibrations, it is recommended to calibrate SDR/HDR using the picture mode “Custom for Pro 1” and Color Temperature mode “Expert 1” and Dolby Vision using the picture mode “Custom for Pro 2″ and Color Temperature mode “Expert 2”
- Notes:
Step 2
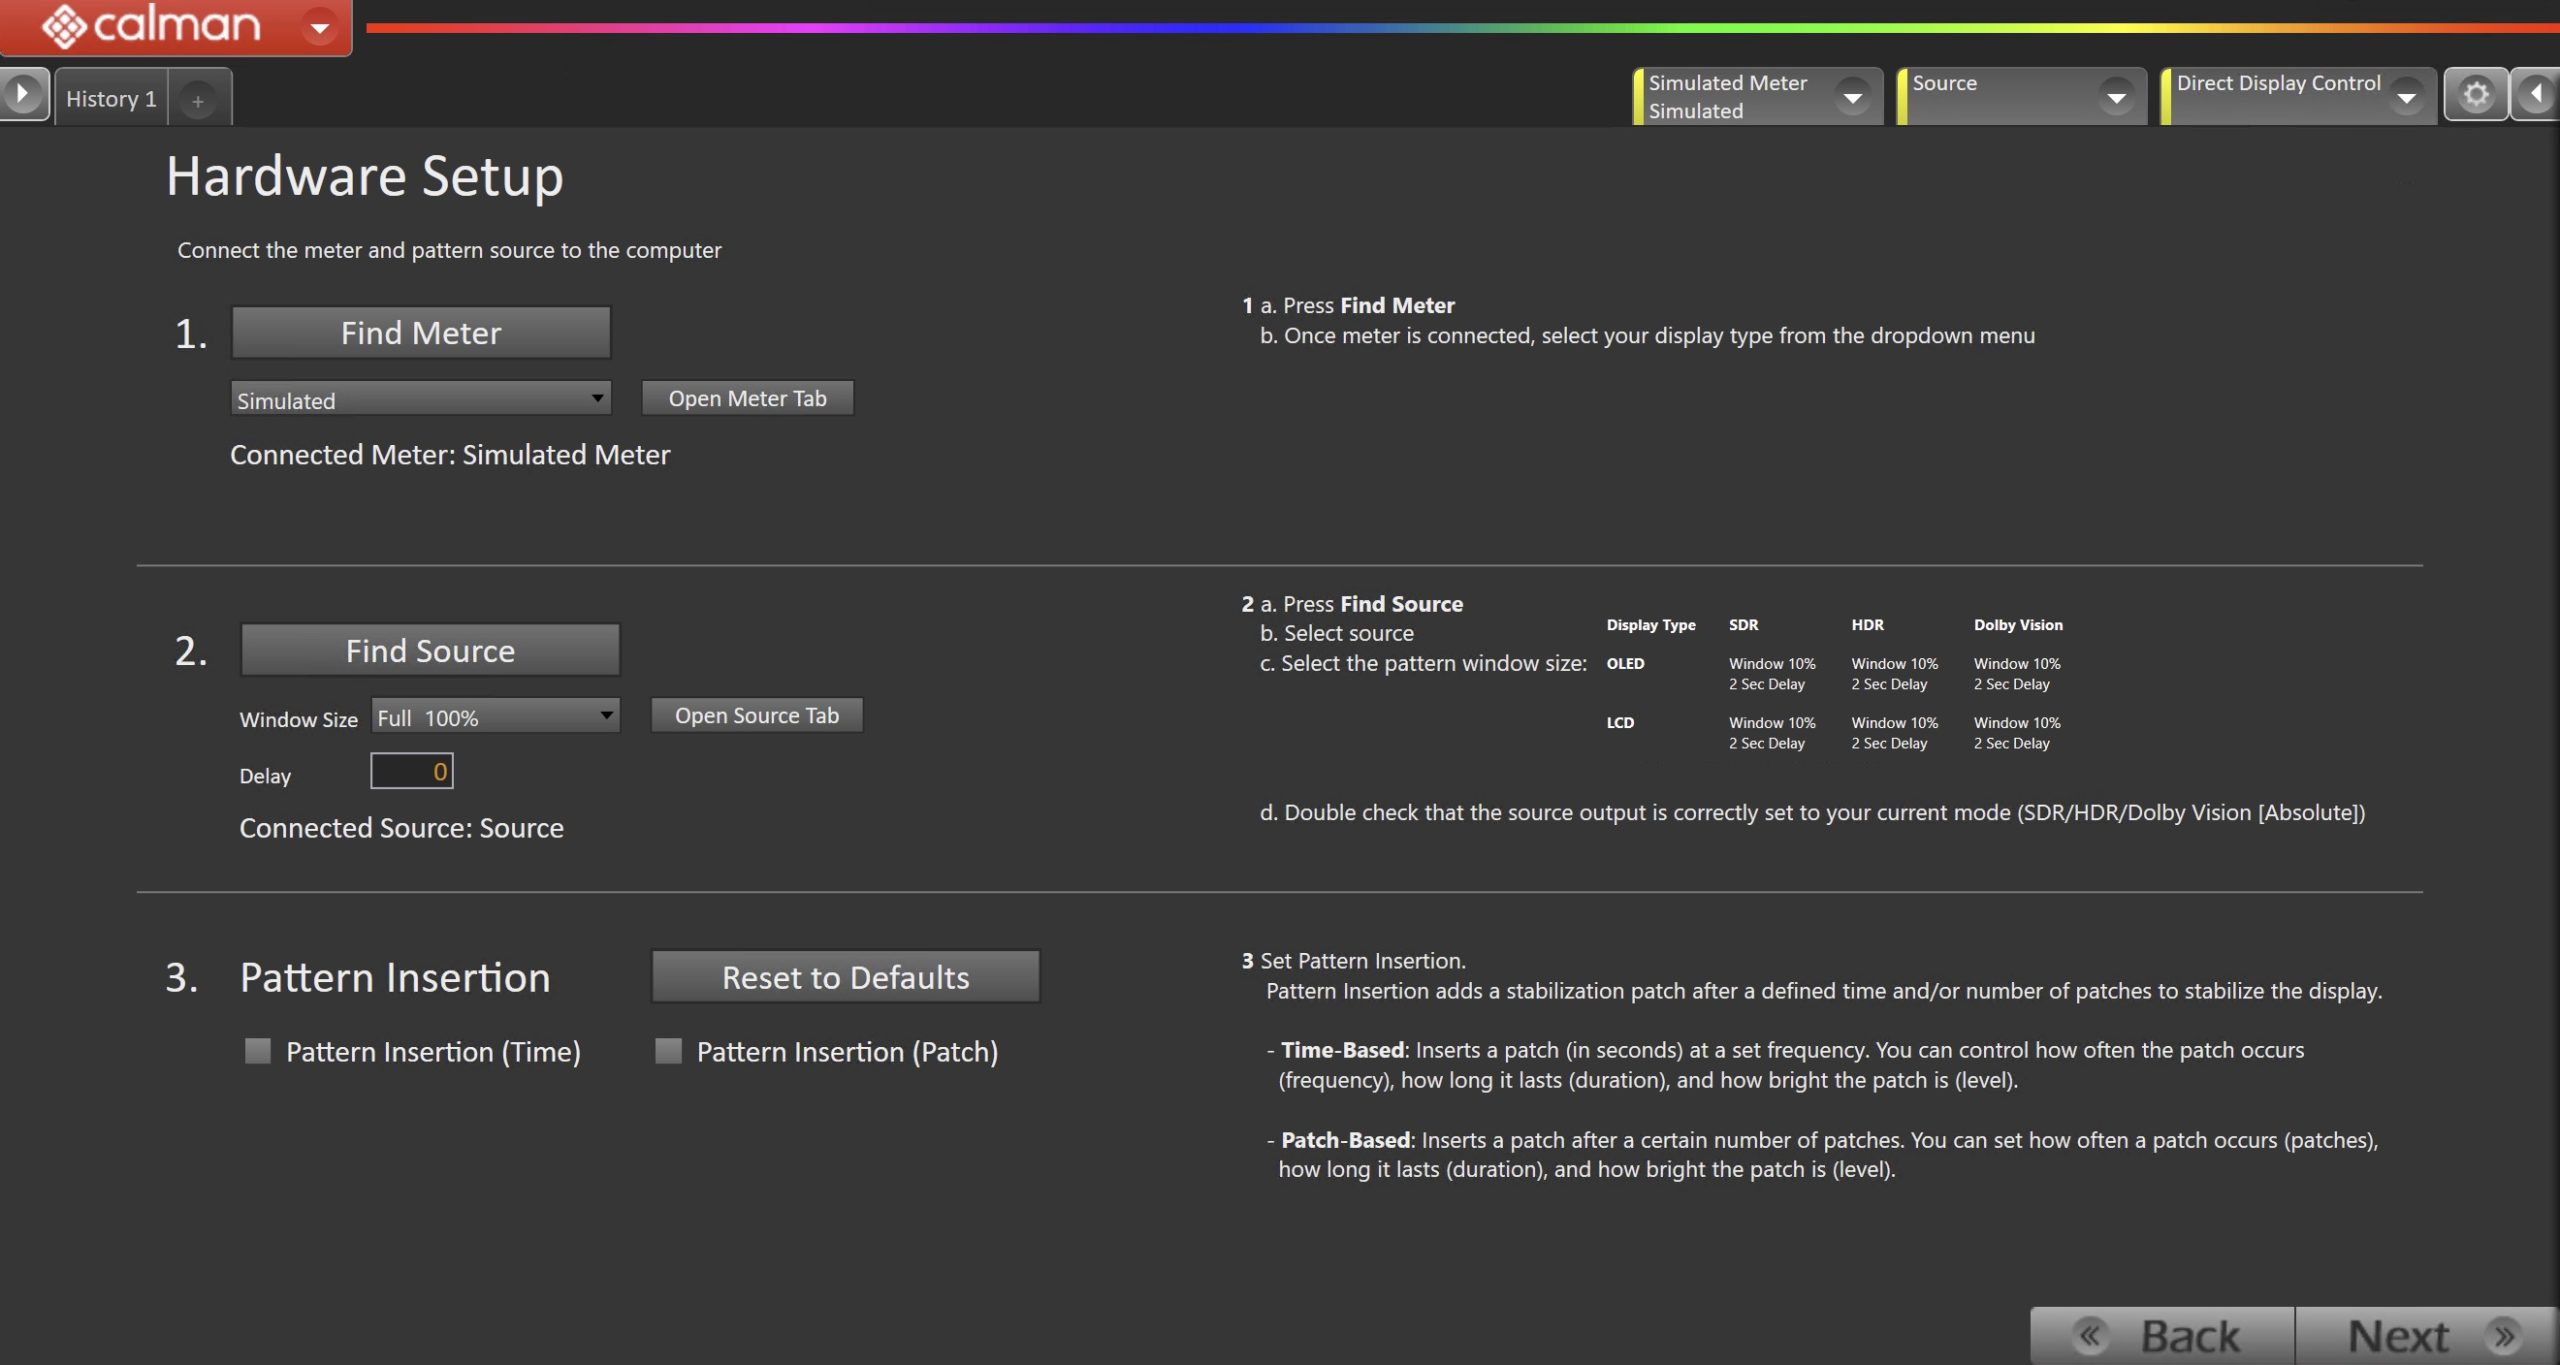
- Plug your meter into a USB port on the computer and press the Find Meter button on the left.
- When your meter is connected, select your display type from the dropdown
- Connect Pattern Source to your computer.
- Click the Find Source button, then select your source
- Select the pattern window size and delay
- Window 10%
- 2 Second delay
- Ensure your source is set to SDR, HDR, or Dolby Vision (Absolute metadata), corresponding to your choice in Step 1
- Set Pattern insertion
- Click the Reset to Defaults button to set the appropriate pattern insertion for the display and calibration type in Step 1
- LCD models do not require Pattern Insertion to be enabled.
- Click the Reset to Defaults button to set the appropriate pattern insertion for the display and calibration type in Step 1
- Click Next to proceed
Step 3
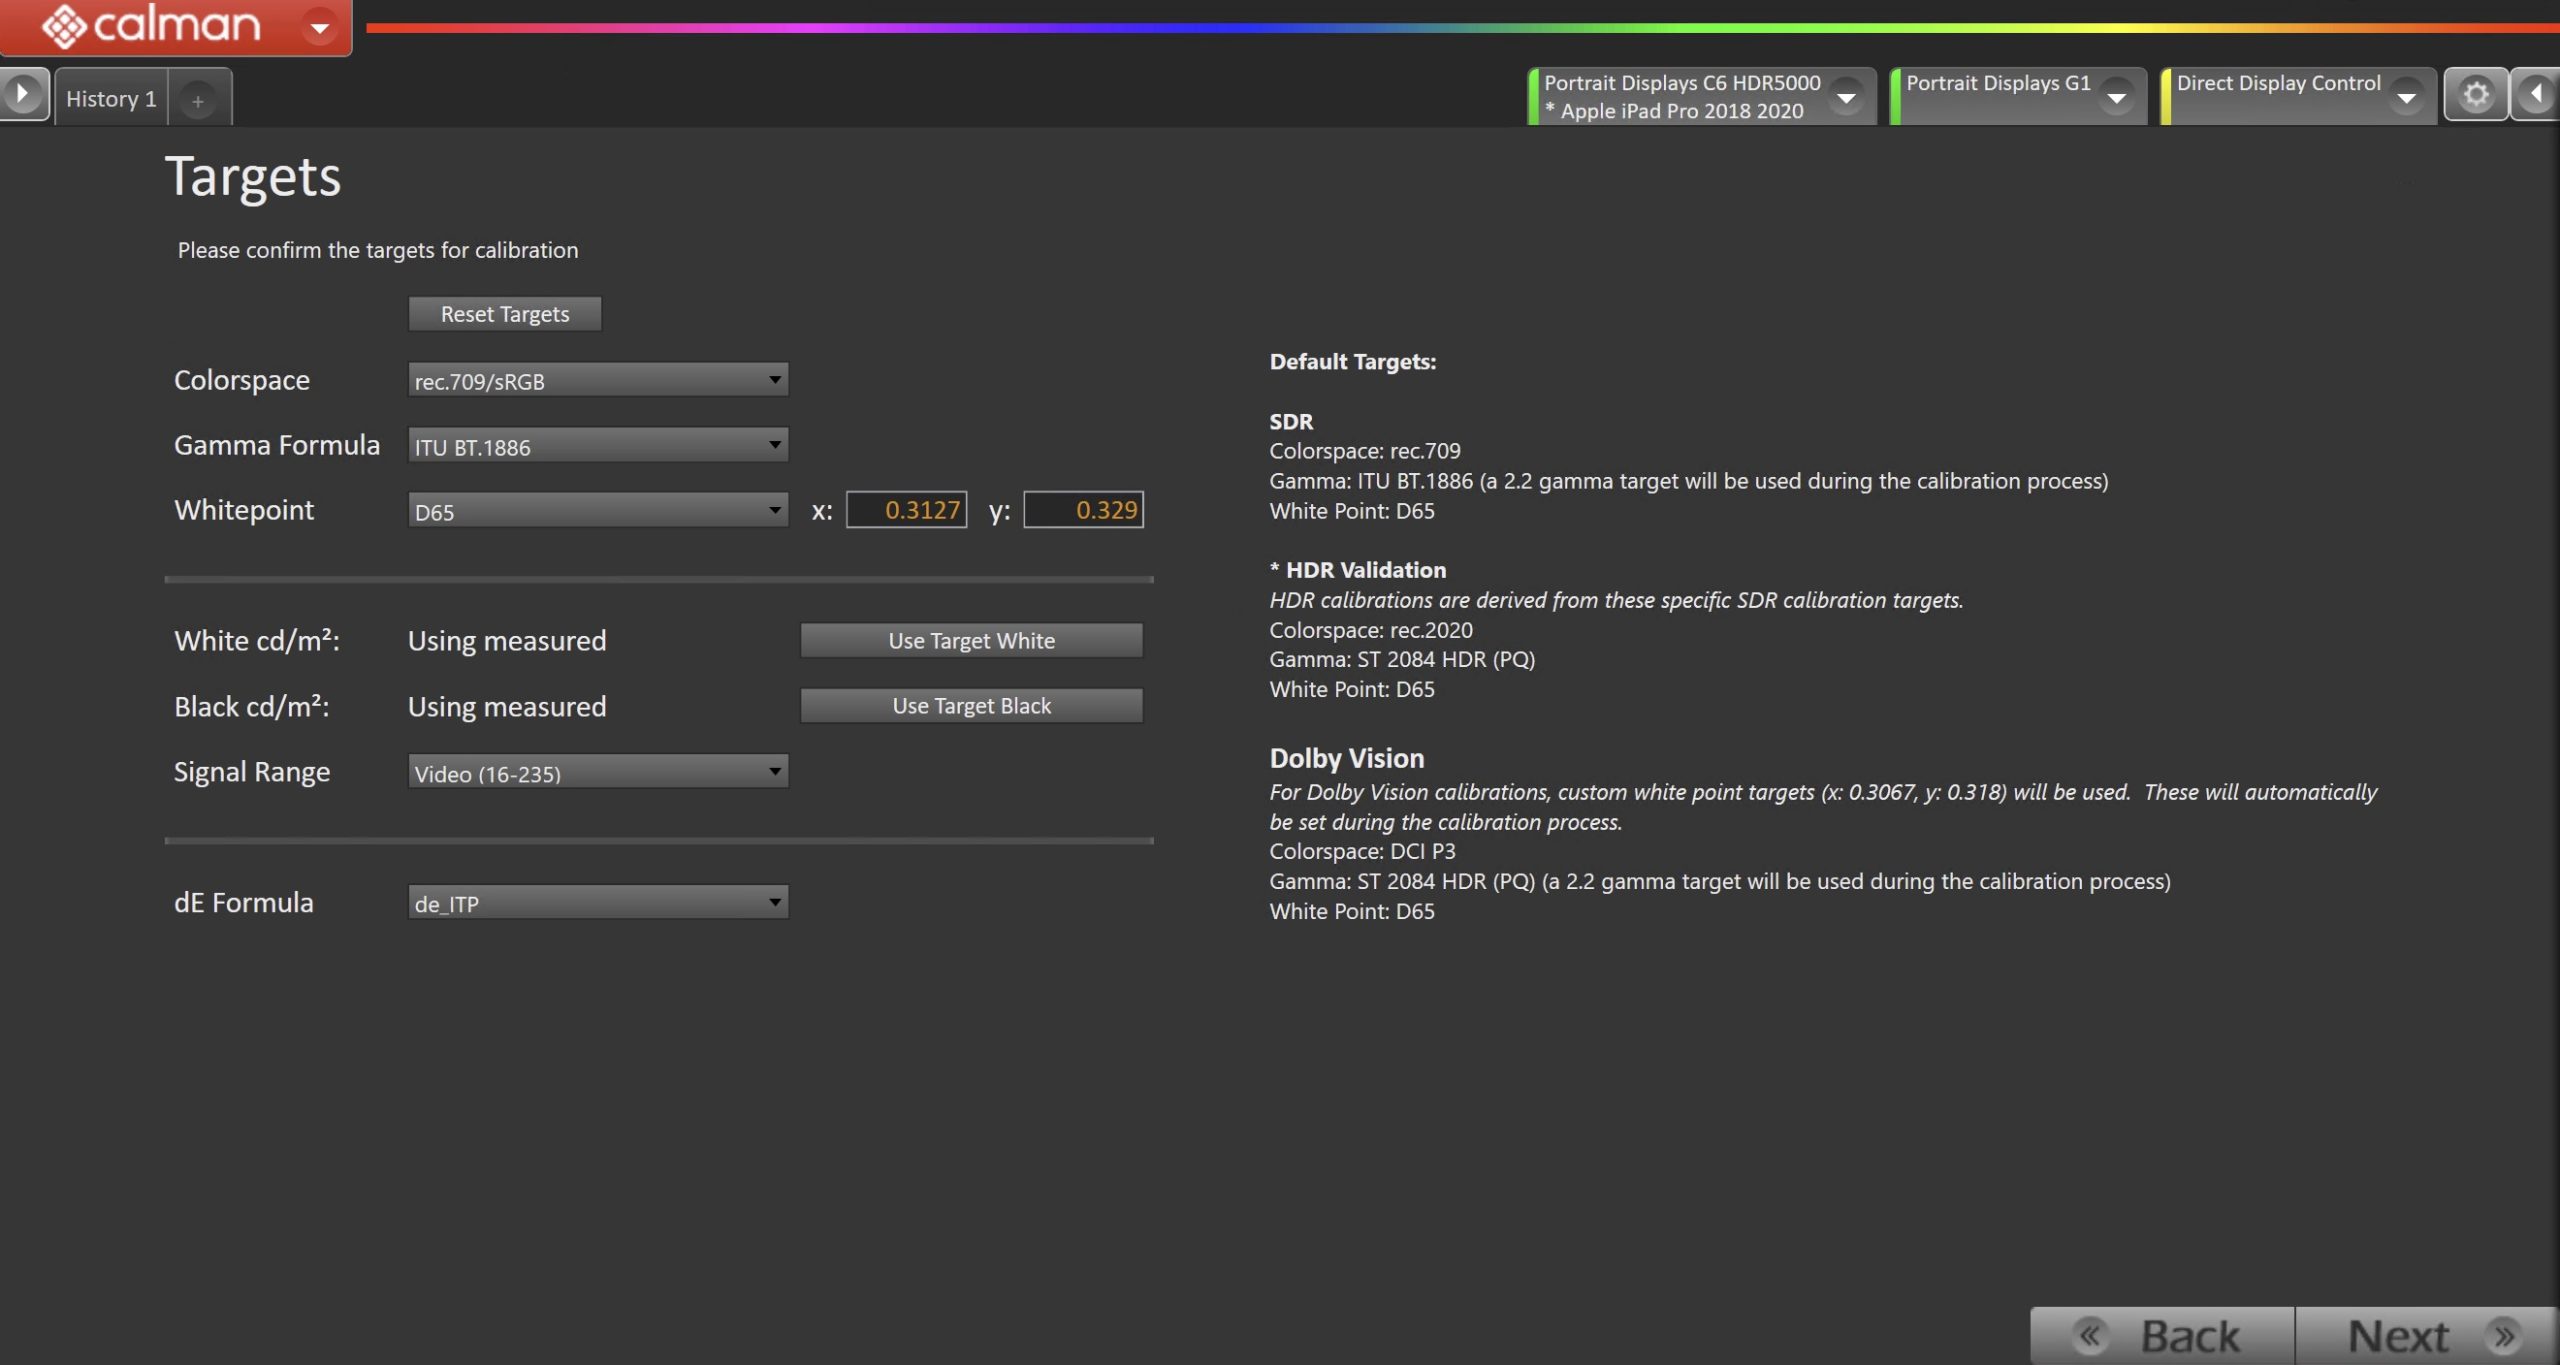
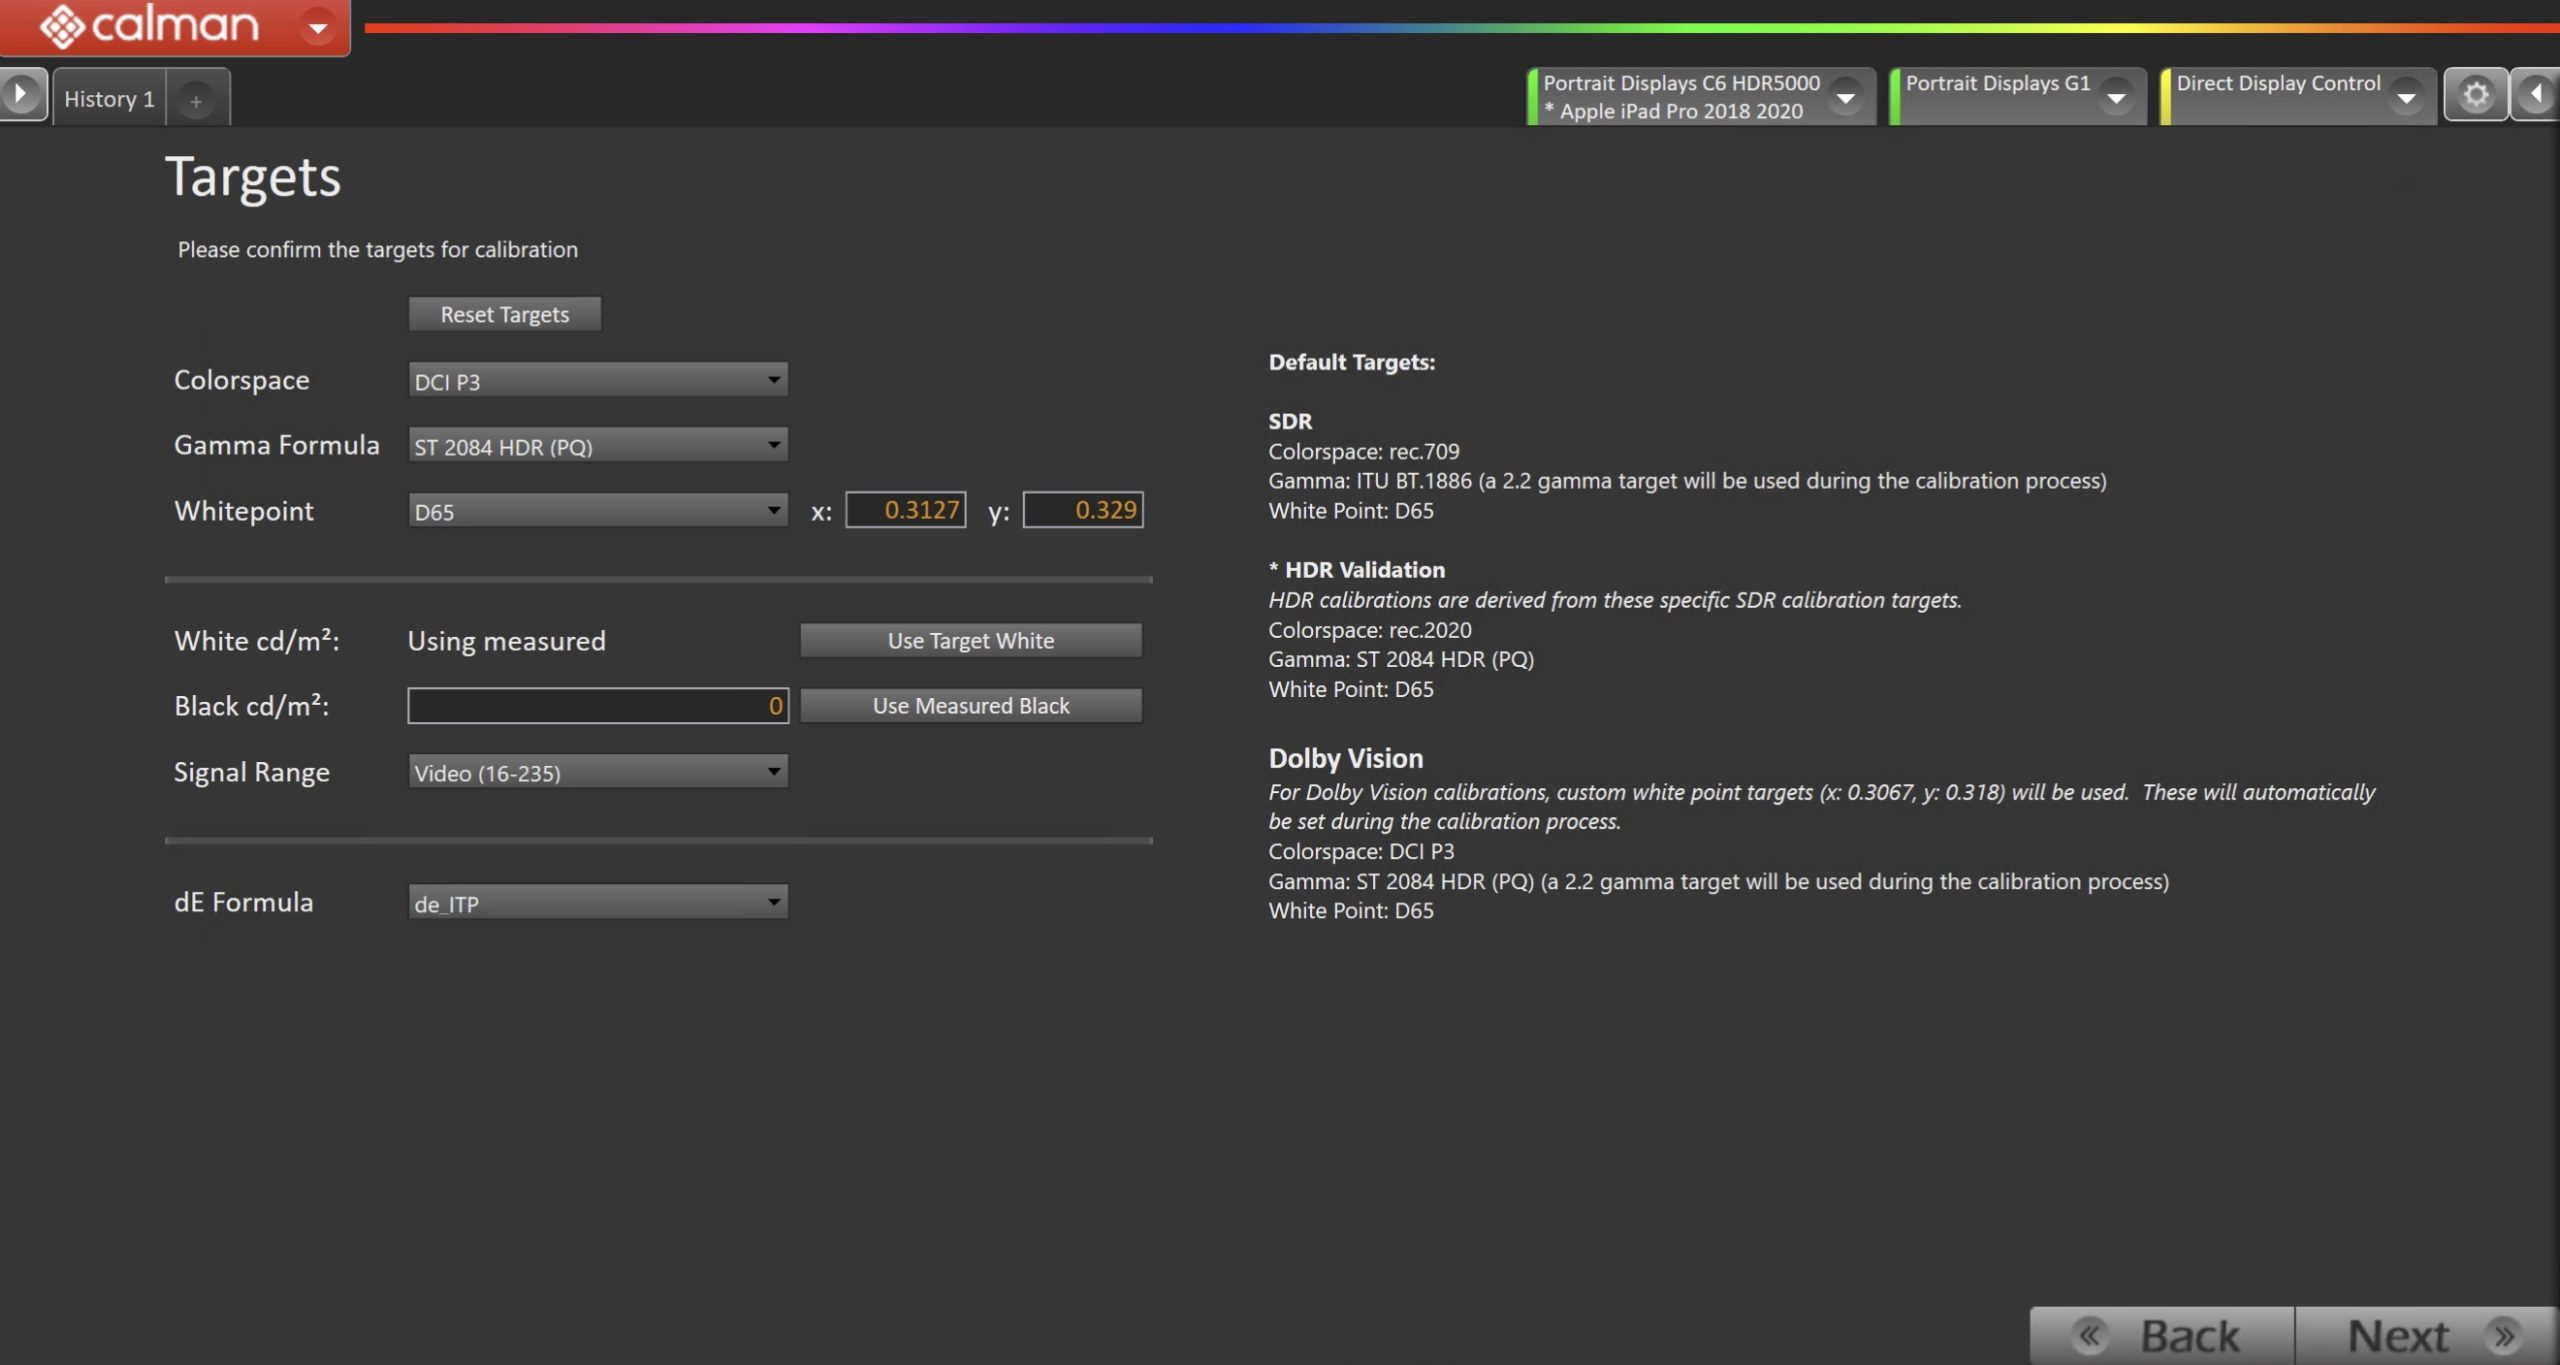
- Select the calibration targets
- Confirm/configure your calibration targets. These will be automatically set to common defaults by the options from Step 1
- Configuration Examples:
- Confirm your targets, and click Next to proceed
| SDR | HDR | Dolby Vision |
 |
 |
 |
|
|
|
(Optional) Current State Measurements
- This workflow page is intended to document the monitor’s current operational state before establishing any DDC connection or selecting a calibration mode.
- This step can be skipped if documenting the current state is not needed. Another set of Pre-Calibration measurements will be taken in later steps.
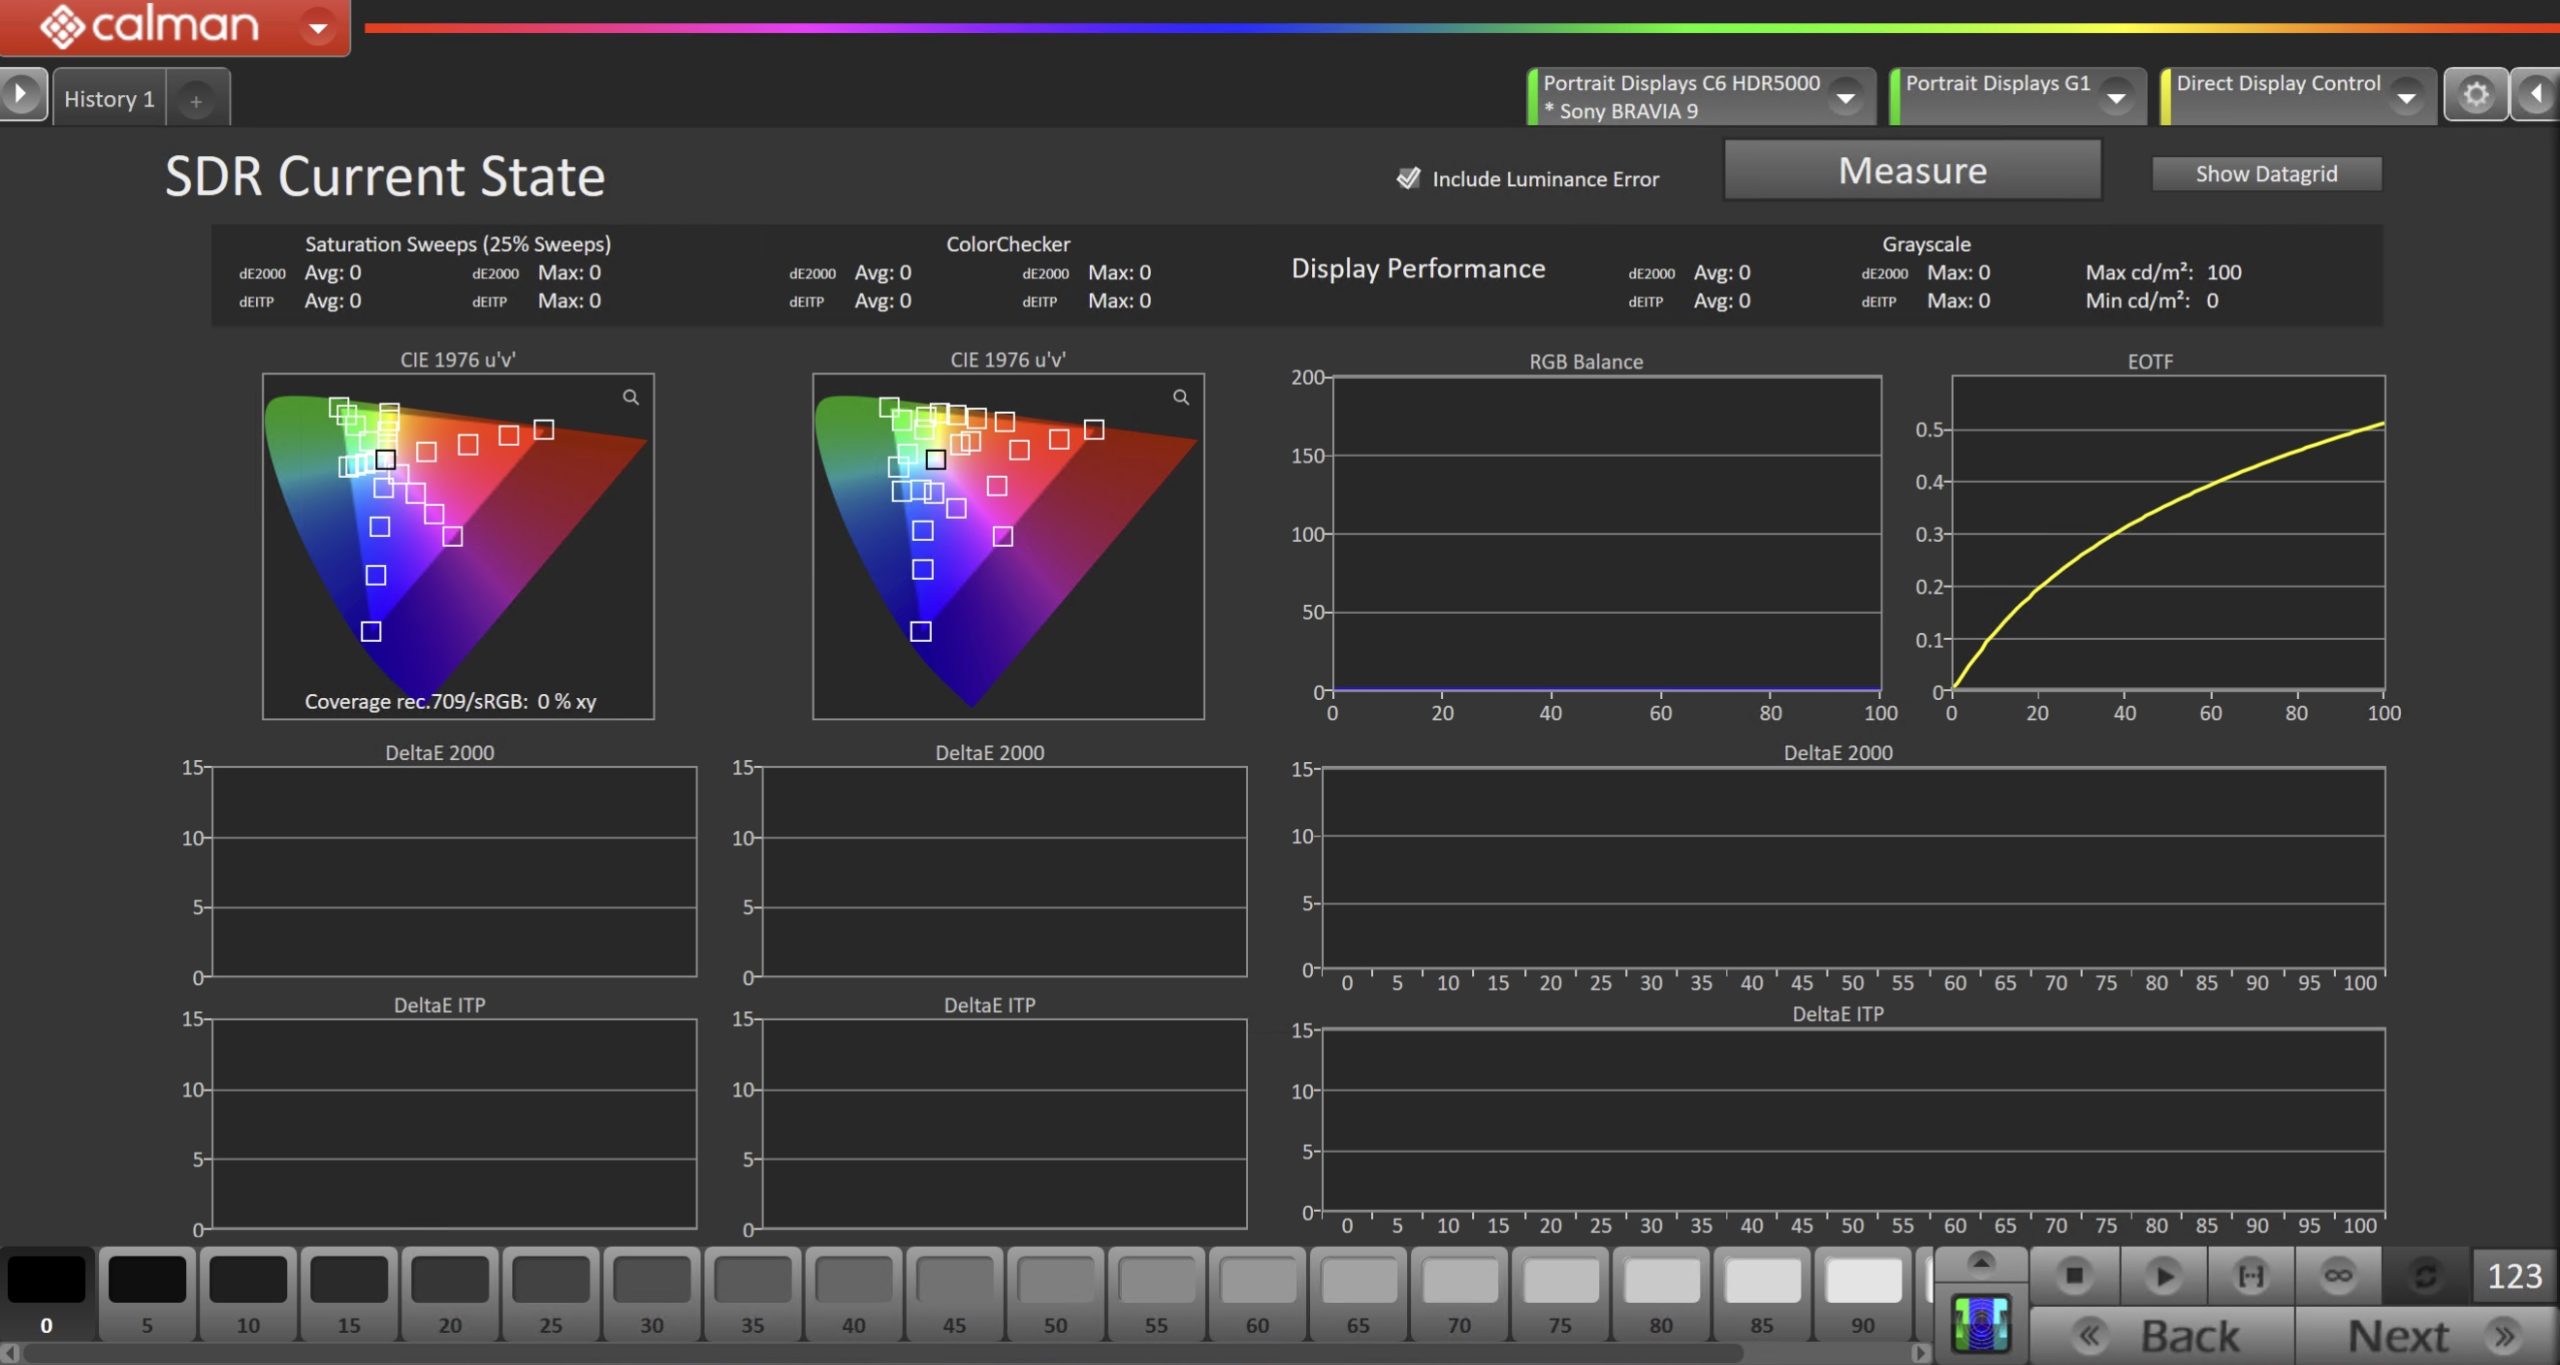
- To take Current State Measurements, click the Measure button to measure the display’s grayscale and color response.
- Click Next to proceed
Step 4
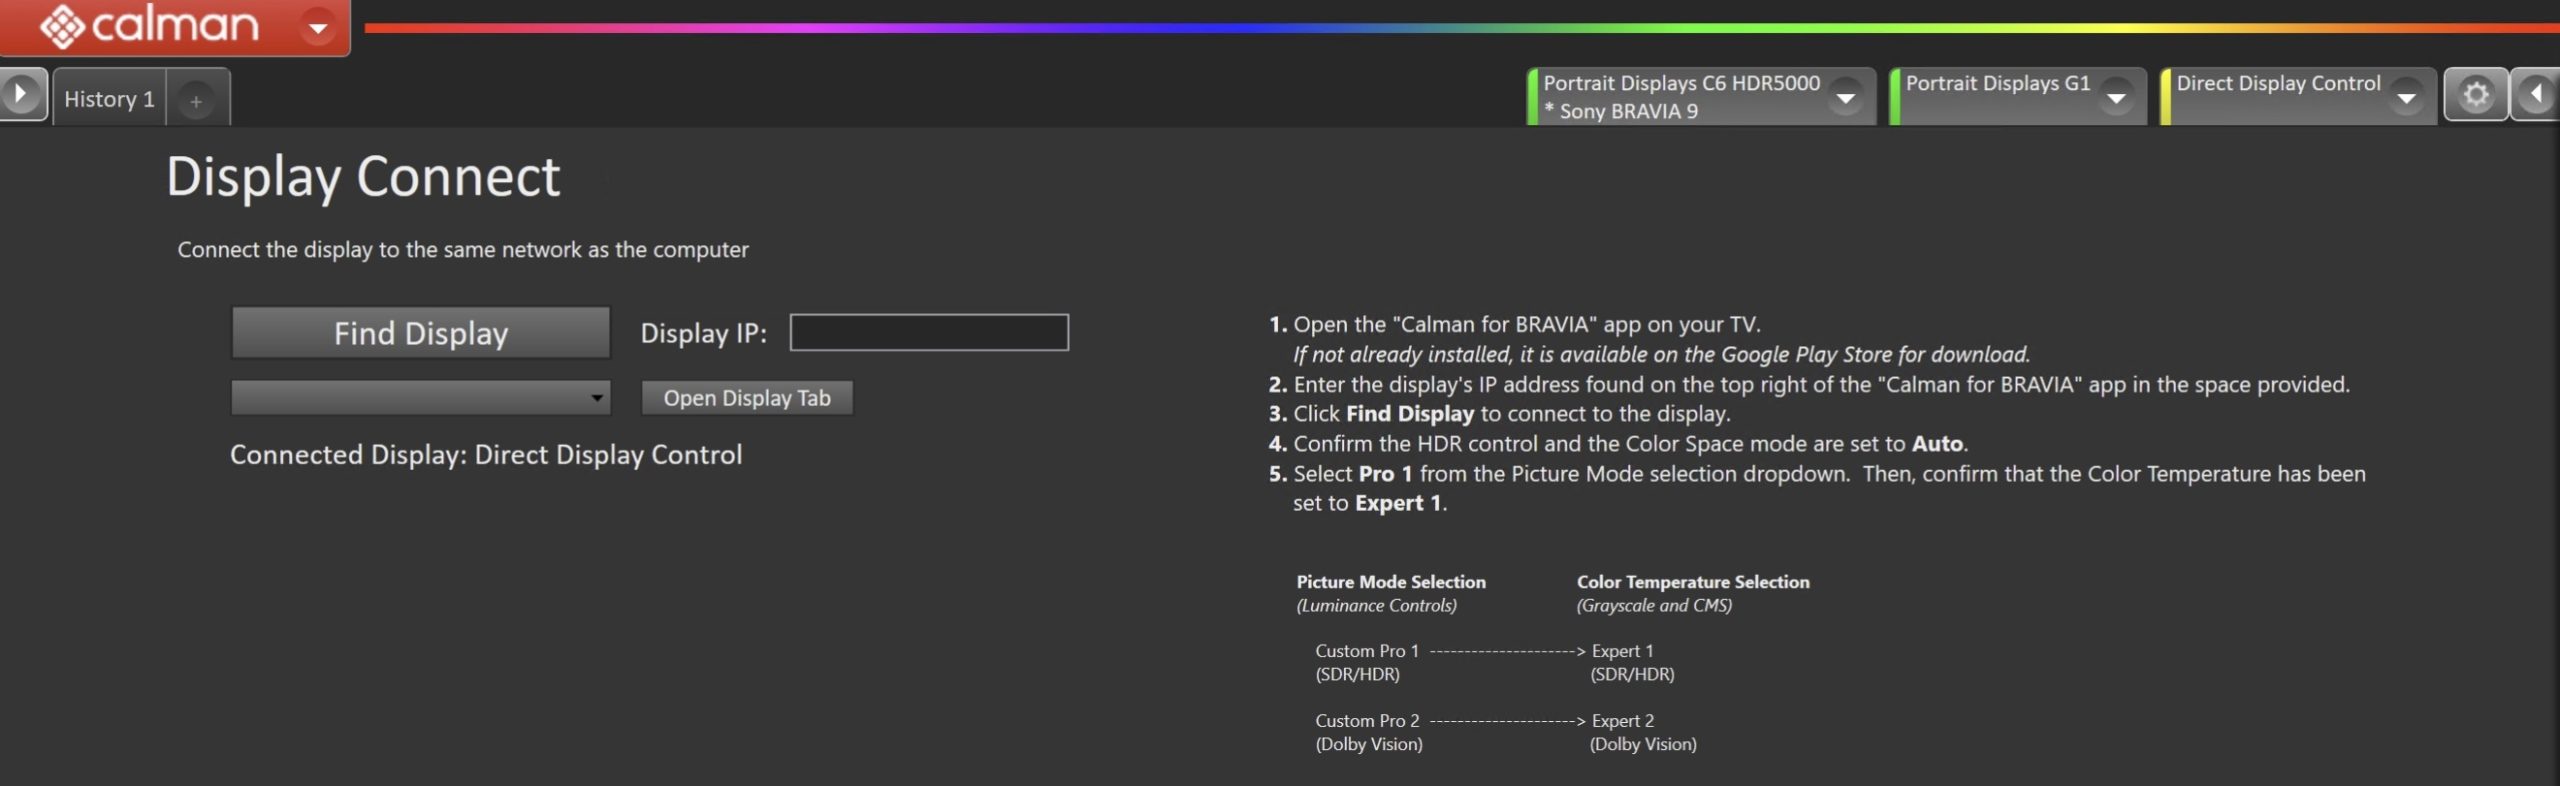
- Connect your TV
- On your TV:
- Open the Calman for BRAVIA app
- If the app is not installed…
- Make sure your TV is connected to the Internet, then open Google Play Store on your TV.
- Search for and install “Calman for BRAVIA”
- Note: If the app does not appear, your TV may not be a compatible model.
- If the app is not installed…
- Open the Calman for BRAVIA app
- In Calman
- Enter the IP address displayed in the Calman for BRAVIA app and click the Find Display Button
- If the connection is successful, you should see Sony BRAVIA in the DDC tab
- On your TV:
|
Note: Sony TVs utilize a unique method of organizing and storing picture settings, which differs from most other manufacturers. This distinction is particularly important for professional calibration and achieving optimal picture quality.
|
Pre-Calibration Measurements
- This workflow page is intended to document the target picture mode prior to calibration.

- To take Pre-Calibration Measurements, click the Measure button to measure the display’s rayscale and color response.
- This will provide a point of reference to compare the calibration results
- Click Next to proceed
Step 5
- Here, the Calman picture mode will be reset to prepare for calibration.
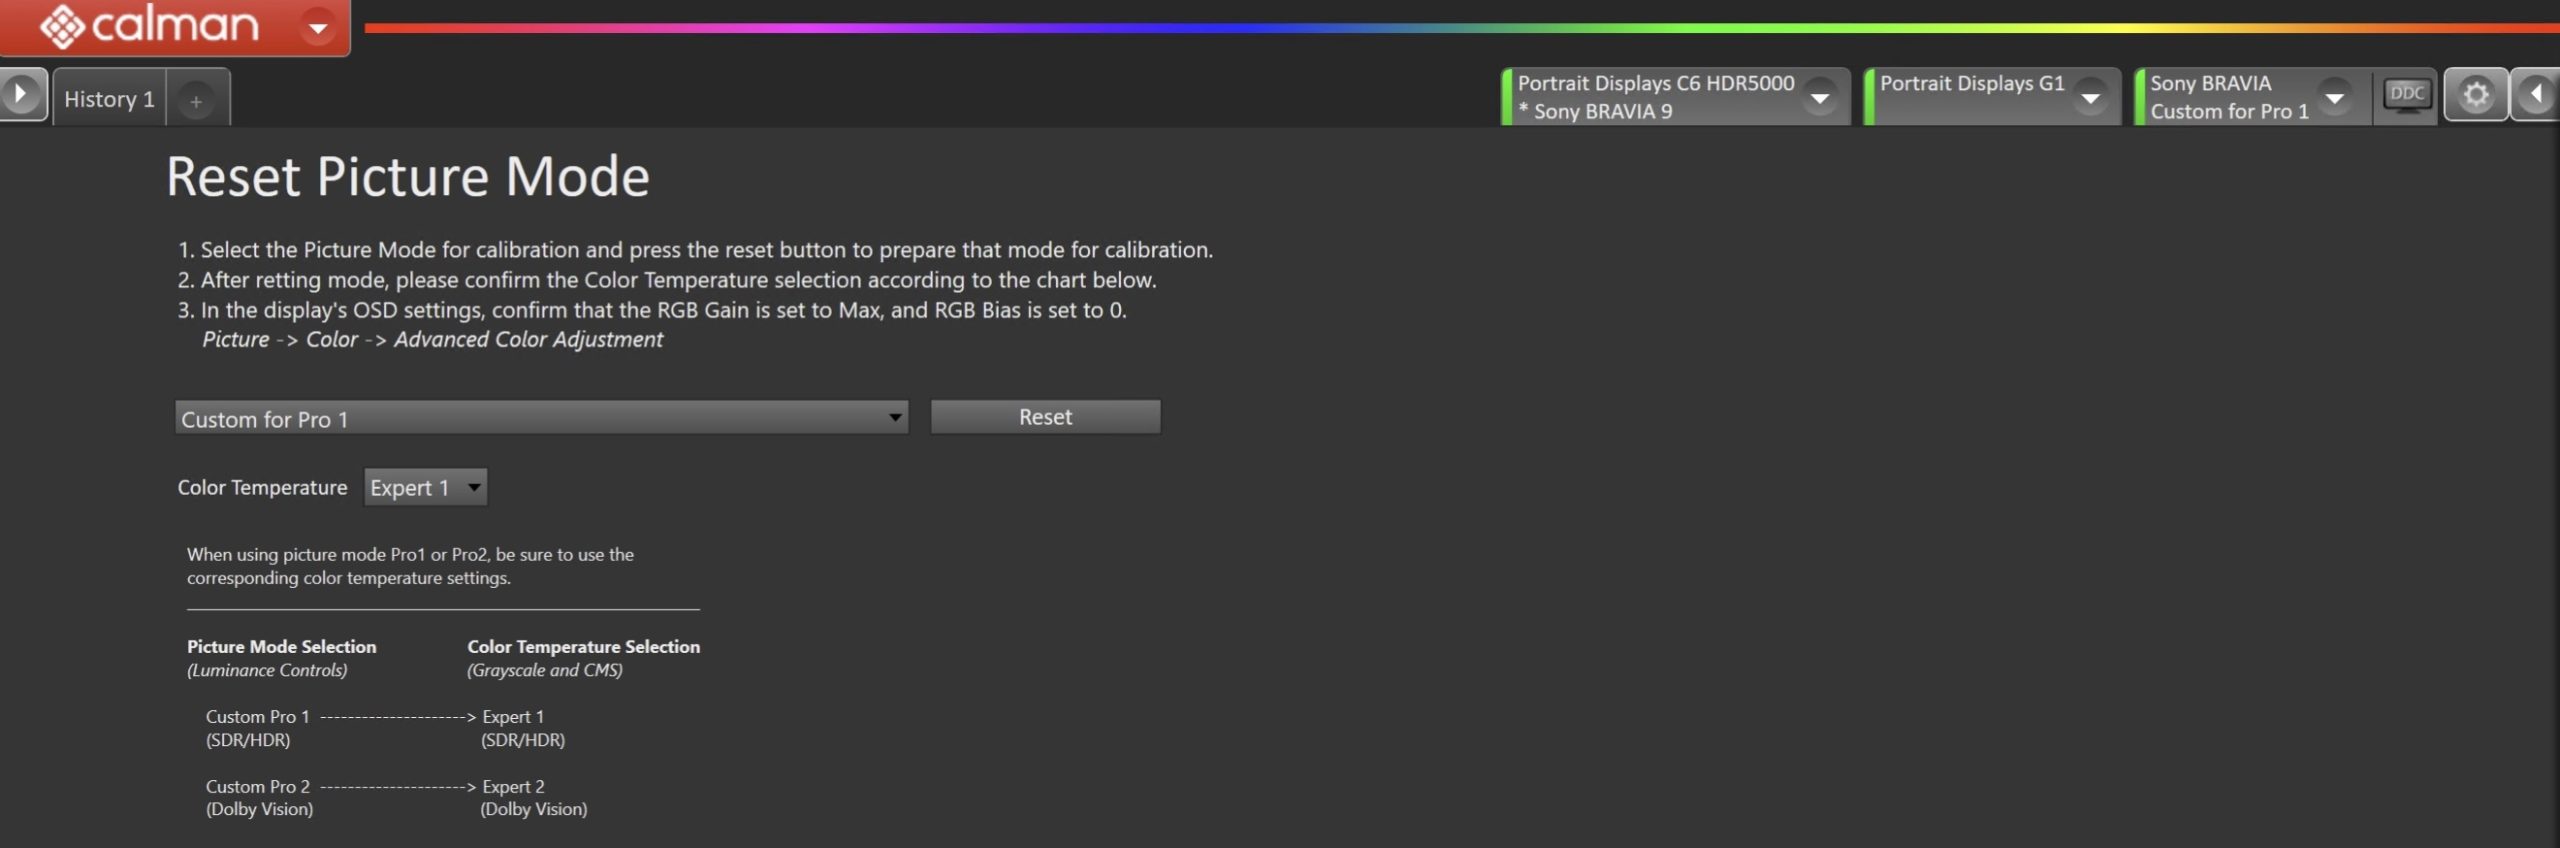
- Confirm your picture mode and color temperature settings, and click the Reset button. This resets and prepares the picture mode for calibration.
- Click Next to proceed
SDR Only – Measure and set Luminance
- Here, you can adjust the display’s Backlight setting to one that meets or exceeds your target luminance
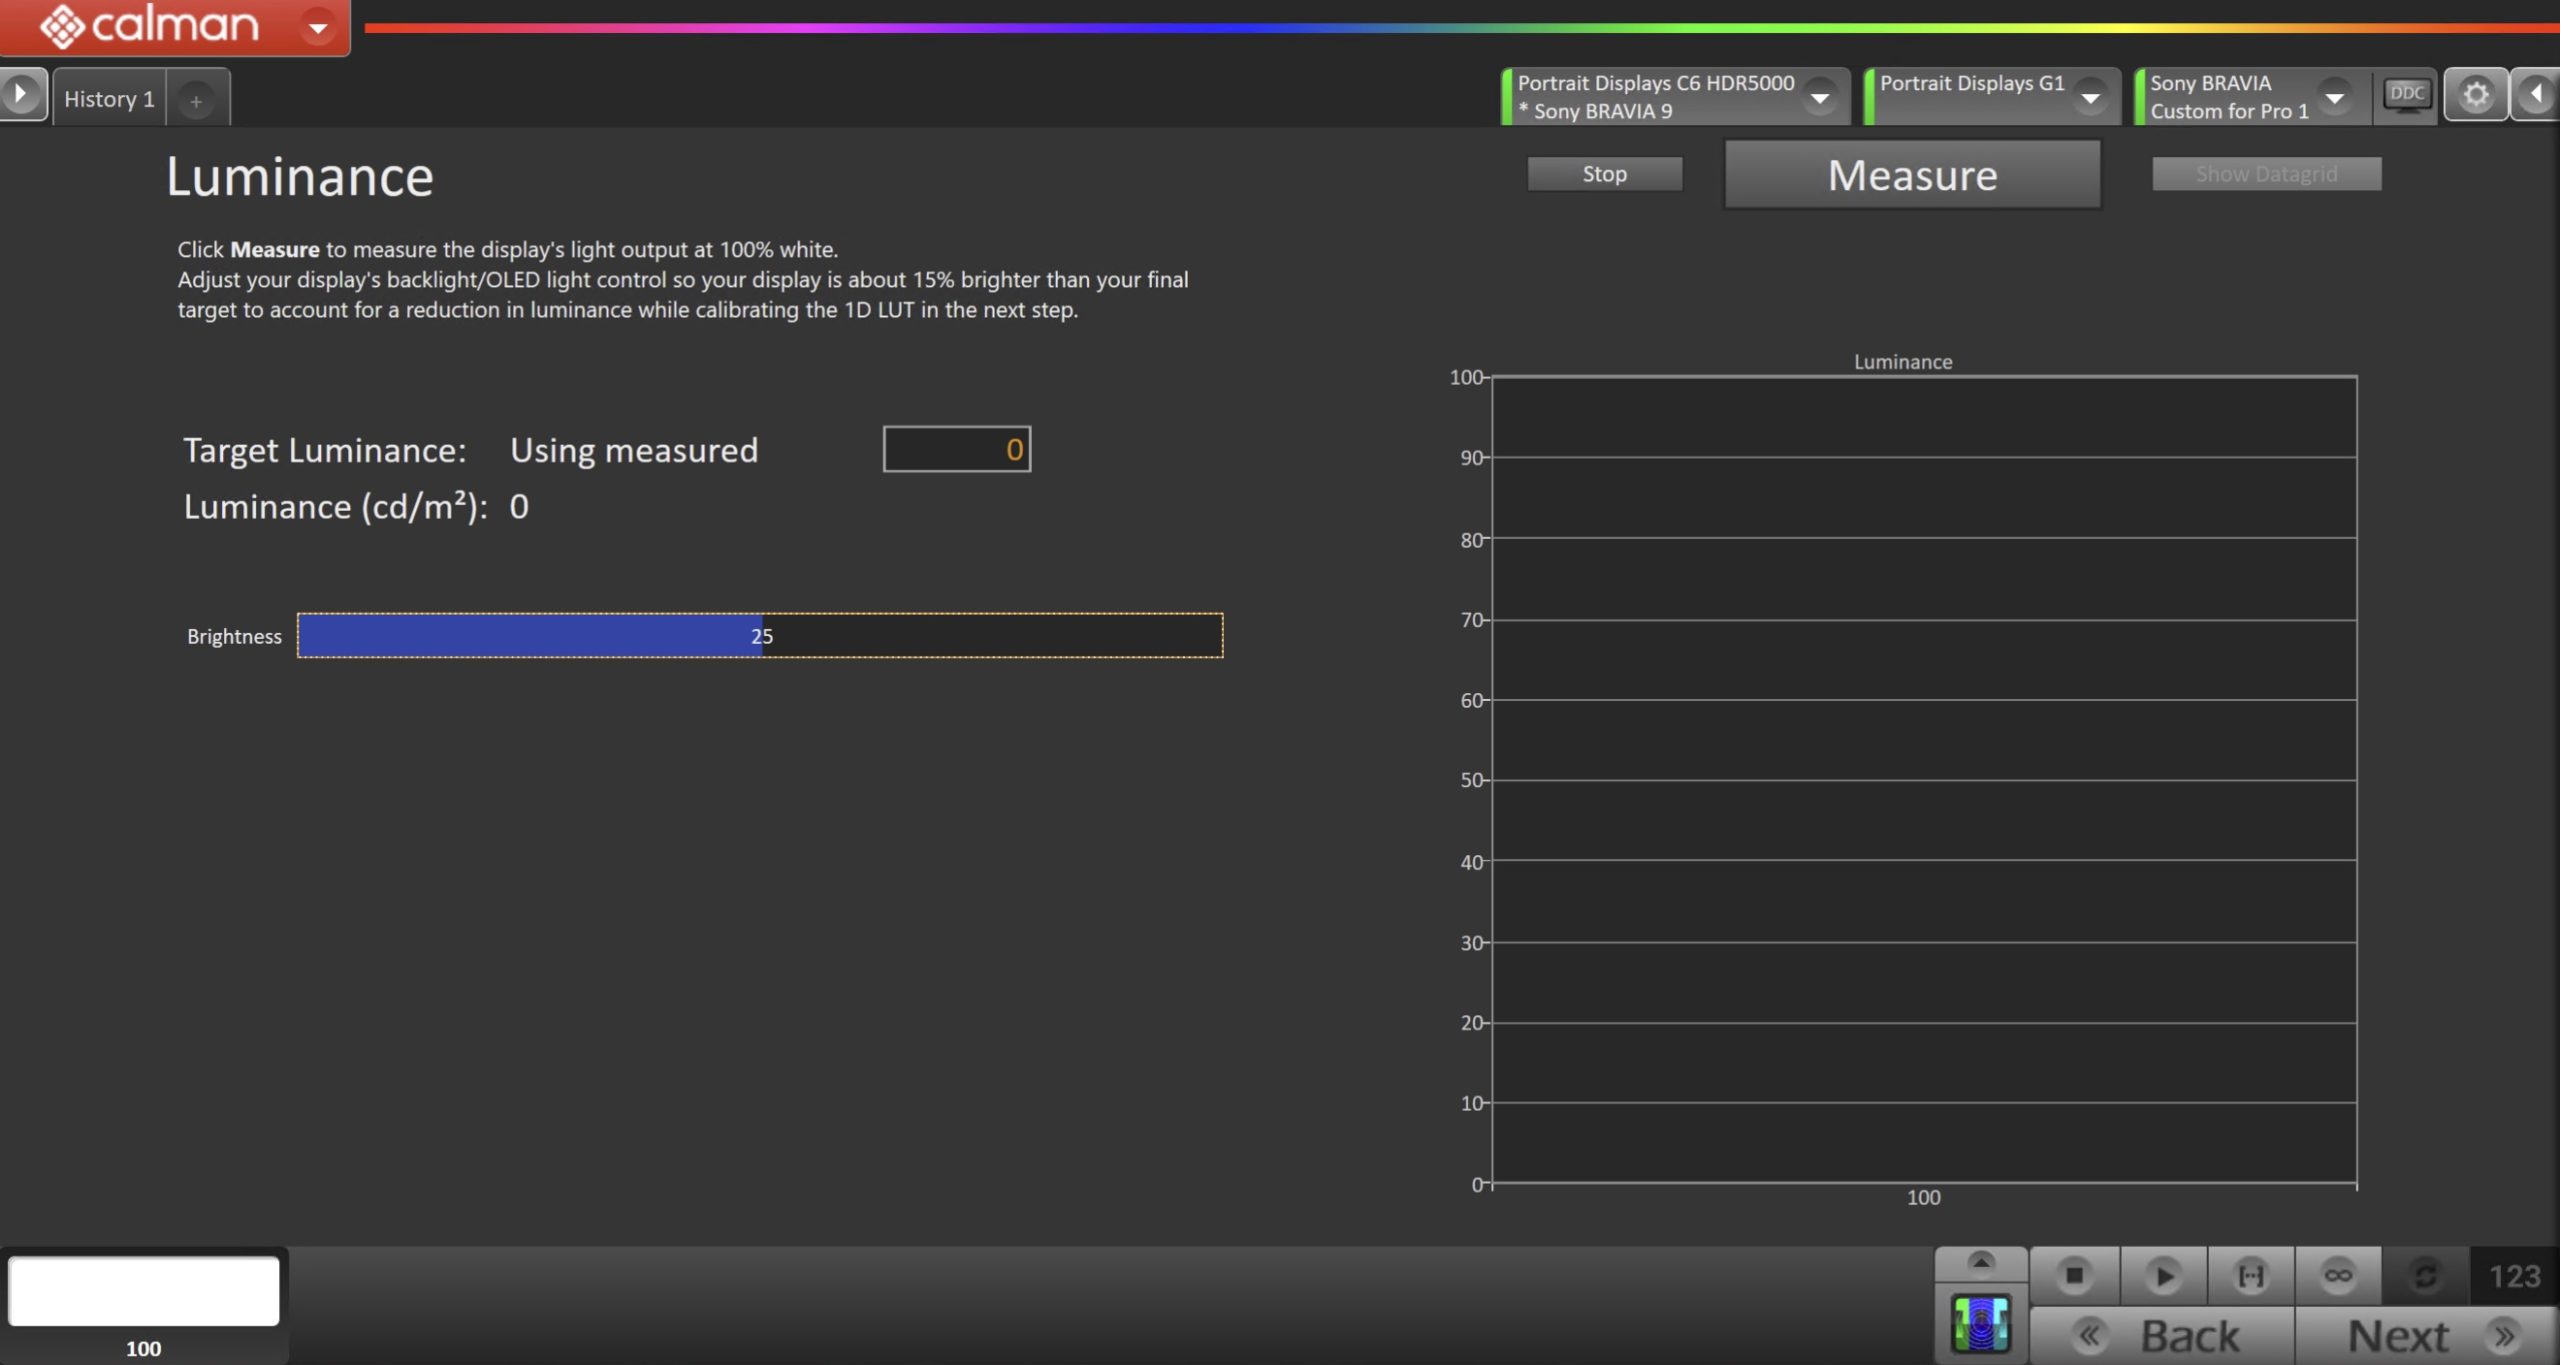
- Click Measure and adjust the Backlight slider as needed.
- Click Next to proceed
Step 6
- Here, Calman will adjust the Multipoint Greyscale.
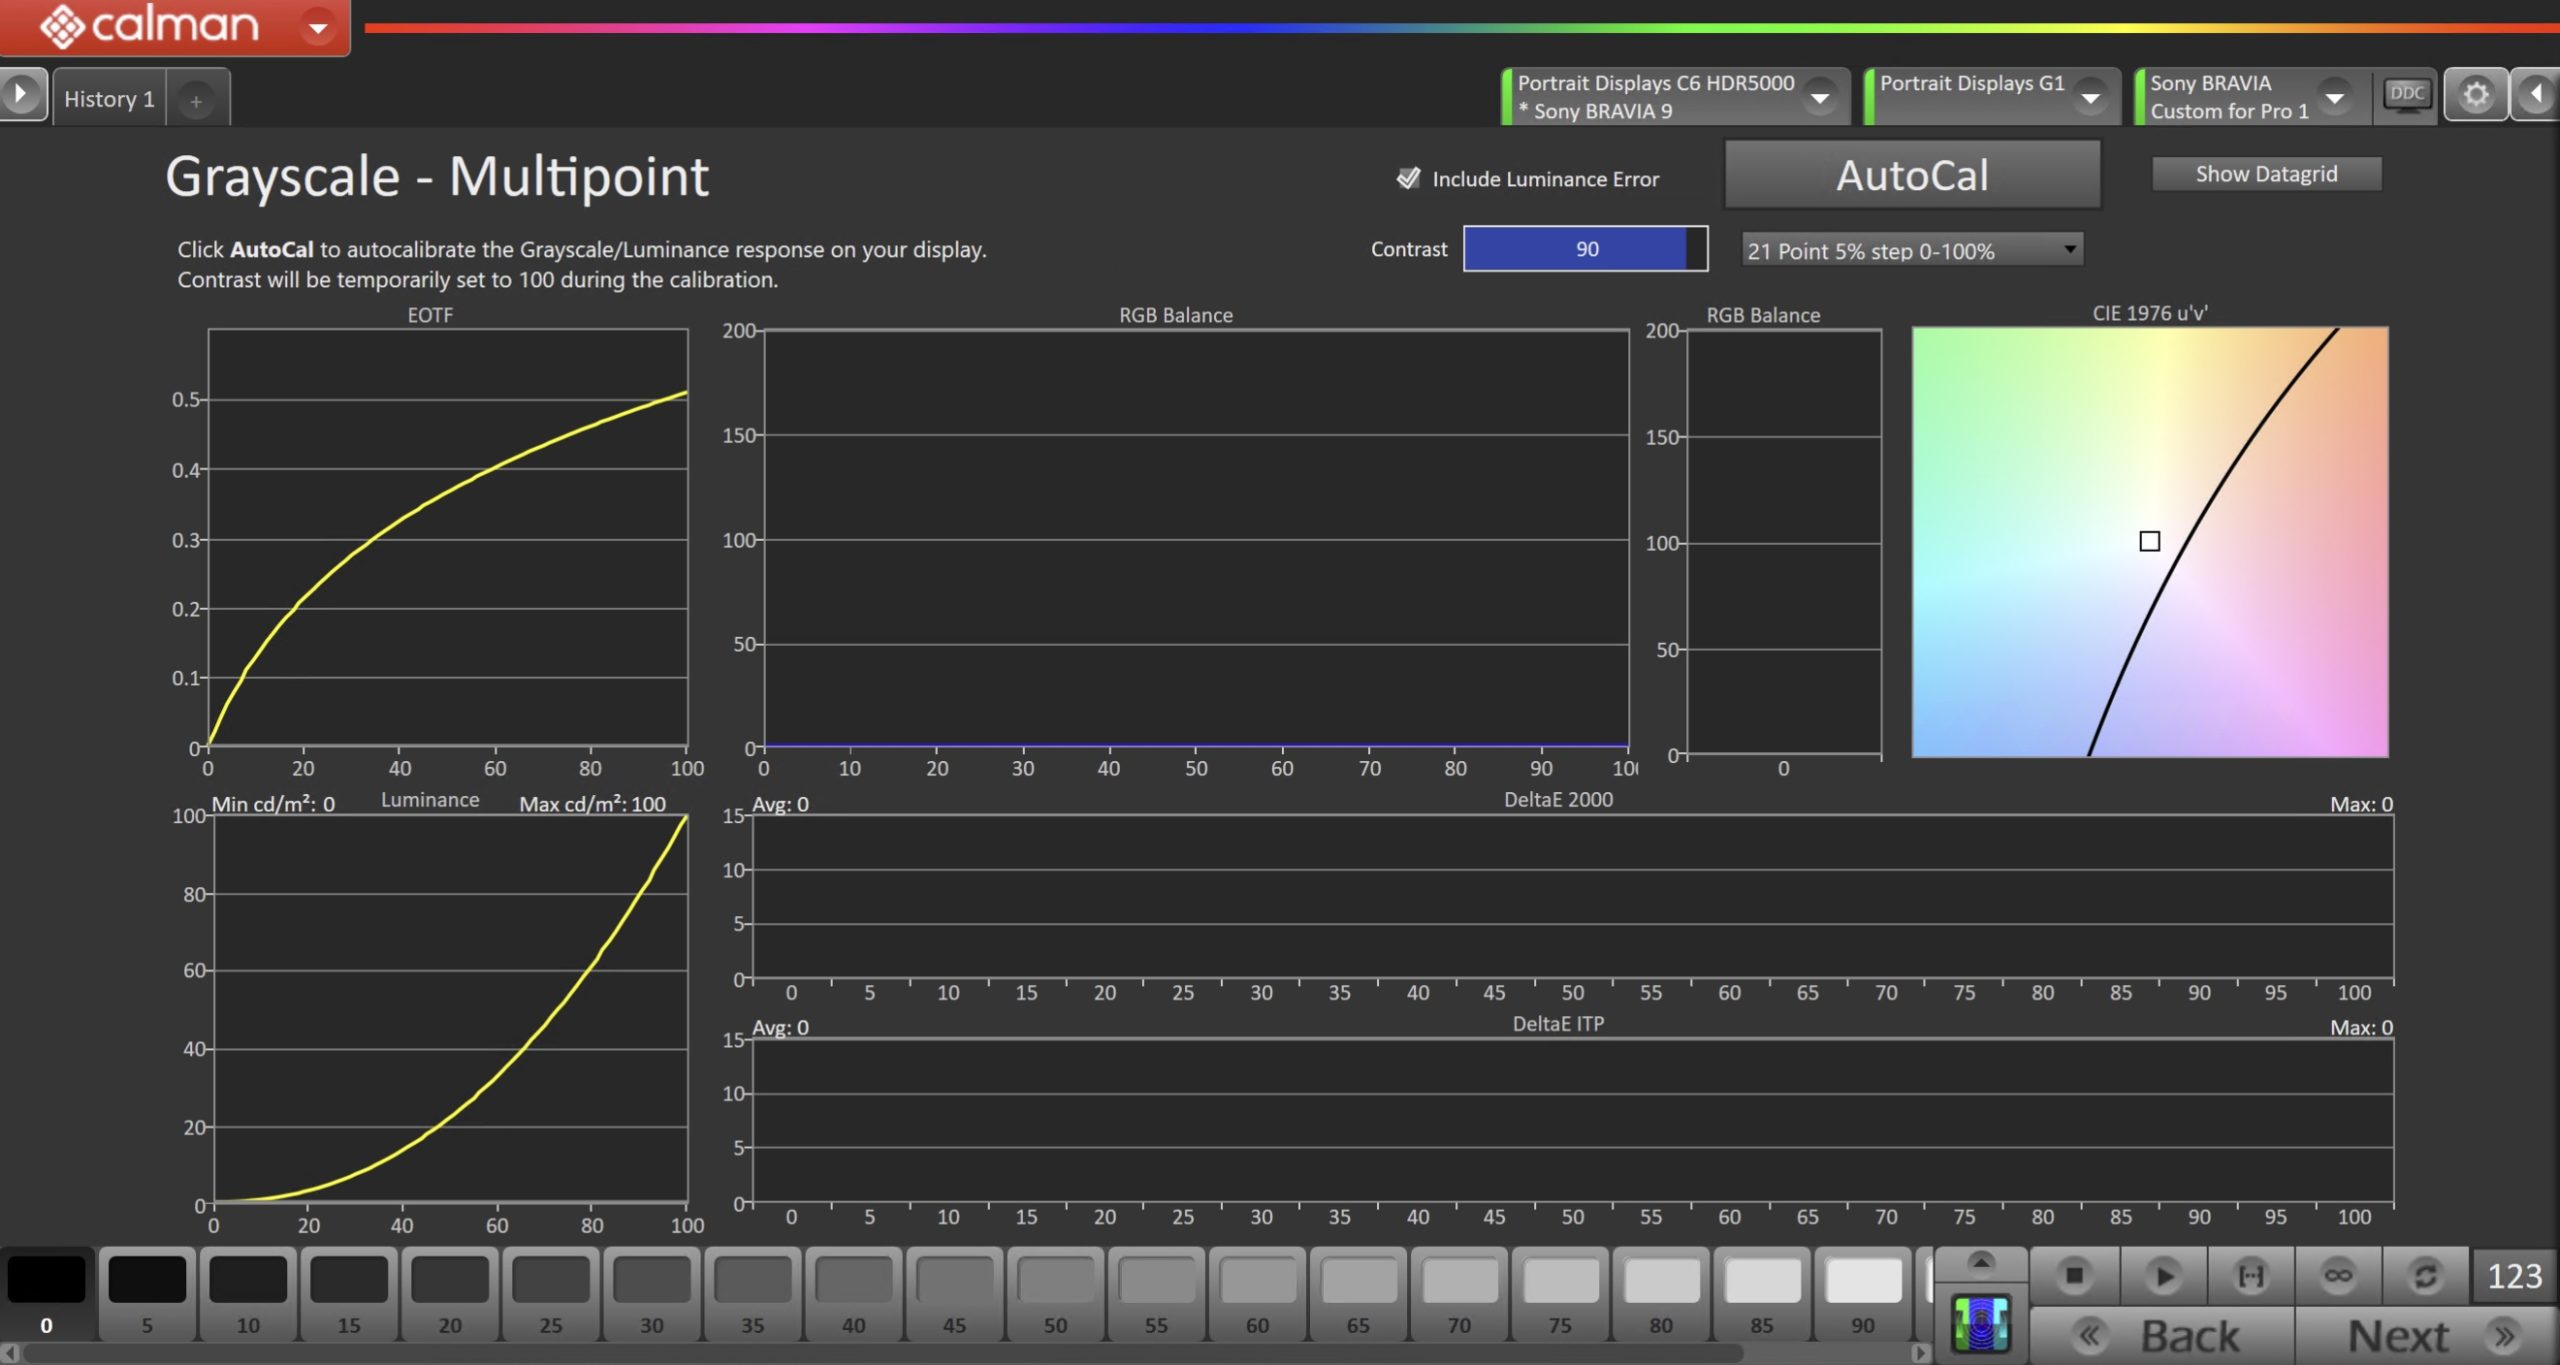
- Click the AutoCal button and select the correct data points in the AutoCal Dialog to auto-calibrate the Grayscale/Luminance response on the display.
- Note: After clicking the AutoCal Button, the contrast will temporarily be set to 100, which is required for the calibration and will be automatically reverted following.
- Click OK to begin greyscale AutoCal.
- When AutoCal is complete, click the Next button to proceed.
Step 7
- On this page, Calman will calibrate the Color Gamut via built-in CMS controls.
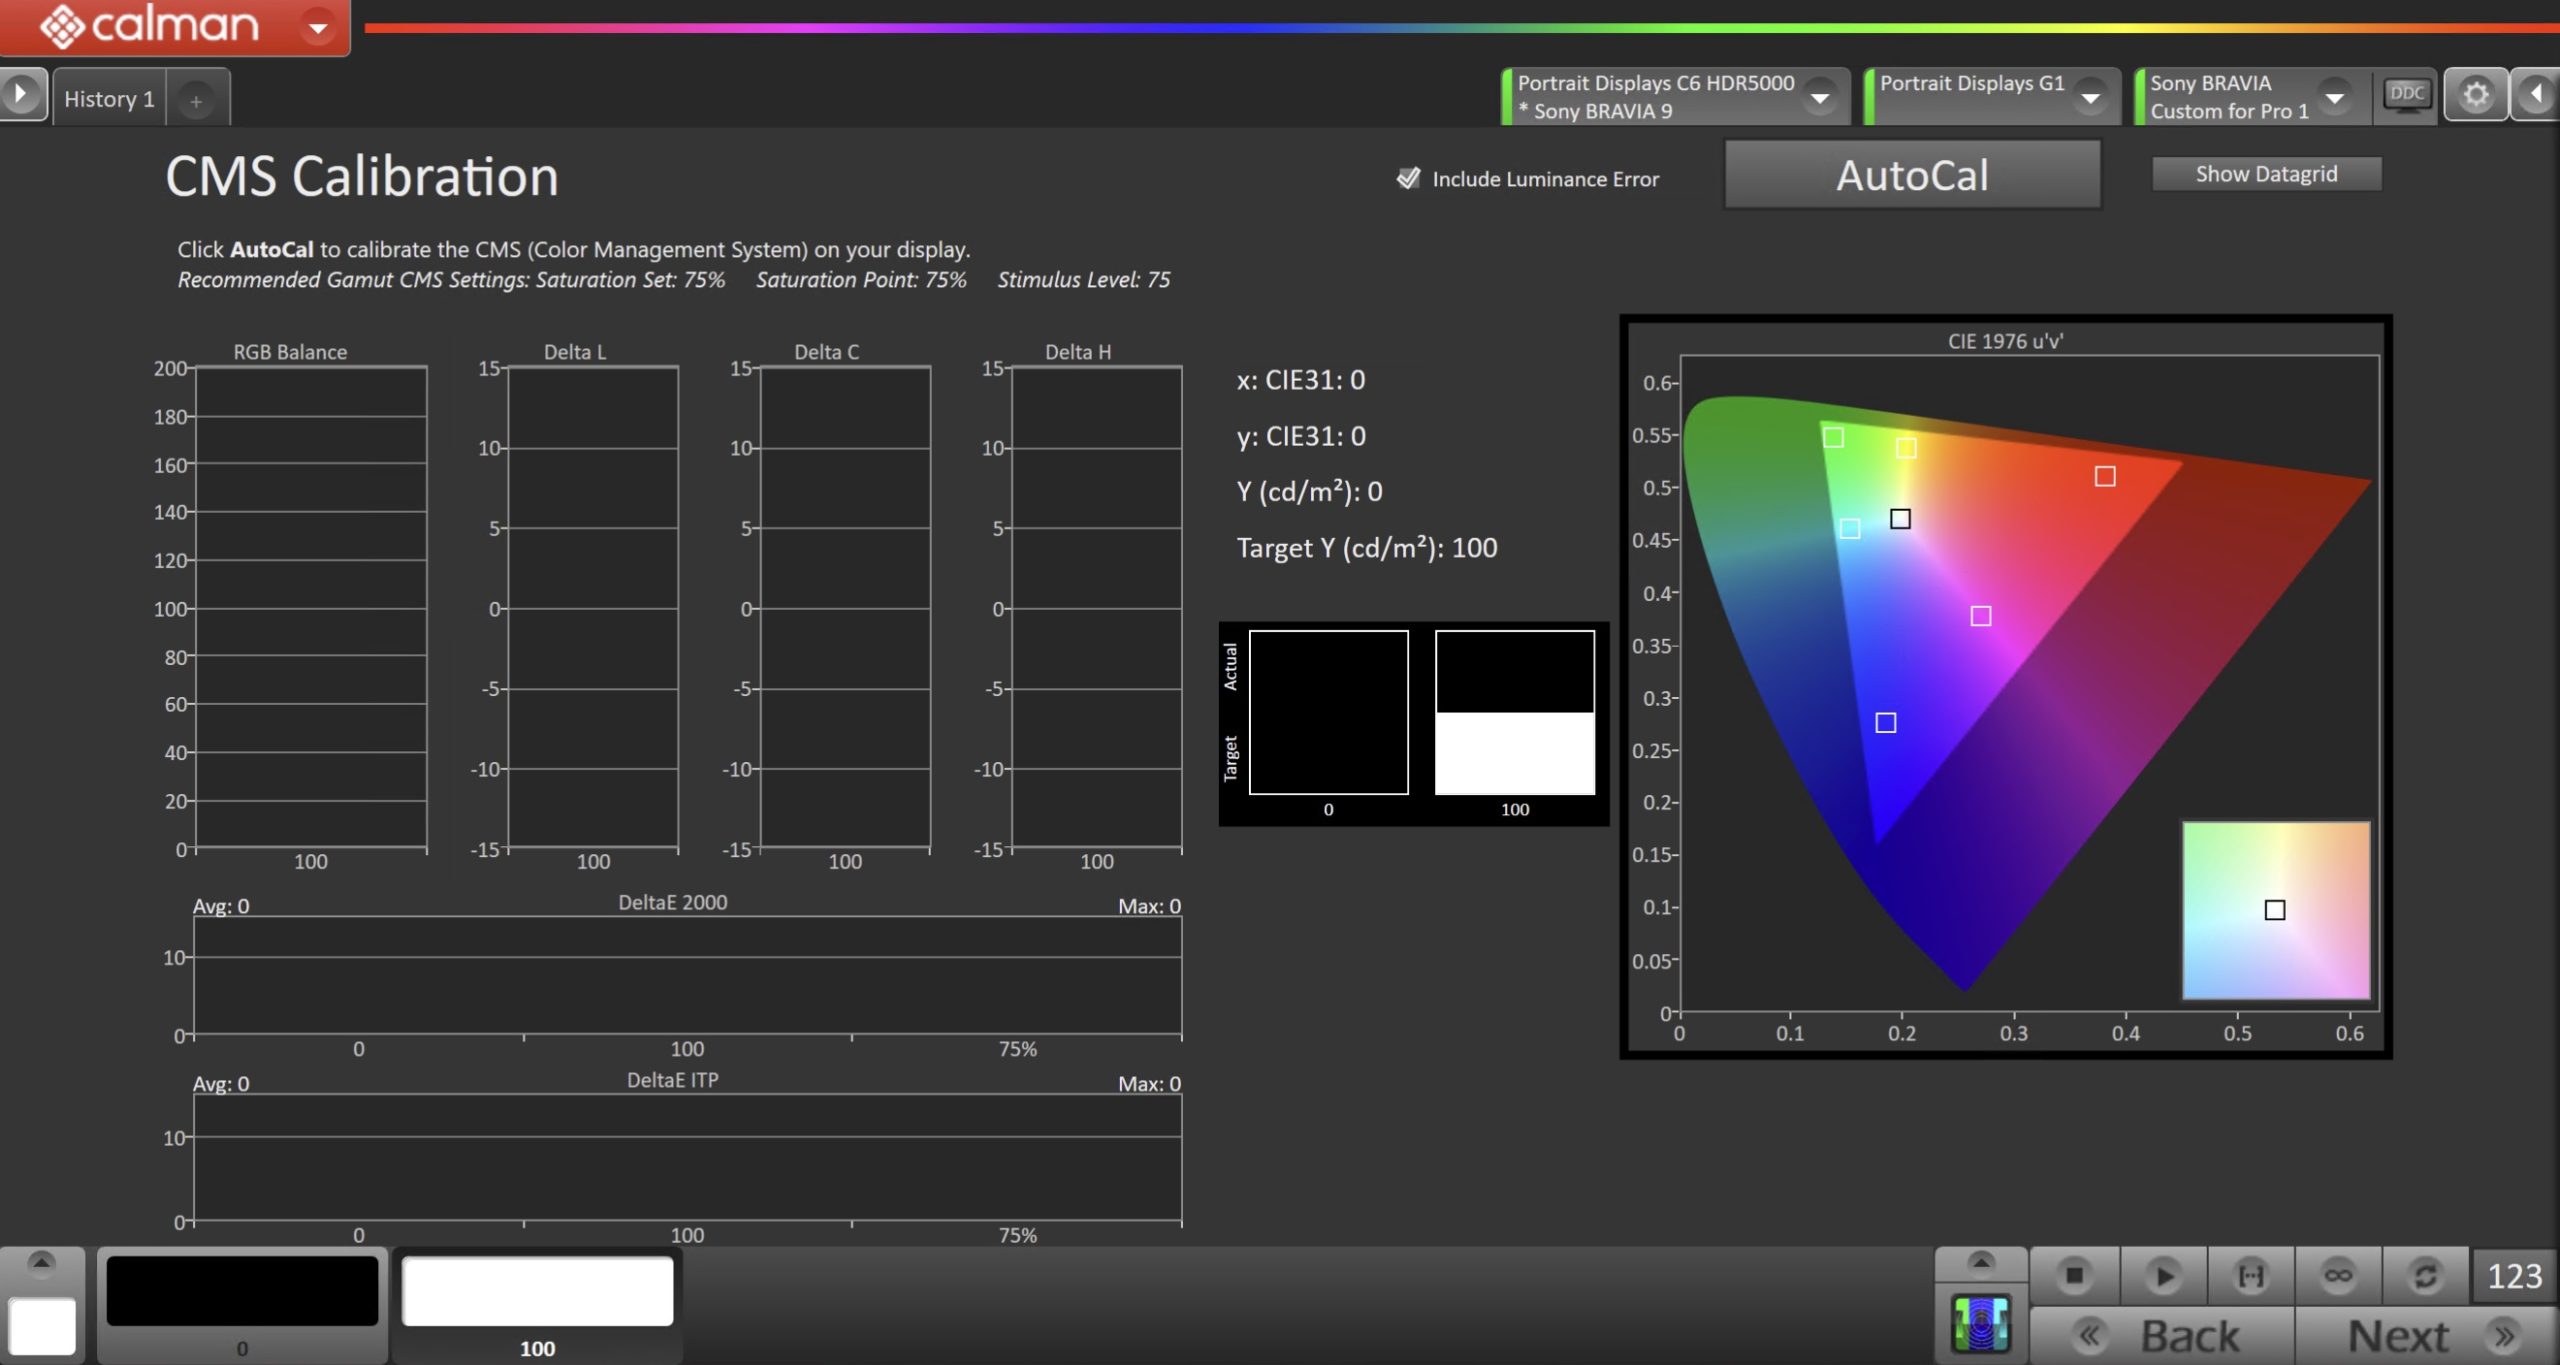
- Press the AutoCal button to open the AutoCal dialog
- Recommended Gamut CMS Settings:
- Saturation Set: 75%
- Saturation Point: 75%
- Stimulus Level: 75
- Recommended Gamut CMS Settings:
- Click OK to begin the colorspace AutoCal process
- When AutoCal is complete, press the Next button to proceed
Step 8
To account for behavior that occurs on some Sony models when disconnecting from the Calman for Bravia app, please follow these steps closely
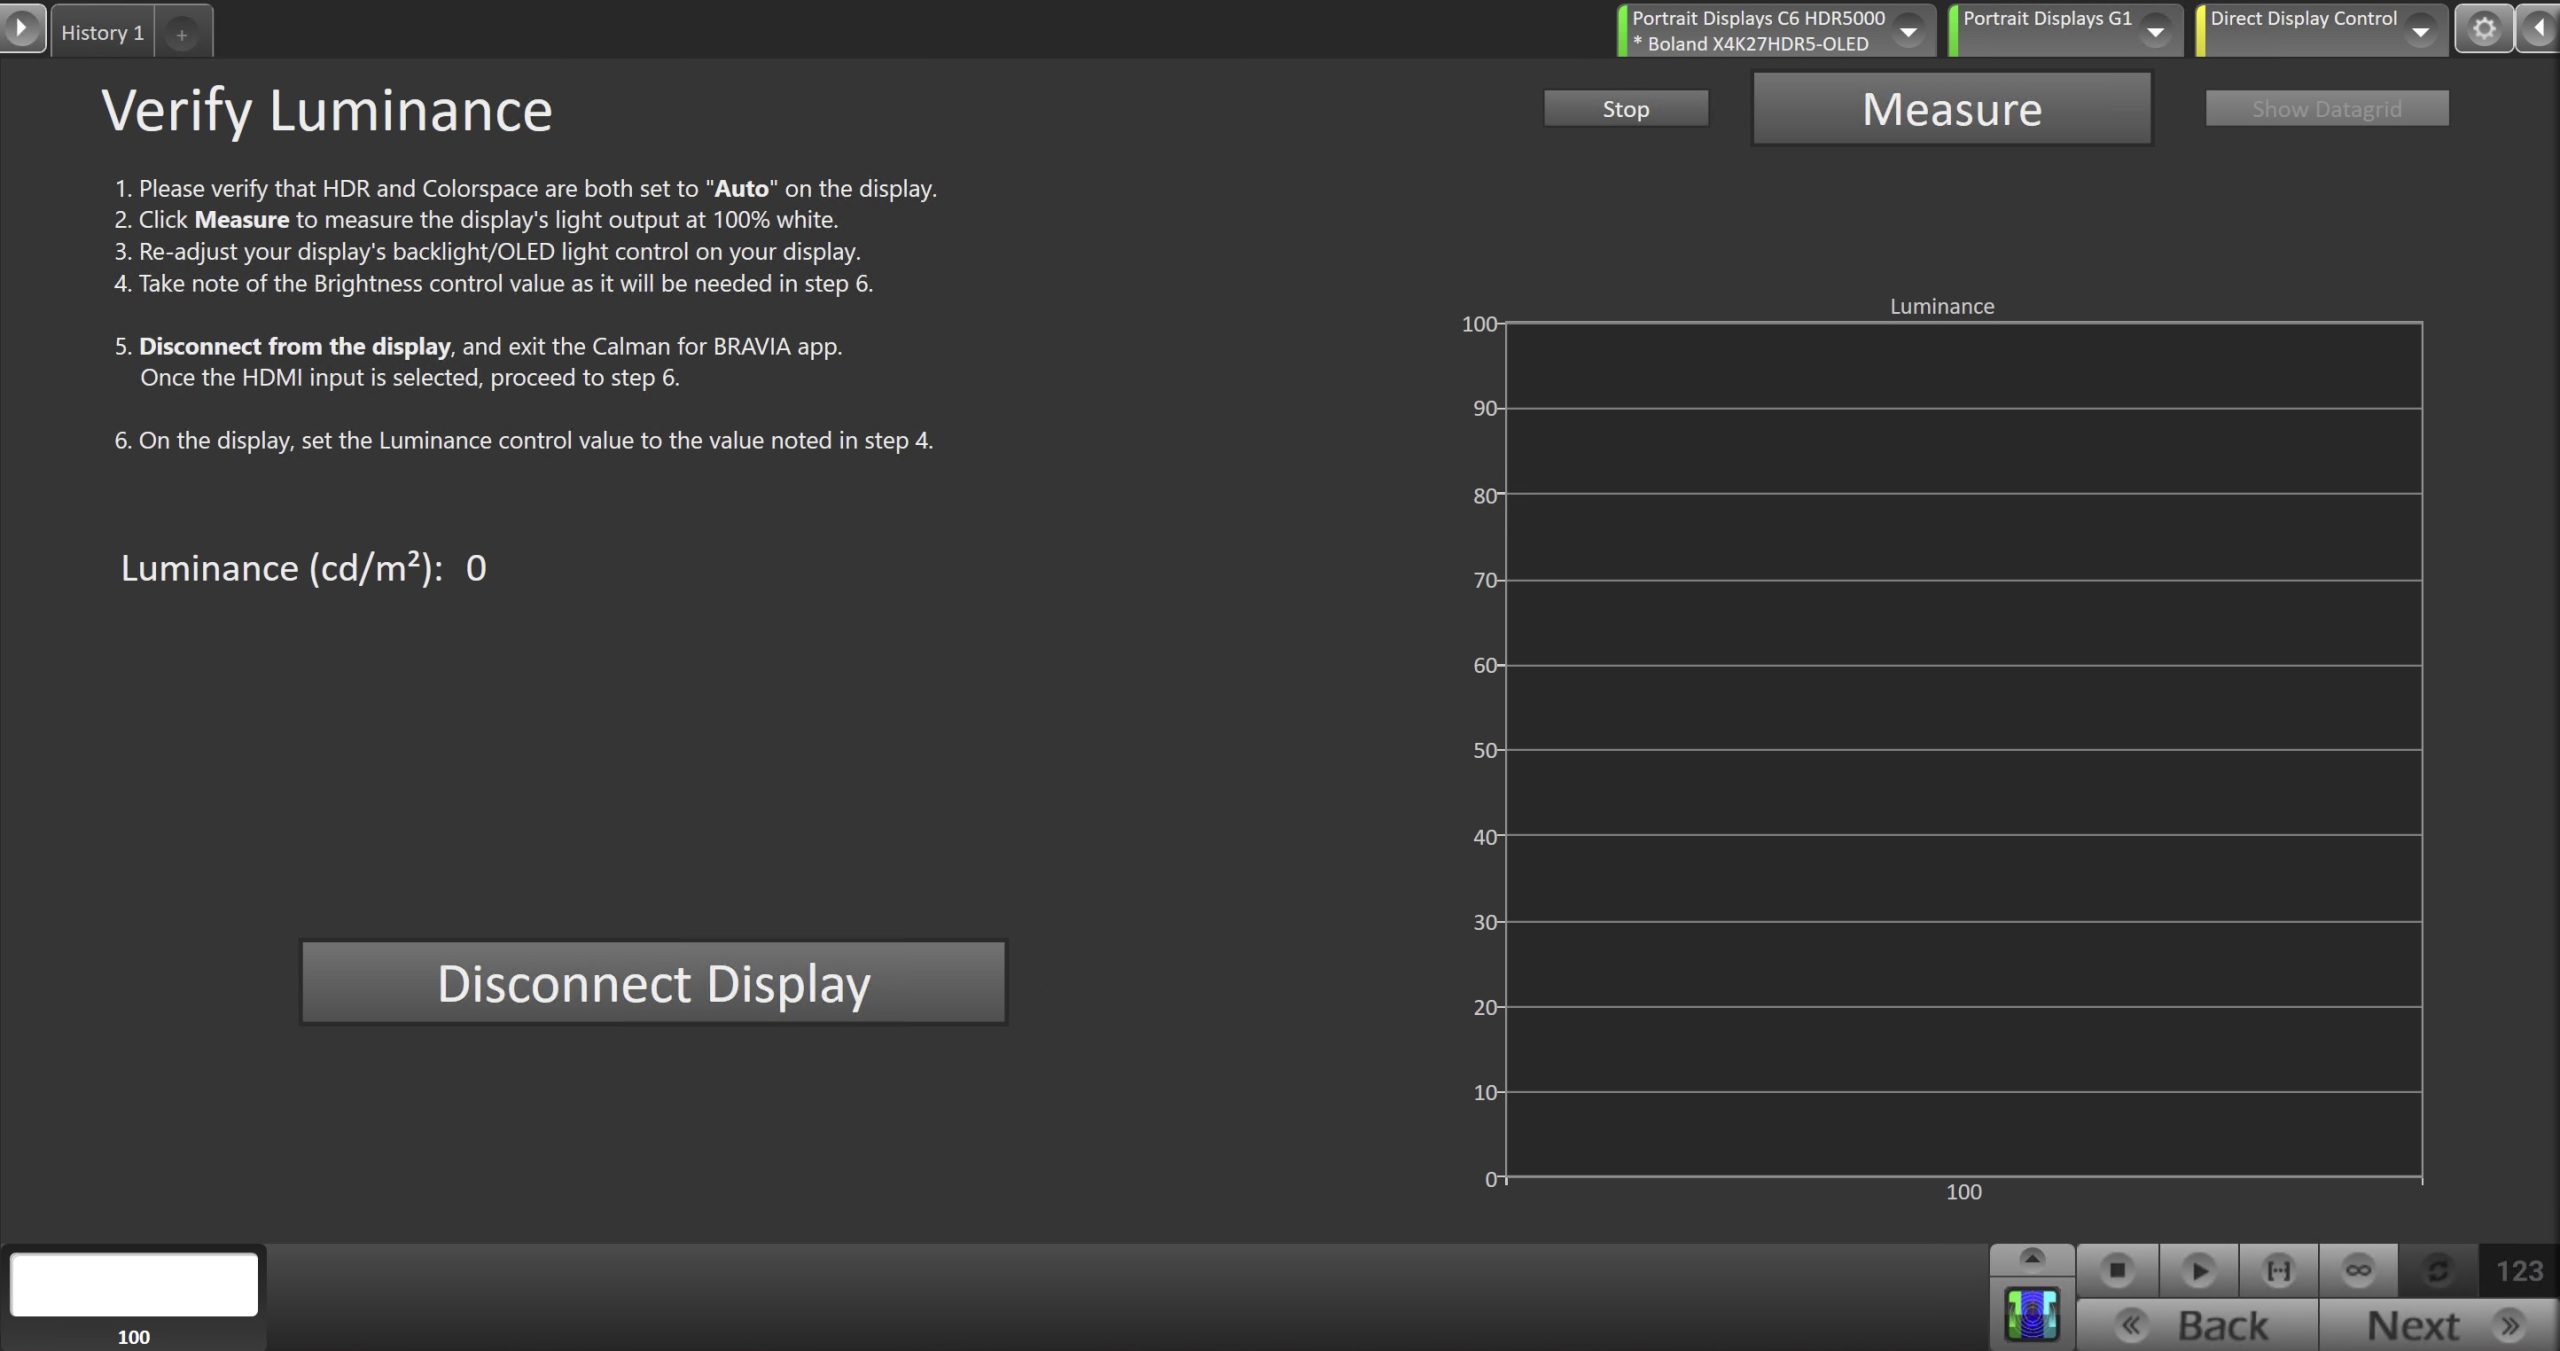
- Please verify that HDR and Colorspace are both set to “Auto” on the display.
- Click Measure to measure the display’s light output at 100% white.
- Re-adjust your display’s backlight/OLED light control on your display.
- Take note of the Brightness control value as it will be needed in step 6.
- Disconnect from the display, and exit the Calman for BRAVIA app.
- Once the HDMI input is selected, proceed to step 6.
- On the display, set the Luminance control value to the value noted in step 4.
Step 9
- In this step, you’ll take measurements of the calibration results.
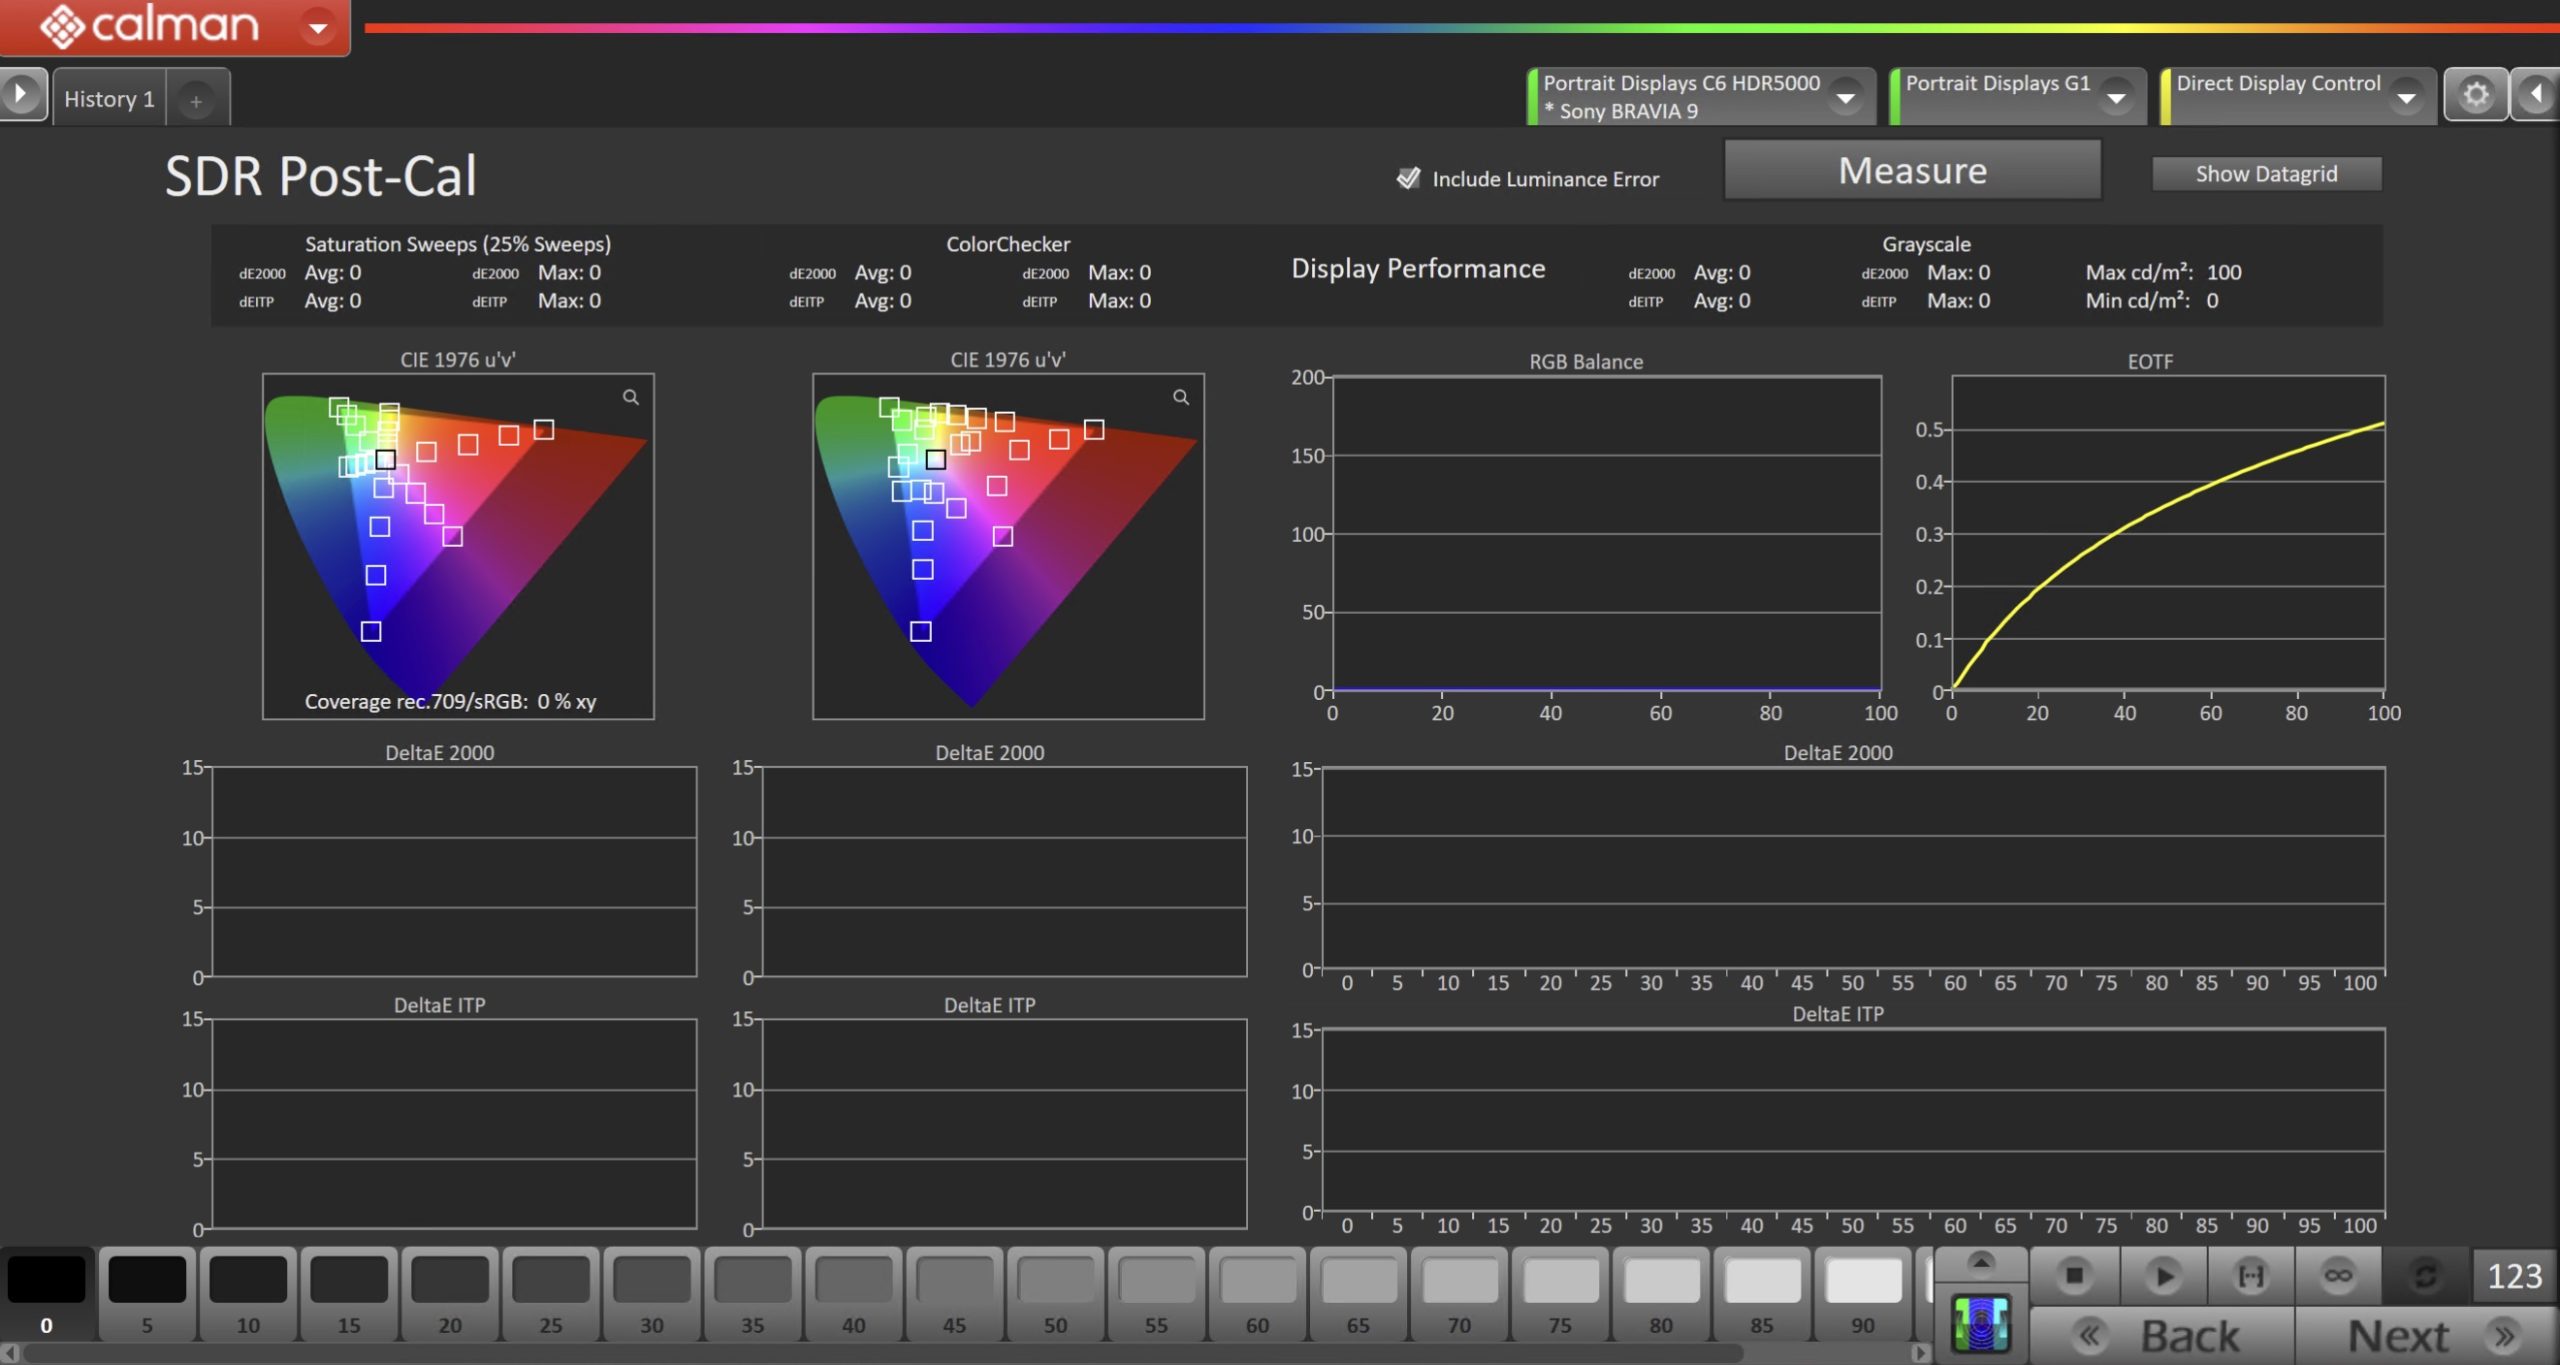
- To take Post-Calibration Measurements, click the Measure button to measure the display’s grayscale and color response.
- Click Next to proceed

- On the Calibration Complete page, you can choose to…
- Save and Report
- Select Save and Report to generate the calibration report
- View Comparison
- Displays Pre and Post Calibration measurements of the calibrated mode side-by-side
- Restart
- Returns to the beginning of the workflow where a new mode or colorspace can be selected
- Note: Does not save workflow data
- Save and Report