Calman Home for Philips can automatically calibrate supported 2021 and newer models.


Calman Required Version
- Calman Home for Philips v5.15.2 or newer
Required Hardware
- HDR Compatible Pattern Generator
- HDR Compatible Meter
- For information see Calman Compatible Meters
- Calman Compatible Philips TV
- 2021
- OLED: 9×6/8×6/7×6
- miniLED/LCD: 95×6/9636/9xx6
- TV software version: TPM211EA_R.001.001.233.026 or newer
- 2022
- OLED: 9×7/8×7/7×7
- miniLED/LCD: 95×7/88×7/85×7.
- Only SDR calibration is supported in 85×7.
- TV software version: TPM211EA_R.101.000.178.206 or newer
- 2023 Google TV
- OLED: 9×8/8×8/7×8
- miniLED/LCD: 91×8/88×8/85×8.
- TV software version: TPM231WW_R.001.001.032.028 or newer
- 2023 TitanOS TV
- miniLED: 93×8/90×8
- TV software version: TPN238E.238.002.142.131 or newer
- 2024 Google TV
- OLED: 9×9/8×9
- miniLED/LCD: 91×9/88×9.
- TV software version: TPM231WW_R.101.001.148.226 or newer
- 2021
- TV setup:
- Complete TV network setup and ensure TV is connected to the same local area network (e.g. router) as the computer running Calman software
- Connect the Calman-supported pattern generator to the TV’s HDMI port 1 with a certified (at least HDMI 2.0 grade) cable.
Each step of this workflow has been optimized to display relevant information, and automatically configure common settings. Both Pre-Calibration and Post-Calibration measurement steps are included for comparing pre- and post-performance.
Note: For best results, the workflow steps should be performed in order, as many steps include automation designed to be performed in order
Step 1
- From the Calman Menu in the top-left, choose Open Workflow Template and then Philips AutoCal
- On the introduction screen, choose the Display Type (OLED/LCD) and Colorspace Target (SDR/HDR)
- This pre-configures the workflow for the desired targets.
- At the end of the selected workflow, you will have the chance to proceed to another colorspace target
Step 2
Connect your Colorimeter and Pattern Generator to Calman.
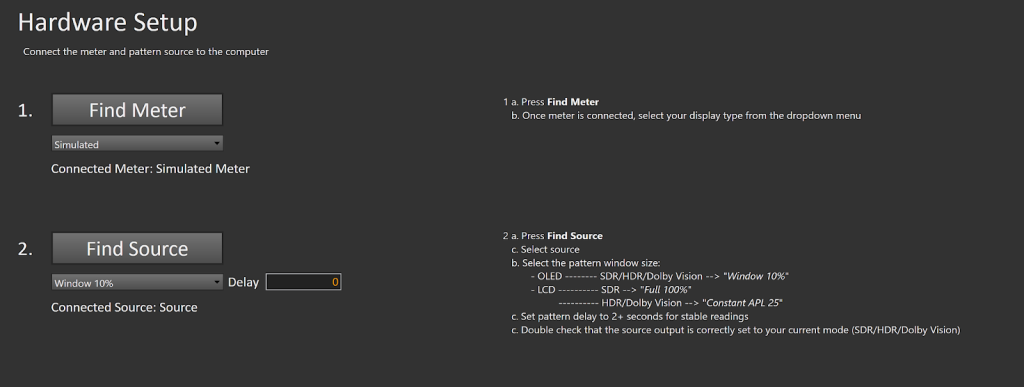
- Plug your meter into a USB port on the computer and press the Find Meter button on the left
- When your meter is connected, select your display type from the dropdown (this will vary by meter)
- Connect Pattern Source to your computer.
- Click the Find Source button then select your source
- Select the pattern window size
- OLED: Window 10%
- LCD: 100% full-screen (SDR), APL 25 (HDR)
- Set pattern delay to 2+ seconds for stable readings
Step 3
Confirm your calibration targets, which have been pre-configured based on suggested values
- Preset Targets:
- Colorspace: rec.709
- Gamma Formula: Power 2.2
- Whitepoint: D65
- dE Formula Info:
- dE ITP –> Maximum accuracy
- dE ICtCp 240 –> Improved speed, some tradeoff in accuracy
- More Info
- Grayscale Calibration Method info: (2023 and older displays)
- RGB Gains only produces excellent results for a Power Function 2.2 curve
- 1D LUT would be better for other Gamma formulas/targets
- 2024+ displays will not have this choice, but will automatically configure for Multipoint Greyscale.
Step 4
Pattern insertion is used to help avoid panel temp fluctuations and to keep the display from dimming due to burn-in protection algorithms. These are used with OLED panels only and can be set by using the SDR/HDR defaults button embedded in the workflow
- Calman Defaults (SDR – OLED)
- Pattern Insertion
- Frequency – 45
- Duration – 5
- Level – 25
- Pattern Stabilization
- Patches – 1
- Duration – 1
- Level – 10
- Pattern Insertion
- Calman Defaults (HDR – OLED)
- Pattern Insertion
- Frequency – 5
- Duration – 5
- Level – 25
- Pattern Stabilization
- Patches – 1
- Duration – 1
- Level – 10
- Pattern Insertion
Step 5
In this step, you’ll take readings of your display before the calibration. These will be used to compare your calibration results
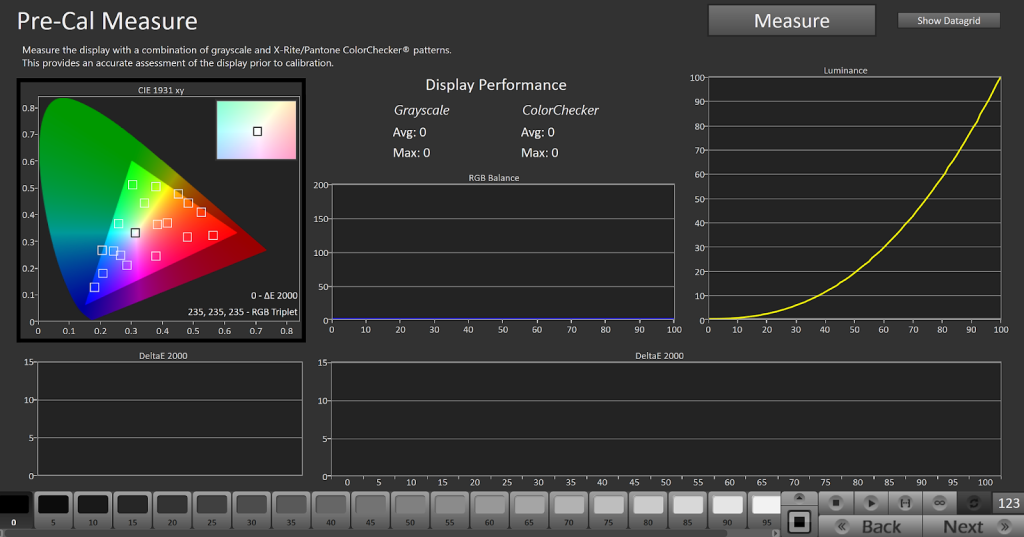
- To take Pre-Calibration Measurements click the Measure or Read Series […] button to measure the display’s grayscale and ColorChecker response
- This will provide a point of reference to compare your calibration results
Step 6
Connect to, and prepare your Philips TV for calibration
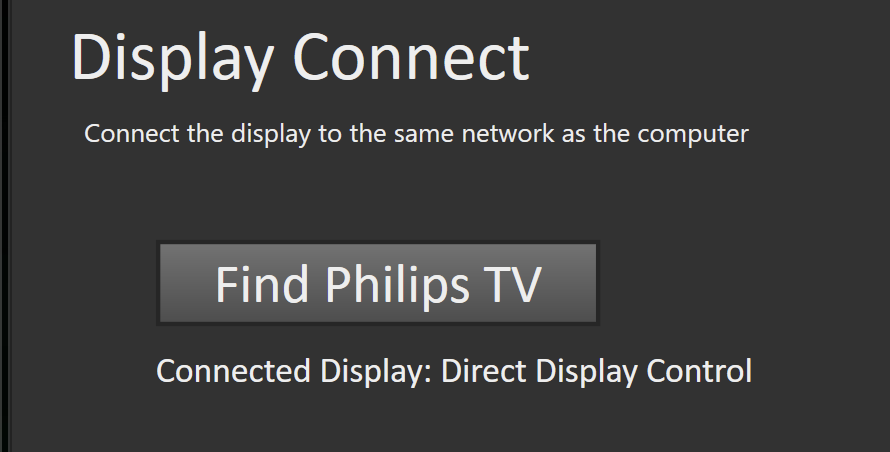
- Connecting to Philips TV:
- Select Frequent Settings > All Settings > Picture > AI Picture
- Select Calman (if locked press 225626 on the remote)
- Press the Green button on the remote to initialize the calibration connection
- Click Find Philips TV and enter the IP address that is displayed on the TV
- After a successful connection, click Next
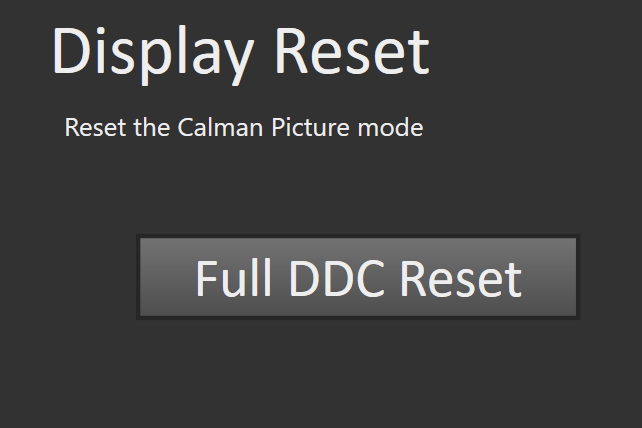
- Click Full DDC Reset to prepare the TV for calibration
Step 7
For SDR calibration, you will set your overall luminance in this step. For HDR calibration this step is not present
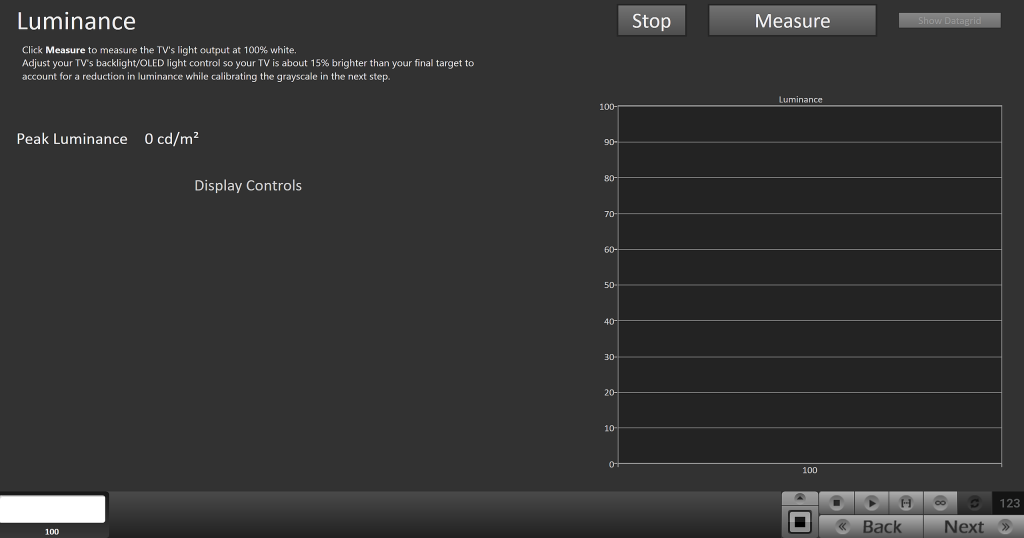
- Click Measure to measure the TV’s light output at 100% white.
- Adjust your TV’s backlight/OLED light control so your TV is about 15% brighter than your final target to account for a reduction in luminance while calibrating the grayscale in the next step.
- Luminance is a subjective target. SDR reference luminance is 100nits, but you may need to target higher to account for the ambient light in your environment.
Step 8
Here Calman will adjust the Multipoint Greyscale of your display.
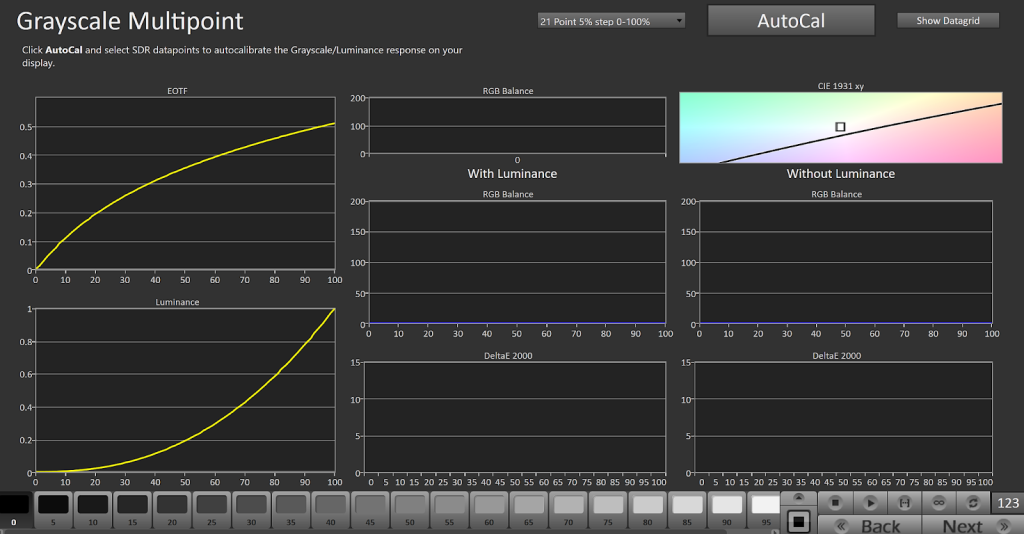
- Click AutoCal and select SDR or HDR datapoints to auto-calibrate the Grayscale/Luminance response on your display.
- For HDR calibration, ensure Tone Mapping is re-enabled on the next page
Step 9
On this page, present only for SDR calibration, Calman will adjust the Colorspace/CMS controls on your display.
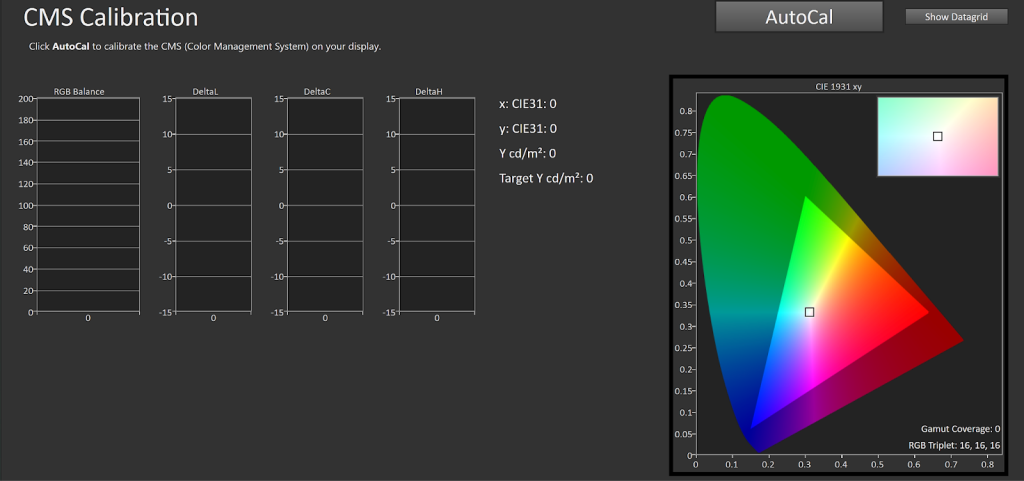
- Click AutoCal to calibrate the CMS (Color Management System) on your display.
Step 10
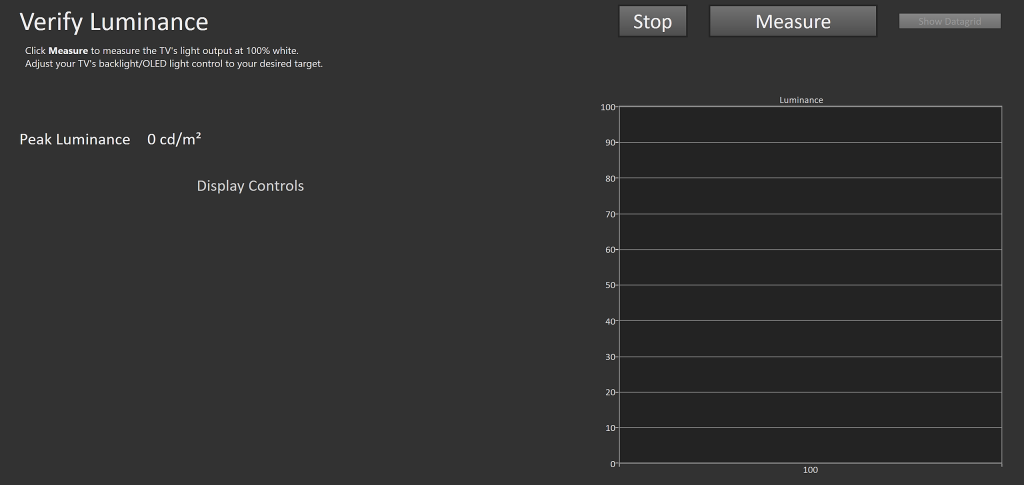
For SDR calibration, it is common for overall Luminance to change following calibration. Here you can verify and adjust your luminance if needed using the embedded backlight control
Step 11
In this step, you’ll take readings of your display after the calibration. These will be used to compare your calibration results

Step 12
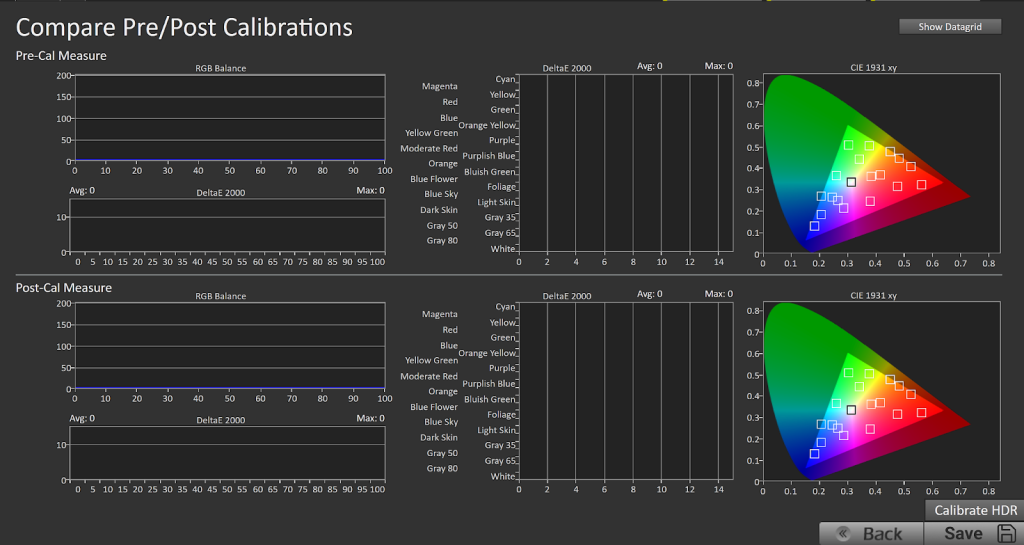
- Pre (top) and Post (bottom) calibration information will show the calibration results.
- Click Save Data to complete this calibration.