
Apple CMF 2026 is an all-new Color Matching Function (CMF) developed by Apple and included in Calman 5 Ultimate for display matching. The goal of Apple CMF 2026 is to improve perceptual white point agreement between displays that have fundamentally different spectral characteristics—especially in situations where traditional calibration approaches produce “correct” readings, but a visibly imperfect match.
More Info:
- Studio Display XDR Technology Overview White Paper
- Measure the calibration of your MacBook Pro with Liquid Retina XDR display, Apple Studio Display XDR, Apple Studio Display, or Apple Pro Display XDR
Why CMFs matter in display calibration
In colorimetry, meters do not “see” color the way humans do. Instead, meters measure light and then convert those measurements into color values. A Color Matching Function is the mathematical relationship used to translate a light spectrum into tristimulus values (XYZ) and chromaticity (x, y) for a specific “observer” model (for example, the widely used CIE 1931 Standard Observer). In practical terms:
- A spectral meter (spectrophotometer/spectroradiometer) can measure intensity across wavelength and then compute XYZ by applying the selected CMF in software.
- A filter-based tristimulus colorimeter estimates XYZ by measuring through RGB filters designed to approximate the CIE 1931 observer curves, and then converting those readings to XYZ via calibration tables/matrices.
This is one reason different meter types, and different display technologies, can behave very differently in the real world, even when targeting the same published standard.
Why calibrating both to D65 can still look wrong
Modern display technologies often have very different spectral power distributions (SPDs) (OLED, WOLED, QD-OLED, LED/LCD phosphor systems, laser projection, etc.). Two displays can be adjusted to measure the same chromaticity under a standard observer (such as CIE 1931) and still show a visible mismatch, particularly in near-neutral grays and highlights, because the underlying spectra can differ dramatically.
This phenomenon is commonly described in terms of metamerism: spectra that produce the same measured tristimulus values for a given observer model may not produce the same visual match for real observers (and real viewing conditions). This is exactly why some “display matching” workflows rely on perceptual checks and why multiple viewers are often recommended when approving a critical match.
What is unique about Apple CMF 2026
Apple CMF 2026 is currently scoped to white point only. In other words, it is designed to improve the perceptual alignment of the display’s neutral axis by using a new CMF-based approach to the D65 target, while leaving your primary calibration targets (colorspace, EOTF/gamma, and gamut mapping) anchored to the standard target.
Because it focuses on a new calculation approach around the D65 spectrum, the recommended usage is intentionally two-stage:
- Calibrate normally (standard workflow):
Use Calman’s built-in workflows to calibrate each display to your desired standard targets—e.g., BT.2020 / ST.2084 for HDR—using the standard CMF basis (typically CIE 1931) for both white point and gamut/grayscale behavior. - Apply an Apple CMF 2026 white point offset via the Apple CMF 2026 workflow:
After both displays meet the standard targets, use the Apple CMF 2026 workflow to evaluate and, if needed, fine-tune only the white point using Apple CMF 2026 as the measurement basis.
The Apple CMF 2026 workflow provides two practical paths:
- Verification path (measurement-only):
Quantify how close your post-calibration white point is to the Apple CMF 2026 target, without changing the display. - Calibration path (white point alignment):
Make a controlled white point adjustment so both displays converge on the Apple CMF 2026 white point target:
x = 0.3144, y = 0.3302 (when measured in Apple CMF 2026)
Note: Chromaticity coordinates depend on the observer/CMF used. A “D65” target expressed under one CMF (e.g., CIE 1931) will not necessarily have the same numerical x,y values under a different CMF. Always interpret the Apple CMF 2026 target values within Apple CMF 2026.
How this differs from legacy “match the reference display” workflows
Traditional perceptual matching often follows a “reference-first” pattern: calibrate the primary display, then use either (a) a perceptual visual match step, and/or (b) a measured alternate-observer/alternate-CMF reading on the reference display to create a derived target for the secondary display. That approach intentionally makes the secondary display “chase” the reference.
By contrast, Apple CMF 2026 is designed so that both displays target the same defined Apple CMF 2026 white point, rather than deriving a custom target from whichever reference display happens to be in front of you. The intent is a more repeatable, technology-agnostic matching process: both displays converge to one shared white point target under the Apple CMF 2026 measurement basis.
Meter requirement
The Apple CMF 2026 workflow is spectrophotometer-based. A spectrophotometer/spectroradiometer is required because this workflow depends on spectral information so Calman can apply the Apple CMF 2026 functions in software. Filter-based tristimulus colorimeters are designed around the CIE 1931 observer response and do not inherently provide the spectral data needed to compute accurate results under a new CMF.
Calman Required Version
- Calman Ultimate v5.17.1 or higher
Hardware Requirements
- Calman Compatible Meter
- Note: This workflow must be performed with a Spectrophotometer
- Calman Compatible Pattern Generator
Note: This workflow is designed to be used following a D65-targeted calibration has been completed on the display. The workflow will assist you in offsetting that calibration using Apple CMF 2026
Step 1
- From the Calman Menu in the top-left, choose Open Workflow Template -> Calman Tools and then Apple CMF 2026.
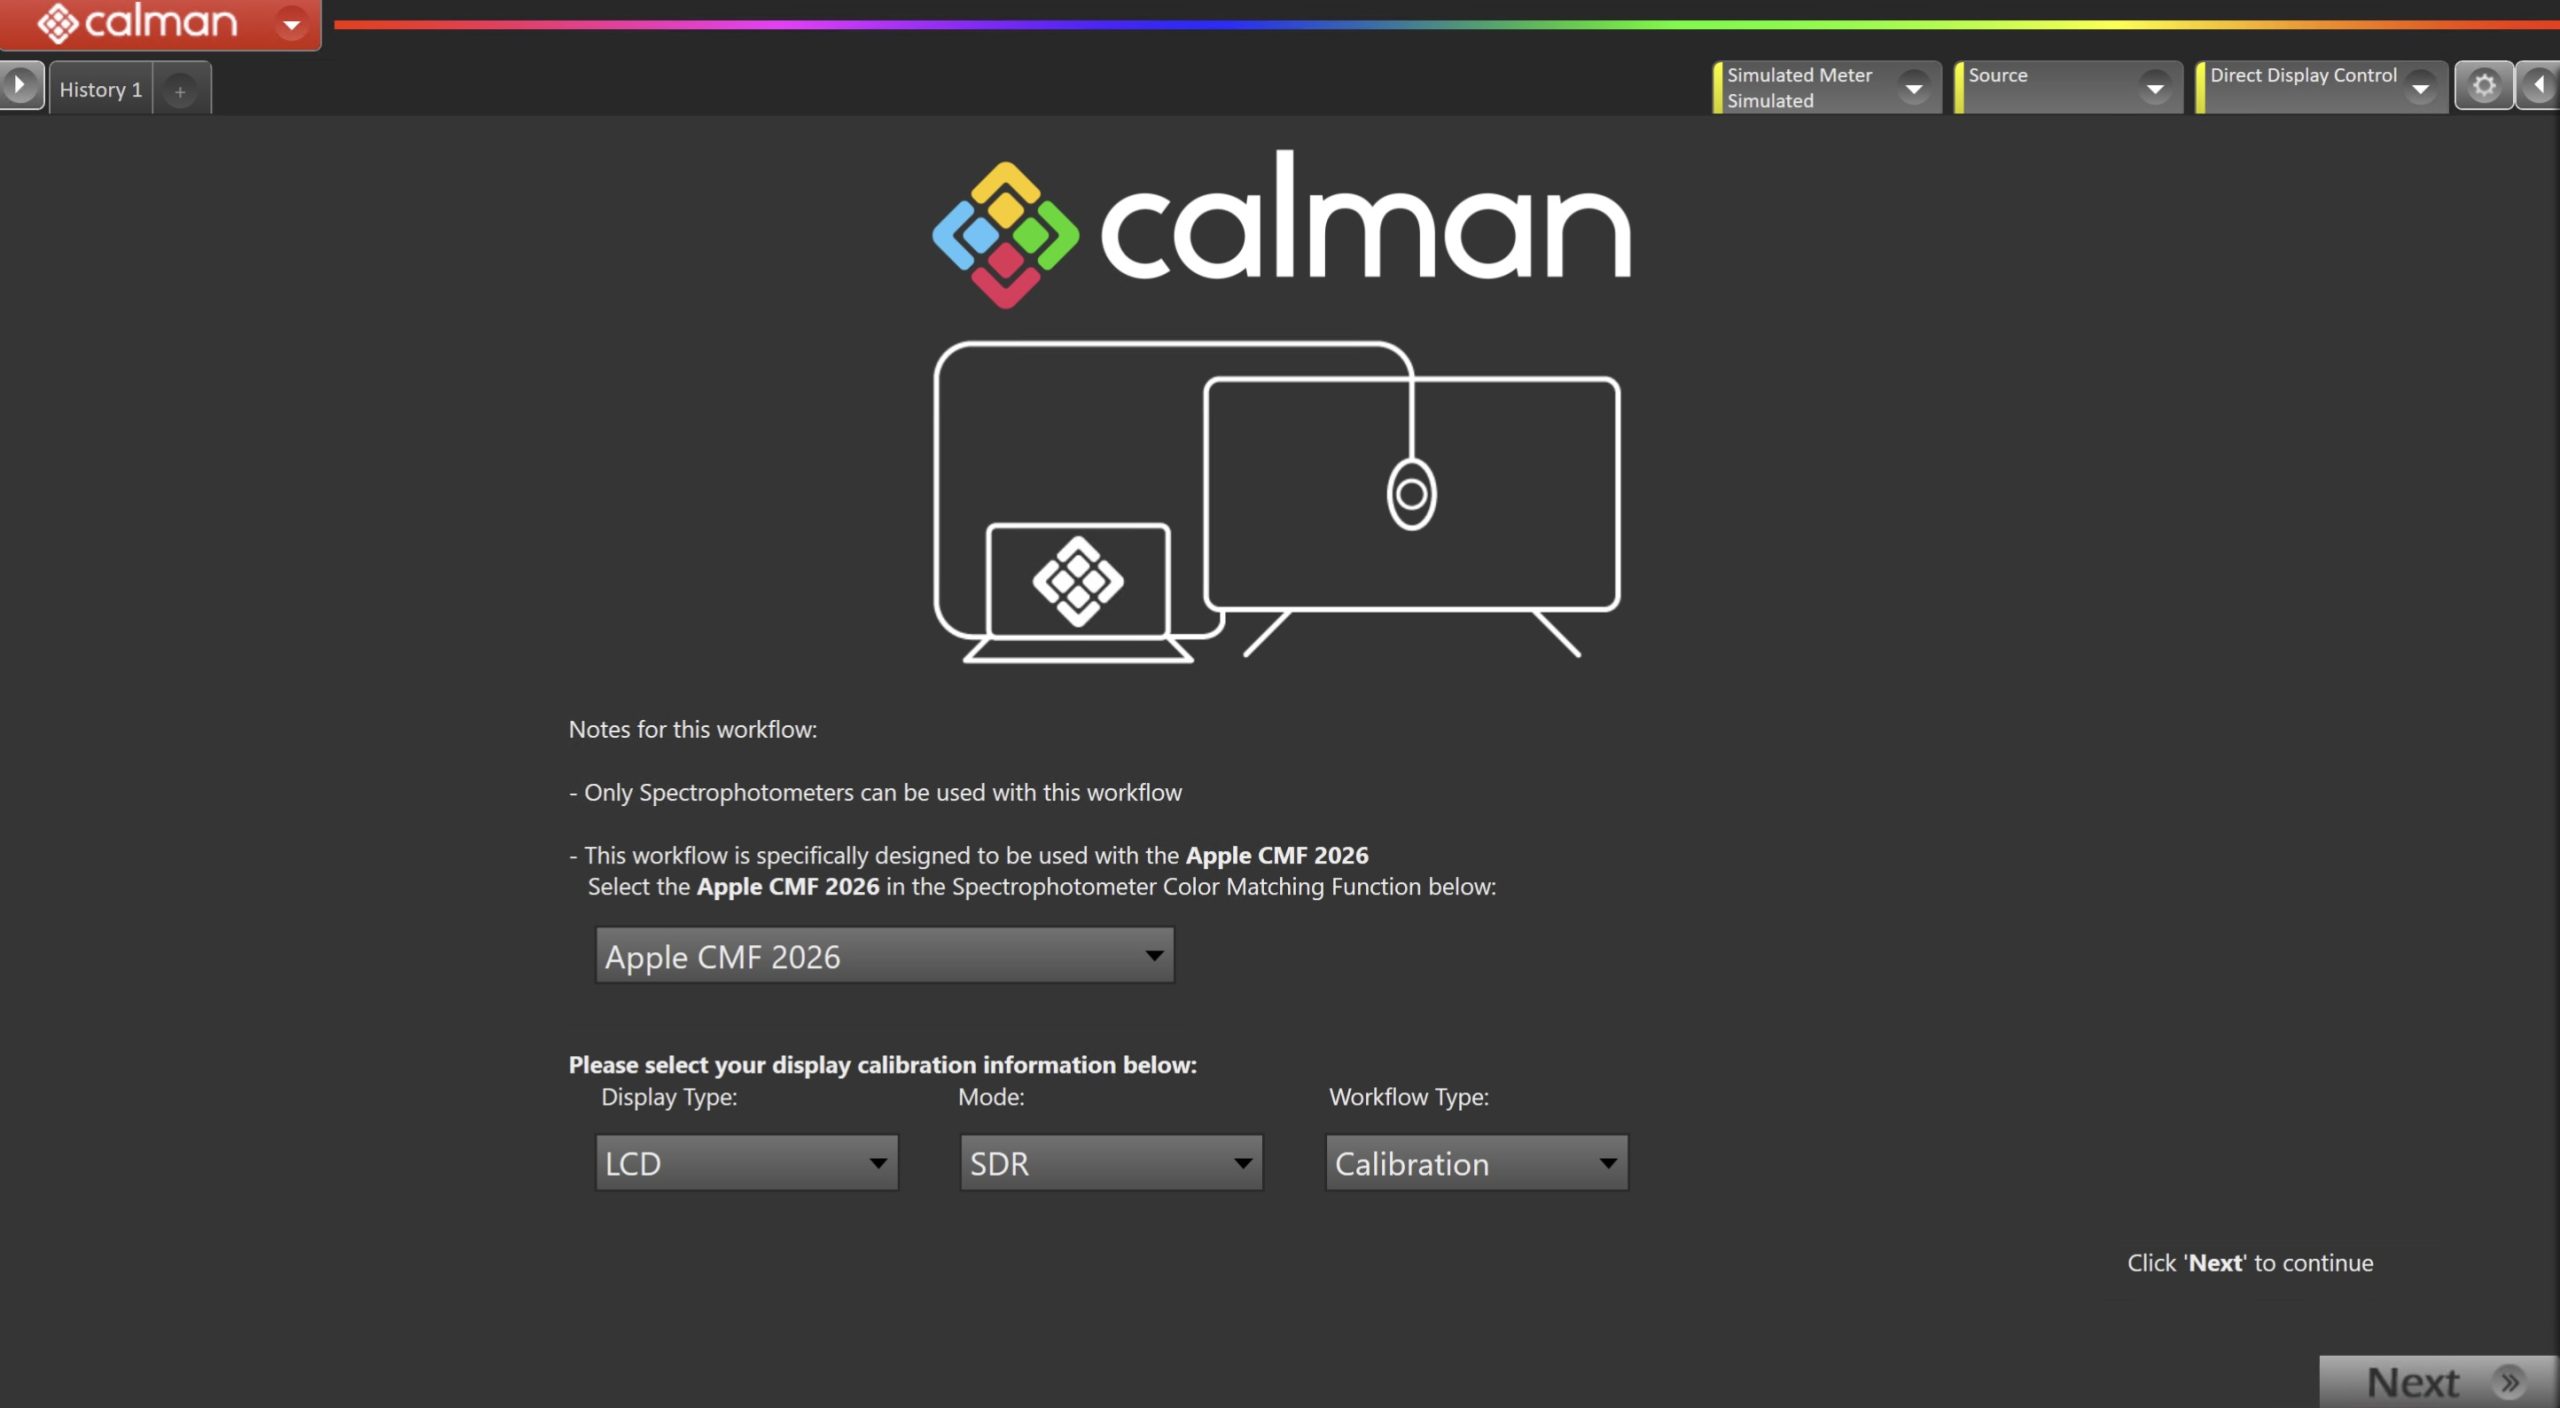
- Select the Apple CMF 2026 in the Spectrophotometer Color Matching Function.
- Note: This setting will persist outside of this workflow. After completion of this workflow, you should return the Calman Settings to your previous CMF. (Default: CIE 1931)
- On the introduction screen, select your display type (LCD/OLED), colorspace mode (SDR/HDR) and Workflow Type (Validation/Calibration) from the dropdown and click Next to proceed to Hardware Setup
- Validation will only include a multipoint greyscale to assist in validating the display using the Apple CMF.
- Calibration will include steps to adjust the display using the Apple CMF
- Click Next to proceed
Step 2
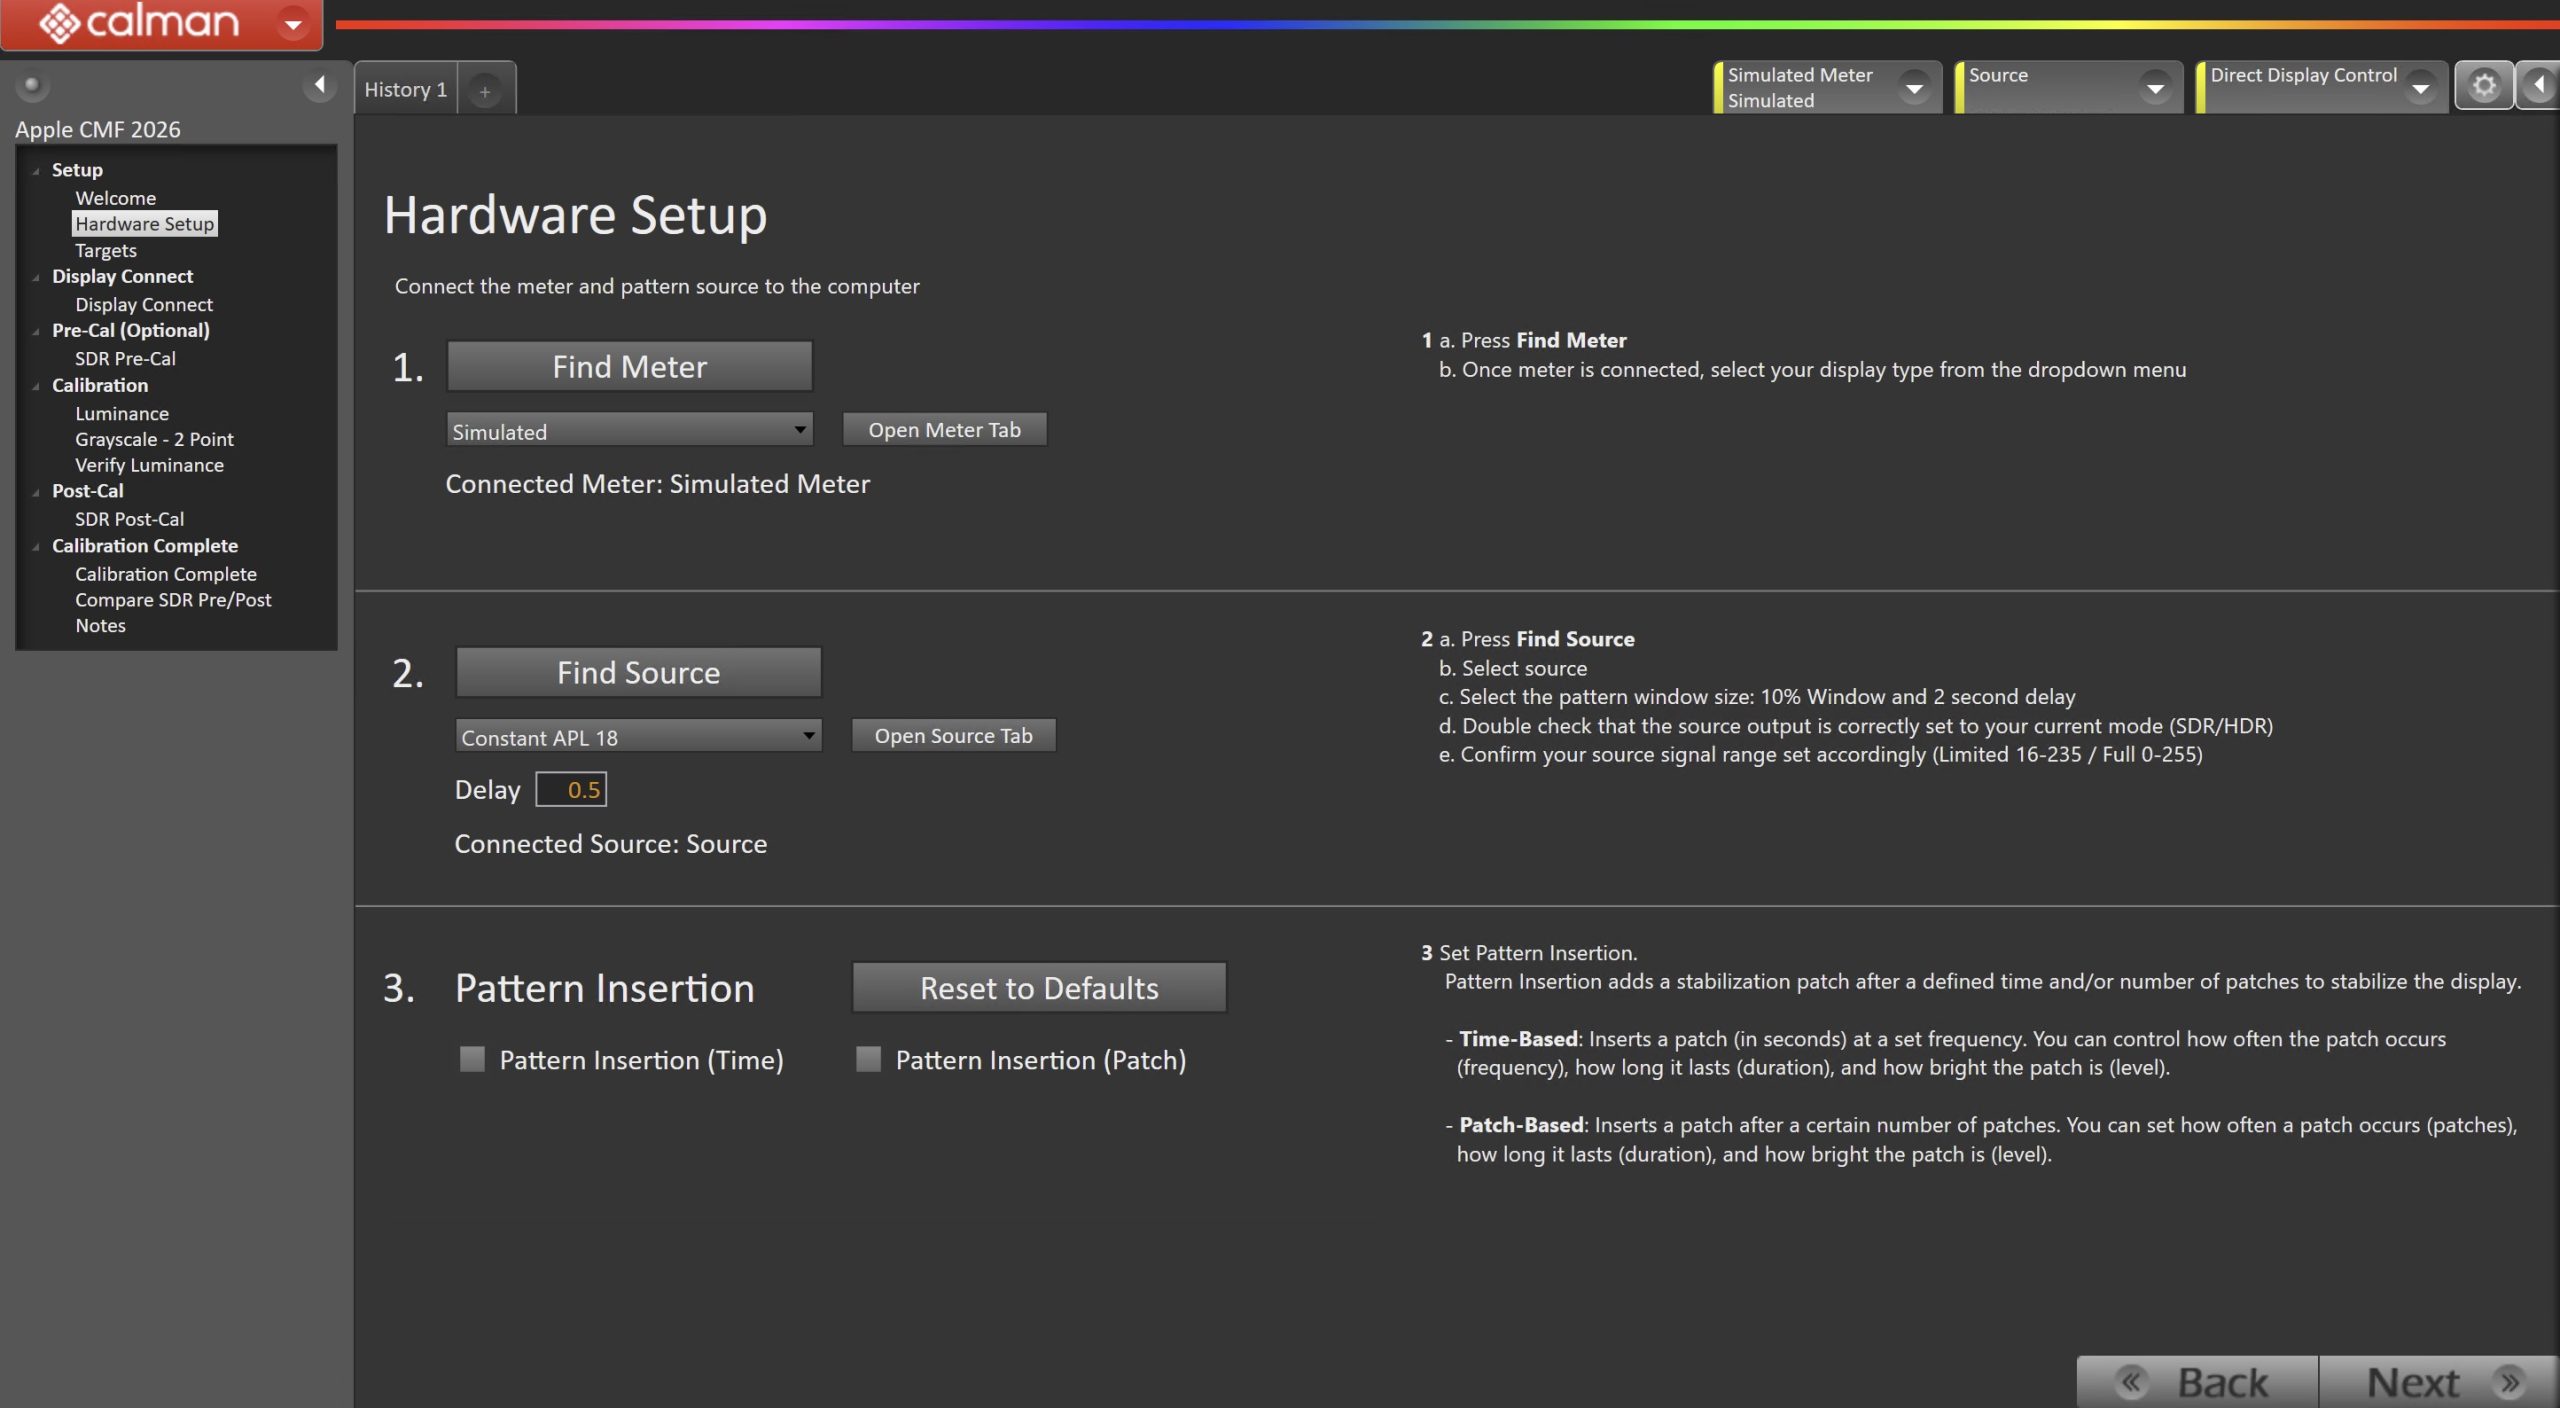
- Plug your meter into a USB port on the computer and press the Find Meter button on the left.
- Connect Pattern Source to your computer.
- Click the Find Source button, then select your source
- Select the pattern window size and delay
- OLED
- Window 10%
- LCD
- SDR: Constant APL 18
- HDR: Window 10%
- OLED
- Ensure your source is set to SDR or HDR corresponding to your choice in Step 1
- Set Pattern insertion
- Click the Reset to Defaults button to set the appropriate pattern insertion for the display and calibration type in Step 1
- LCD models do not require Pattern Insertion to be enabled.
- Click the Reset to Defaults button to set the appropriate pattern insertion for the display and calibration type in Step 1
- Click Next to proceed
Step 3
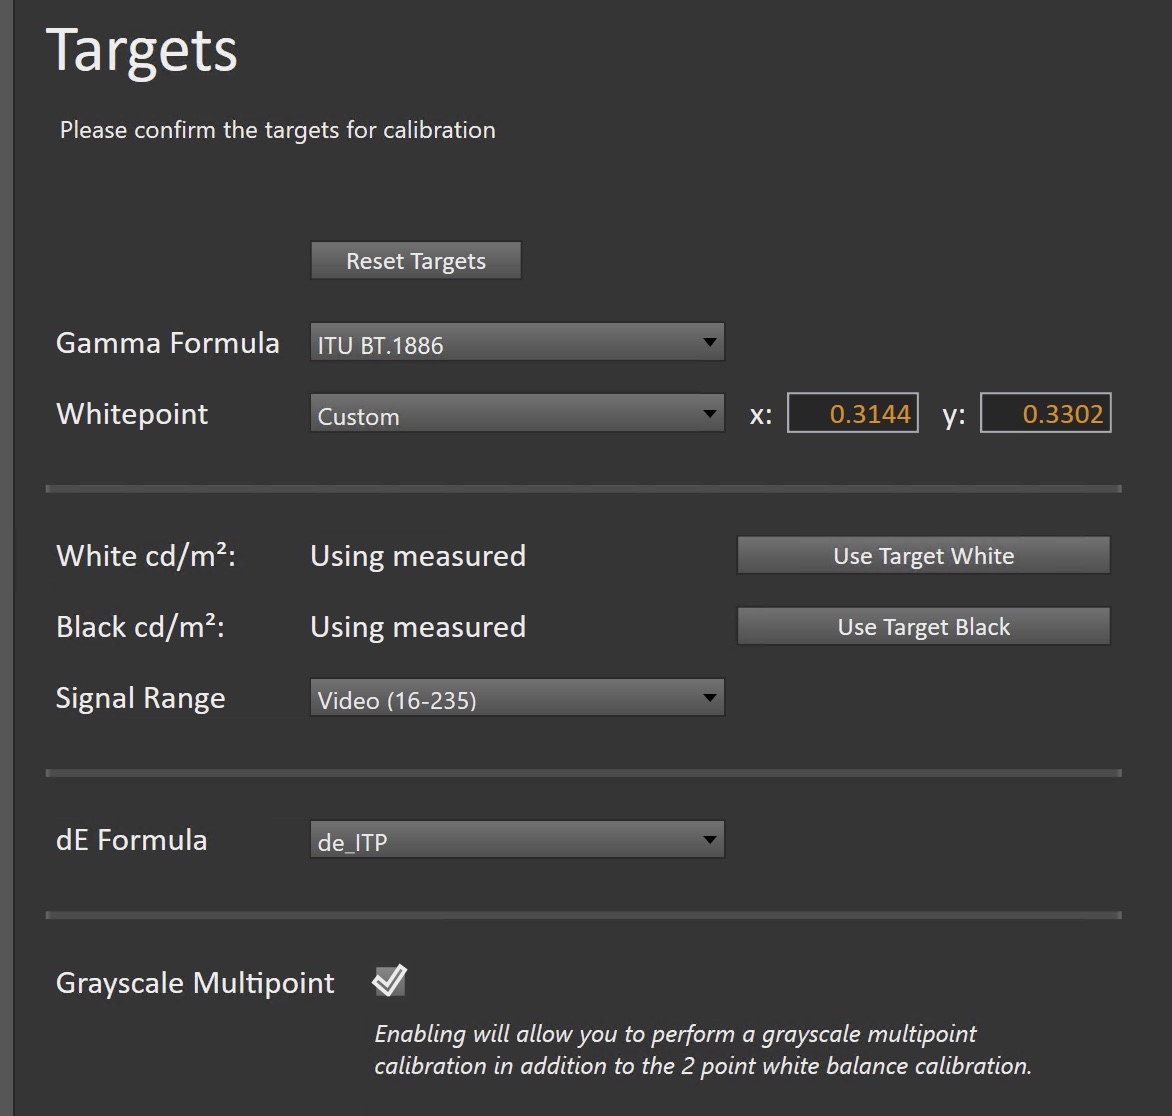
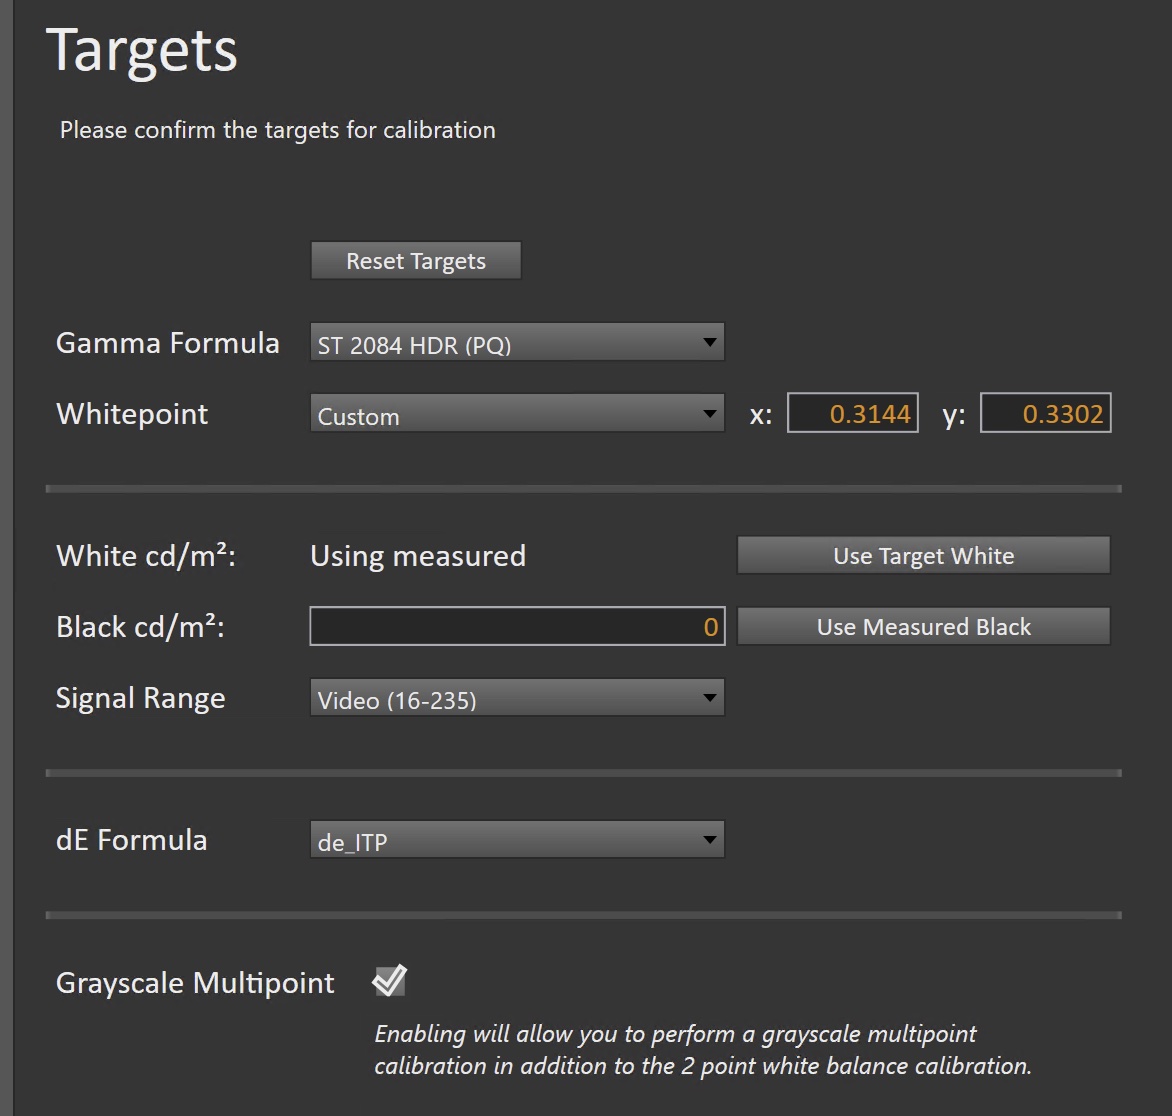
- Select the calibration targets
- Confirm/configure your calibration targets. These will be automatically set to common defaults by the options from Step 1
- Configuration Examples:
- Note: By default this workflow will use just a 2-point white balance adjustment to match with the Apple CMF. If you wish to perform a more detailed multipoint calibration, check the “Grayscale Multipoint” checkbox here.
| SDR | HDR |
 |
 |
|
|
- Confirm your targets, and click Next to proceed
Step 4

- Connect your TV
- Select the manufacturer and your TVs year/model from the dropdown
- Follow the instructions in the Calman Display Connect Dialog or your specific TVs AutoCal guide for specific information.
Pre-Calibration Measurements
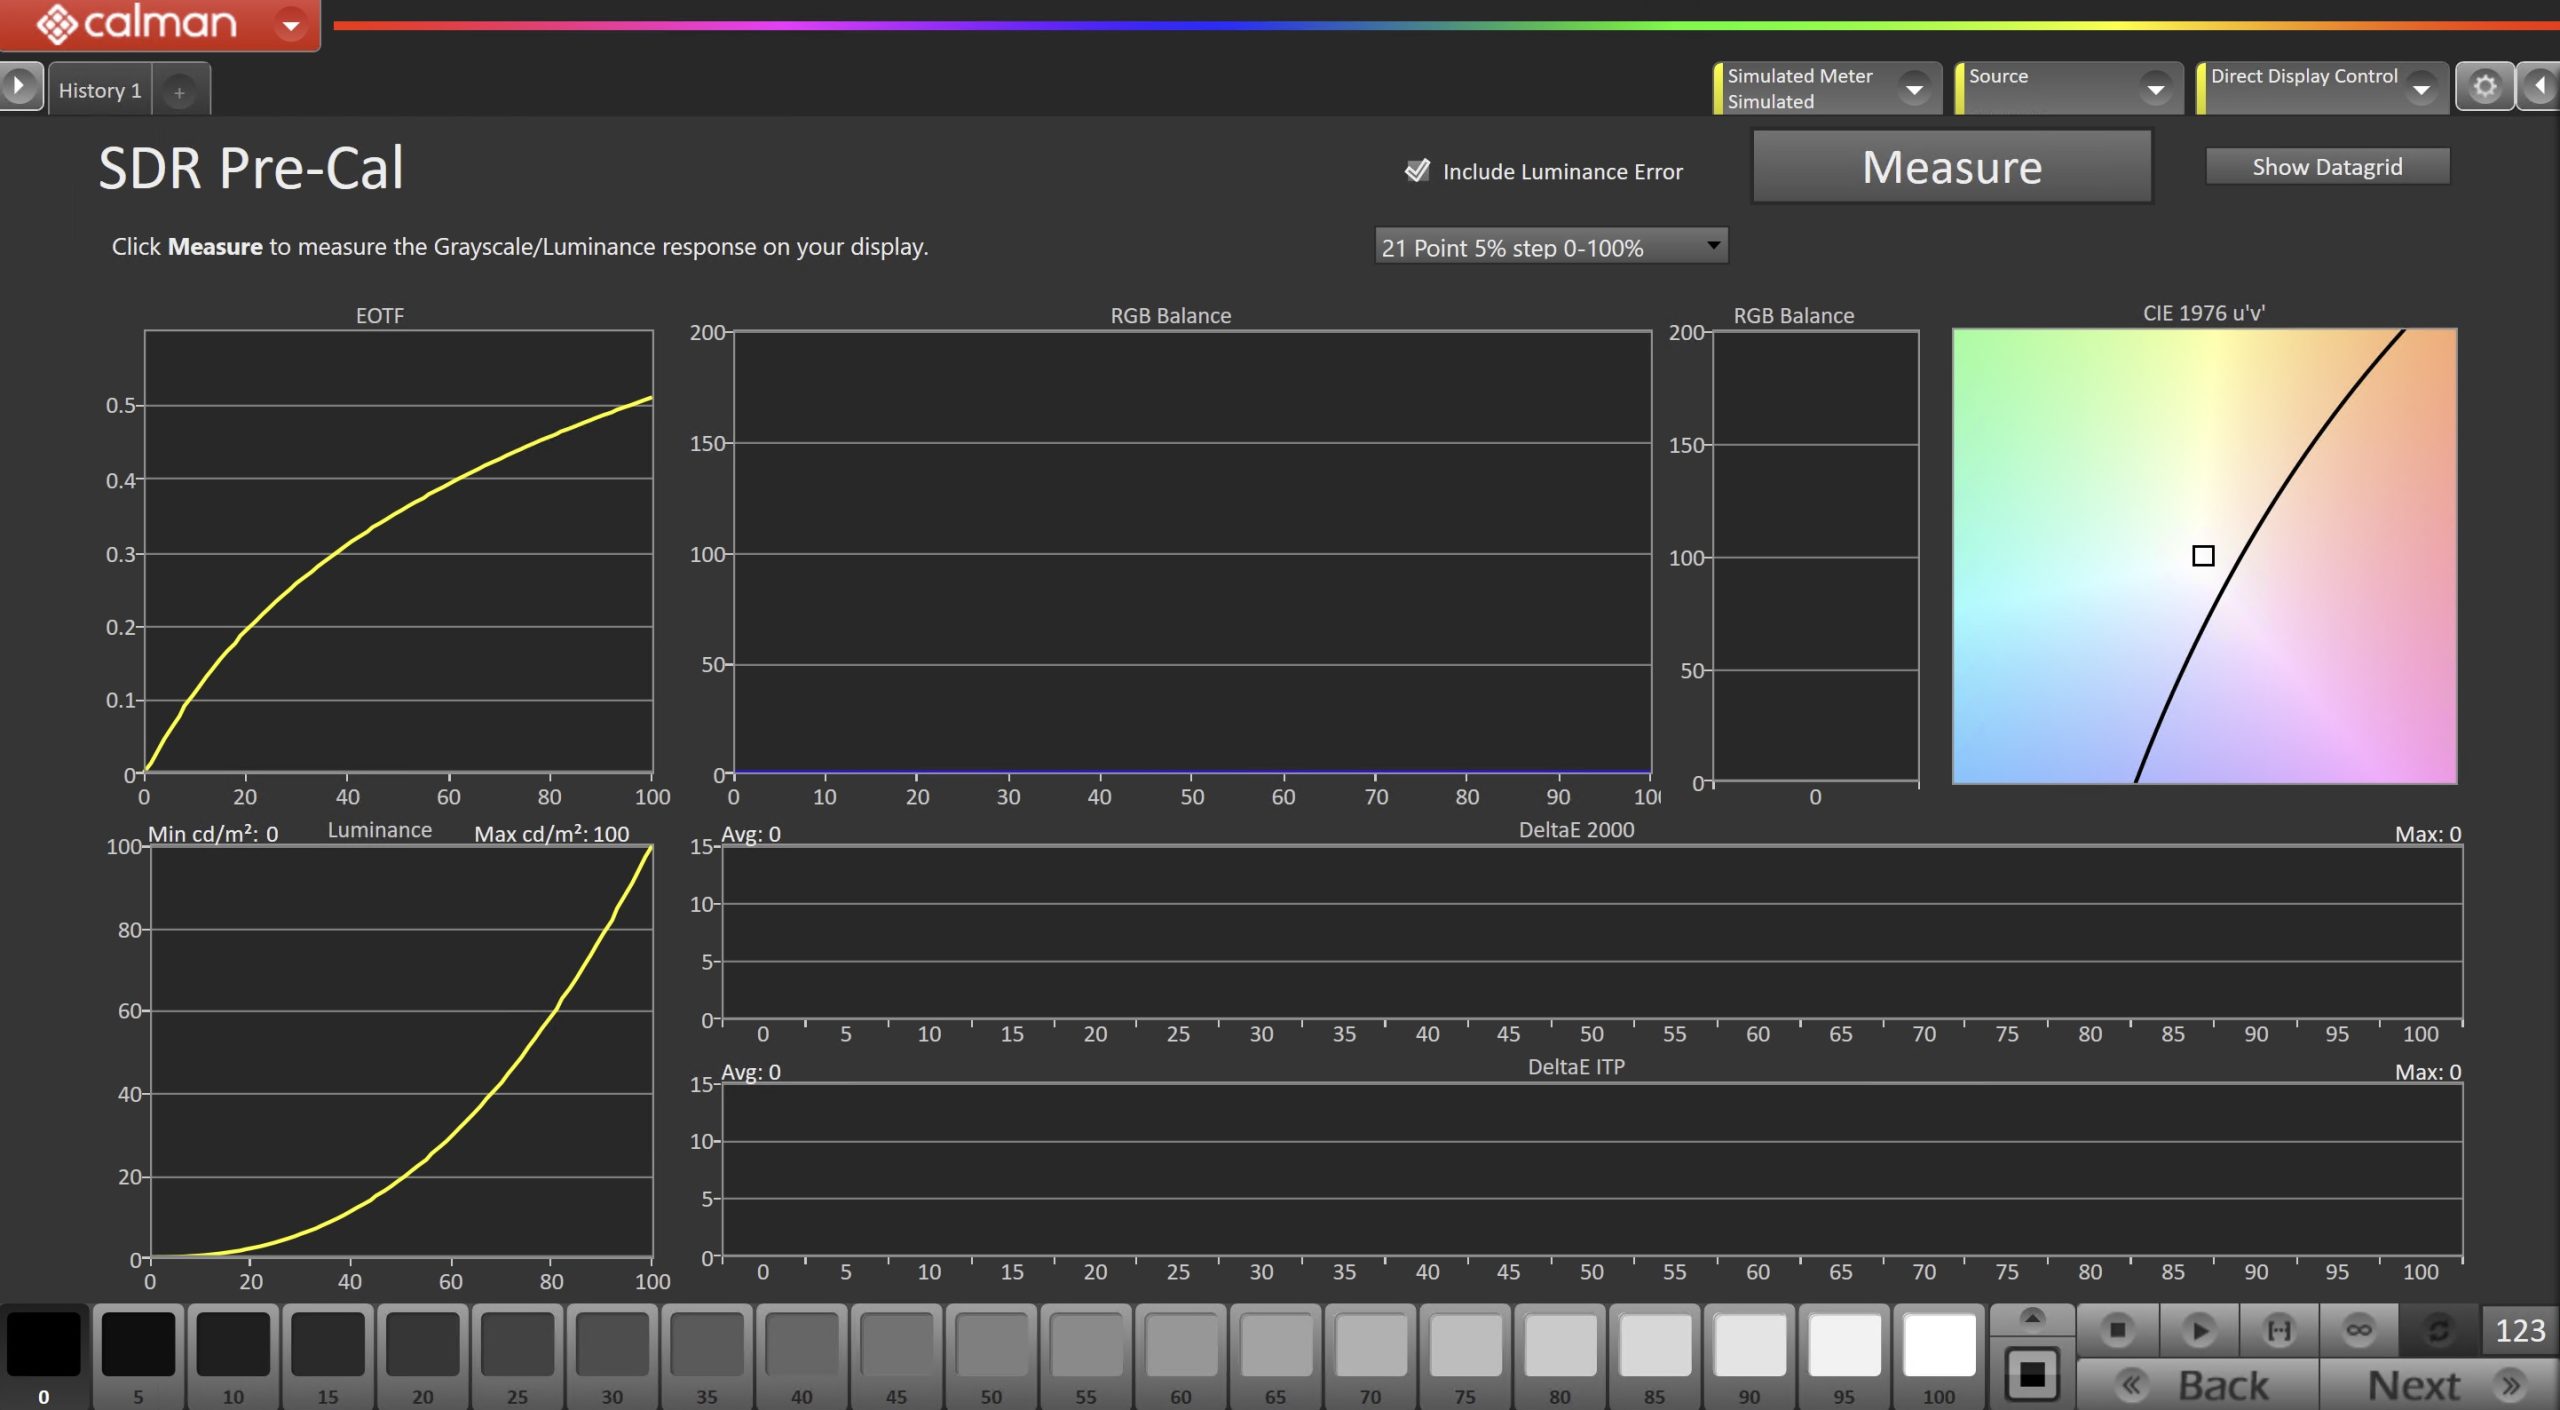
- This workflow page is intended to document the target picture mode prior to calibration.
- To take Pre-Calibration Measurements, click the Measure button to measure the display’s rayscale and color response.
- This will provide a point of reference to compare the calibration results
- Click Next to proceed
Step 5
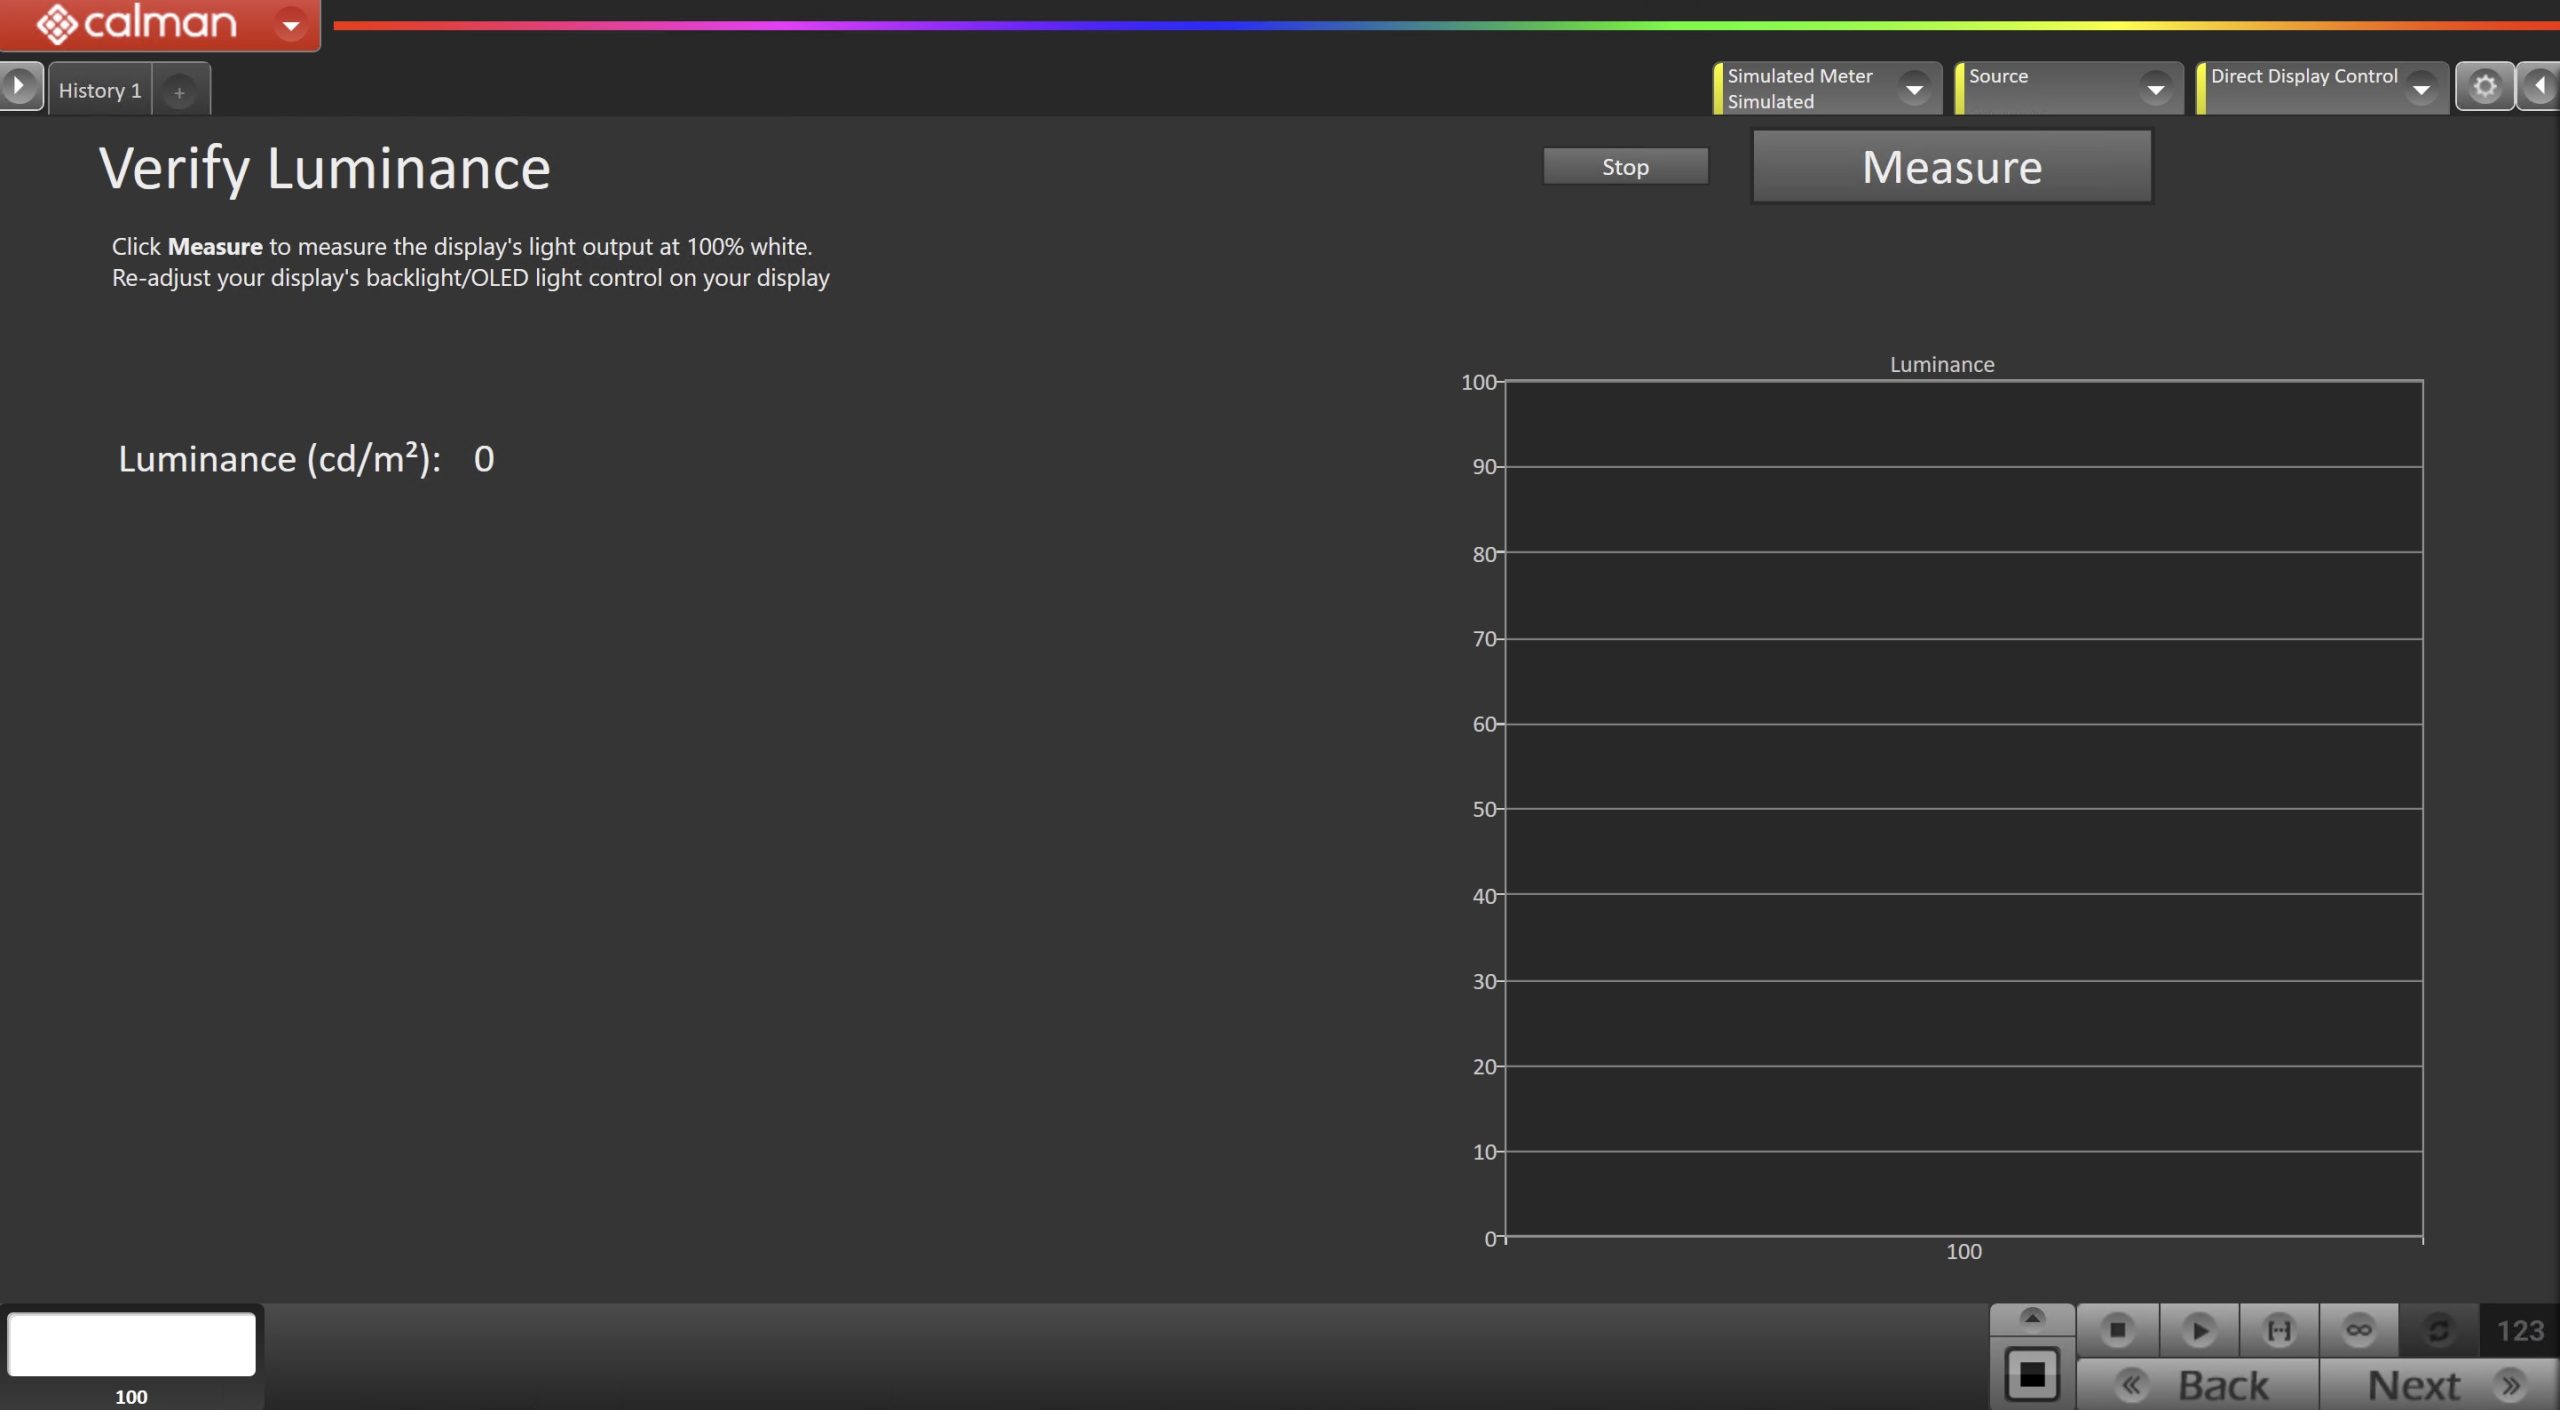
SDR Only – Measure and set Luminance
- Here, you can adjust the displays Backlight setting to one that meets or exceeds your target luminance
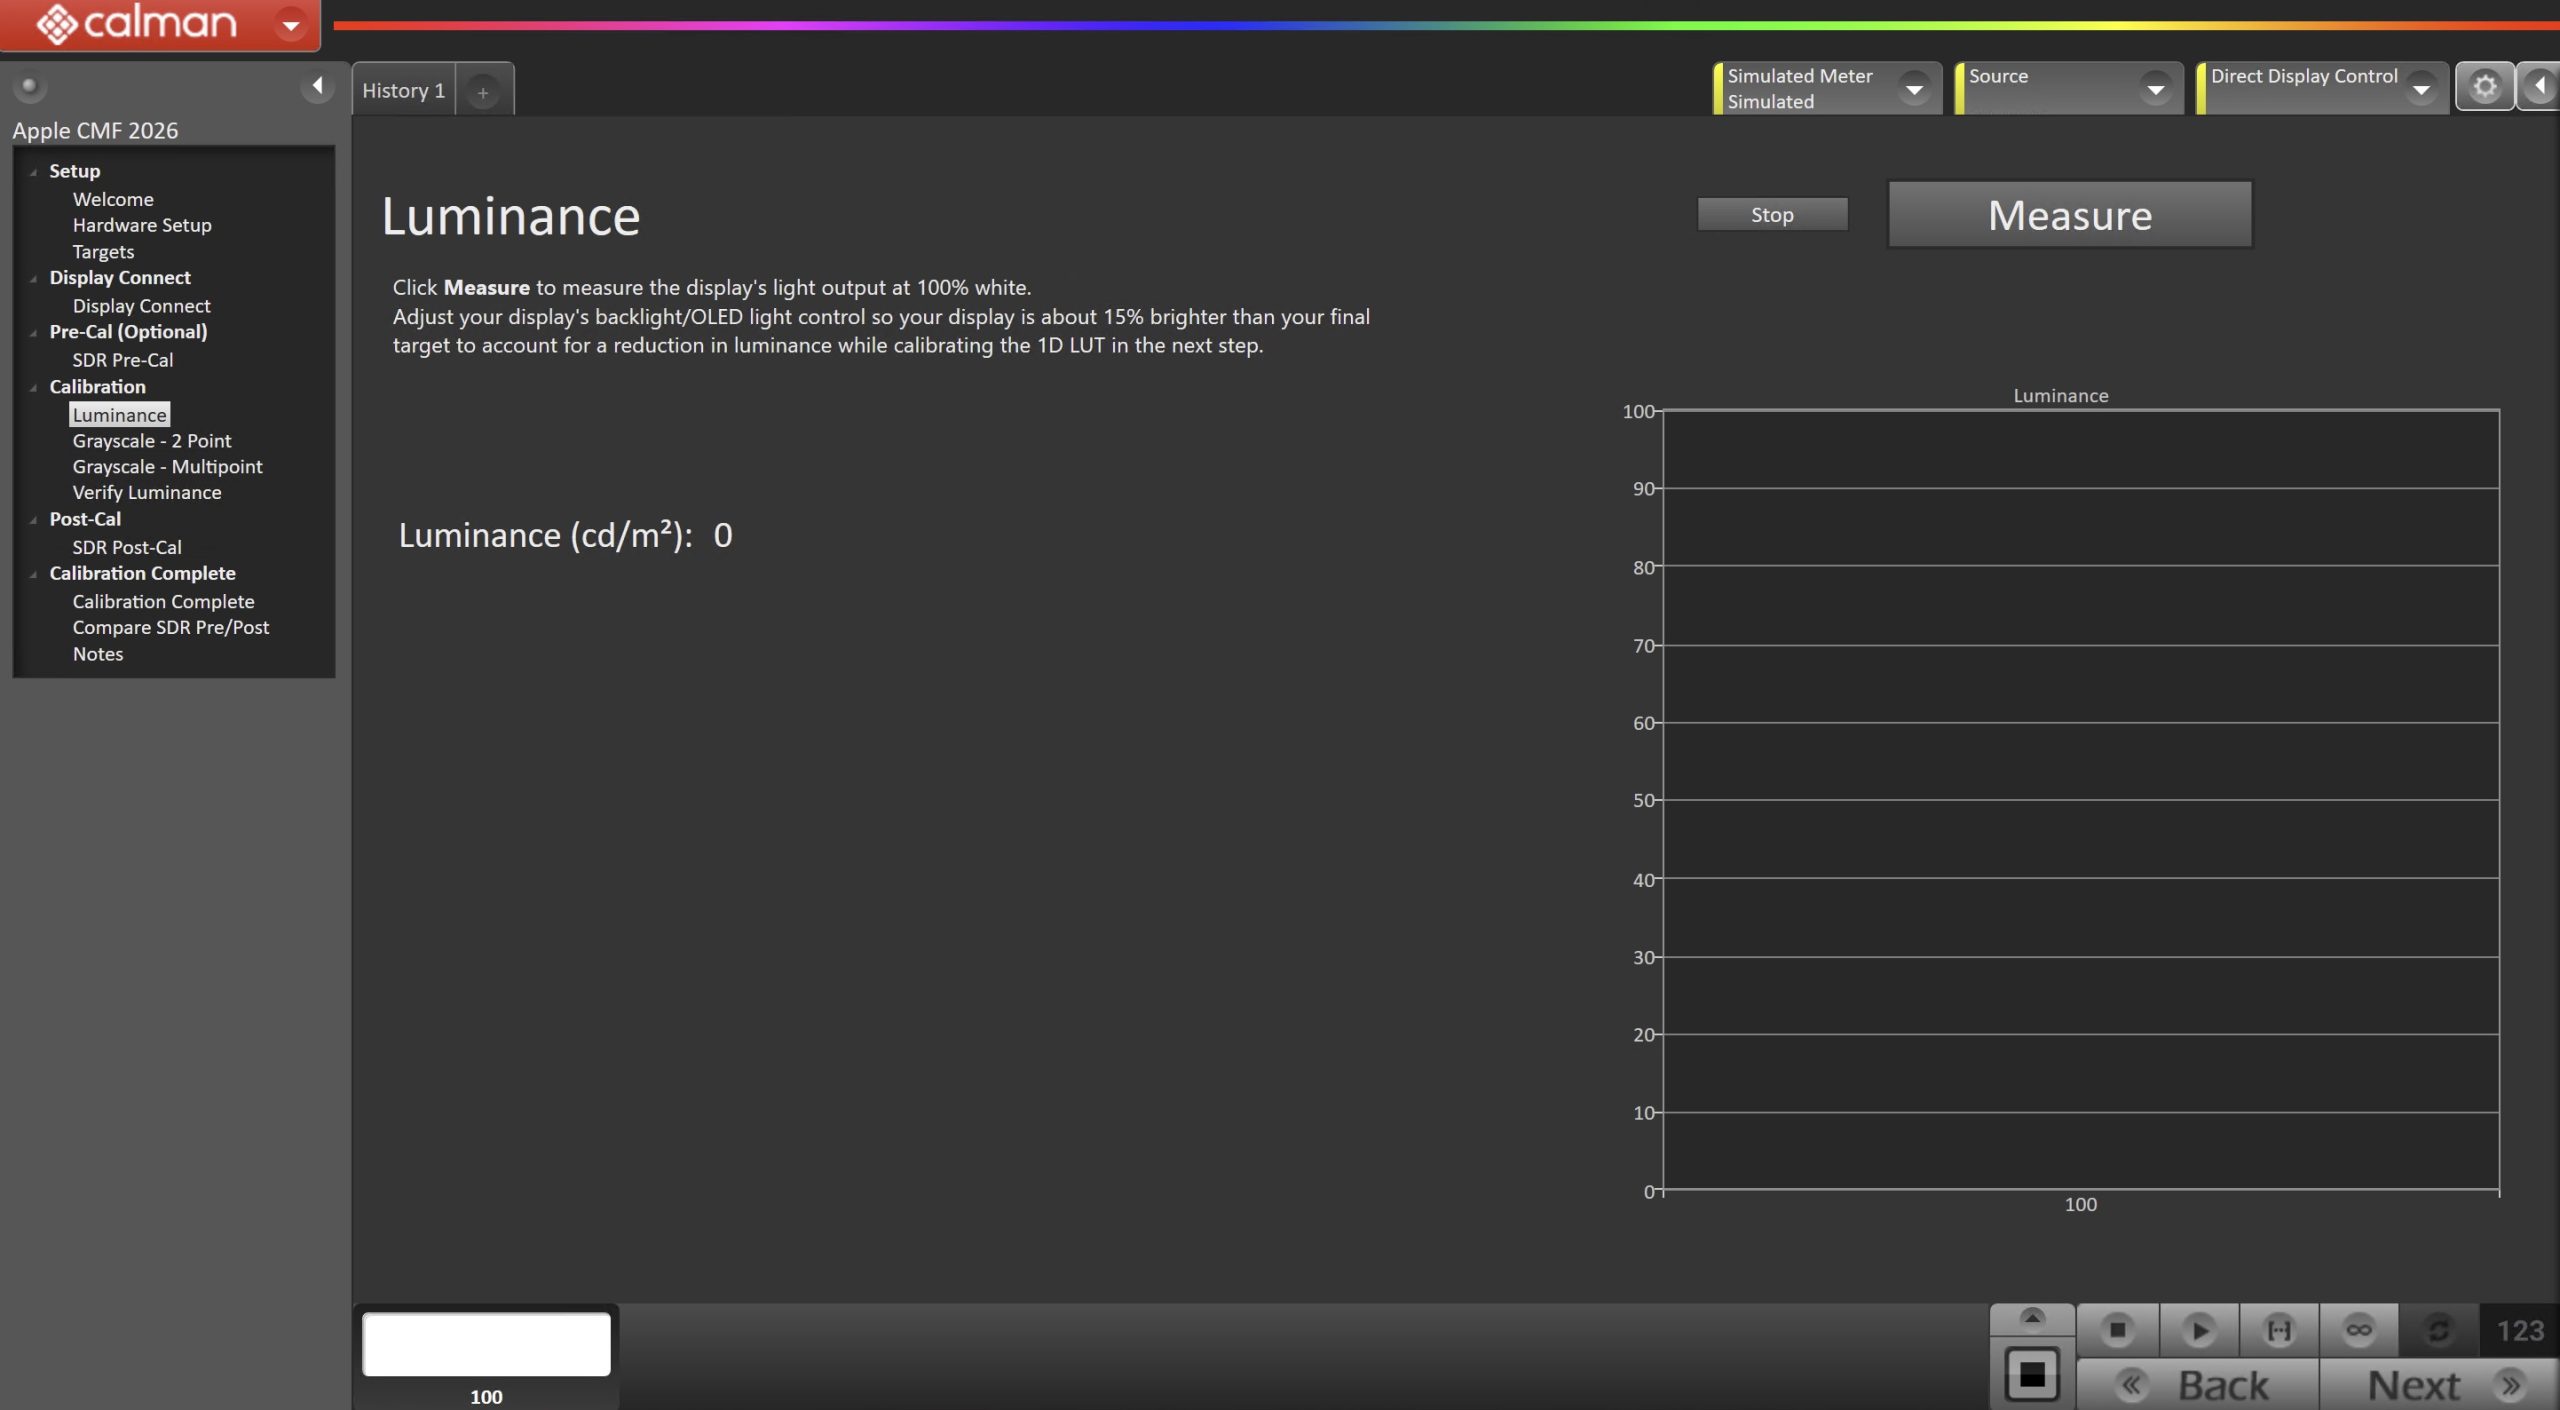
- Click Measure and adjust the Backlight slider as needed.
- Click Next to proceed
Step 6
- On this page, you will adjust your display’s White Balance
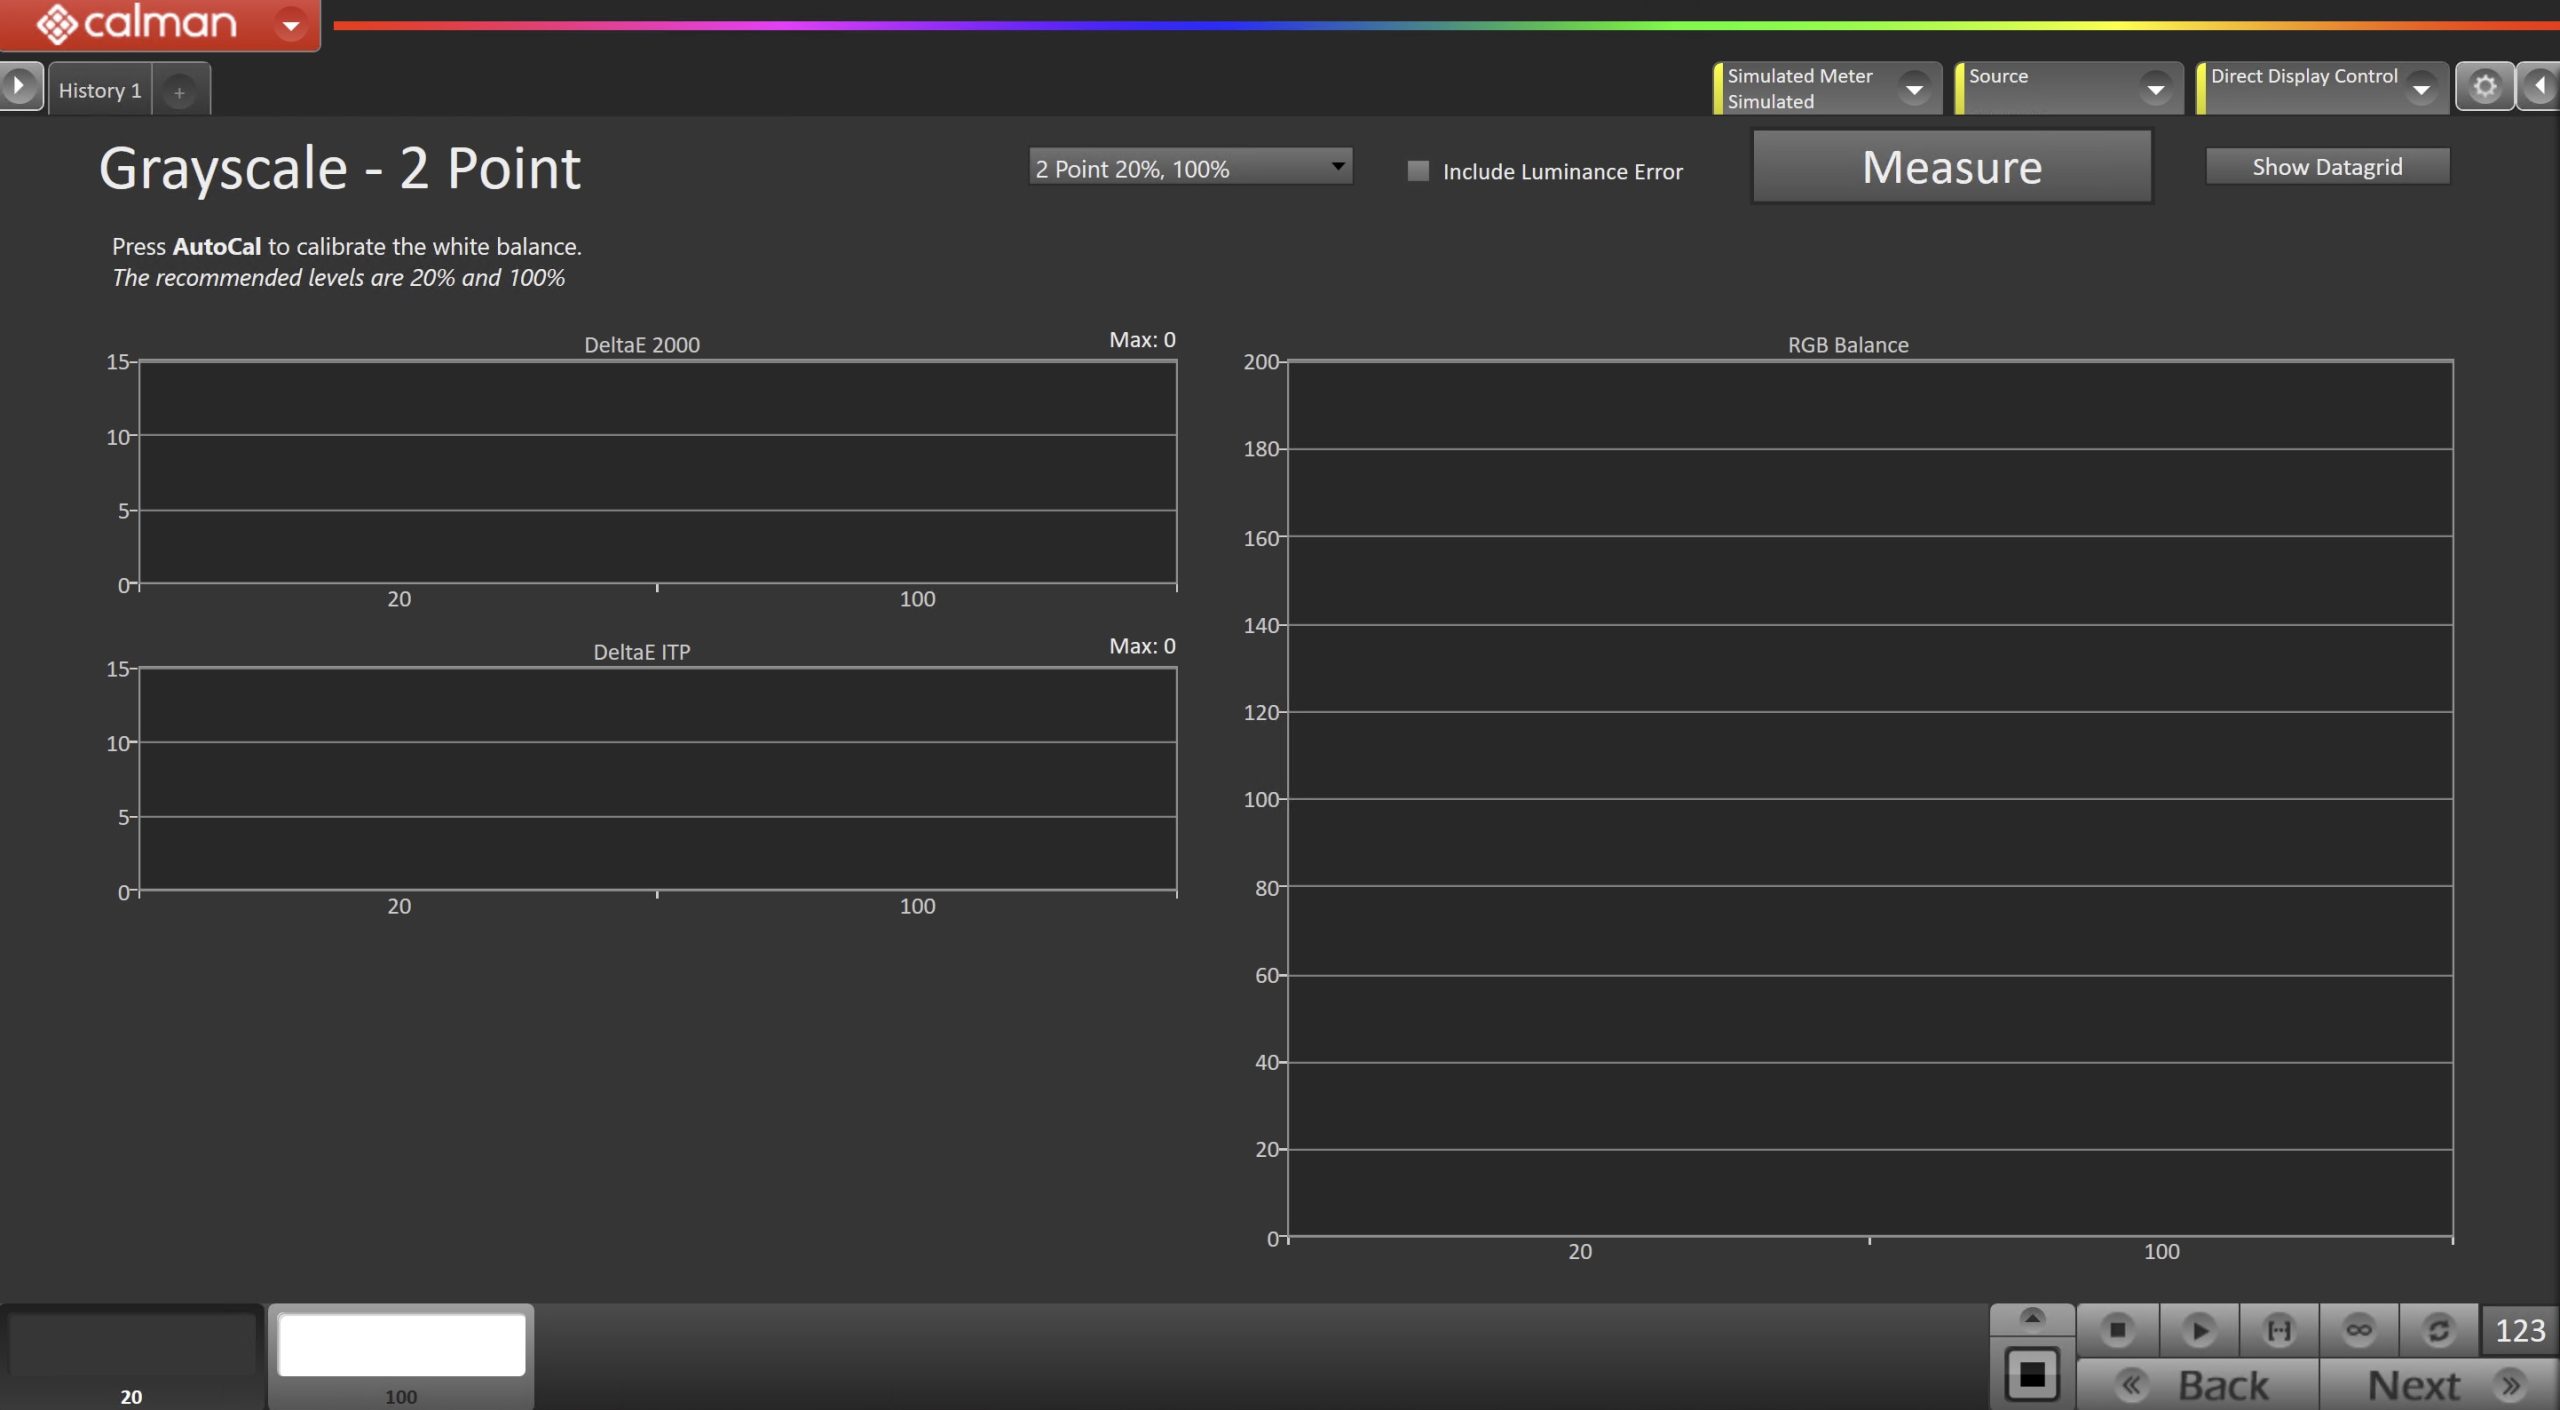
- Using the dropdown near the top of the page, select the high and low levels for the display you’re calibrating.
- Click the Read Series to measure the display’s current white balance performance.
- On the bottom Pattern Slider bar, choose the high-brightness adjustment level.
- Press Read Continuous to begin continuous measurements.
- Adjust the display’s Red and Blue Gain controls to match the Green level on the single-level RGB Balance chart.
- Repeat Adjustments as Needed
- On the bottom Level Select bar, choose the low-brightness adjustment level (usually 20–30%).
- Adjust the display’s Red and Blue Offset controls to match the Green level on the RGB Balance chart.
- Repeat Adjustments as Needed
- After adjusting low brightness, check high brightness again. Some displays experience drift at high brightness after low-brightness adjustments.
-
- Repeat Gain (high brightness) and Offset (low brightness) adjustments until both levels are optimized and interaction is minimized.
-
More Info: Adjusting 2-Point White Balance for TV Calibration
Optional – Step 7
- If you checked the “Grayscale Multipoint” checkbox in Step 3, this page will be displayed. Here, Calman will assist in adjusting the Multipoint Grayscale.
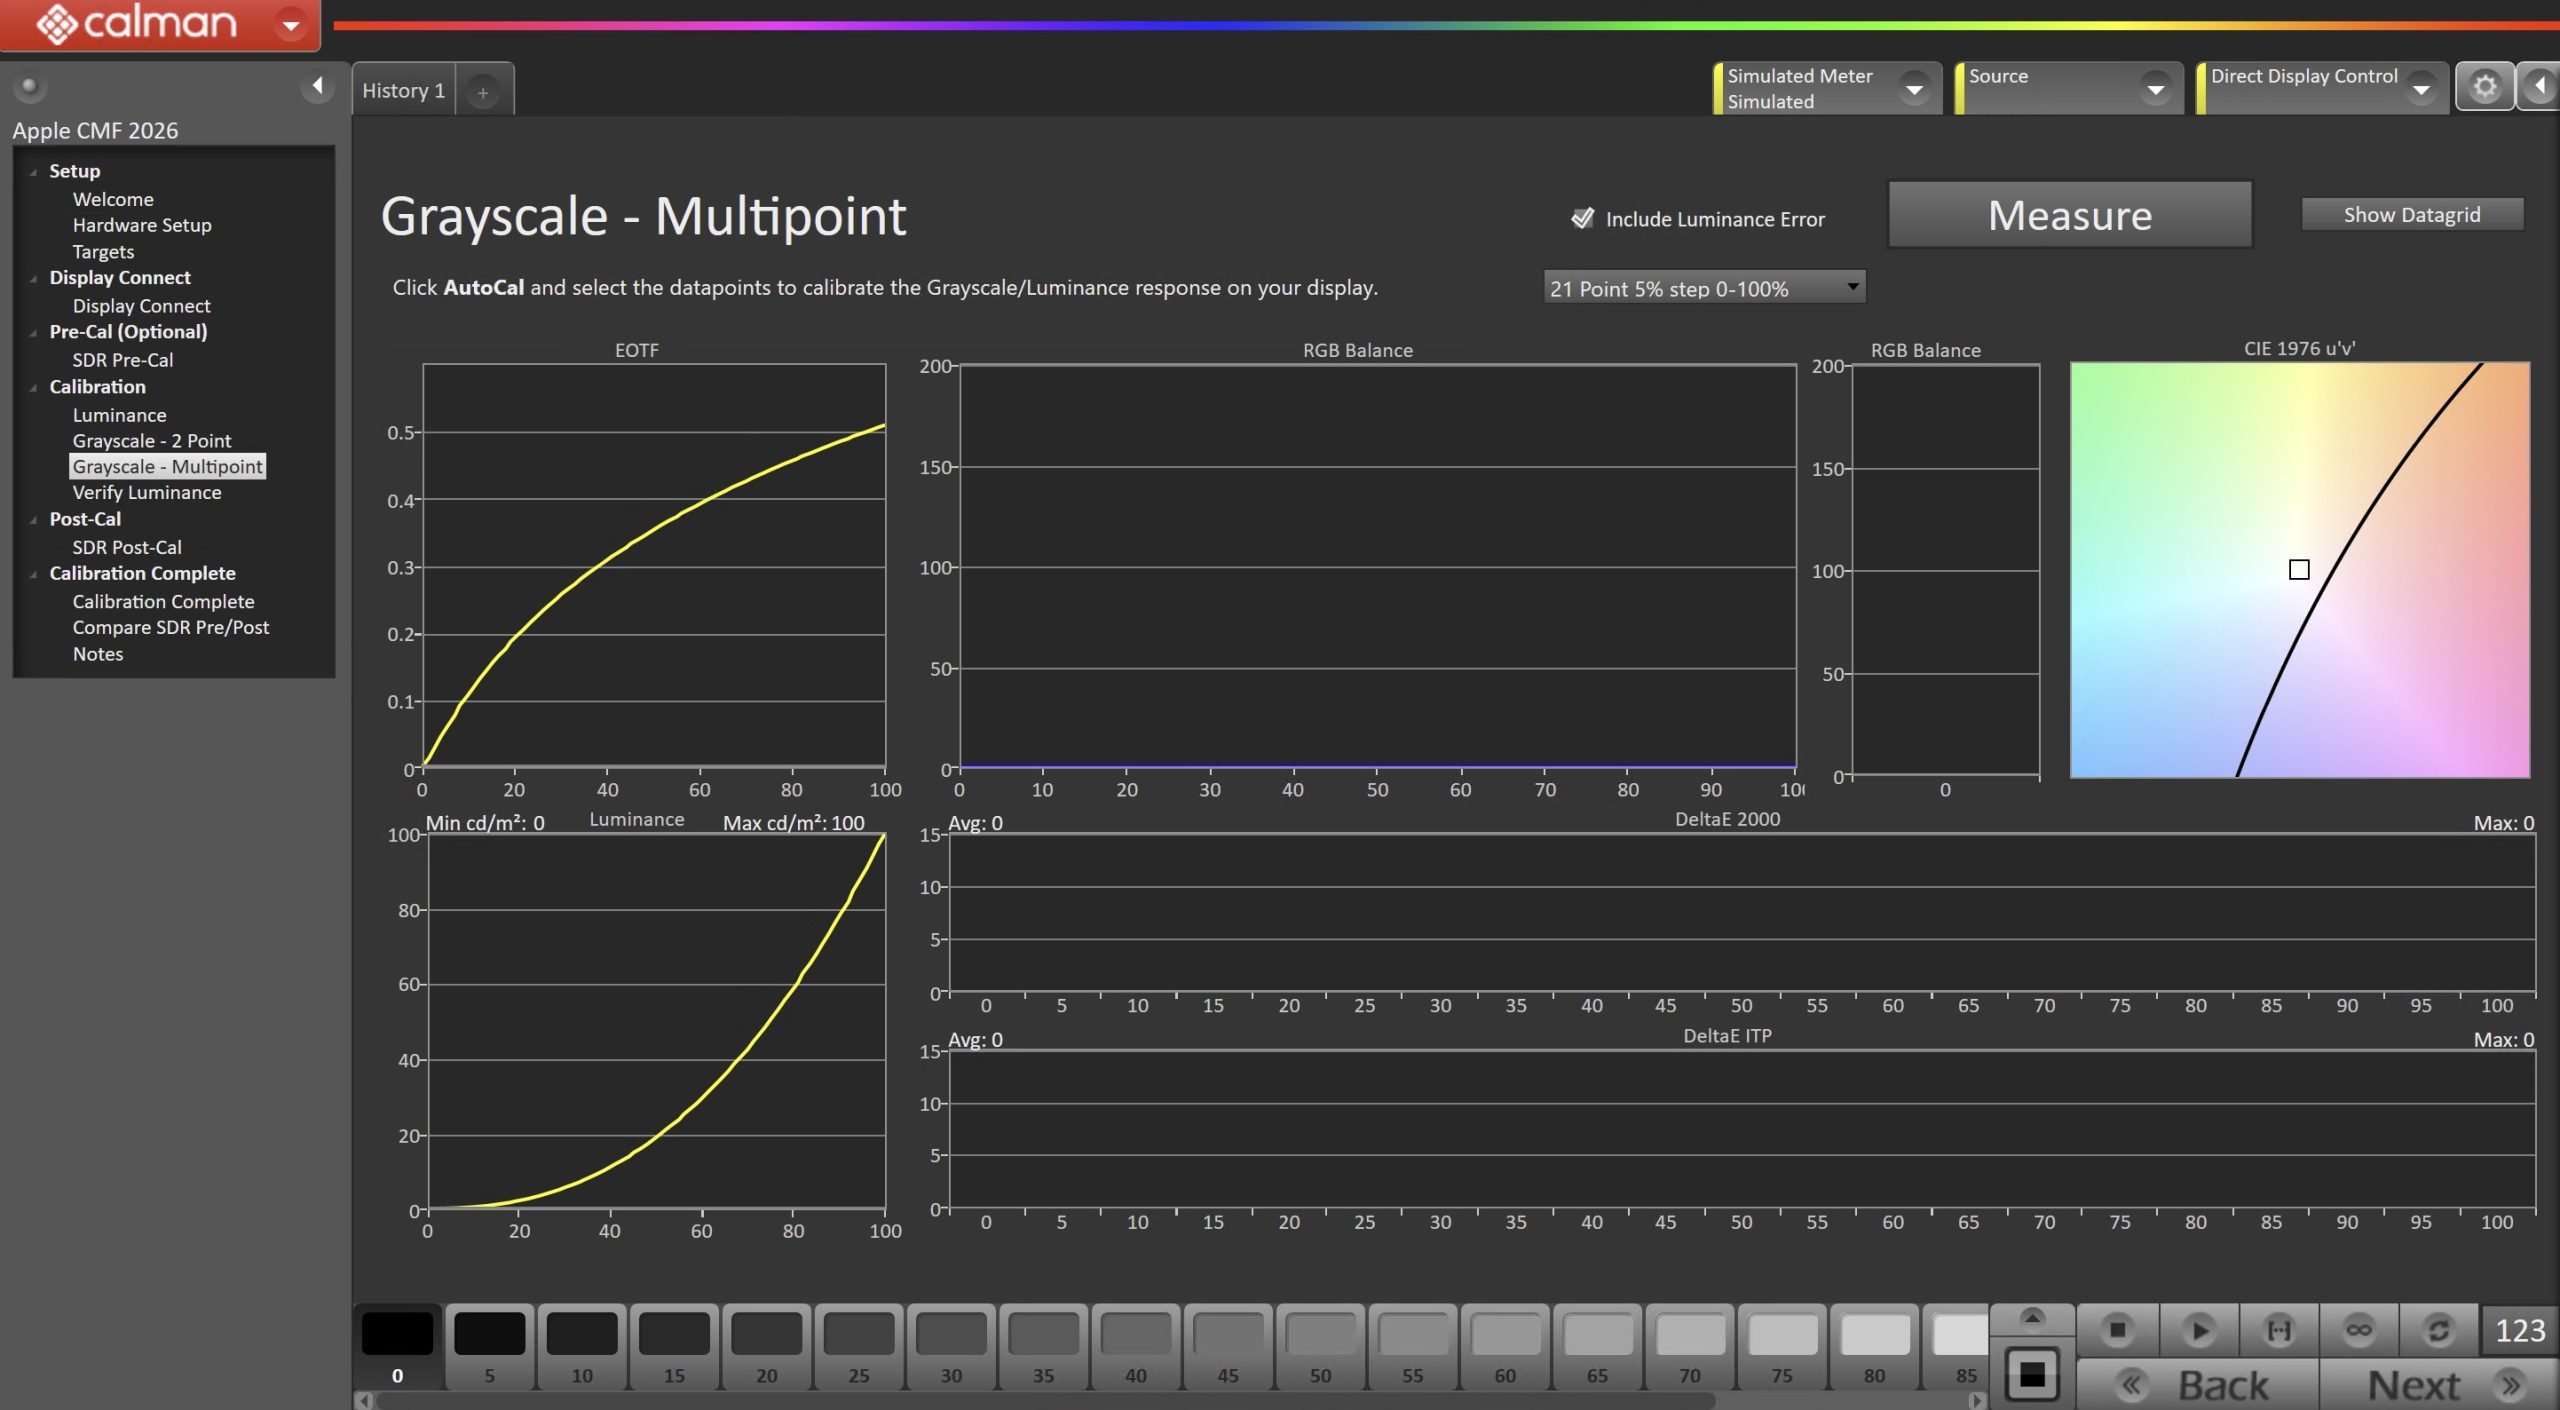
- If available, click the AutoCal button and select the correct data points in the AutoCal Dialog to auto-calibrate the Grayscale/Luminance response on the display.
- This should match the video range you chose in Step 1.
- If your display is not AutoCal compatible, proceed with manual adjustments.
- Click OK to begin greyscale AutoCal.
- When AutoCal is complete, click the Next button to proceed.
Step 8
- After calibration, your overall luminance may have changed slightly. Use this page to re-adjust the display to your target.
- Click Measure and adjust the Backlight slider as needed.
- Click Next to proceed
Step 8
- In this step, you’ll take measurements of the calibration results.

- To take Post-Calibration Measurements, click the Measure button to measure the display’s grayscale and color response.
- Click Next to proceed
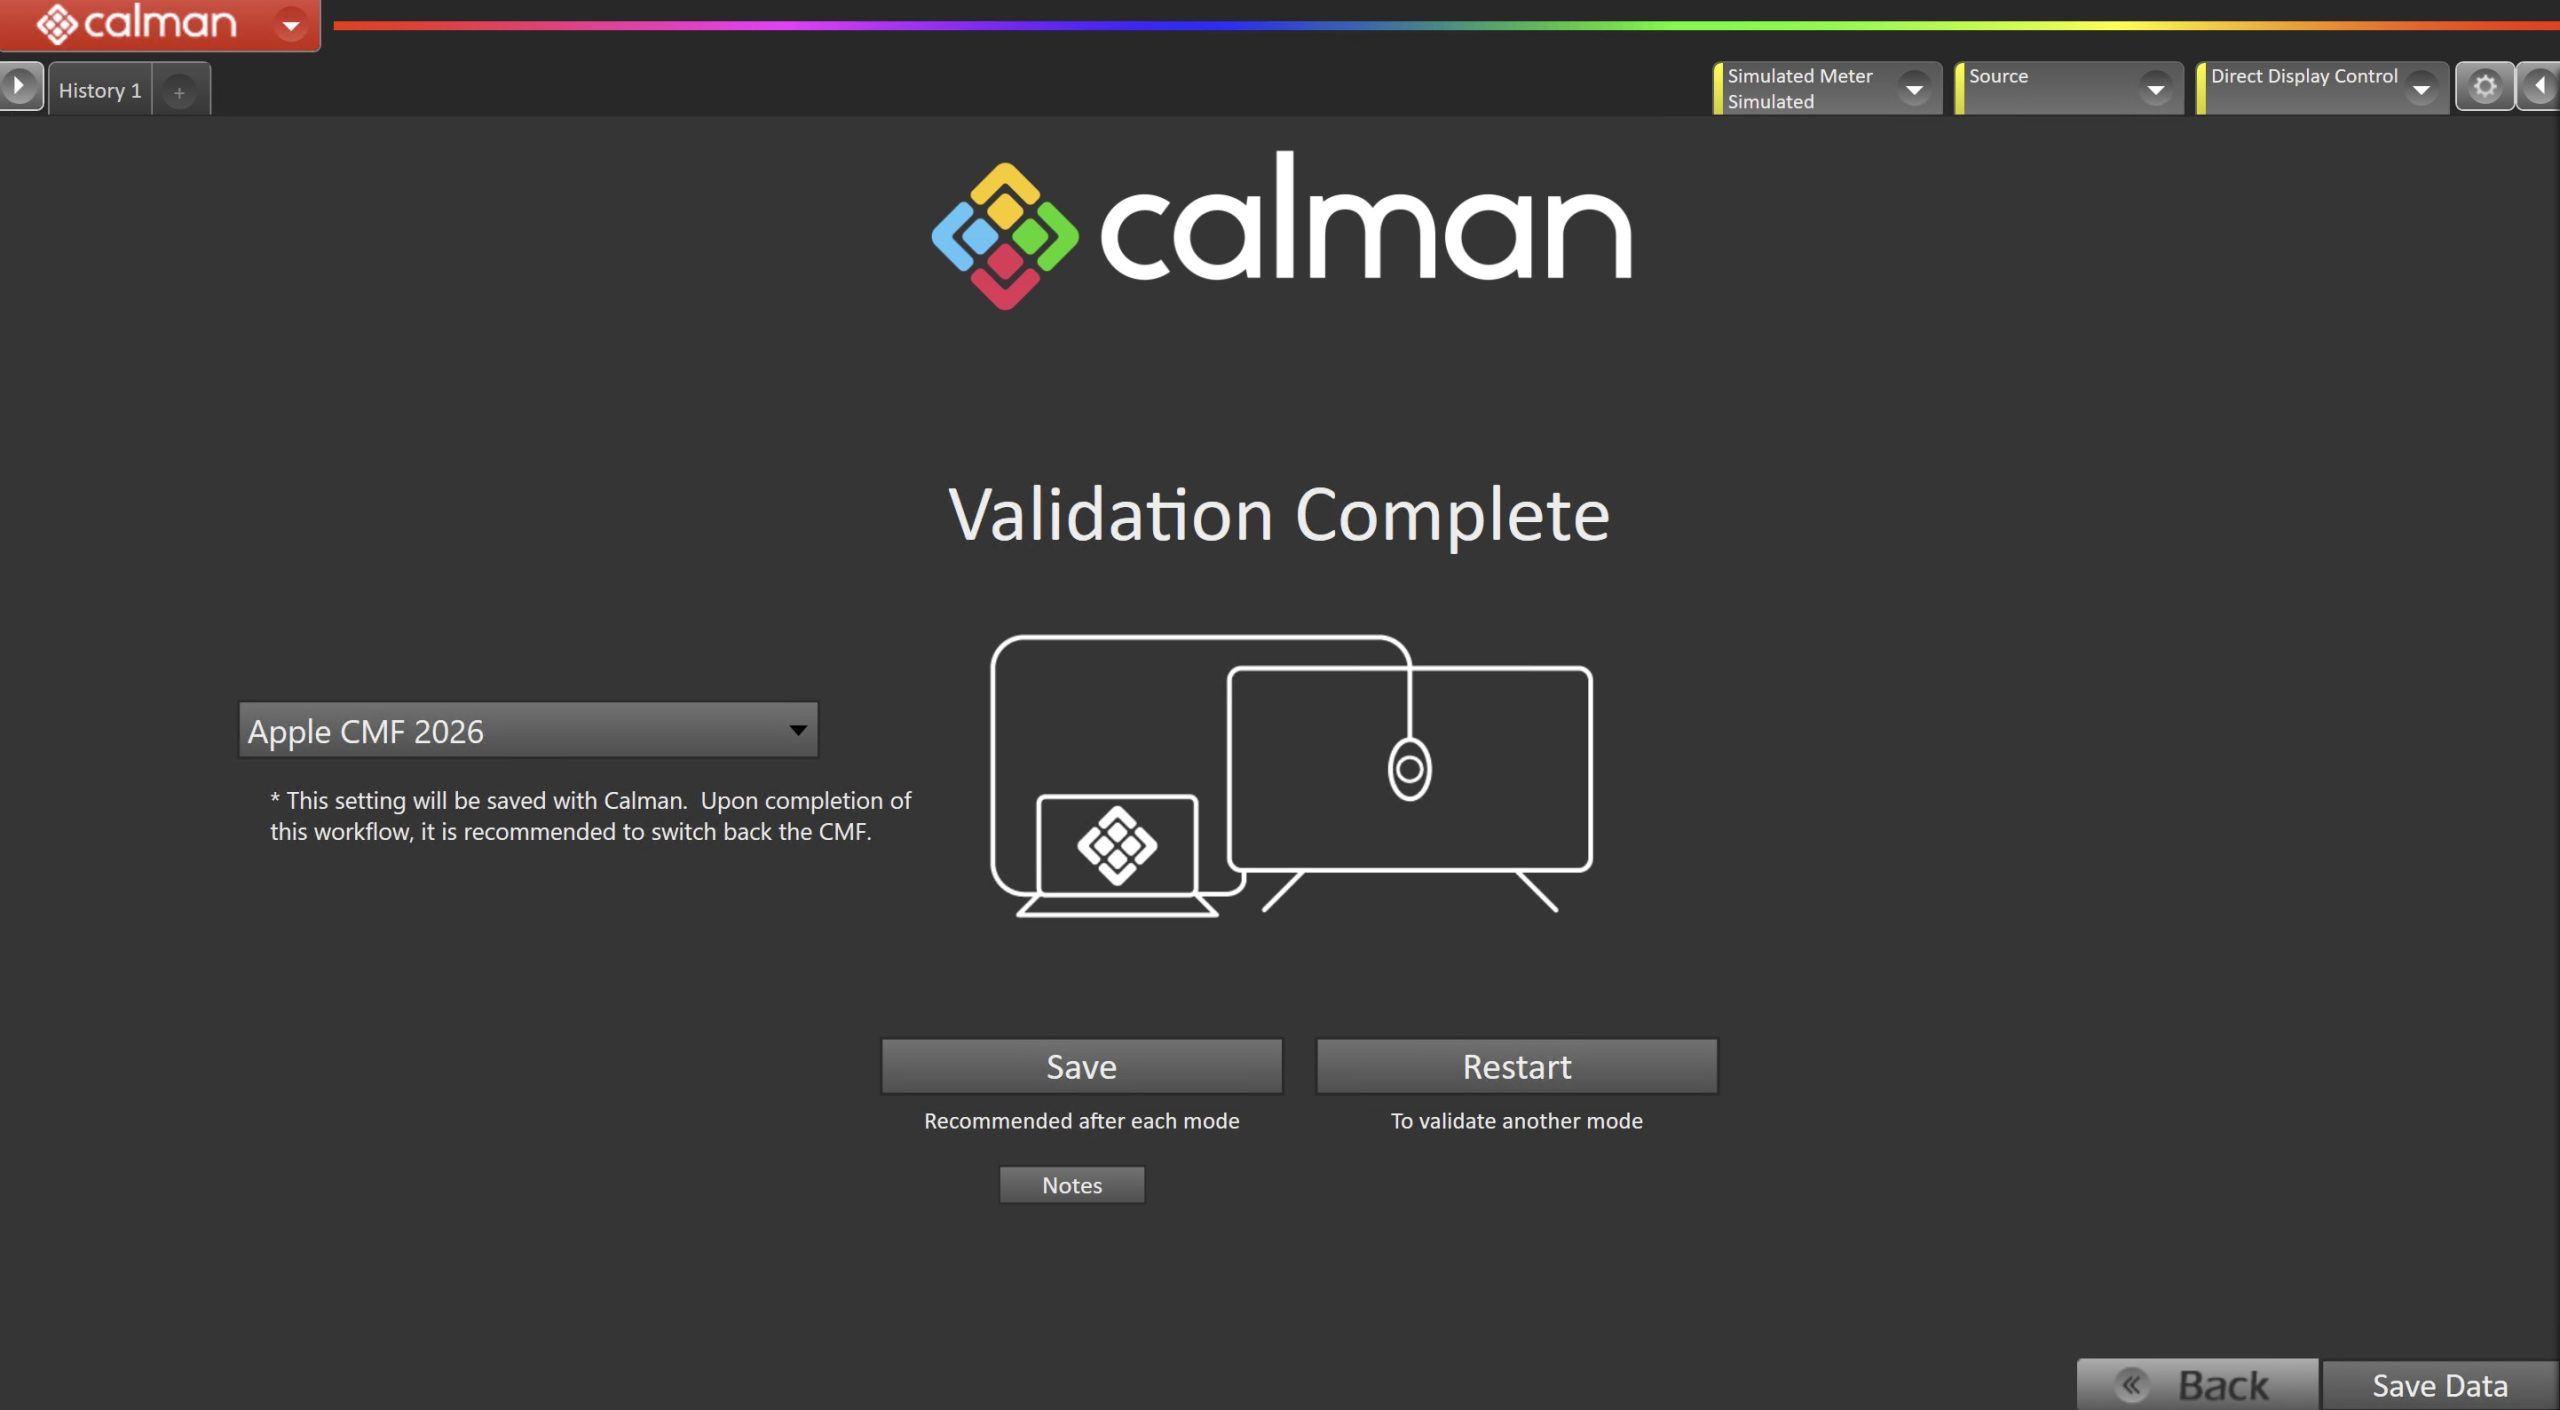
- The CMF target setting will be saved with Calman. Upon completion of this workflow, it is recommended to switch back the CMF.
- On the Calibration Complete page, you can choose to…
- Save and Report
- Select Save and Report to generate the calibration report
- Restart
- Returns to the beginning of the workflow where a new mode or colorspace can be selected
- Note: Does not save workflow data
- Save and Report