Calman offers a streamlined workflow for calibrating Xencelabs Pen Displays, ensuring precise color accuracy and optimal image quality. This guide covers the steps to properly calibrate your Xencelabs display, helping you achieve consistent and reliable results for professional-grade color performance.


Calman Required Version
- Calman Studio or Ultimate v5.16.3 or higher
Hardware Requirements
- Xencelabs Pen Display+
- See Xencelabs Quickstart Guide – Connecting Pen Display for connection information. We recommend connecting the display using USB-C for both video and the DDC connection, but calibration will still function with video over HDMI or DisplayPort and a DDC connection over USB.
- Calman Compatible Meter
- Calman Compatible Pattern Generator
- For external validation only, the Calman pattern window can be used for calibration.
Note:
- Calibration must be performed in Full-Range (0-255) video levels, ensure your PC/Graphics Card/Pattern Source is set to send Full Range video.
Step 1
- From the Calman Menu in the top-left, choose Open Workflow Template -> Display Specific and then AutoCal – Xencelabs.
- Click Next to proceed to calibration setup
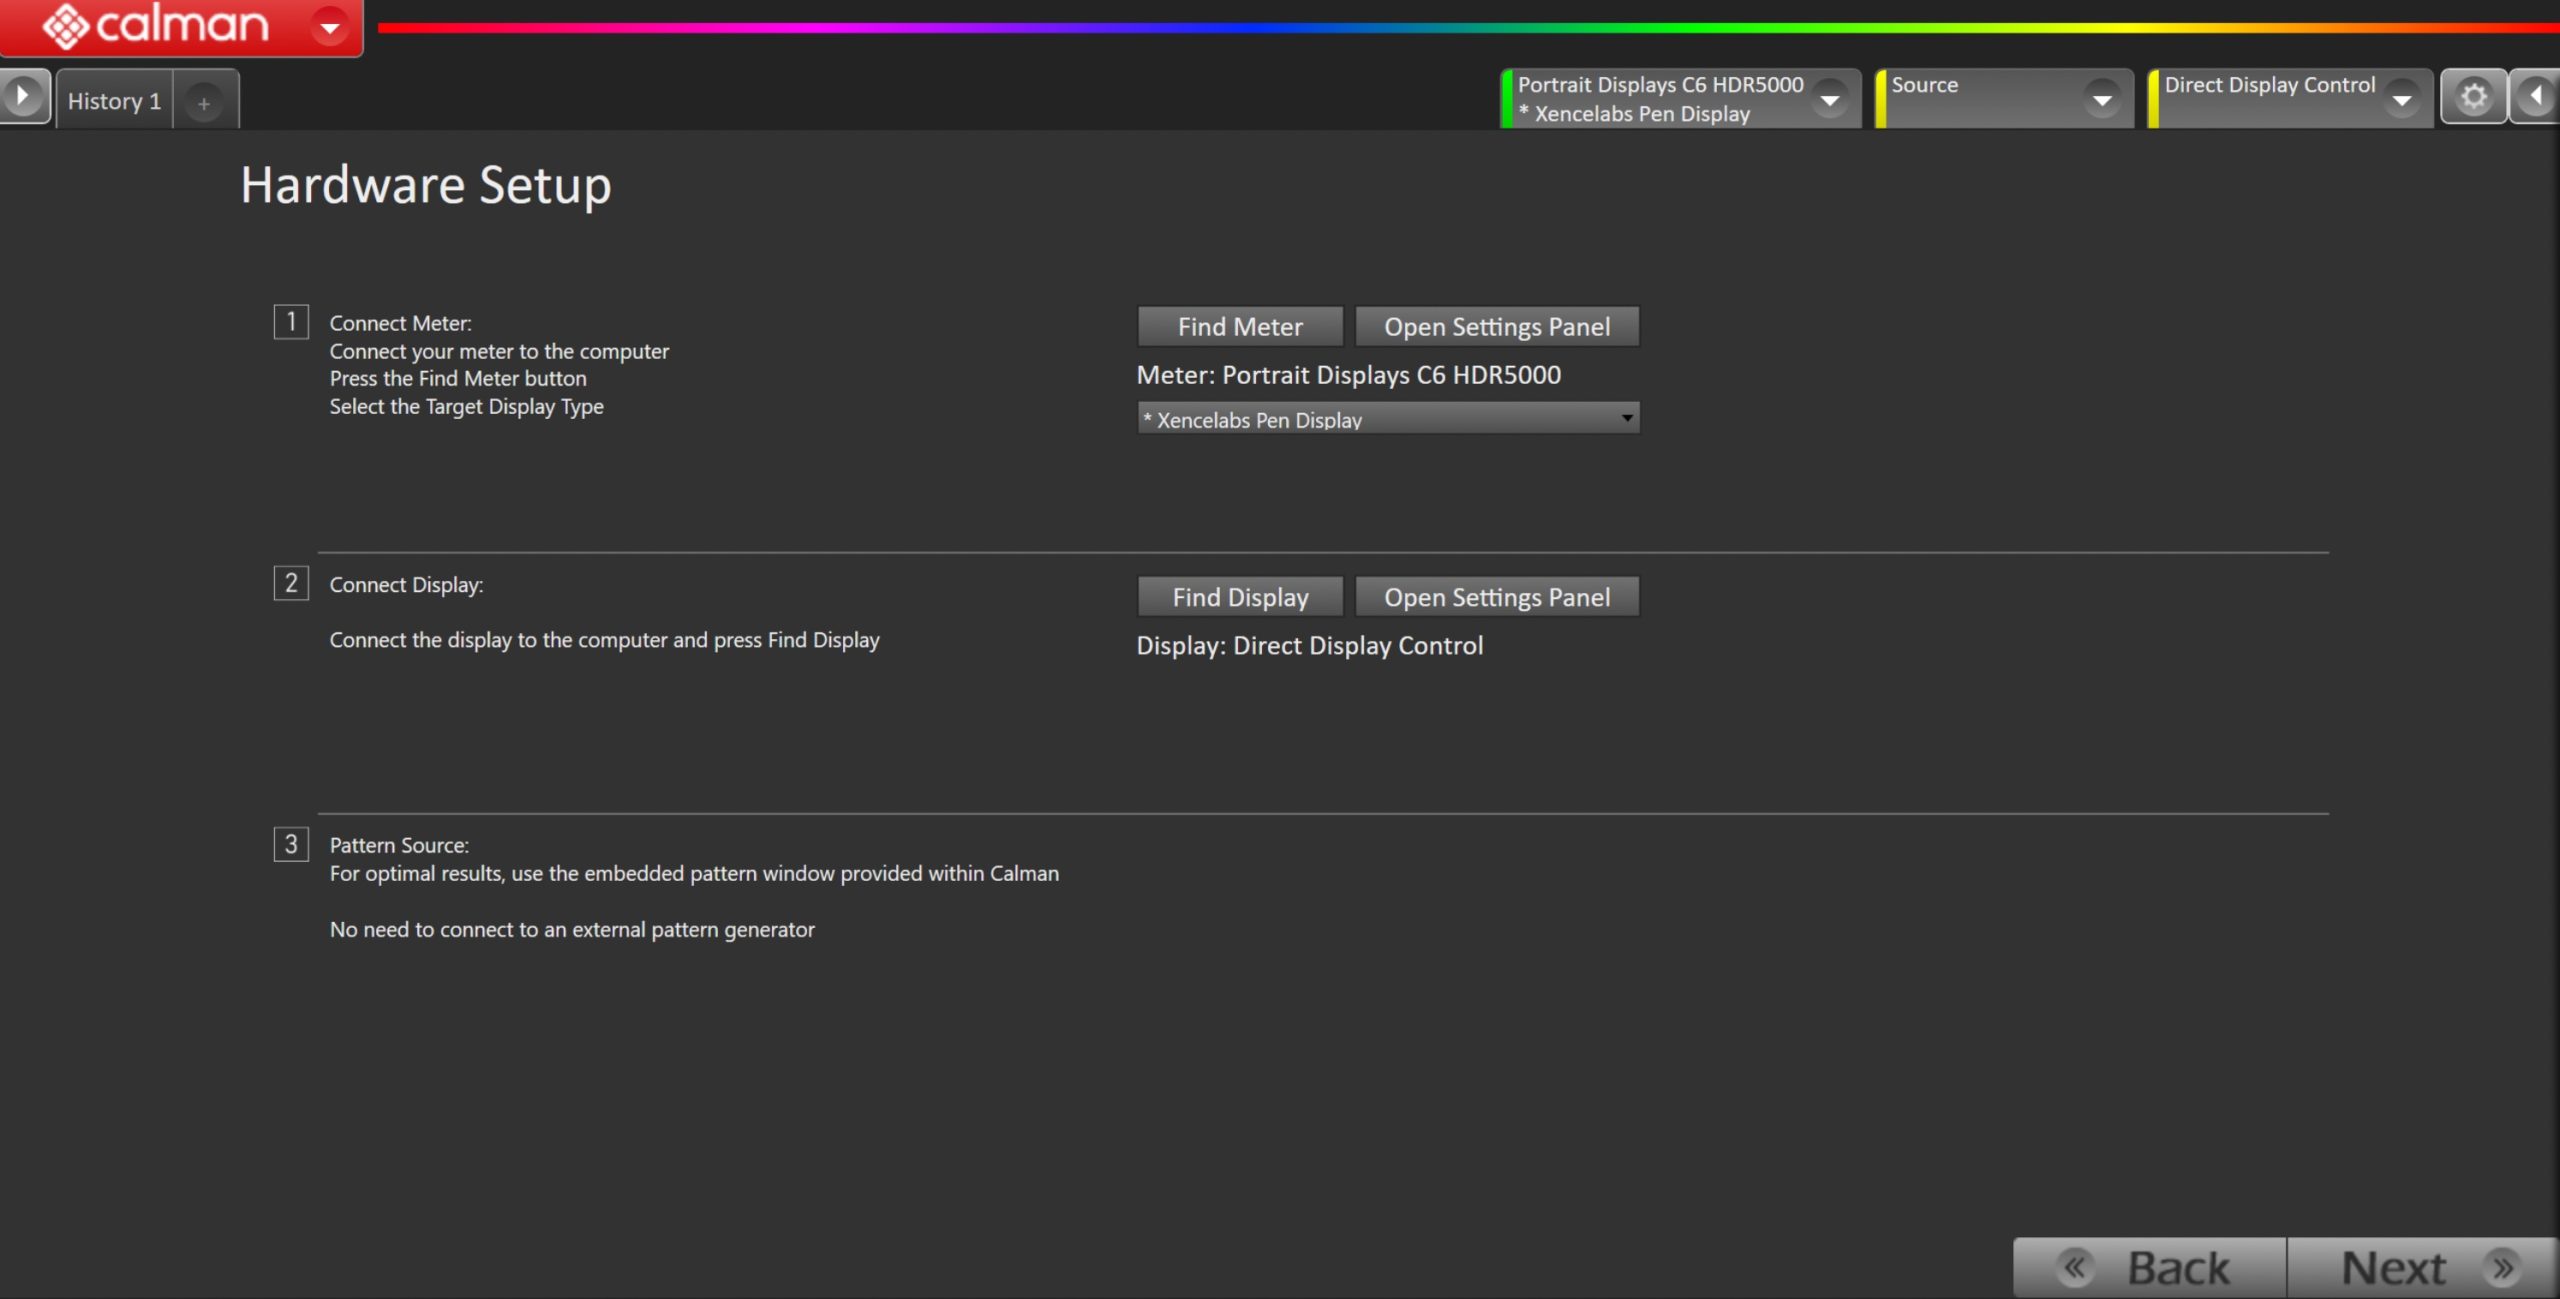
- Plug your meter into a USB port on the computer and press the Find Meter button on the left.
- When your meter is connected, select your display type from the dropdown. For Portrait Displays C6 meters, choose the custom Xencelabs Pen Display mode included.
- During measurement/calibration steps, ensure meter is placed in front of the embedded pattern window that will be displayed in the center of the Calman window
- Connect your Xencelabs Pen Display
- Ensure you have connected your Pen Display to your computer via USB
- Click the Find Display Button
- Select Xencelabs – Pen Display 24+ from the dropdown
- Click Connect
Step 2
- Confirm Calibration Targets and Application Settings

- For calibration targets should be:
- DCI P3
- Power 2.2
- D65
- Click Next
Step 3
- In this step, you’ll take measurements of the display before the calibration. These will be used to compare the calibration results.
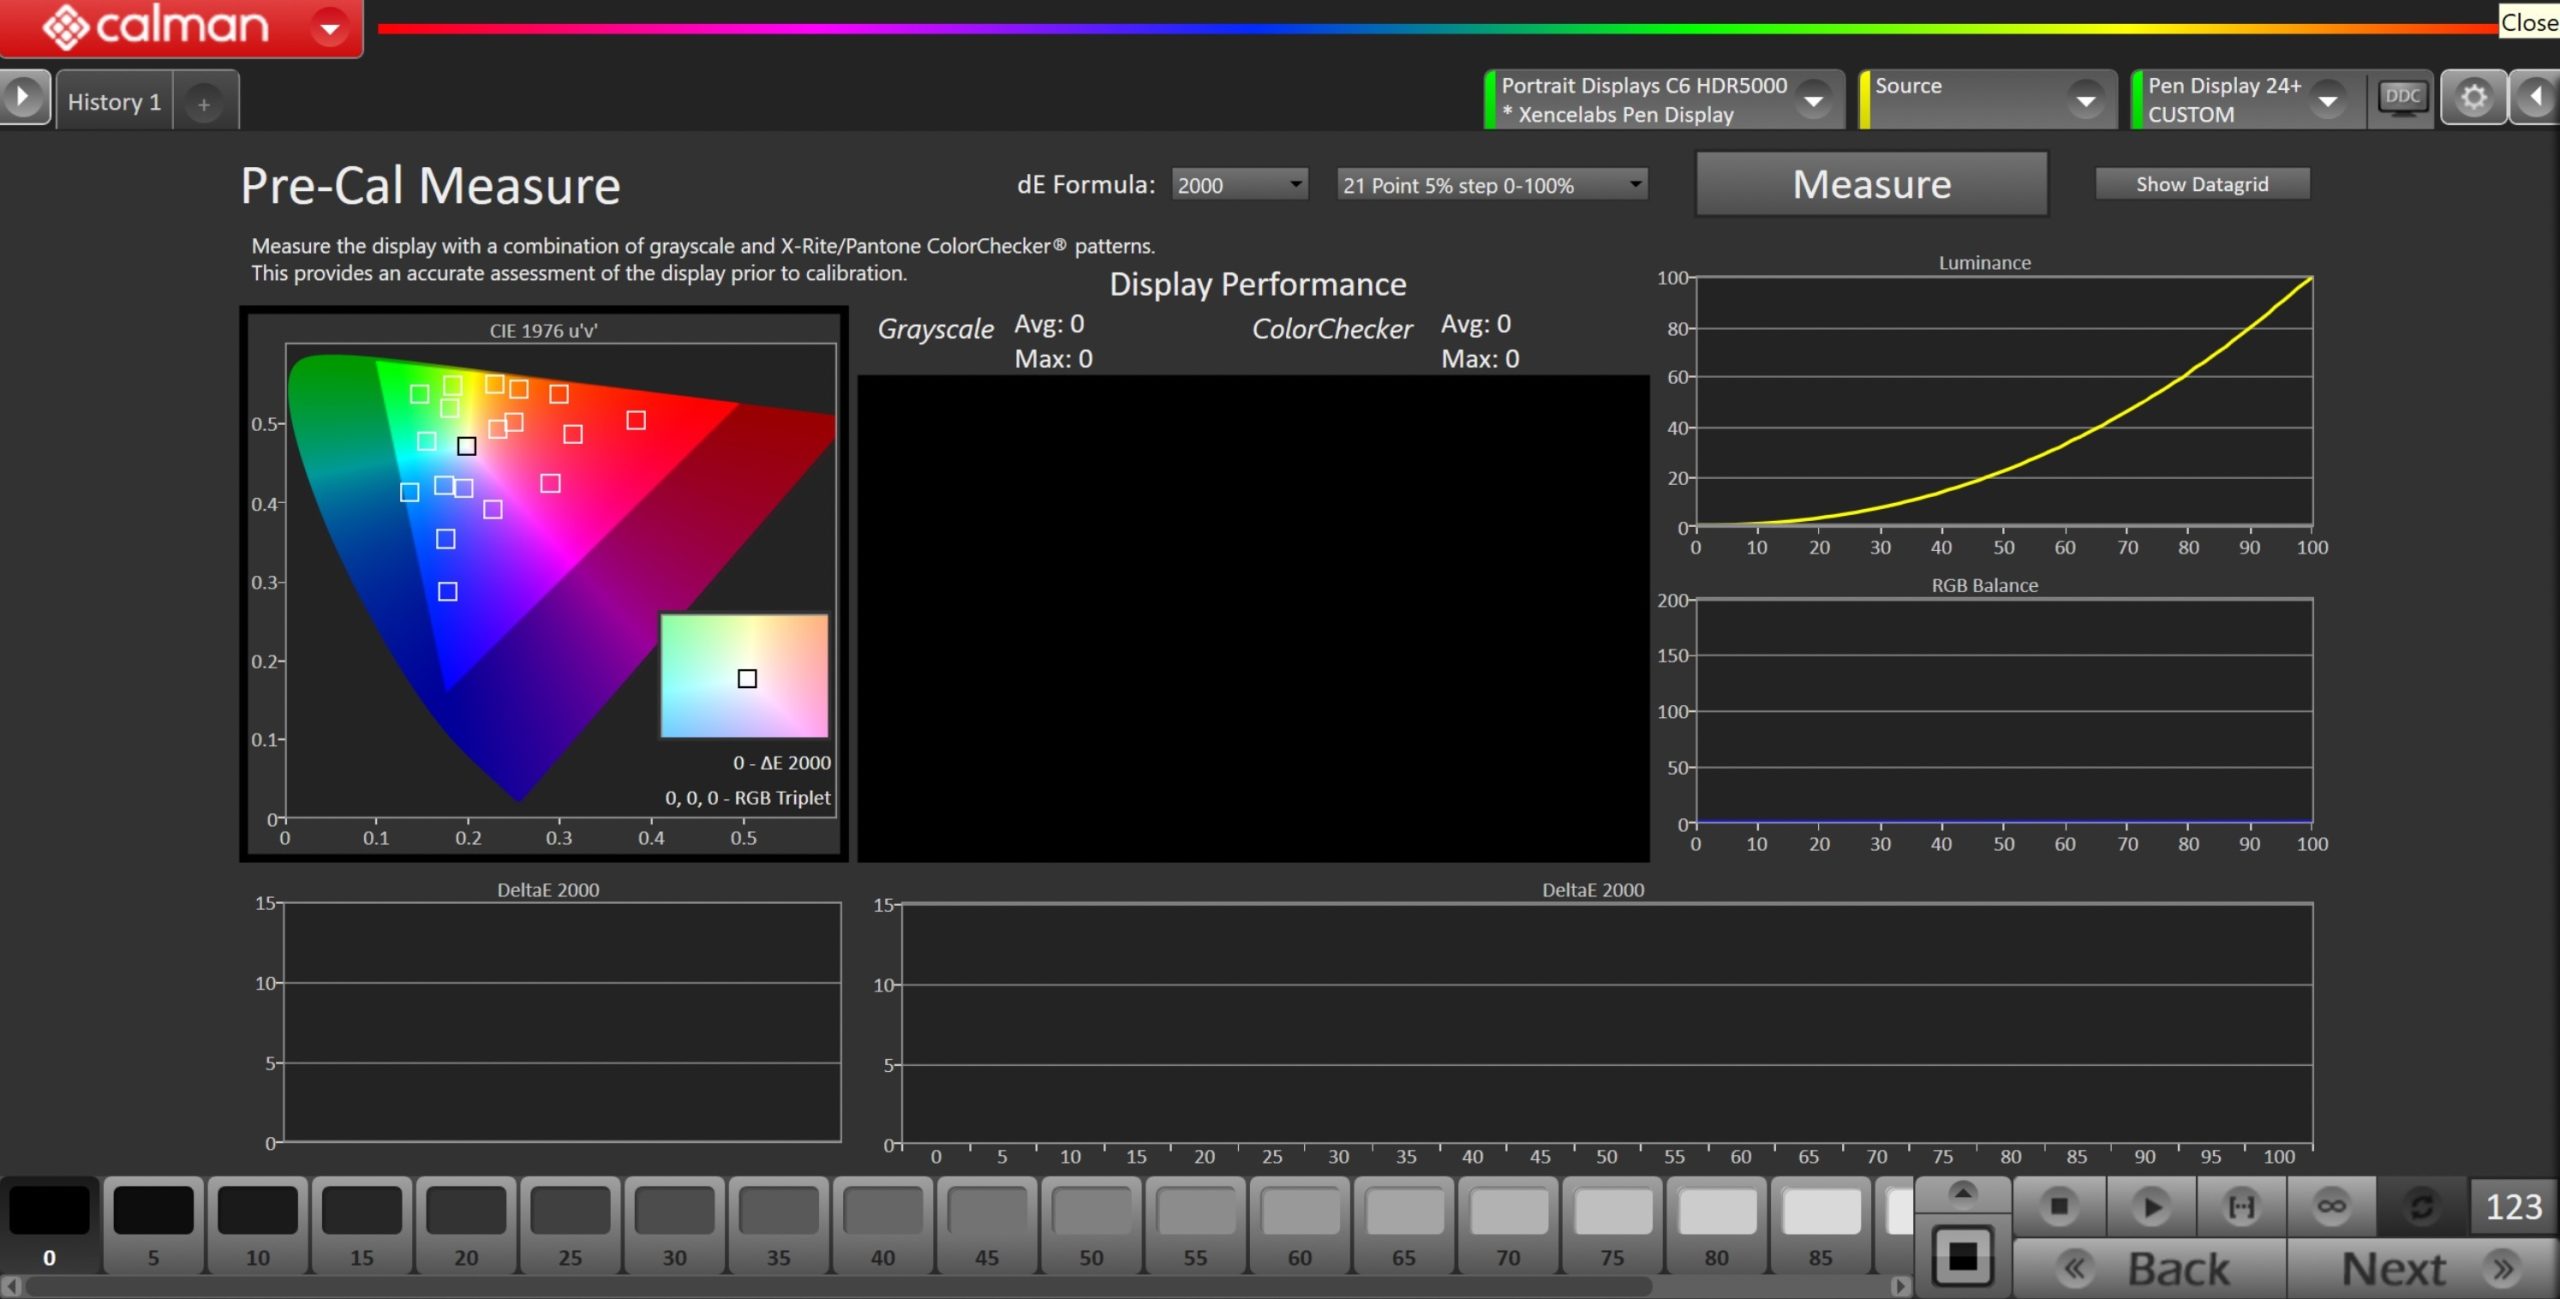
- To take Pre-Calibration Measurements, click the Read Series […] button to measure the display’s grayscale and ColorChecker response
- This will provide a point of reference to compare the calibration results
- Click Next to proceed

- Click Reset to prepare for calibration.
- Click Next to proceed
Step 4
- In this step, you will be able to adjust the Luminance of the display to match your desired target.
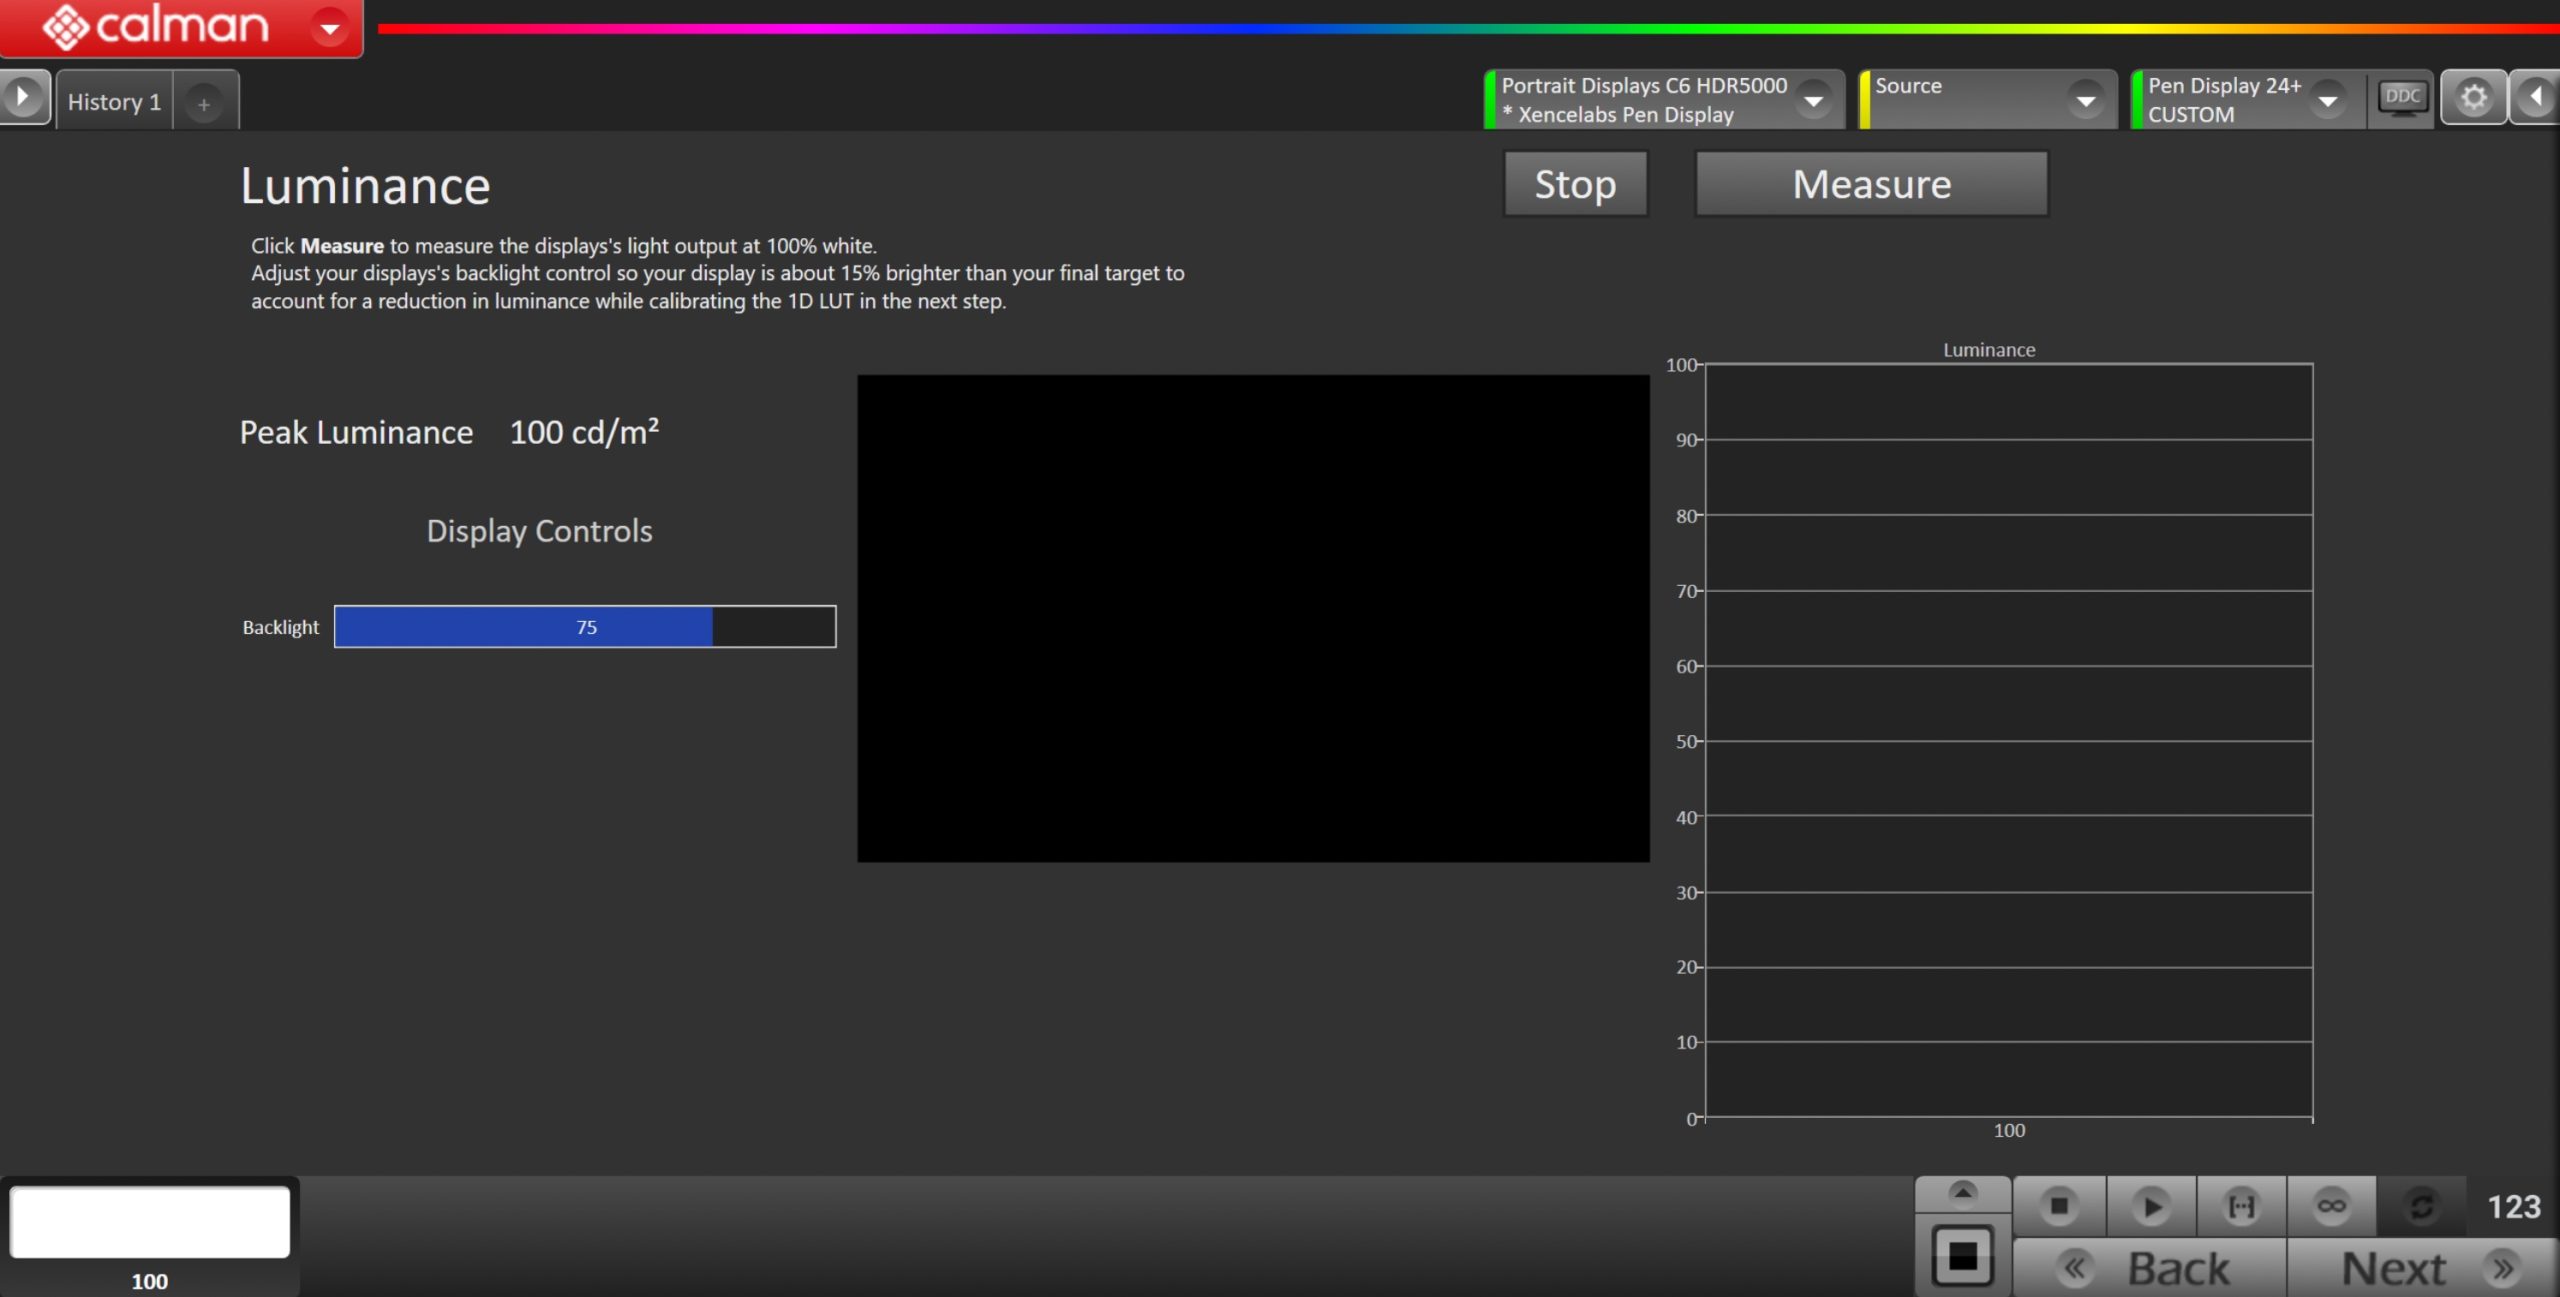
- Click the Measure button to measure your display’s light output at 100% white and adjust the display’s peak white to the desired luminance.
- Luminance is a subjective target. SDR reference luminance is 100nits, but you may need to target higher to account for the ambient light in your environment.
- Adjust your luminance control so your display is about 15% brighter than your final target to account for a reduction in luminance when calibrating the grayscale in the next step.
- Click Stop when the luminance adjustment is complete, and click Next to proceed
Step 5
- Here, Calman will adjust the Multipoint Greyscale of the display using a 1D LUT
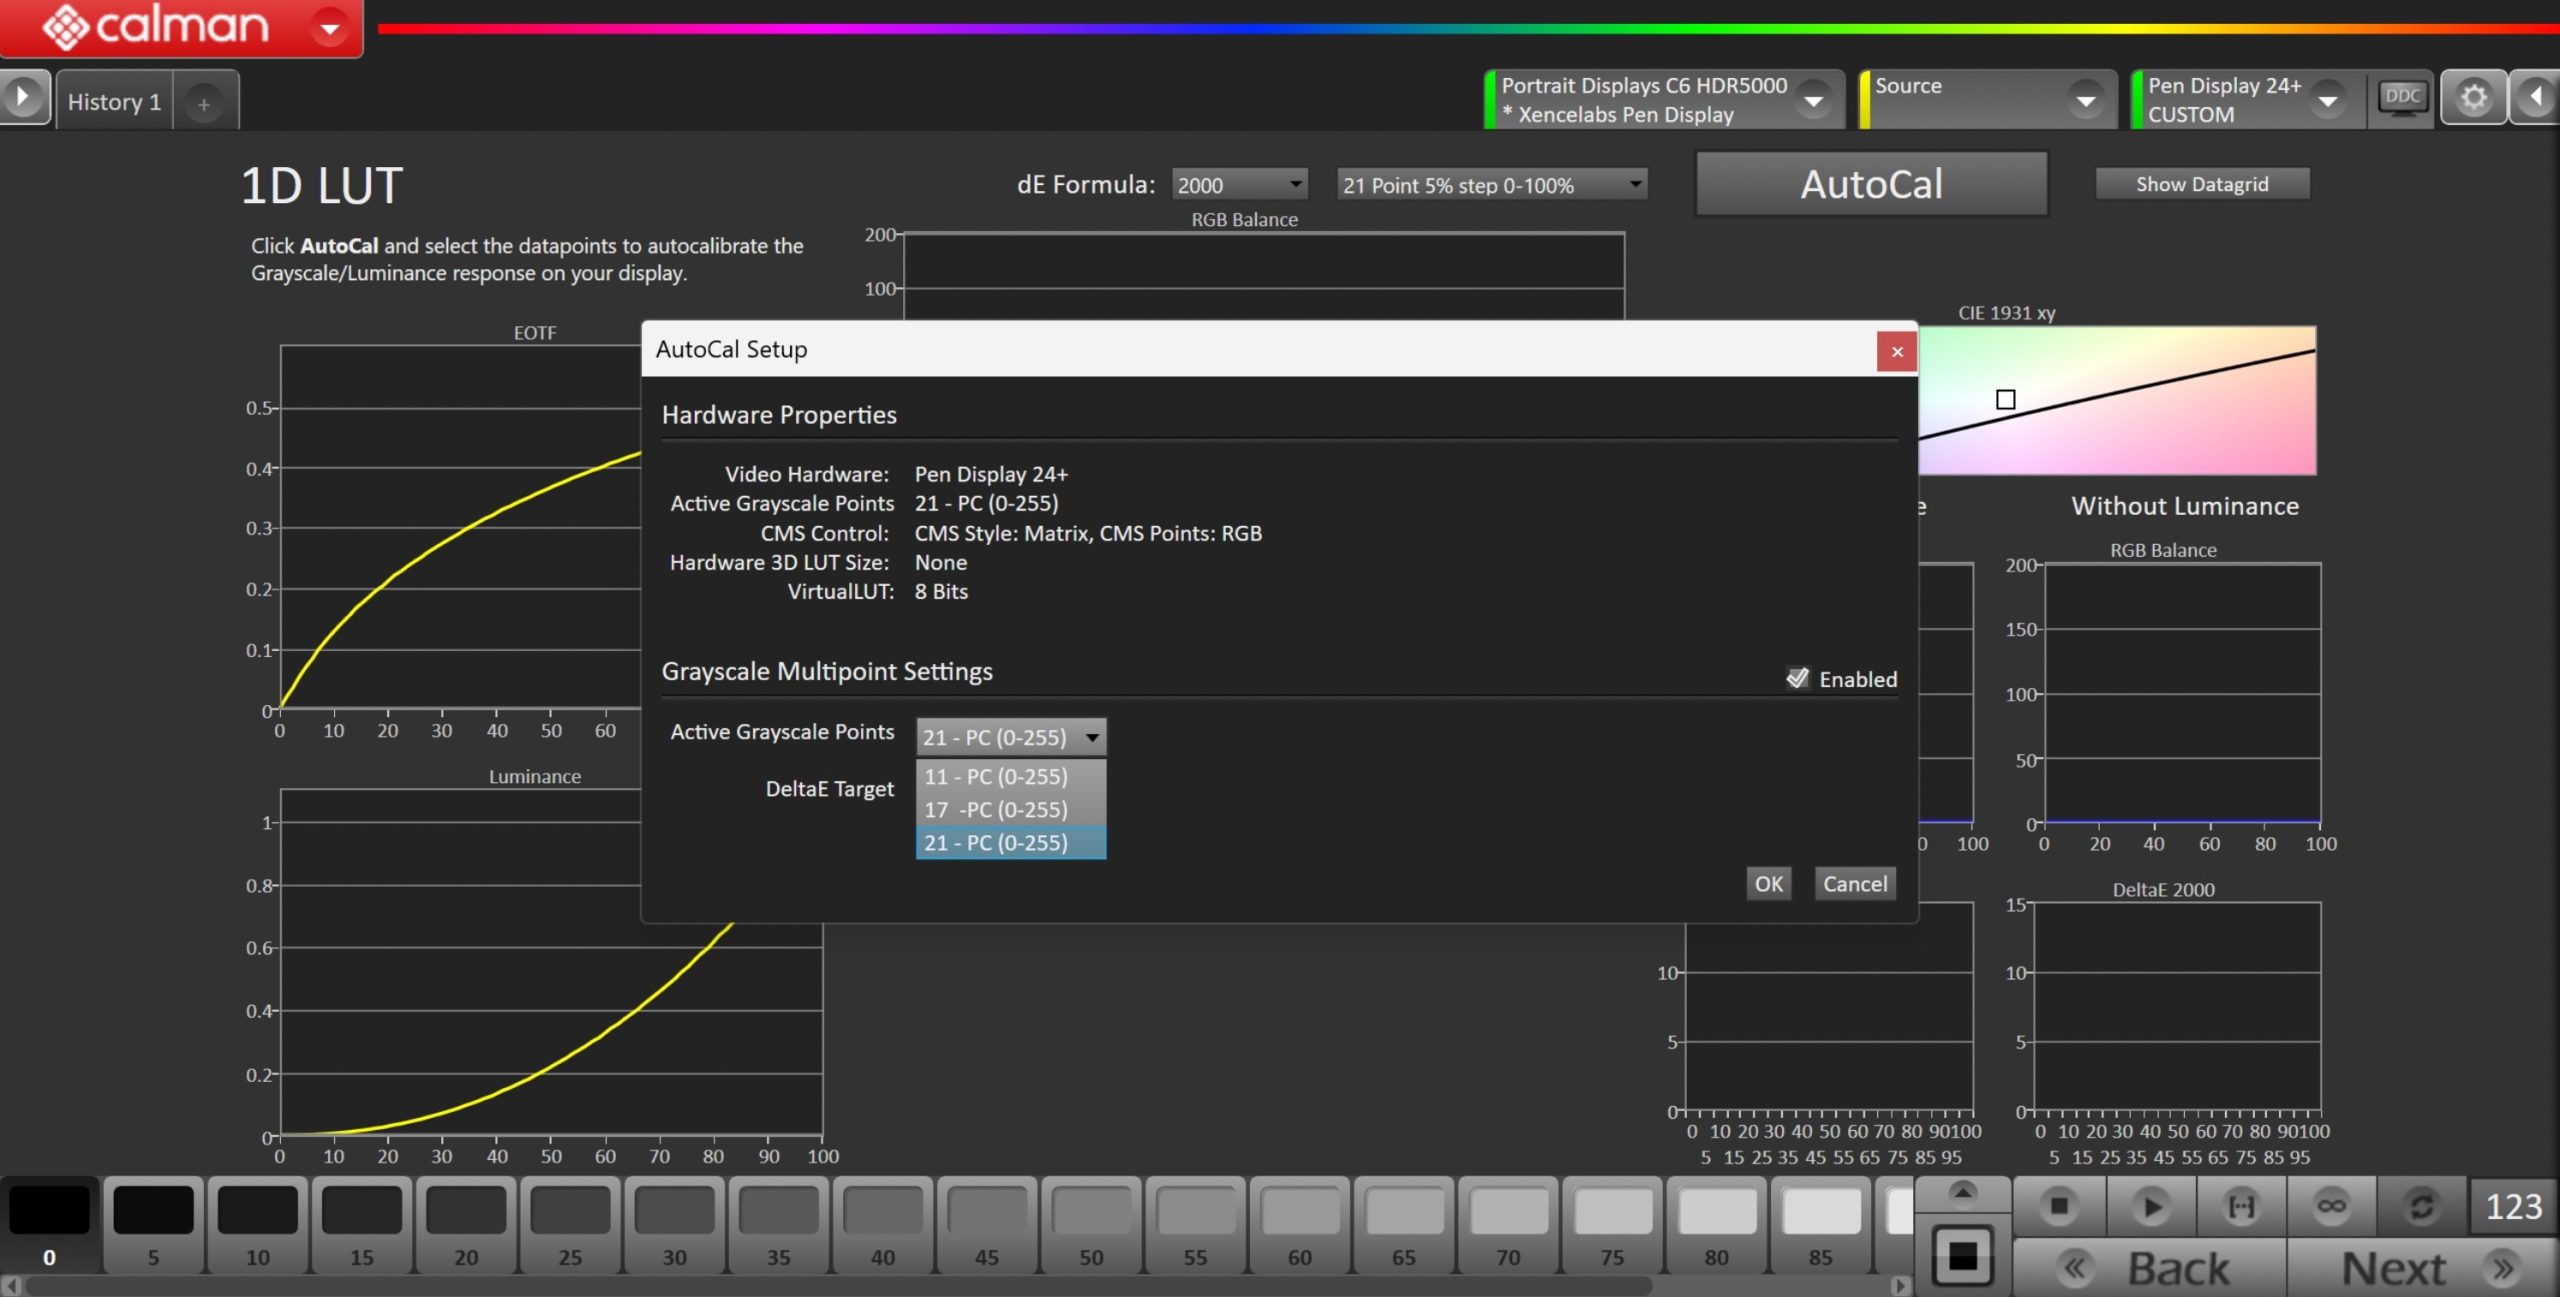
- Press the AutoCal button and select the number of data points in the AutoCal Dialog to auto-calibrate the Grayscale/Luminance response on the display.
- Click OK to begin greyscale AutoCal
Step 6
- On this page, Calman will calibrate the Color Management using a 3×3 Matrix
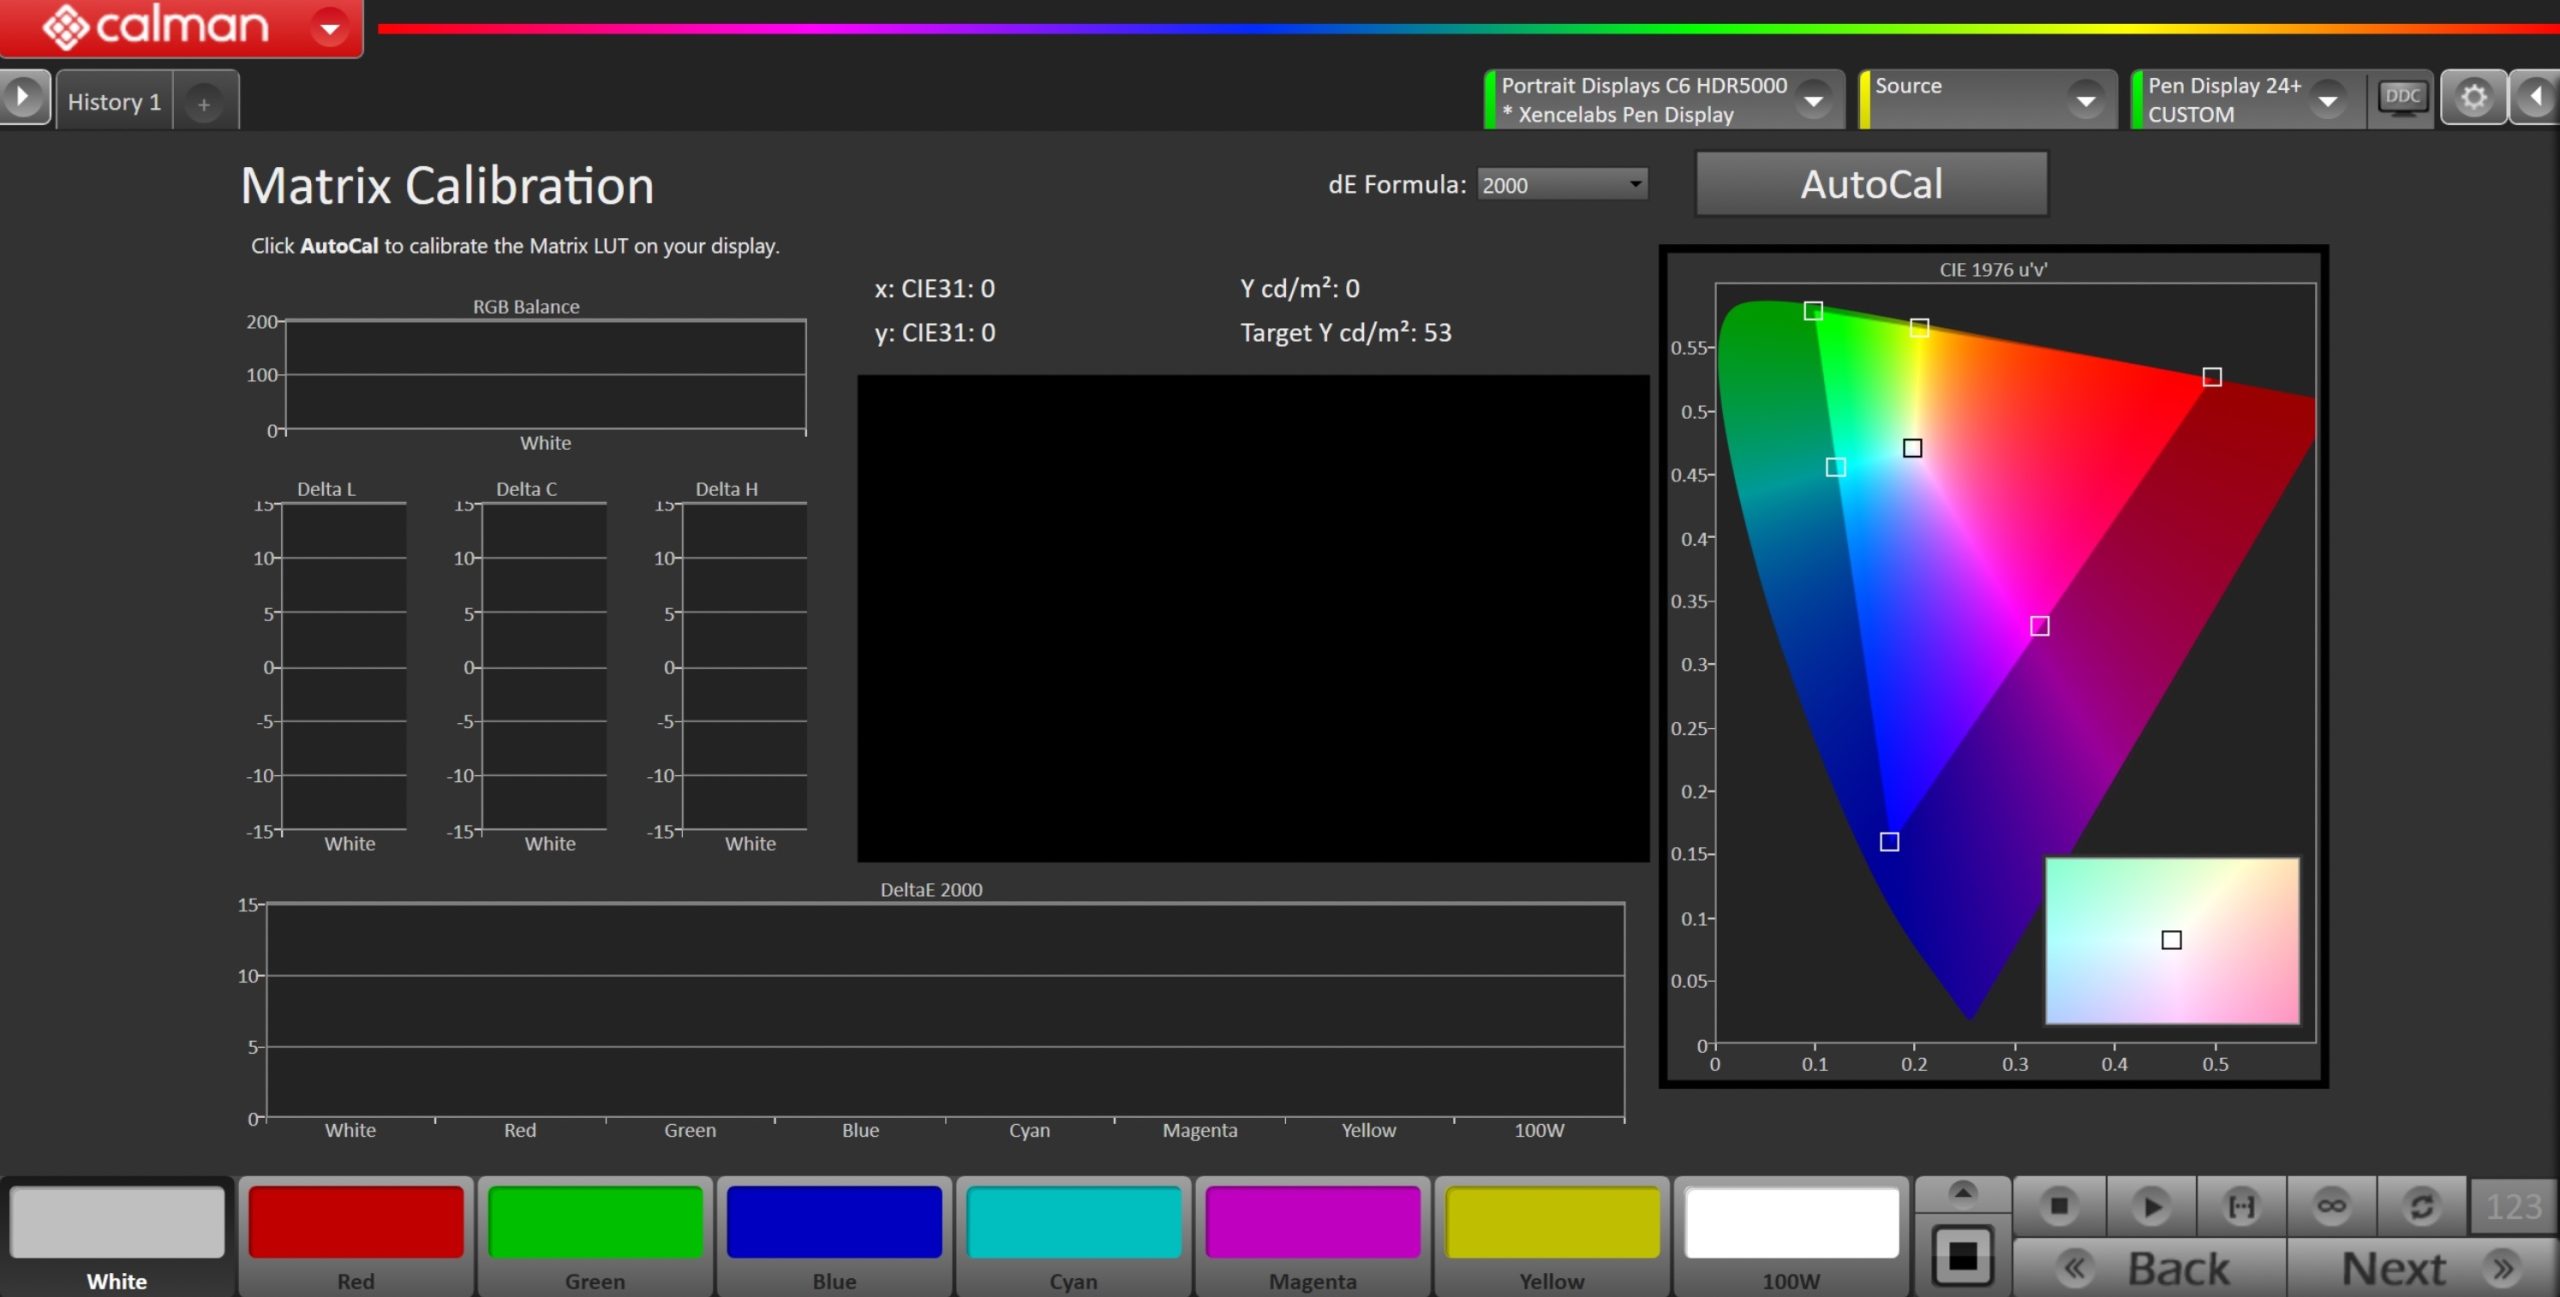
- Click the AutoCal button to open the AutoCal dialog
- Click OK to begin the colorspace AutoCal process
- When AutoCal is complete, click the Next button to proceed
Step 7
- It’s common to lose some overall luminance after the 1D LUT calibration. Use this step to adjust back to your luminance target if it has changed.
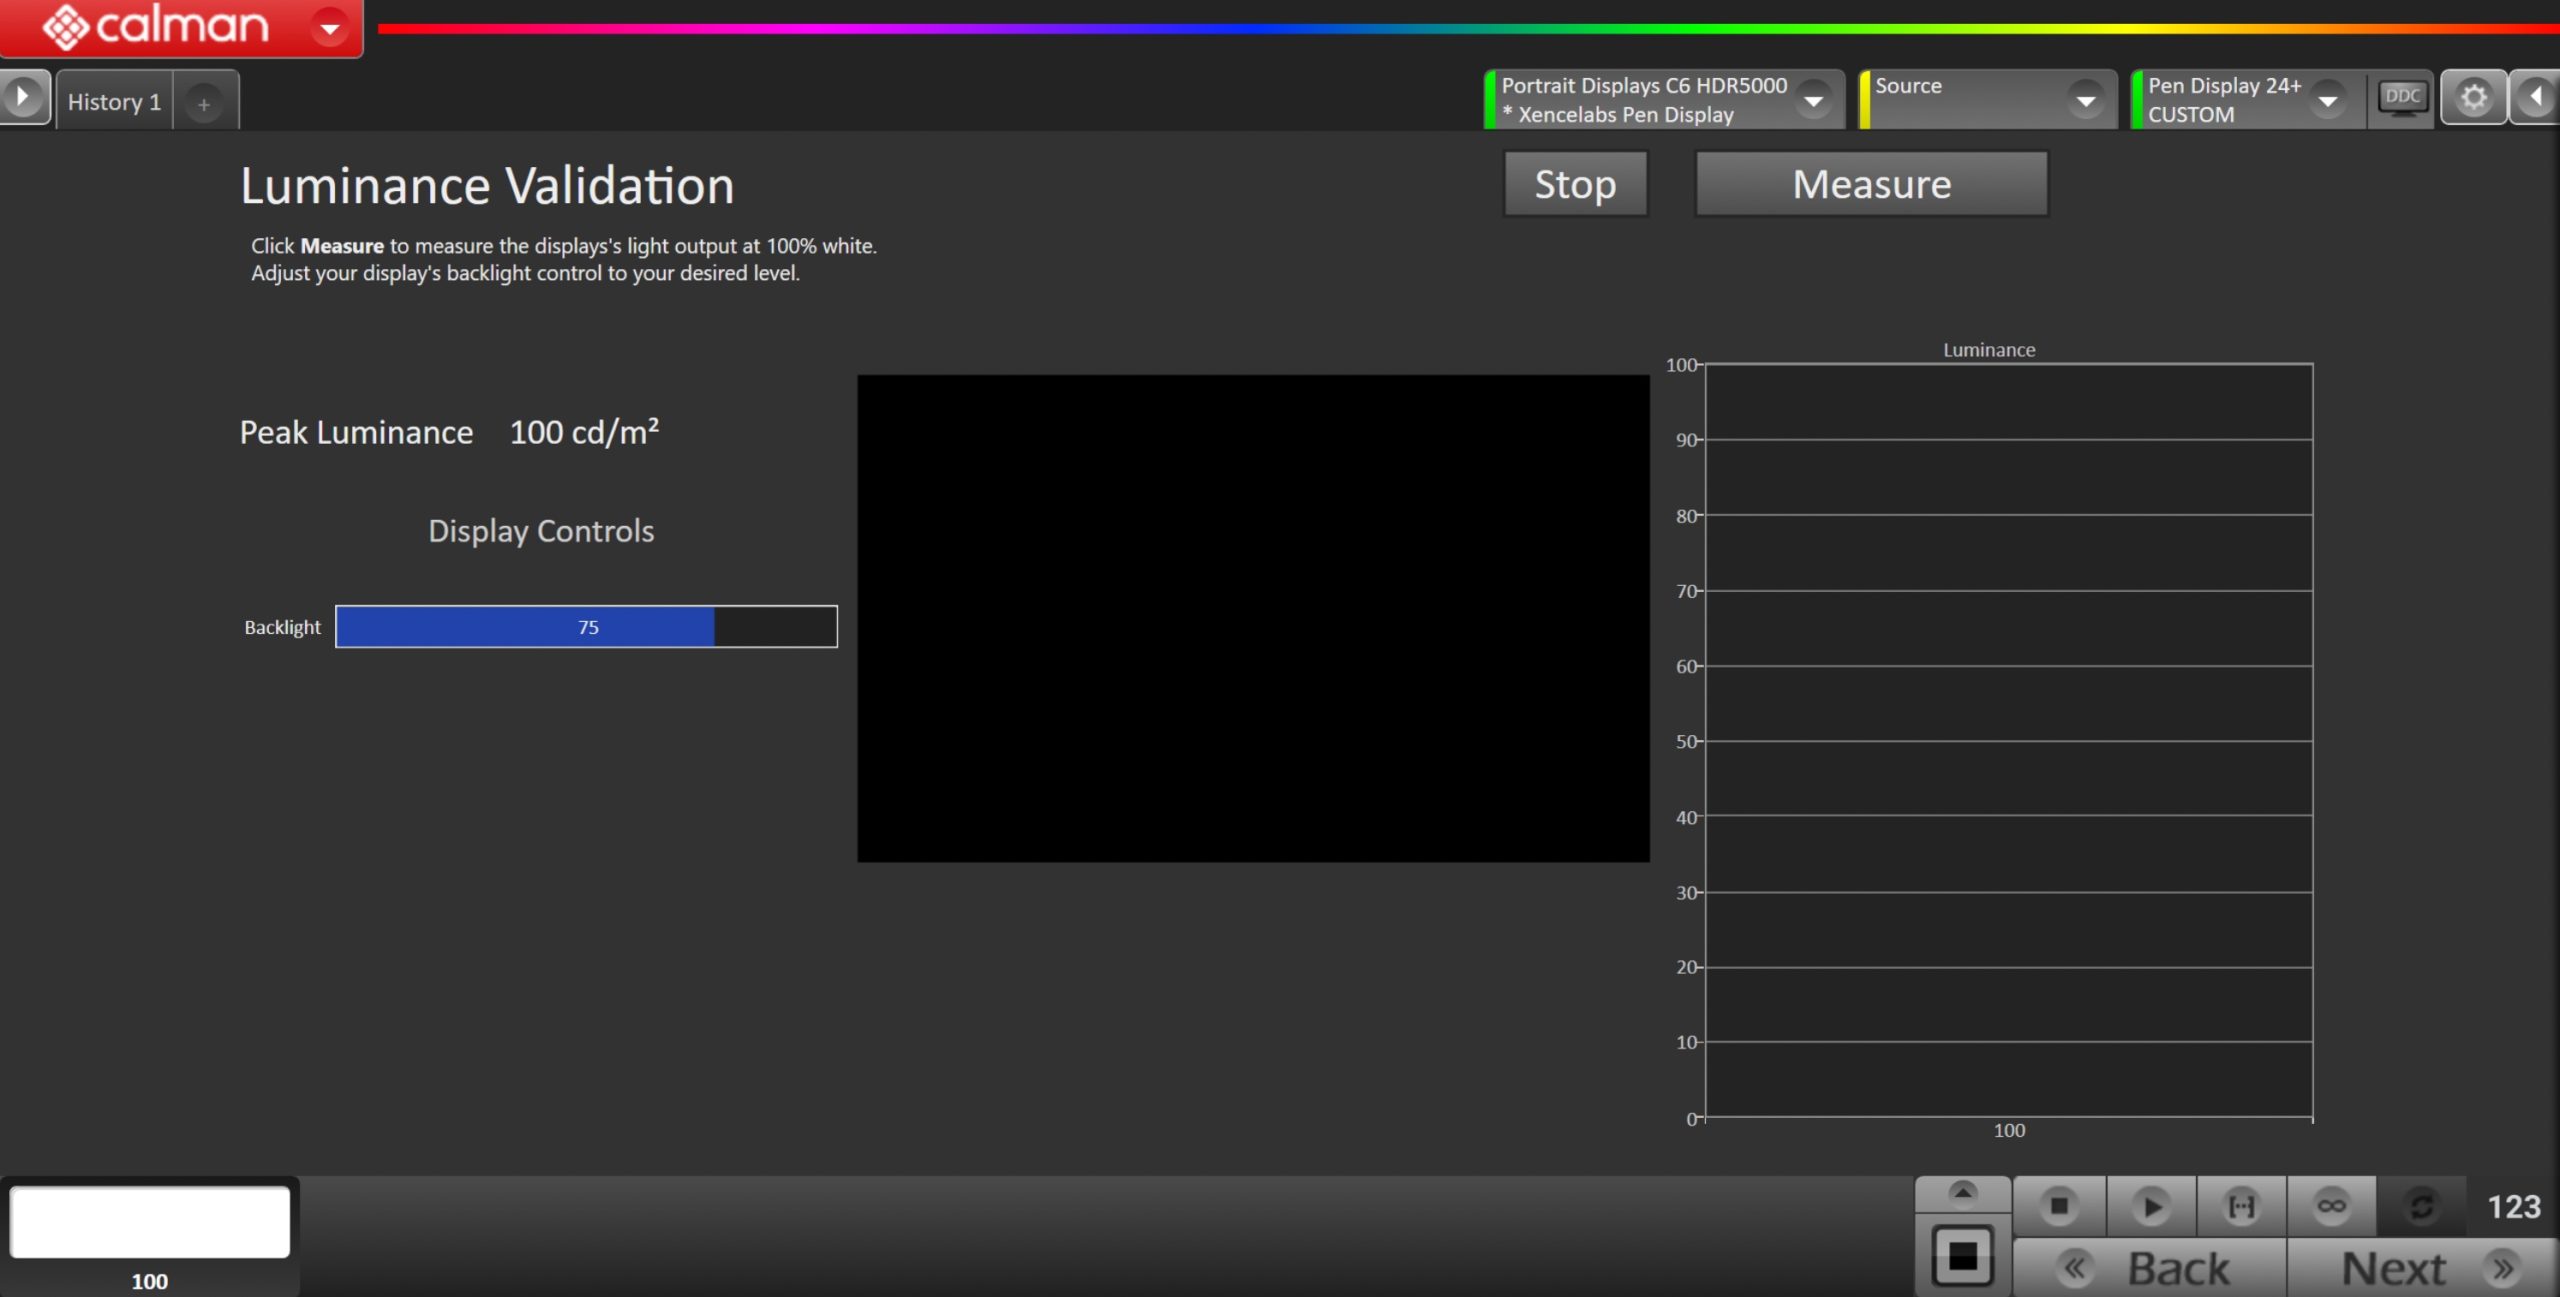
- Click the Read Continuous button to measure the display’s light output at 100% white and adjust the display’s peak white to the desired luminance.
- Press Stop when luminance adjustment is complete
Step 8
- In this step, you’ll take measurements of the calibration results.

- To take Post-Calibration Measurements, click the Read Series […] button to measure the display’s grayscale and ColorChecker response
- Click Next to proceed
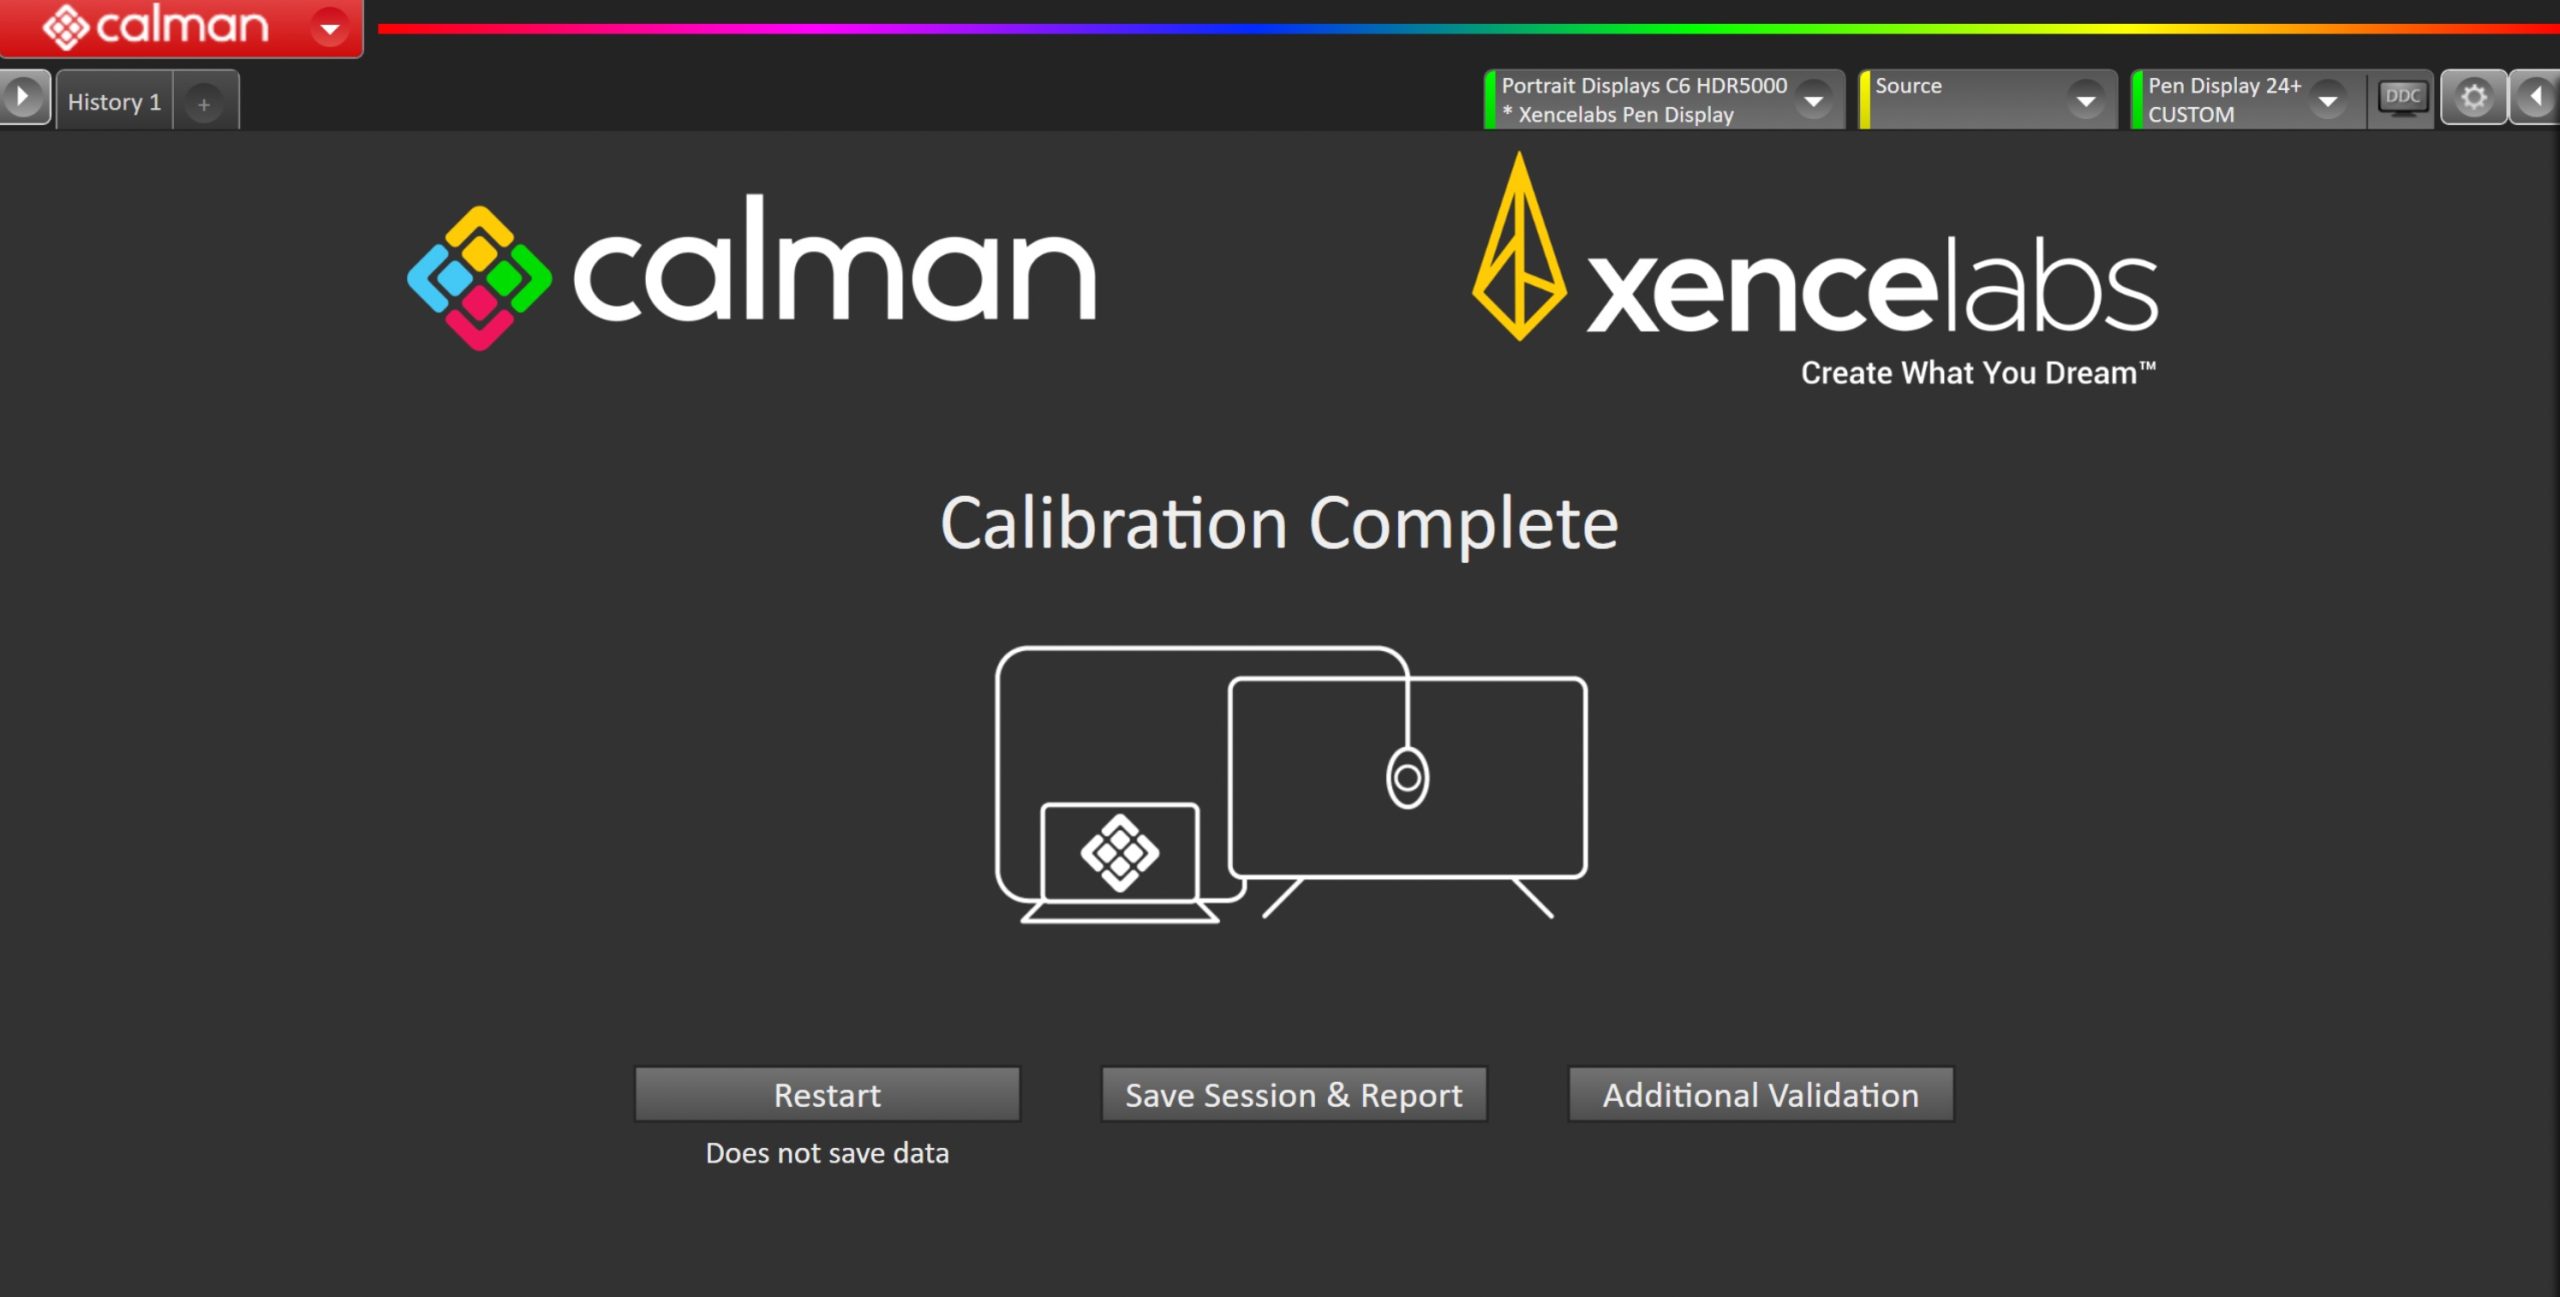
- On the Calibration Complete page, you can choose to…
- Restart
- Returns to the beginning of the workflow where a new mode or colorspace can be selected
- Note: Does not save workflow data
- Save Session and Report
- Select Save and Report to generate the calibration report
- Additional Validation
- Allows measurement of the display using more thorough Saturation Sweeps and ColorChecker® patch sets
- Restart