
In the world of professional color grading and post-production, achieving accurate color representation is essential. A 3D Look-Up Table (3D LUT) is a powerful tool used to precisely map and correct colors on a display. Whether you are working in film, photography, or digital content creation, a properly calibrated monitor is crucial for maintaining color accuracy.
This guide will help you create a detailed and accurate 3D LUT tailored to your professional monitor.
Requirements
-
- Calman Version
- Calman Studio or Ultimate 2022 or newer
- Required Hardware
- Calman Compatible Measurement Device
- Calman Compatible Pattern Generator
- Hardware or Software video processor
- Calman Version
Step 1
- From the Calman Menu in the top left, choose Open Workflow Template → Calibration and then open the 3D LUT workflow.
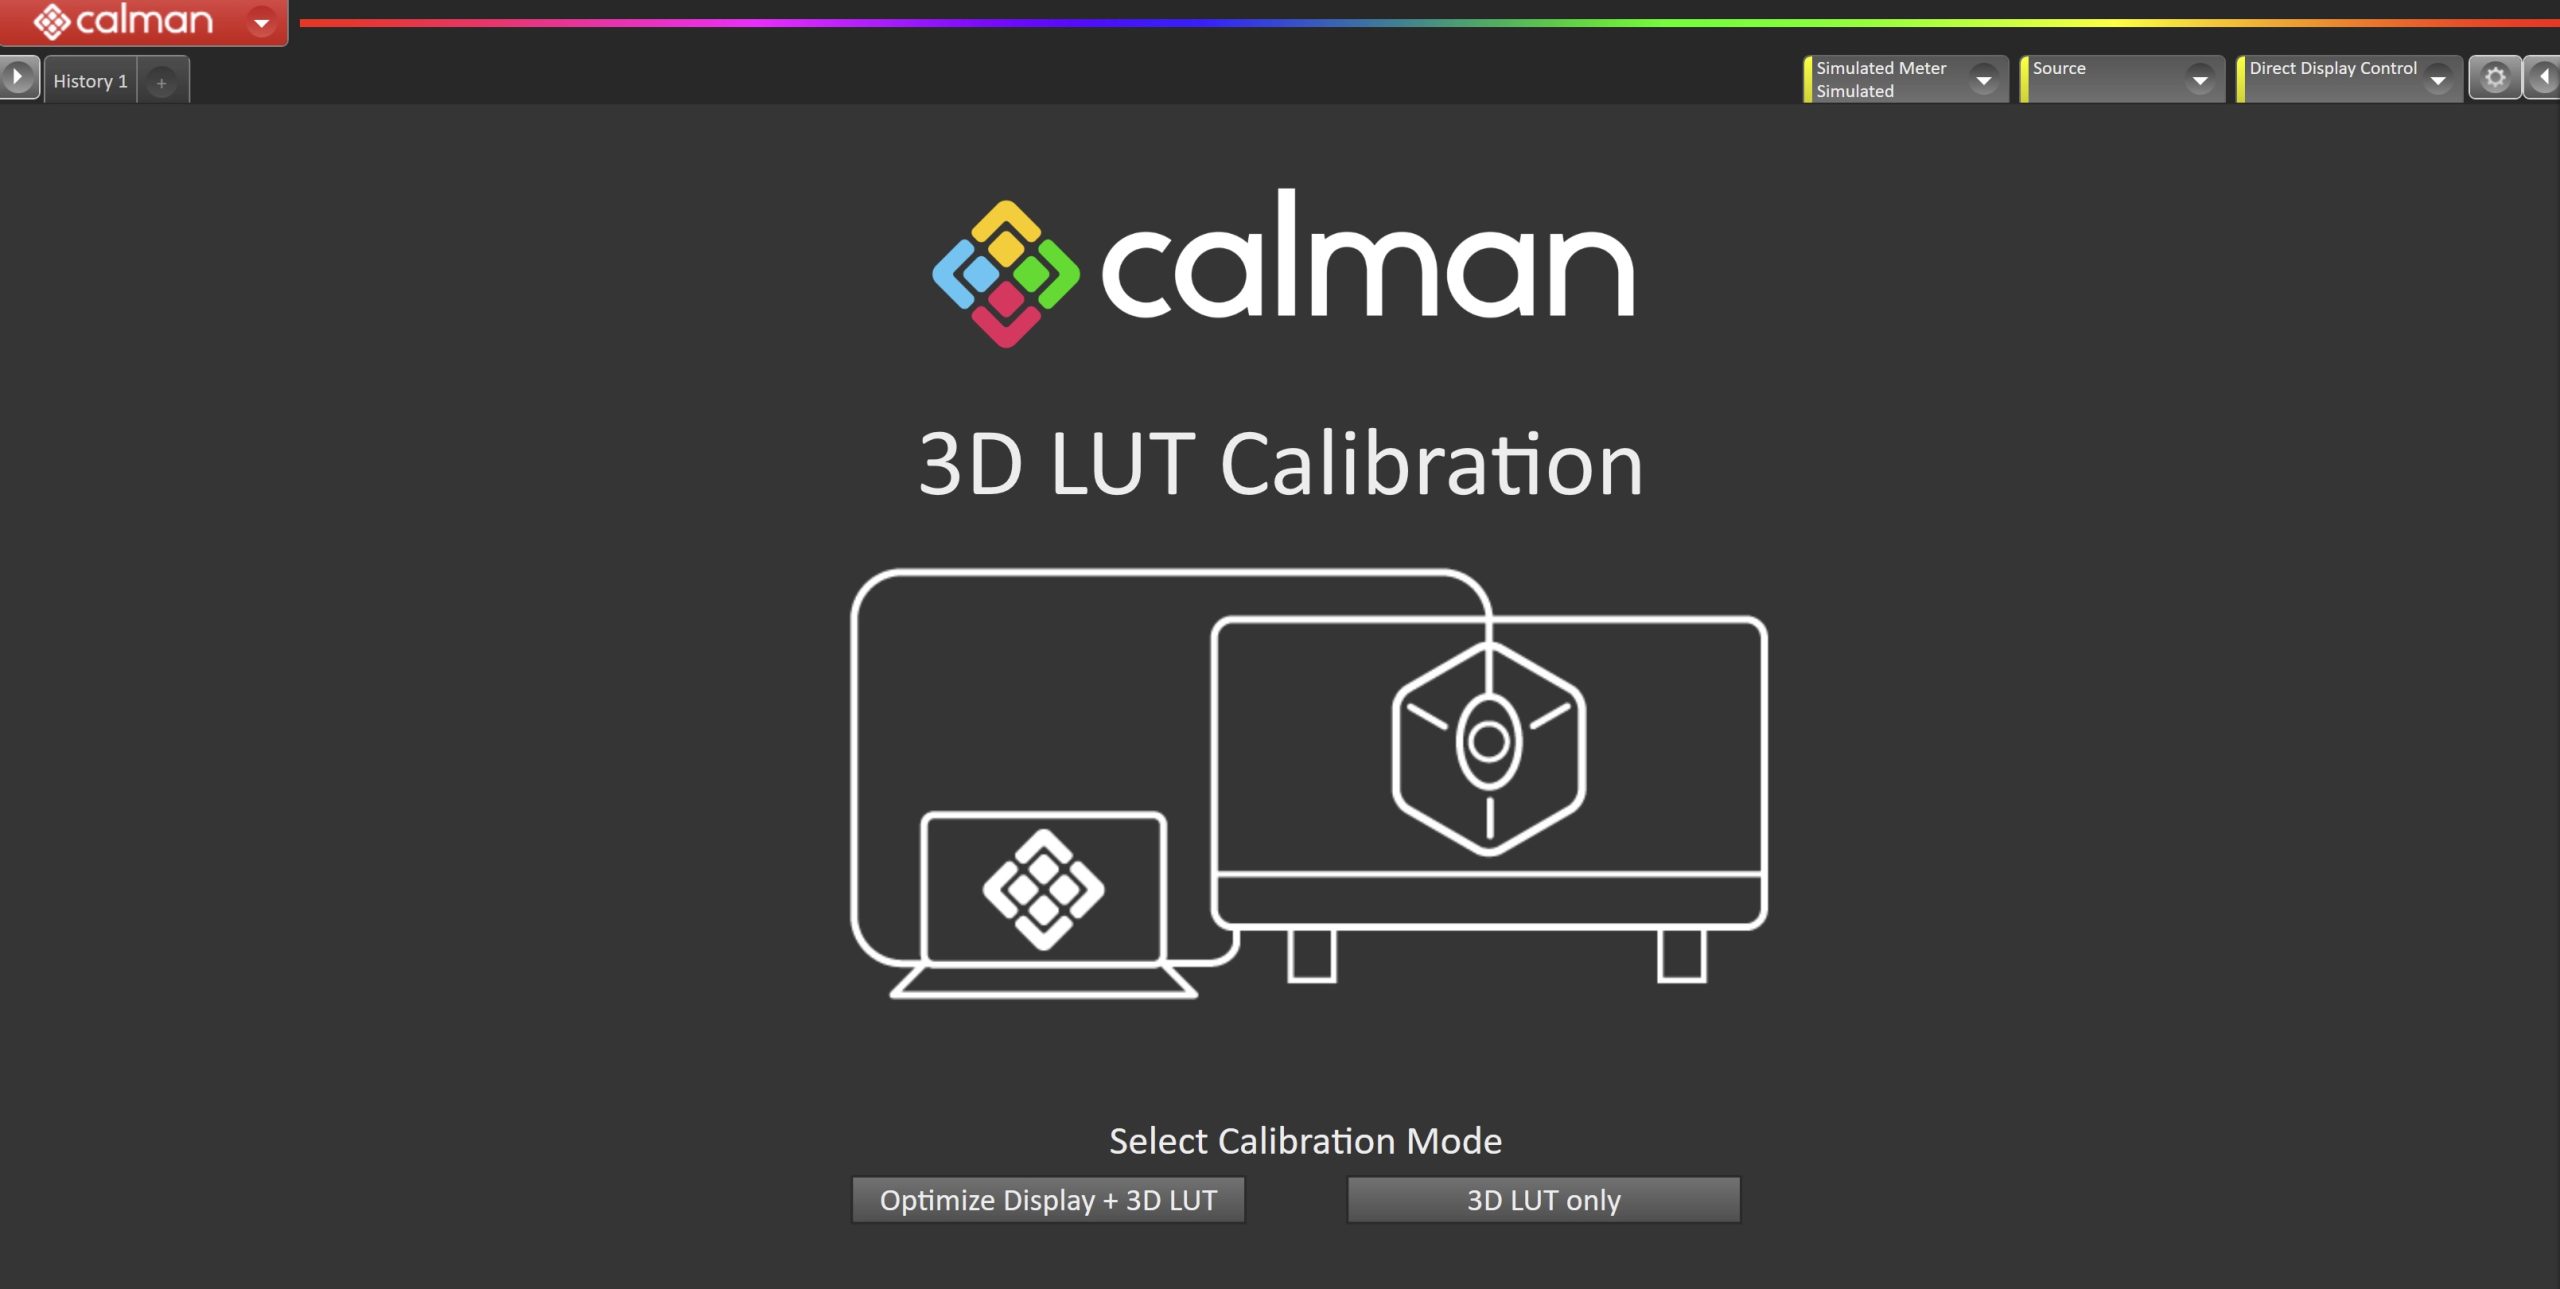
- To begin the calibration process, select one of the two options
- Optimize Display + 3D LUT
- This will guide you through optimizing the luminance and white balance of the display. For best results, its recommended to optimize the display prior to calibration.
- 3D LUT only
- This will skip the optimization steps. May cause less accurate calibration results
- Note: This will include a 1D LUT calibration step for multipoint greyscale. Not all hardware will allow 1D LUT calibration
- Optimize Display + 3D LUT
Step 2
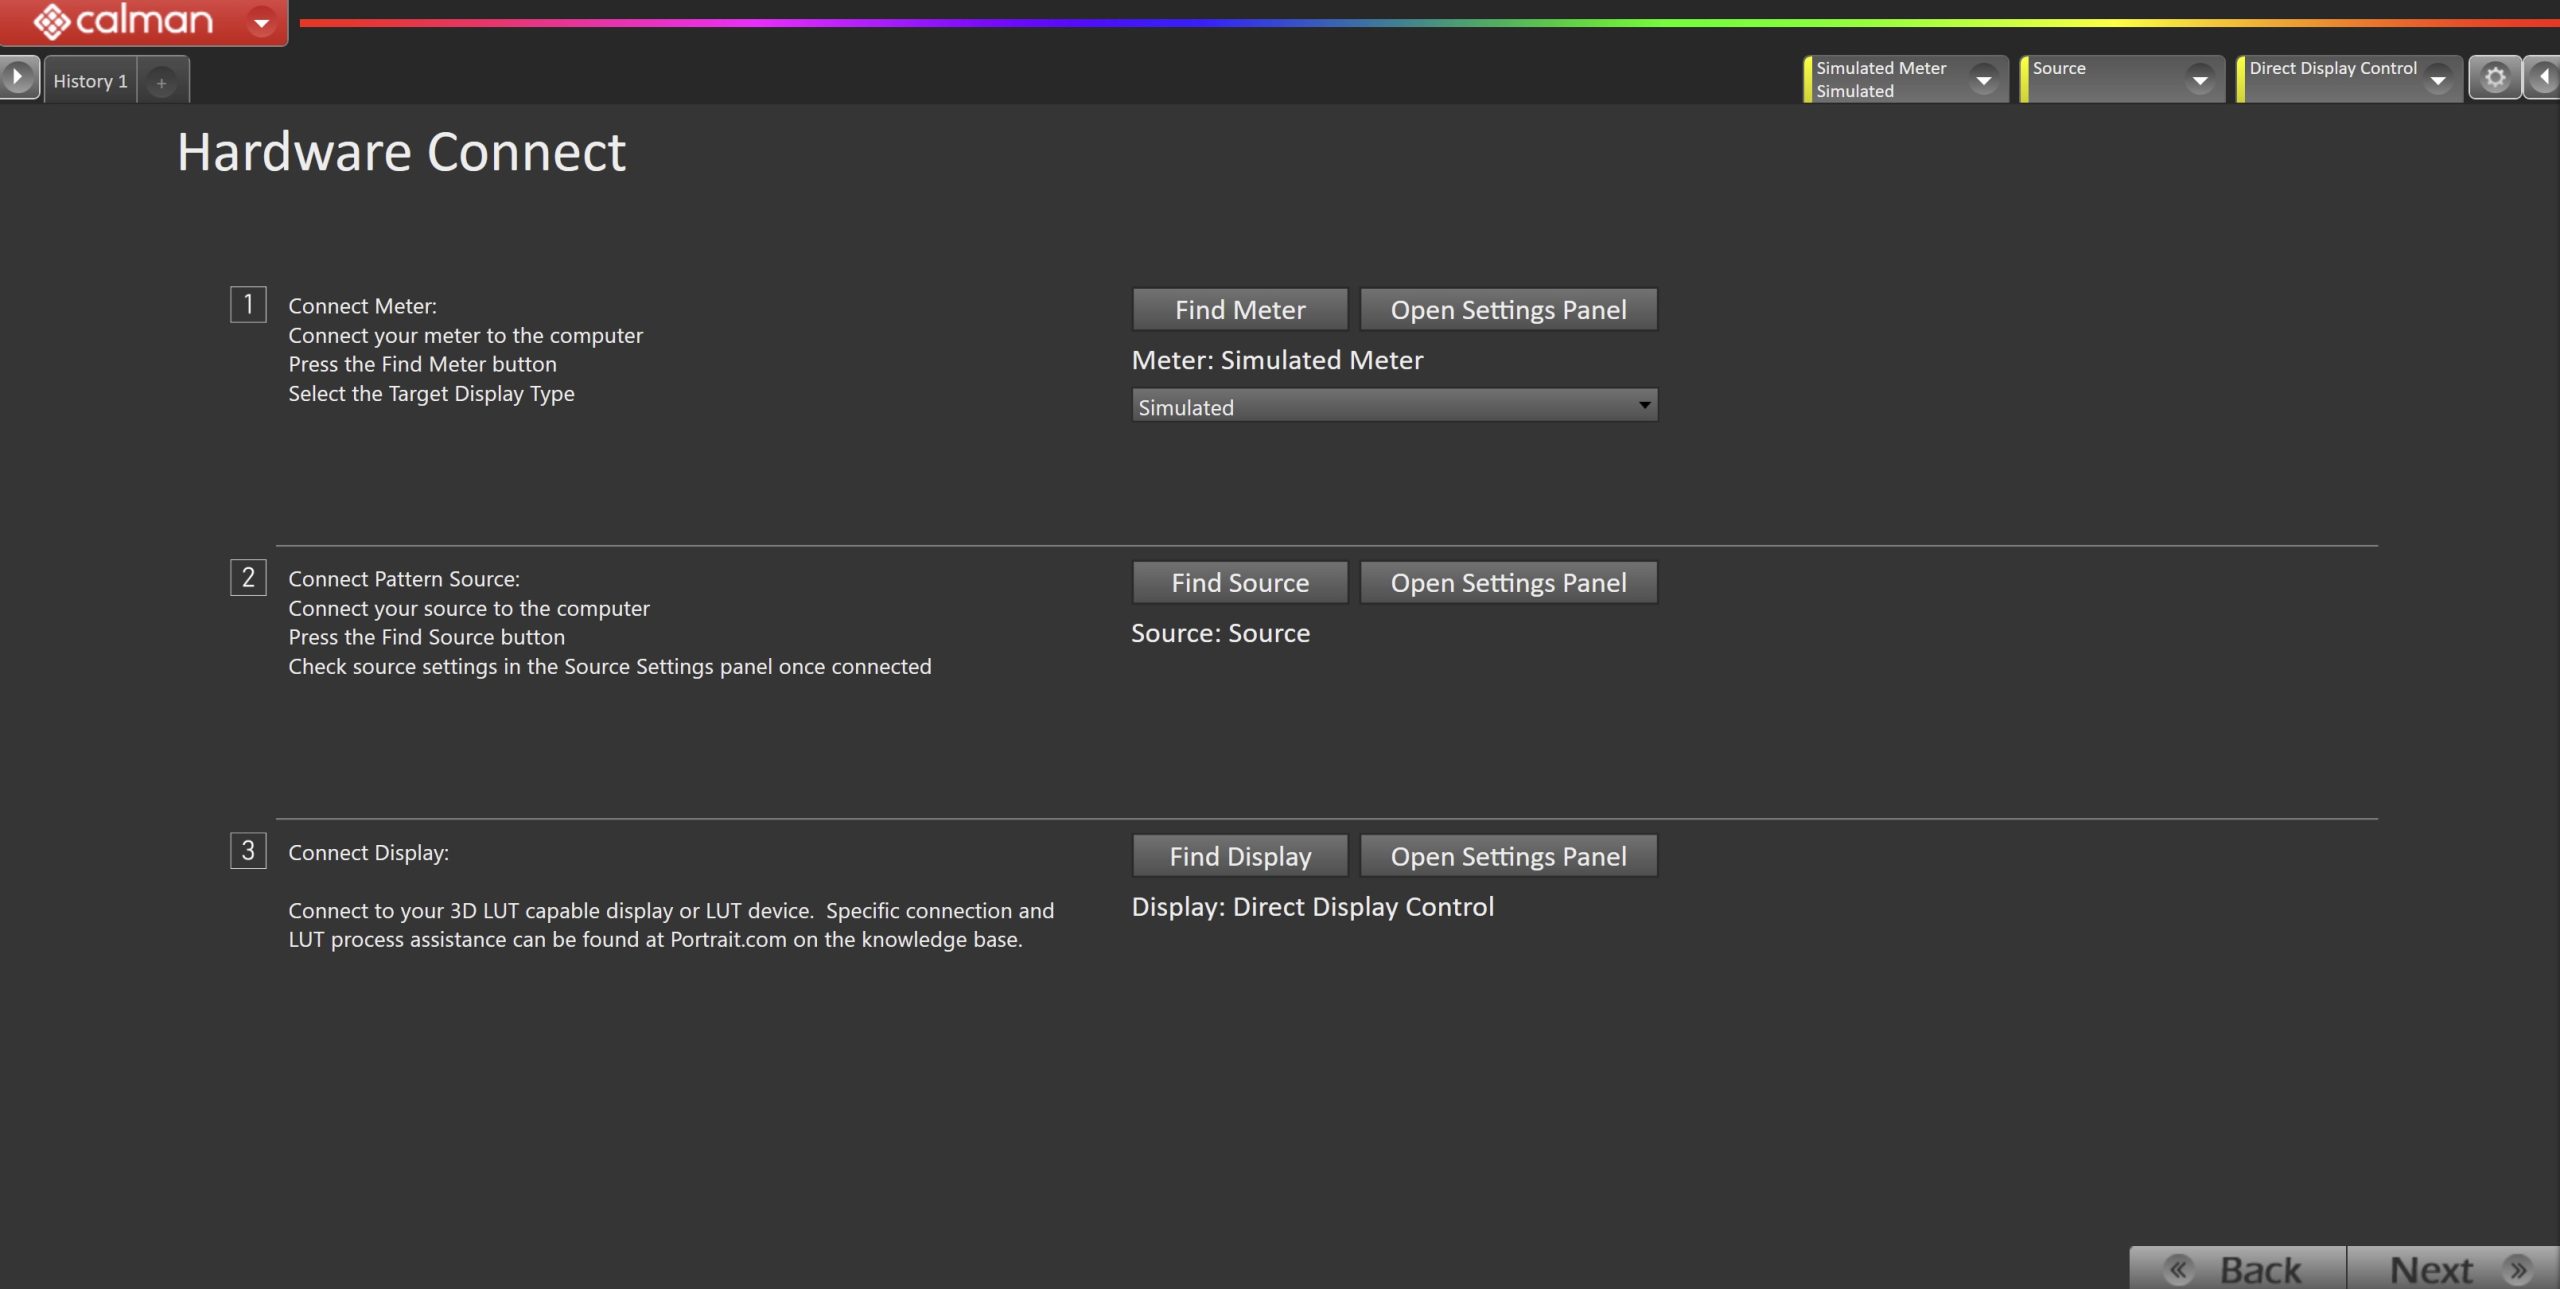
- Plug your meter into a USB port on the computer and click the Find Meter button on the left.
- When your meter is connected, select your display type from the dropdown
- Connect Pattern Source to your computer.
- Click the Find Source button, then select your source.
- Connect Display or Video Processor
- If you’re using a Display or Video Process that supports direct connection to Calman, click Find Display and select your hardware.
- To create a 3D LUT that will be saved to your computer, for manual upload to a processor, Choose Portrait Displays – Cube Generator (3D LUT)
Step 3
- Confirm the calibration targets.
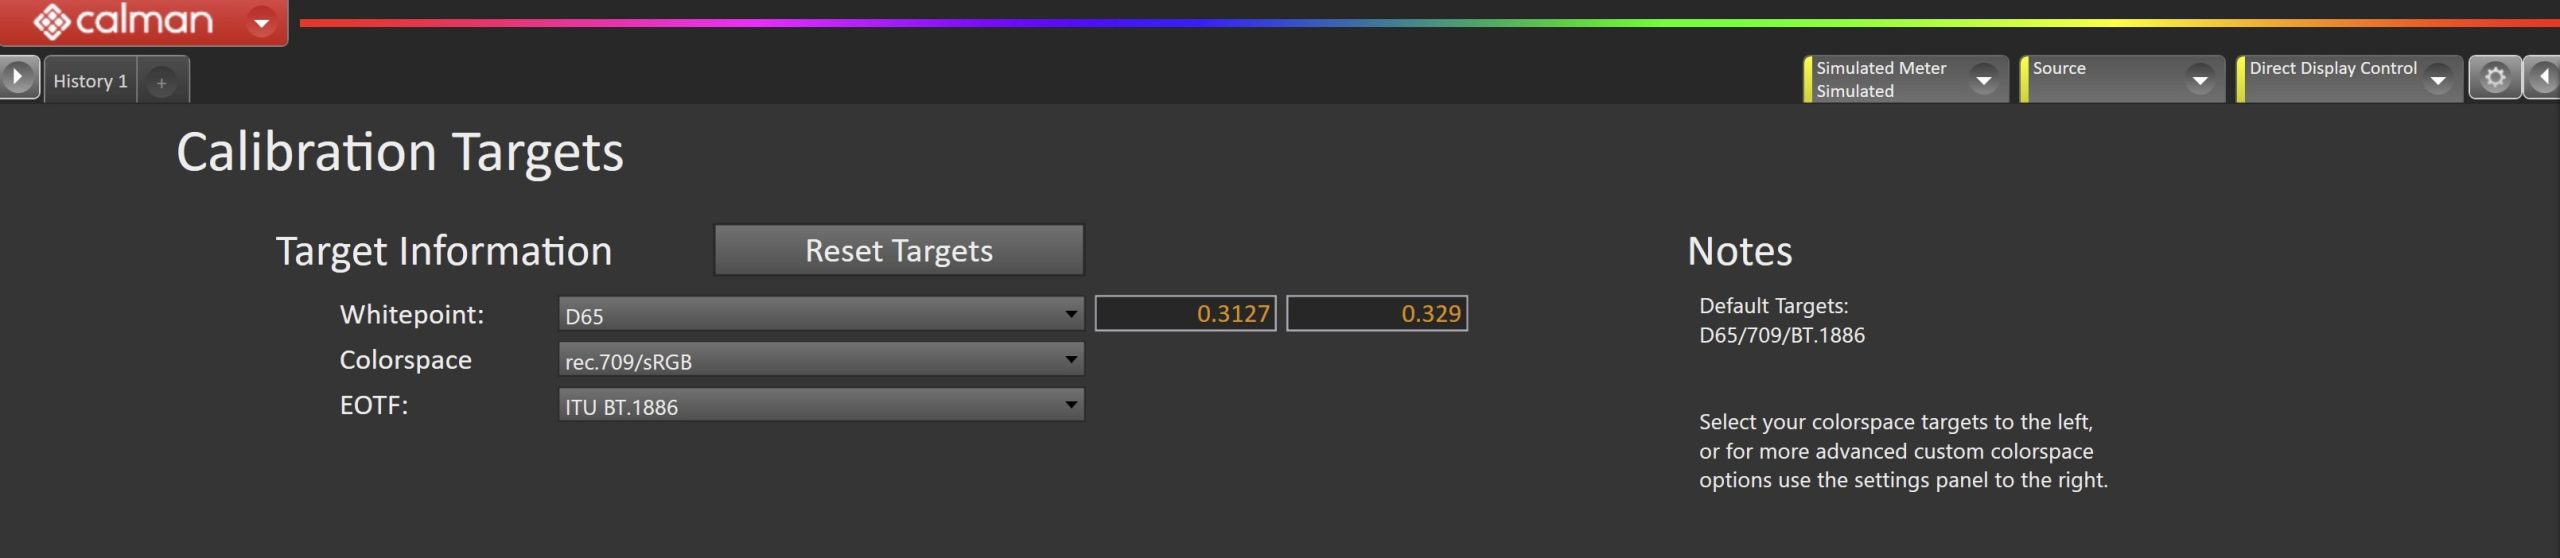
- Select your desired Whitepiont, Colorspace, and Gamma/EOTF and press Next to continue
Step 4
- In this step, you’ll take readings of the display before the calibration. These will be used to compare the calibration results.
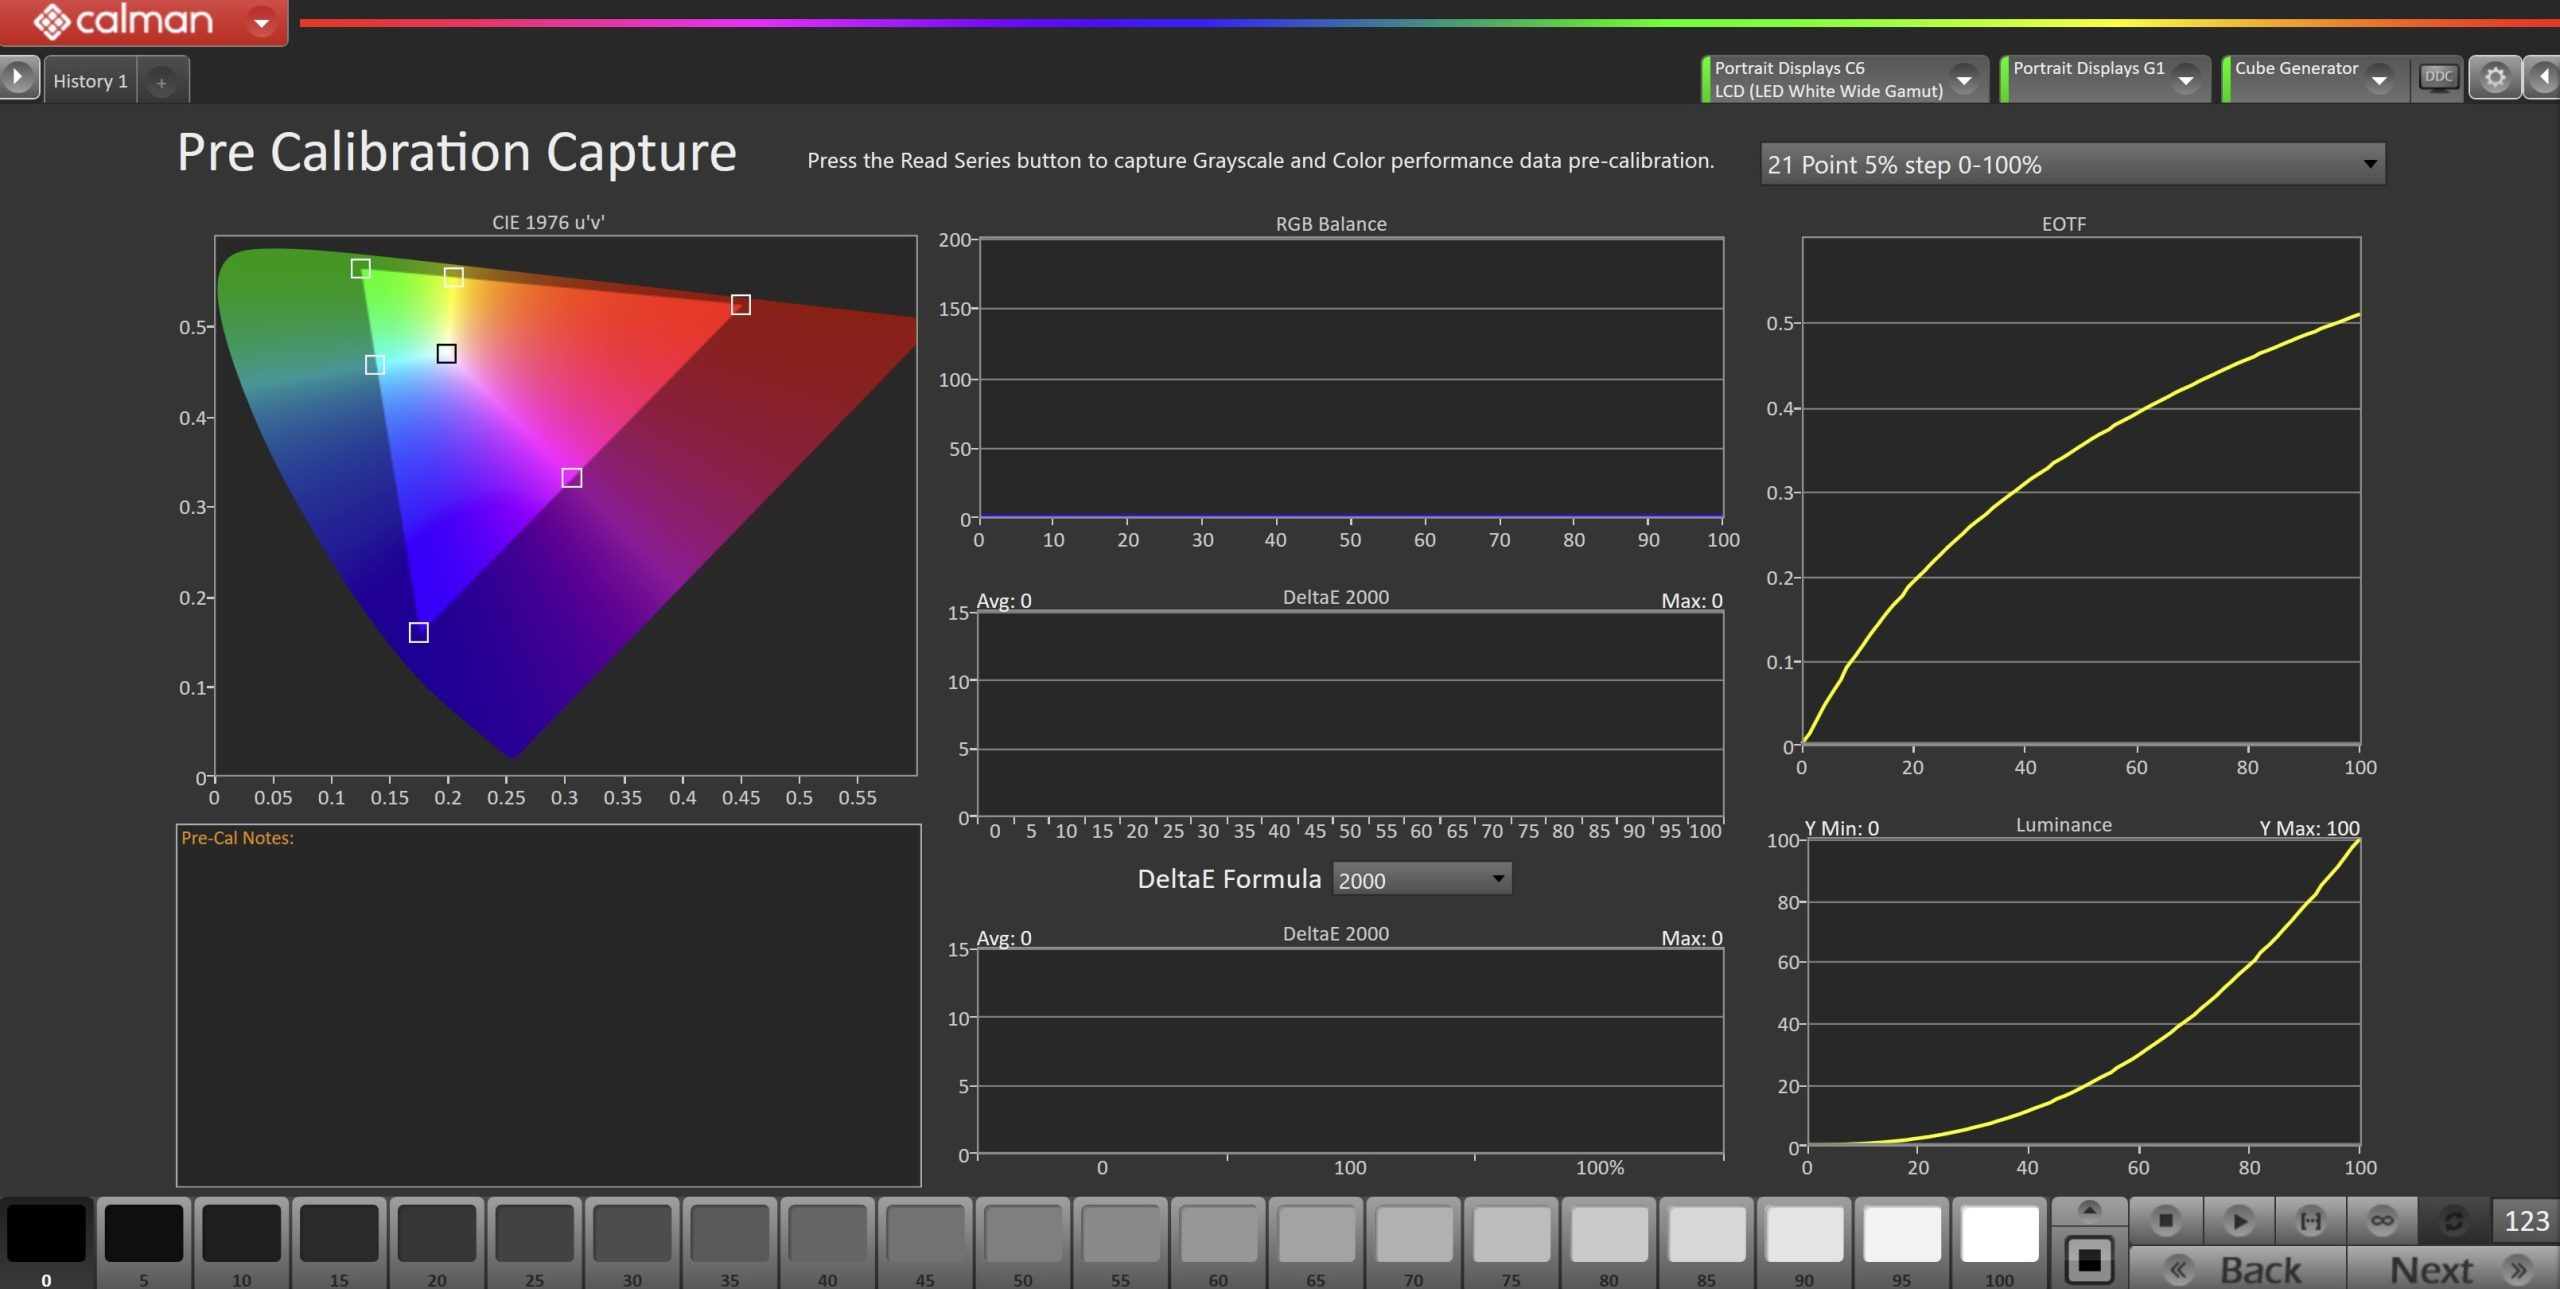
- To take Pre-Calibration Measurements click the Read Series […] button to measure the display’s grayscale and ColorChecker response
- This will provide a point of reference to compare the calibration results
Step 5
- Note: These steps will only be present if “Optimize Display” was chosen in Step 1
Optimize Luminance
- In this step, you will be able to adjust the Luminance of the display to match your desired target. Luminance is a subjective target. SDR reference luminance is 100cd/m2, but you may need to target higher to account for the ambient light in your environment.
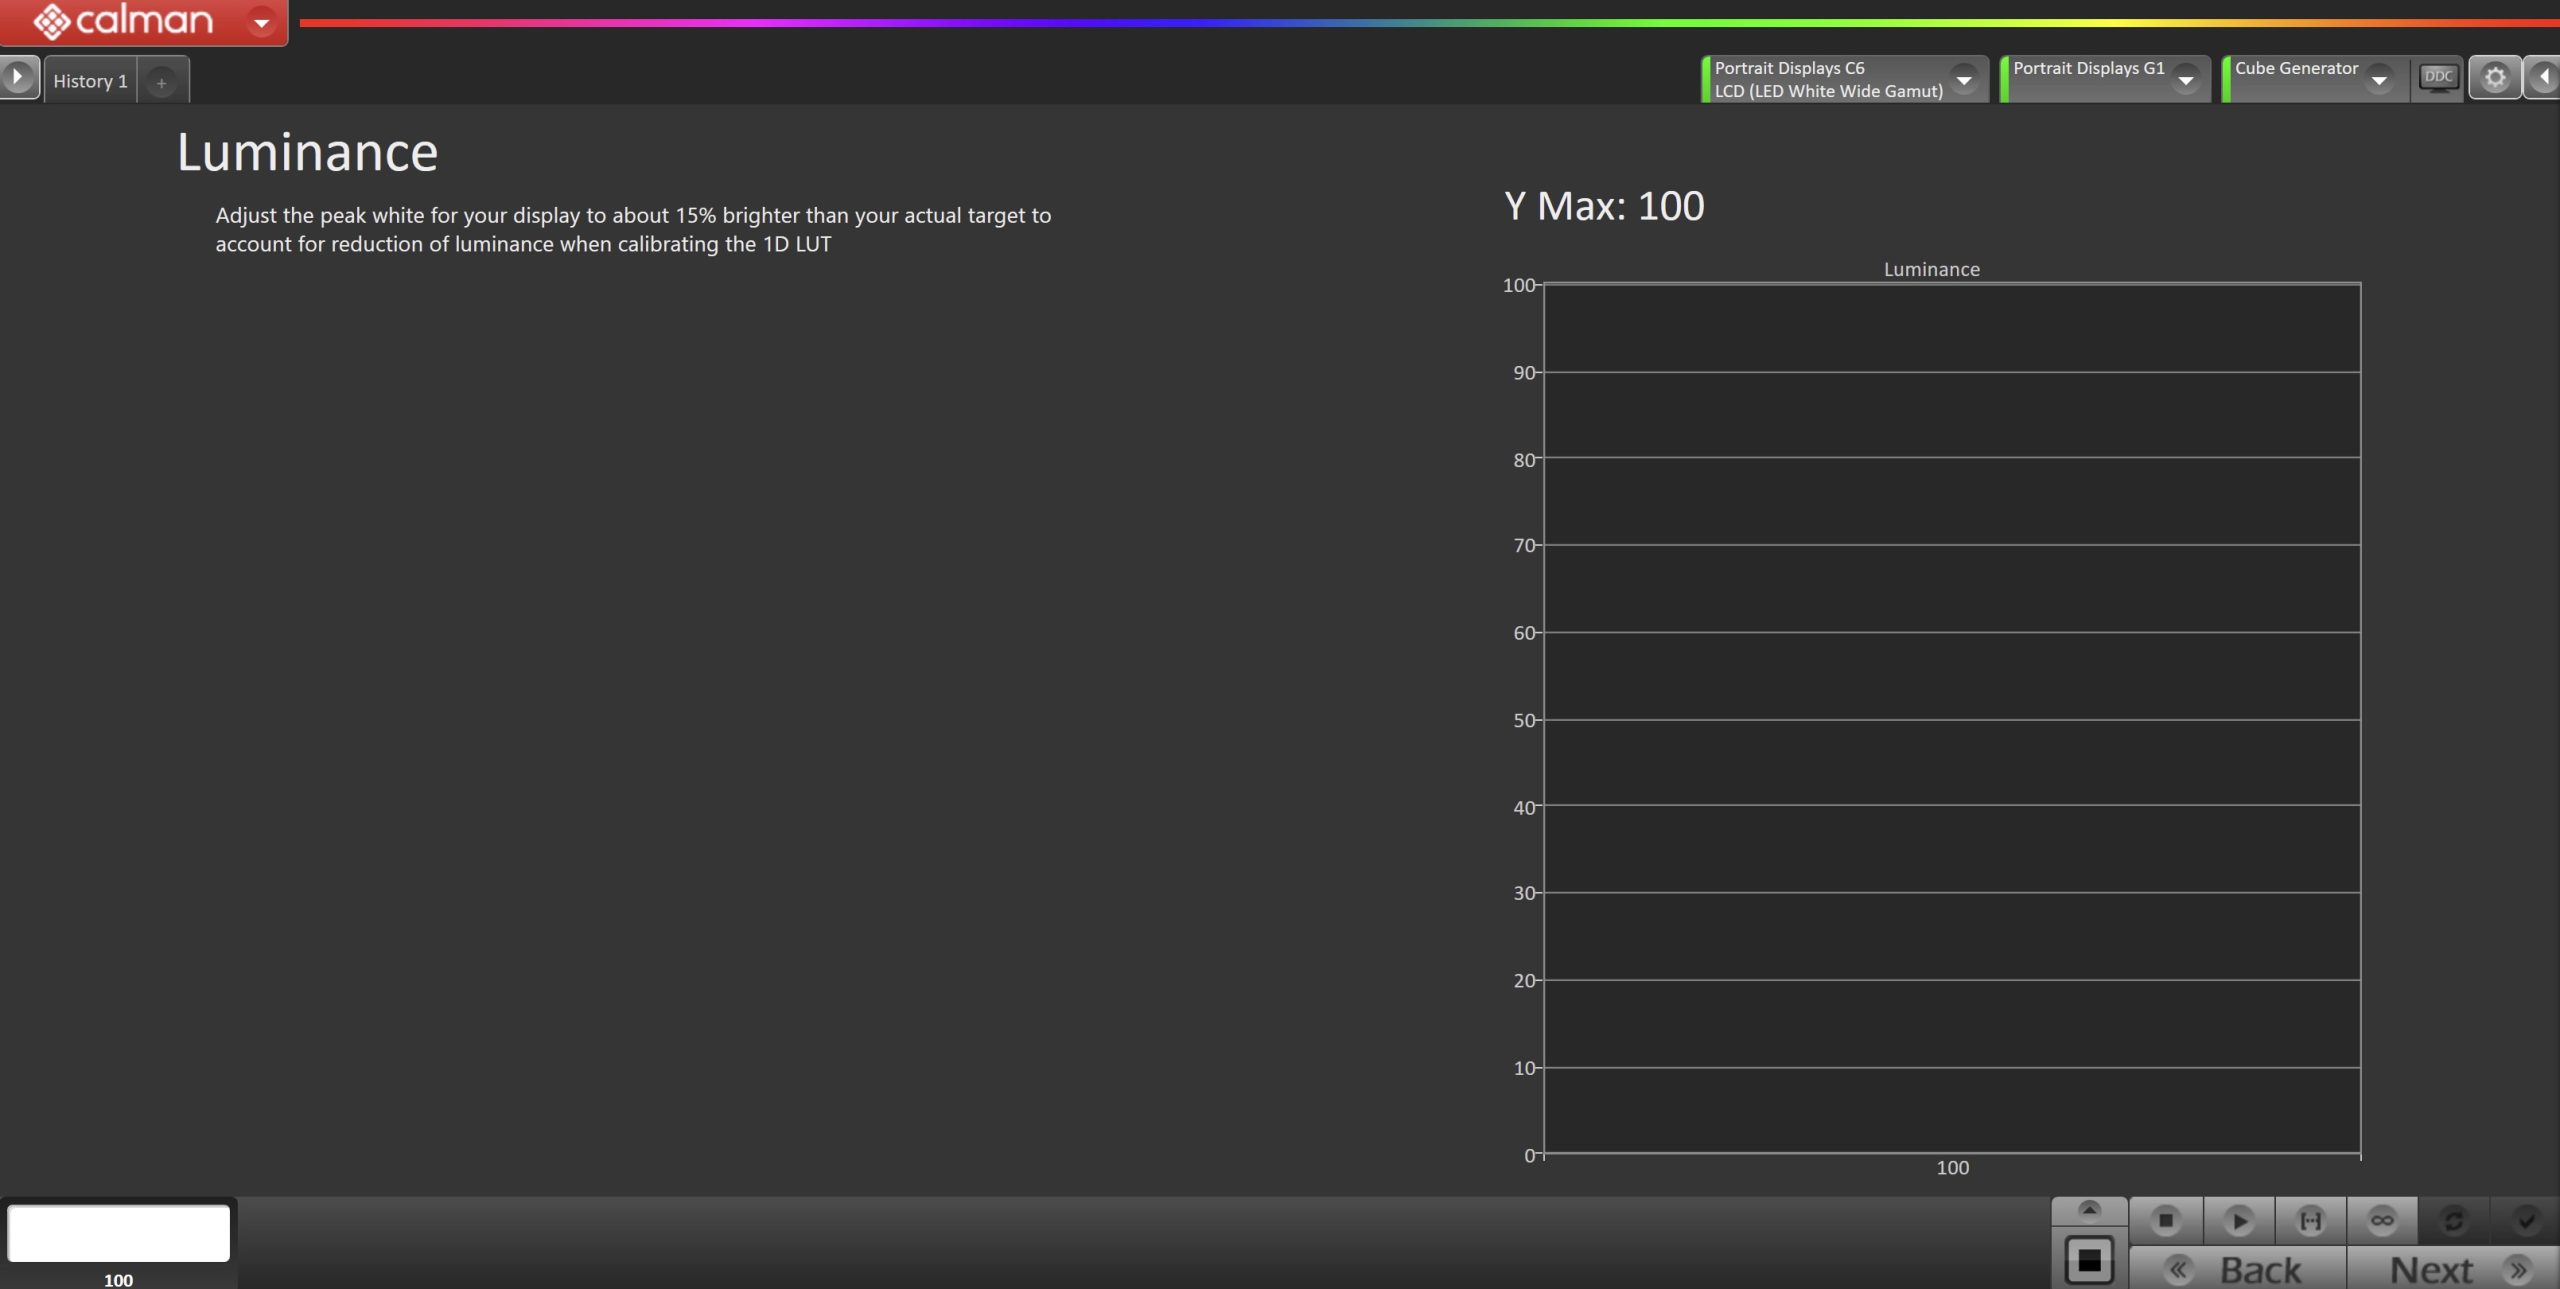
- Click the Read Continuous button to measure your display’s light output at 100% white and adjust the display’s peak white to the desired luminance.
- Adjust your display’s backlight/OLED light control so your display is about 15% brighter than your final target to account for a reduction in luminance when calibrating.
- Press Stop when the luminance adjustment is complete
Optimize White Balance
- Here, you’ll be able to adjust your display’s White Balance or 2-point greyscale. The default points (30/100) are appropriate for most displays, but you can choose alternate points if your display adjusts grayscale at different points.
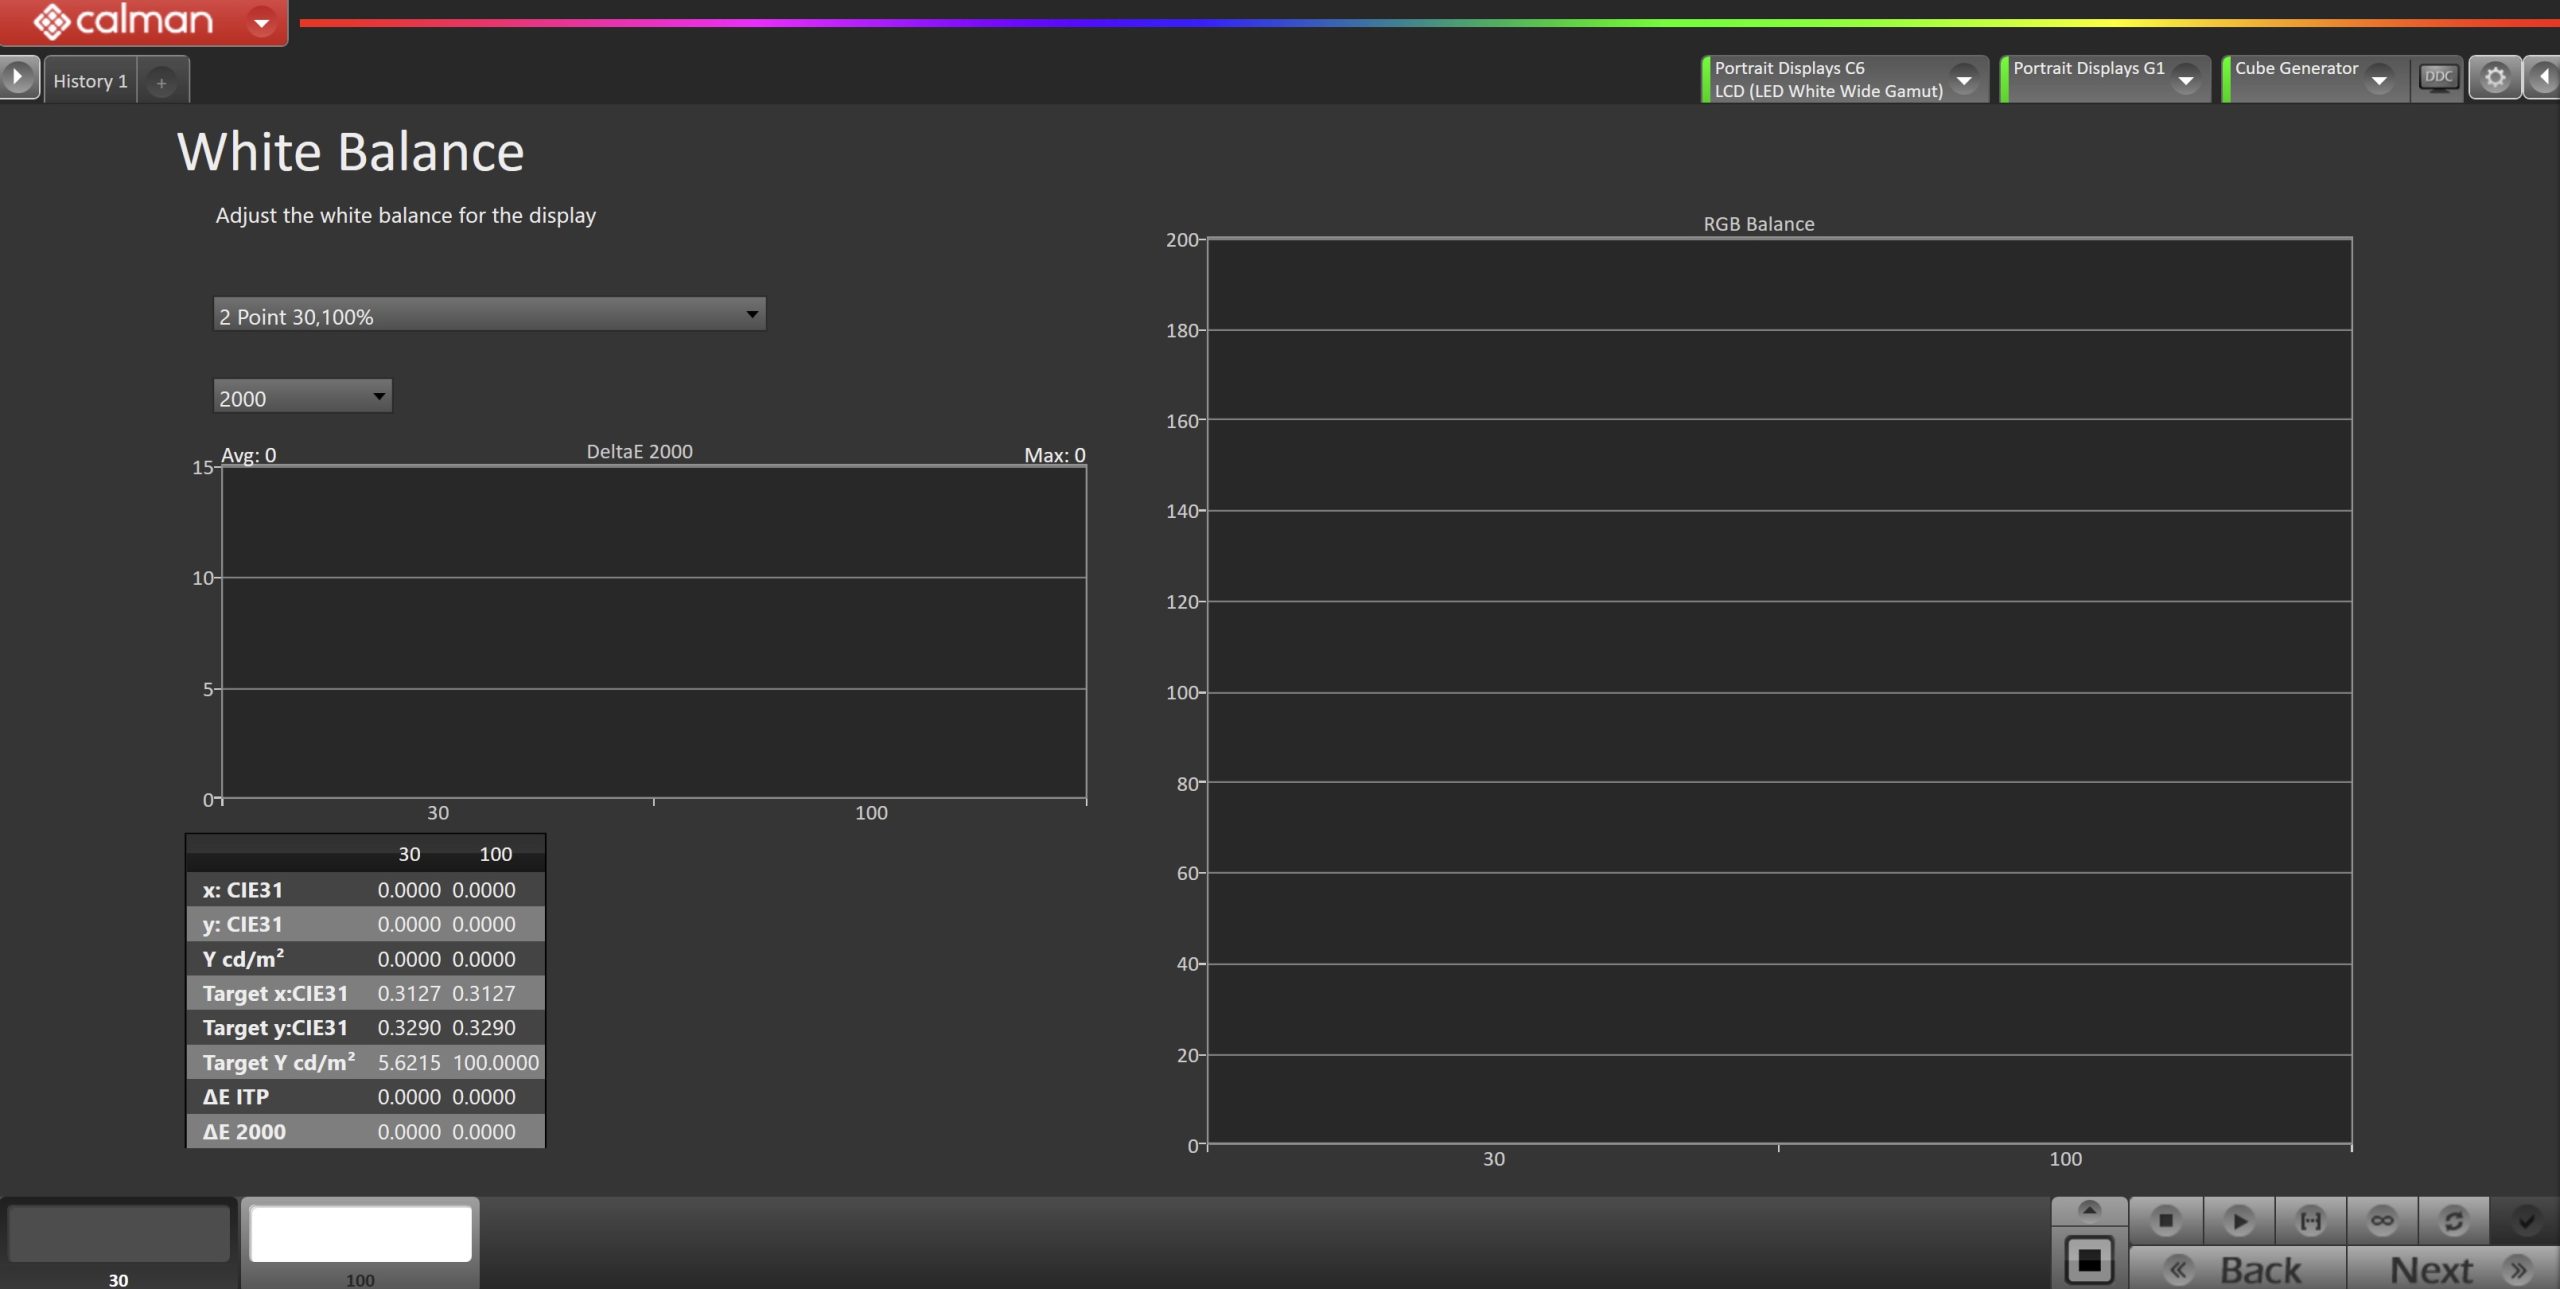
- Use the Read Continuous button to measure the higher of the two greyscale patches shown. This can be modified with the dropdown on the right
- Adjust the RGB Gain/High controls to achieve the lowest DeltaE 2000 possible (far right chart).
- If RGB Offset/Low controls are available, use the Read Continuous button to measure the 30% grayscale pattern (bit level 82) then adjust RGB low controls to achieve the lowest DeltaE 2000 possible (far right chart).
Click Next to complete display optimization
Step 6
- Here Calman will adjust the Multipoint Greyscale of the display using a 1D LUT
- Note: This step can be skipped if your display or video processor does not accept 1D LUTs for grayscale calibration
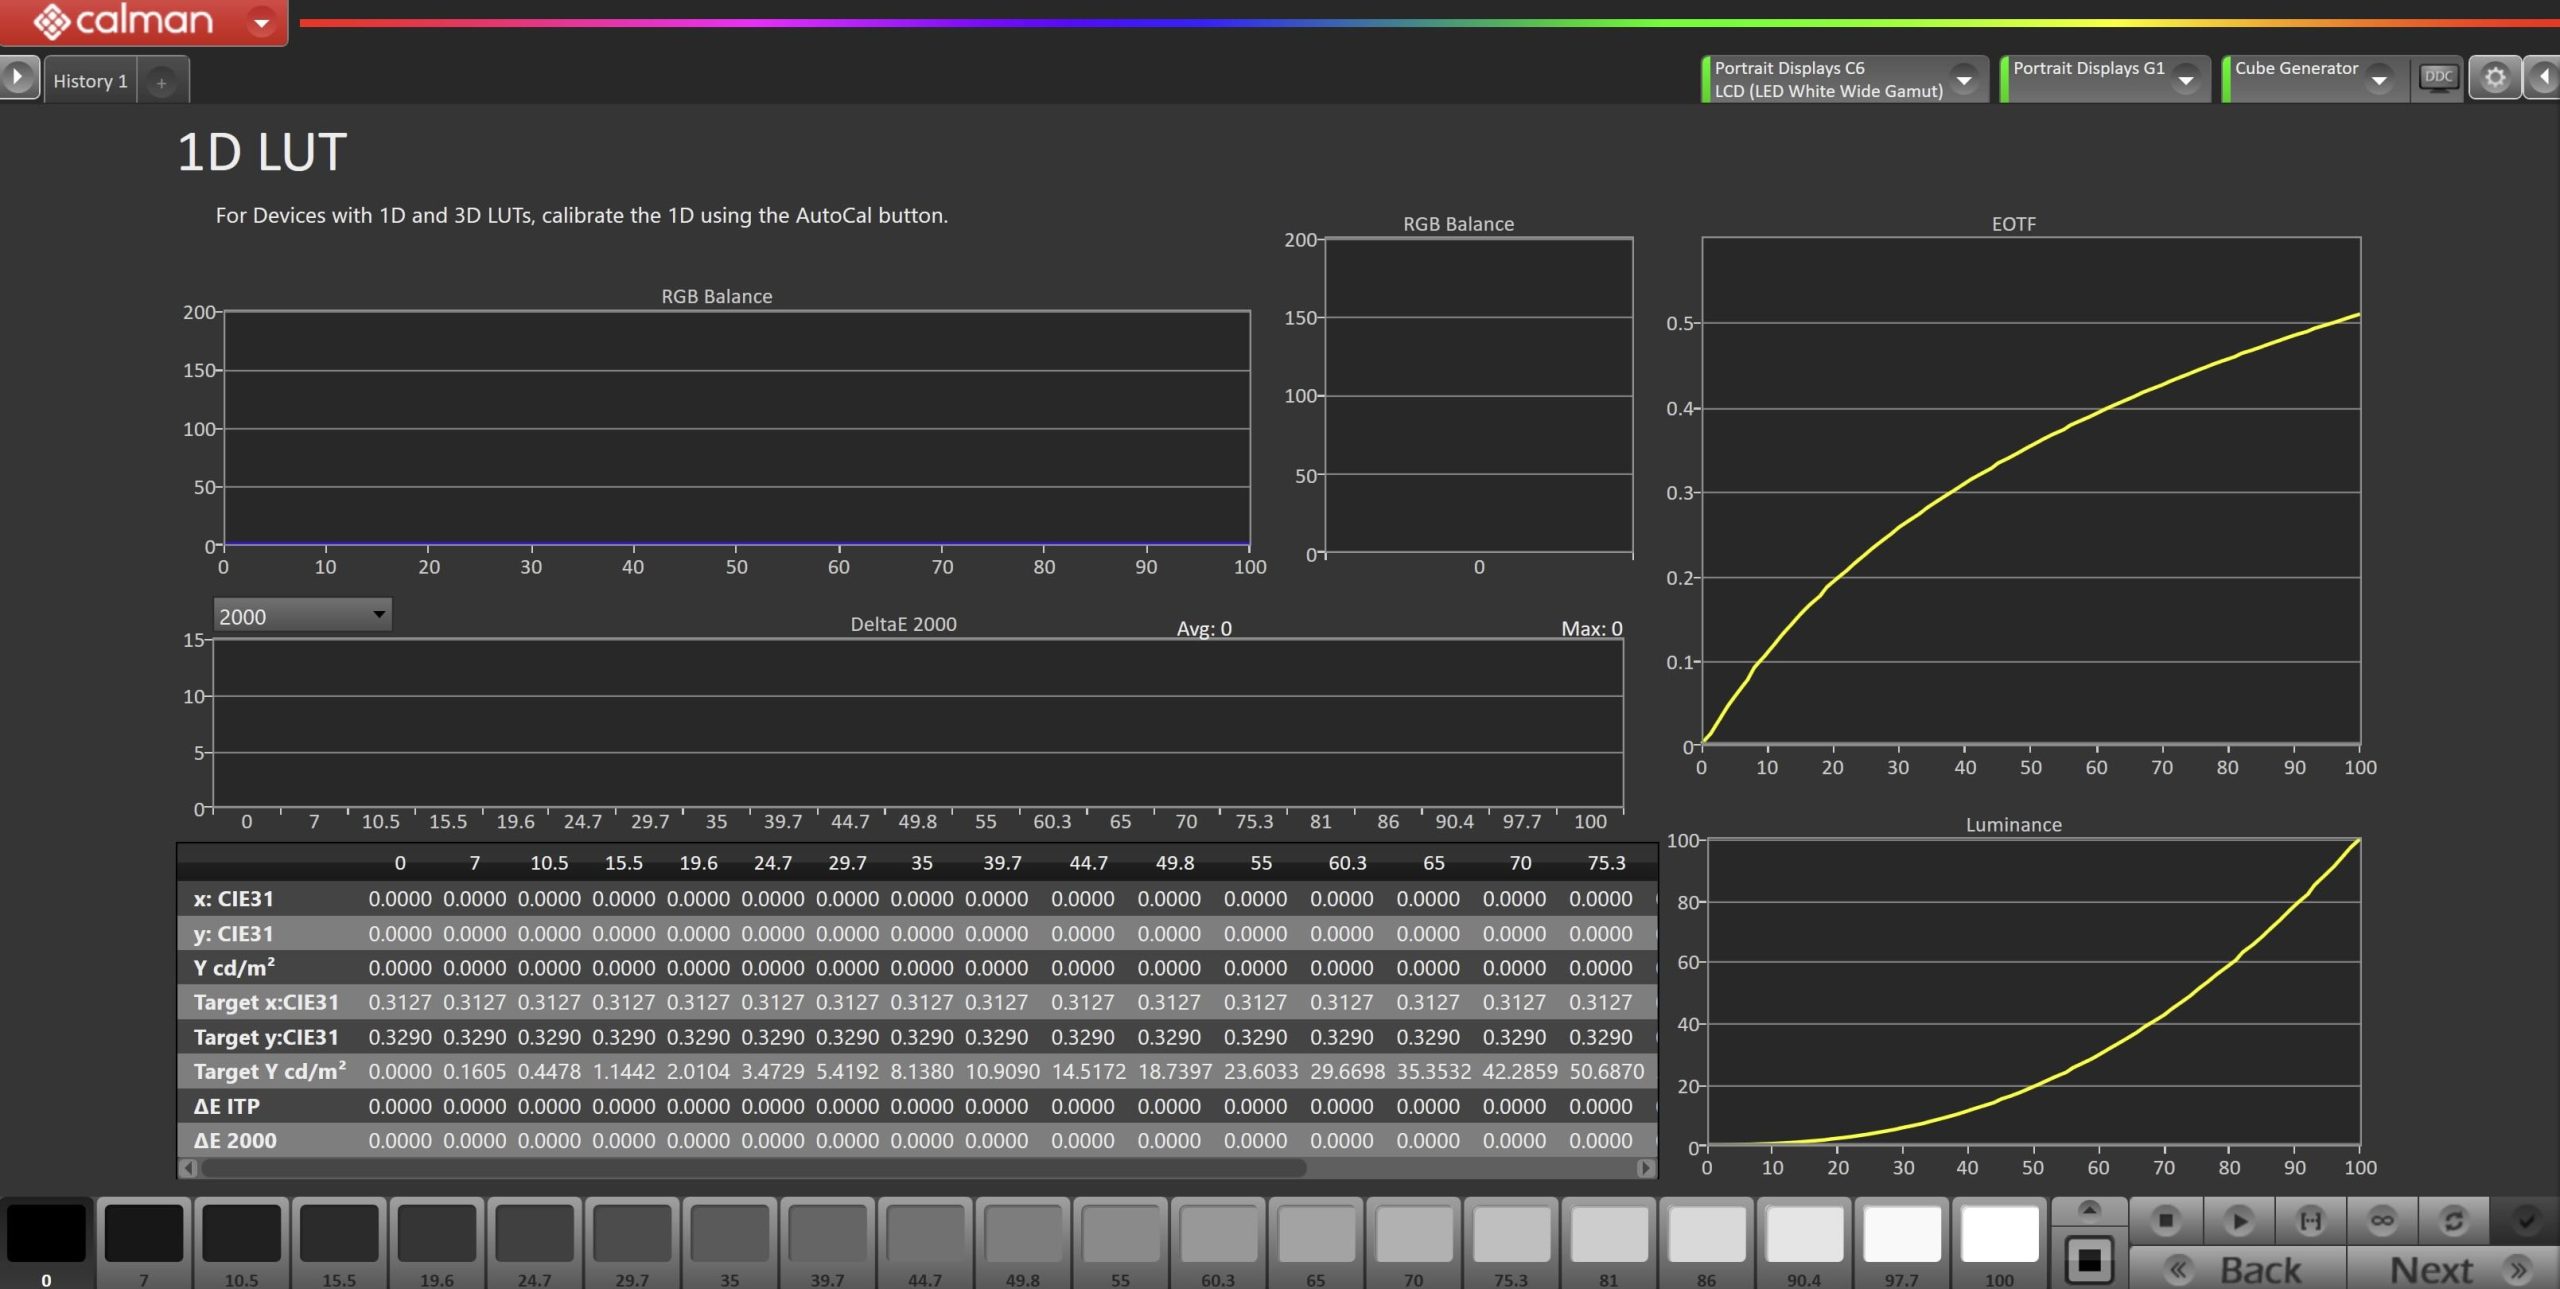
- Press the AutoCal button and configure the 1D LUT to meet the specifications outlined by your hardware manual or manufacturer
- File Format
- Generic CSV
- Generic CUBE
- AJA TXT
- Canon CLUT
- Flanders LUT
- Teradek CUBE
- Prisma LUT
- LUT Entries (amount of entries in final LUT)
- 256 (8-bit)
- 1024 (10-bit)
- 4096 (12-bit)
- 16384 (14-bit)
- 65536 (16-bit)
- LUT Value Range
- 0-255 (8-bit)
- 0-1023 (10-bit)
- 0-4095 (12-bit)
- 0-16383 (14-bit)
- 0-65535 (16-bit)
- Range Expansion
- None
- Expand Black and White
- Expand Black only
- Unity
- File Path
- Select your filename and save location
- Active Grayscale Points
- This will change the amount of measured points used to generate your LUT
- DeltaE Target
- DeltaE Value Calman will attempt to autocal to
- File Format
- Once configured, click OK to begin the calibration process
Step 7
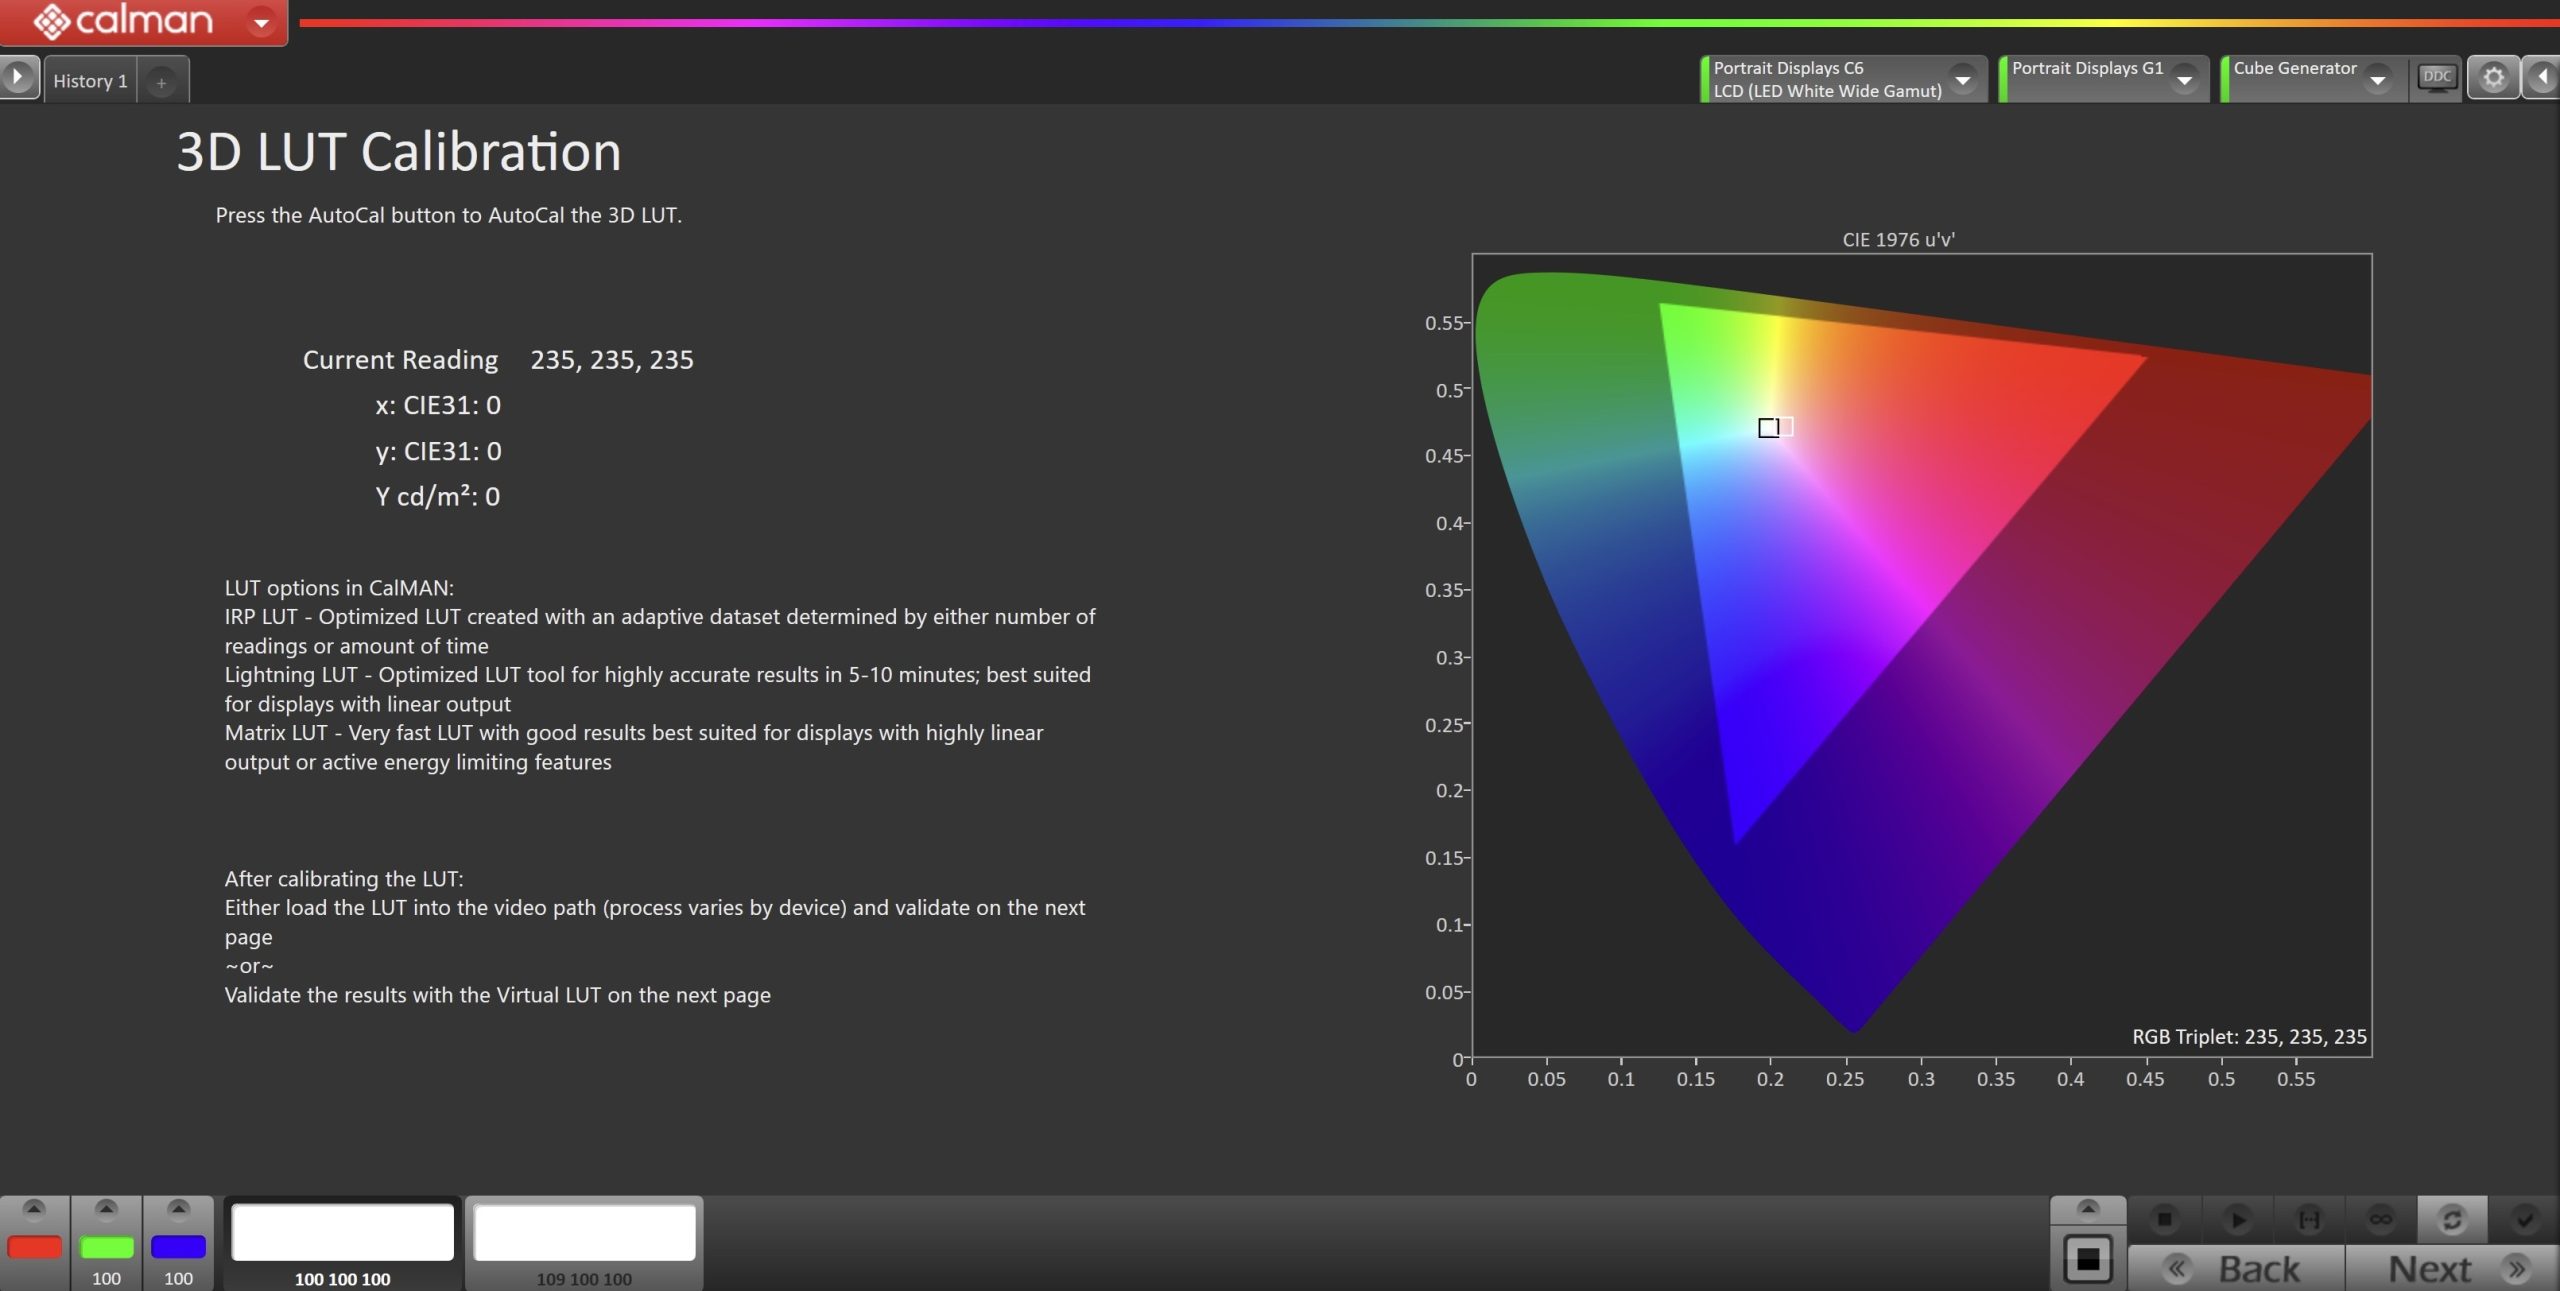
- Press the AutoCal button and configure the 3D LUT to meet the specifications outlined by your hardware manual or manufacturer
- File Format
- Calman provides dozens of formats to meet your hardware specifications
- Output Cube Size
- 16 Points
- 17 Points
- 26 Points
- 33 Points
- 64 Points
- 65 Points SMPTE\SMPTE+
- Bit Depth
- 8-bit
- 10-bit
- 12-bit
- 16-bit
- Calibration Type
- Calman has multiple methods for creating a 3D LUT. For information about these LUTs, see this article.
- File Format
- Once configured, click OK to begin the calibration process
- Following the creation of the 3D LUT, you may need to manually upload the LUT to your hardware via their management interface
Step 8
- In this step, you’ll take readings of the display after the calibration.
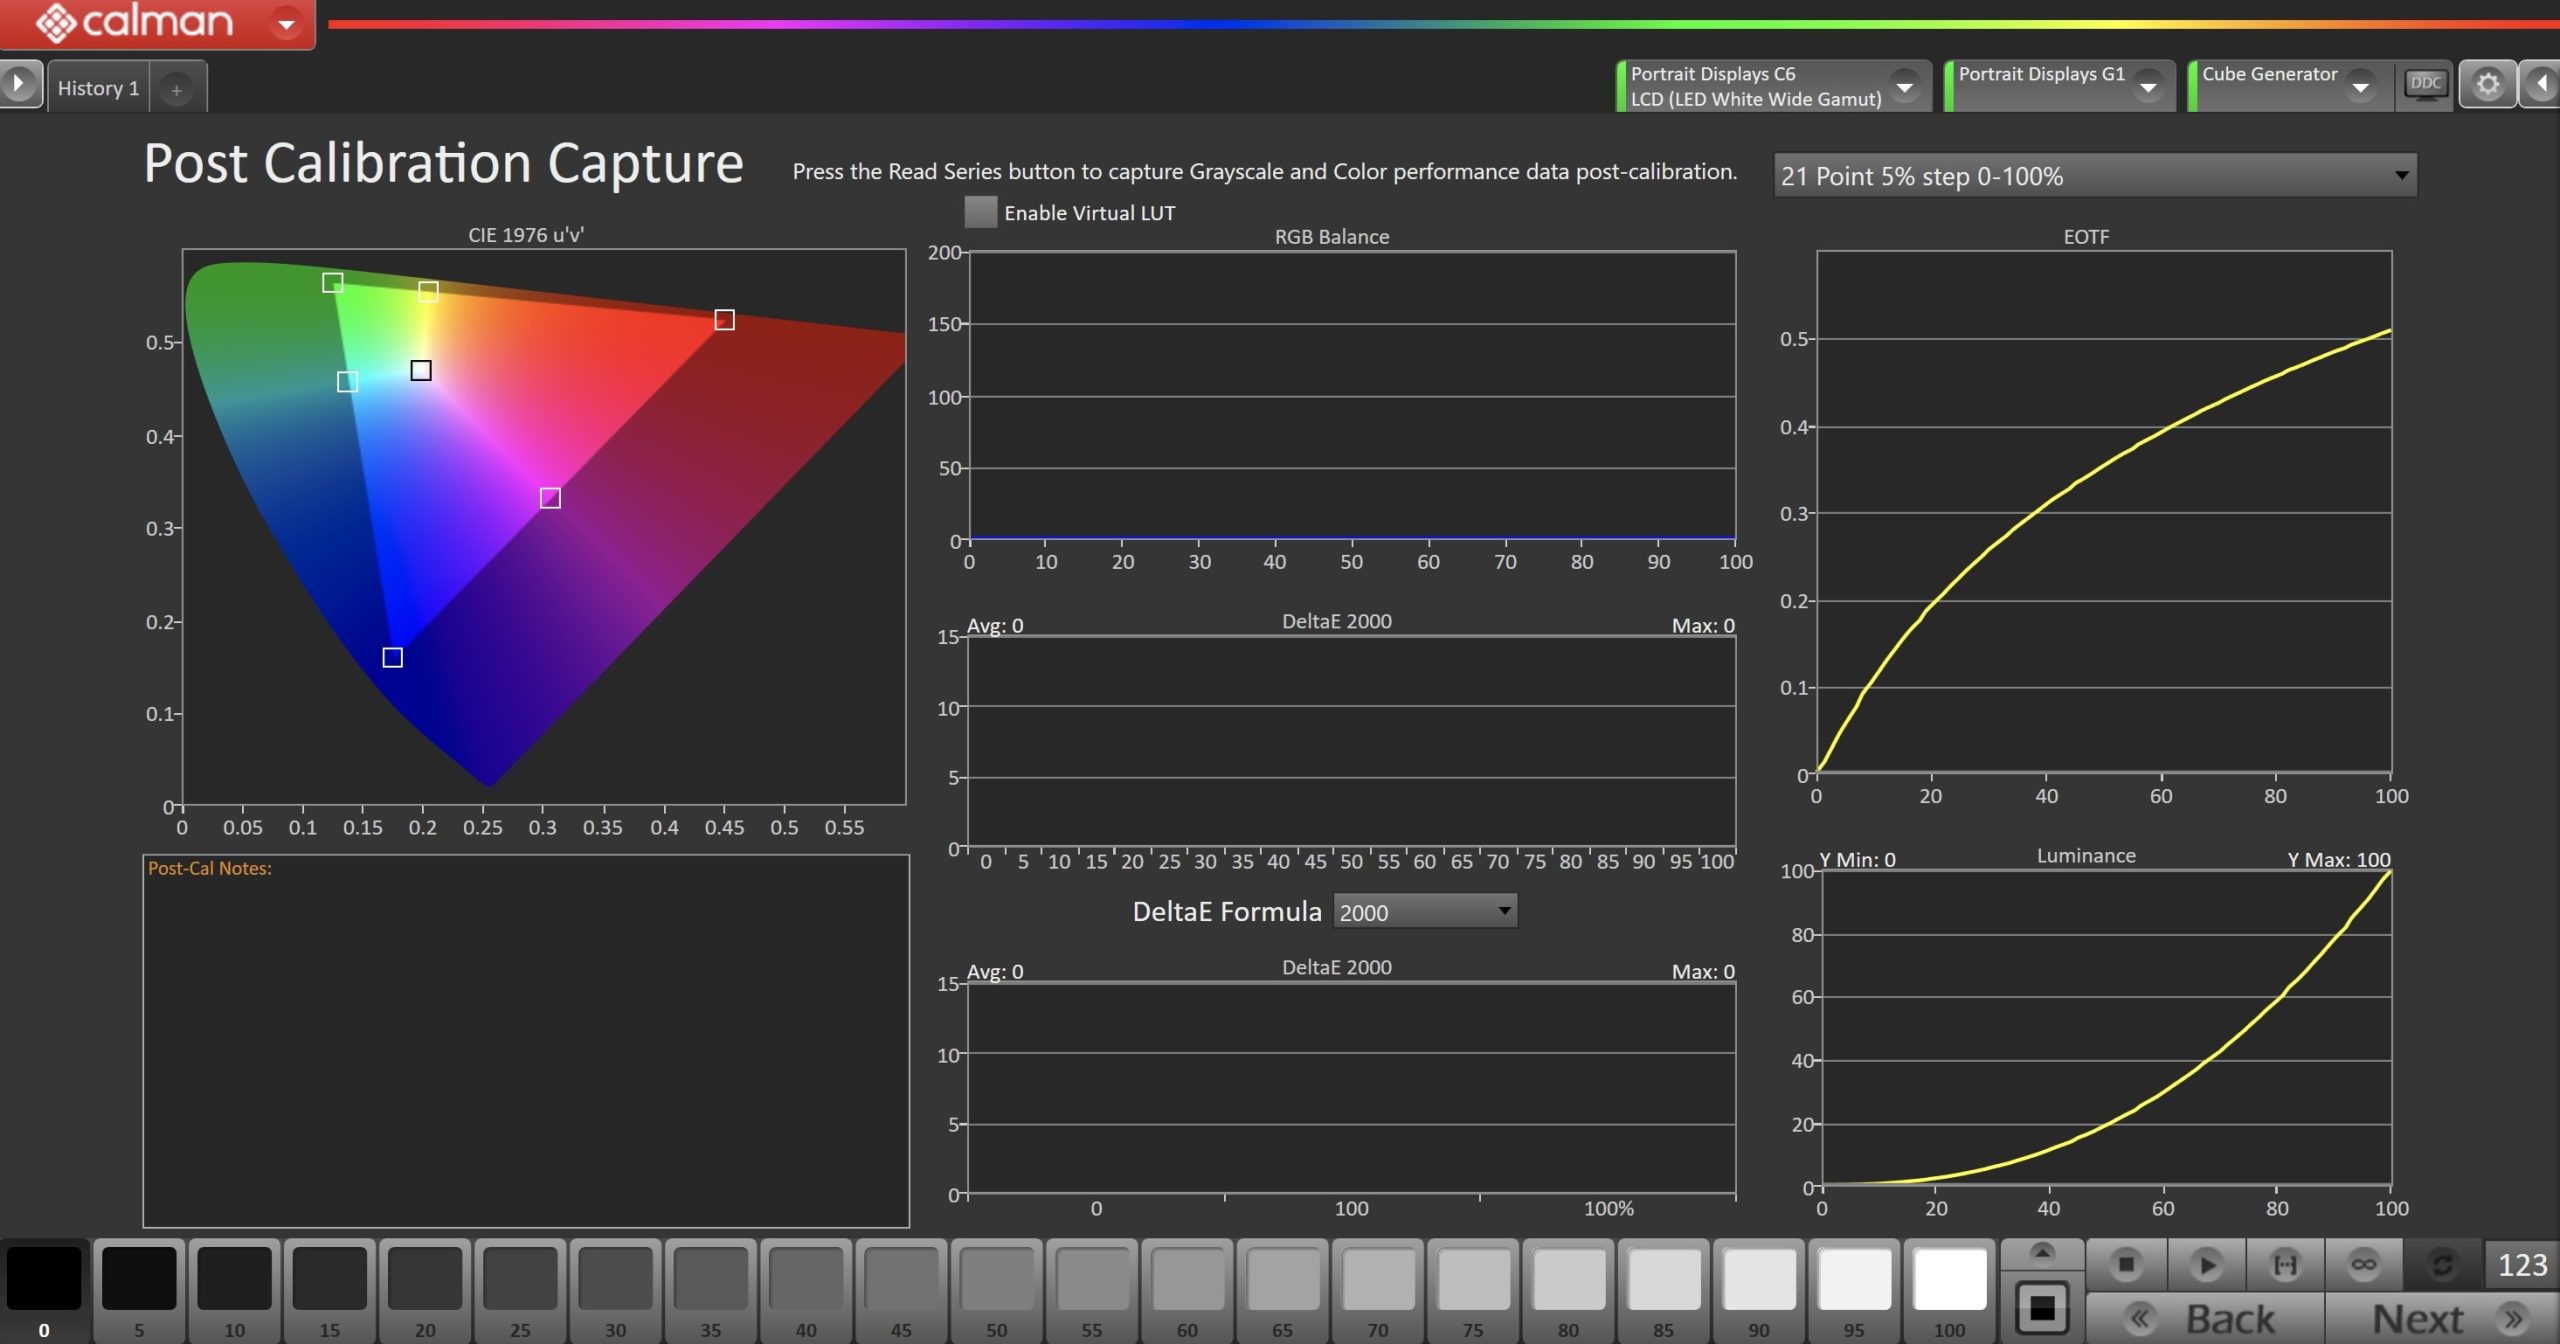
- Click the Read Series […] button to measure the display’s grayscale and color gamut response.
- Note: To verify the calibration before uploading the LUT to your display, check the Enable Virtual LUT checkbox. This will modify the pattern output to virtualize the changes made during the calibration, allowing you to see the results prior to uploading the calibration LUT to your device.
- Click Next.
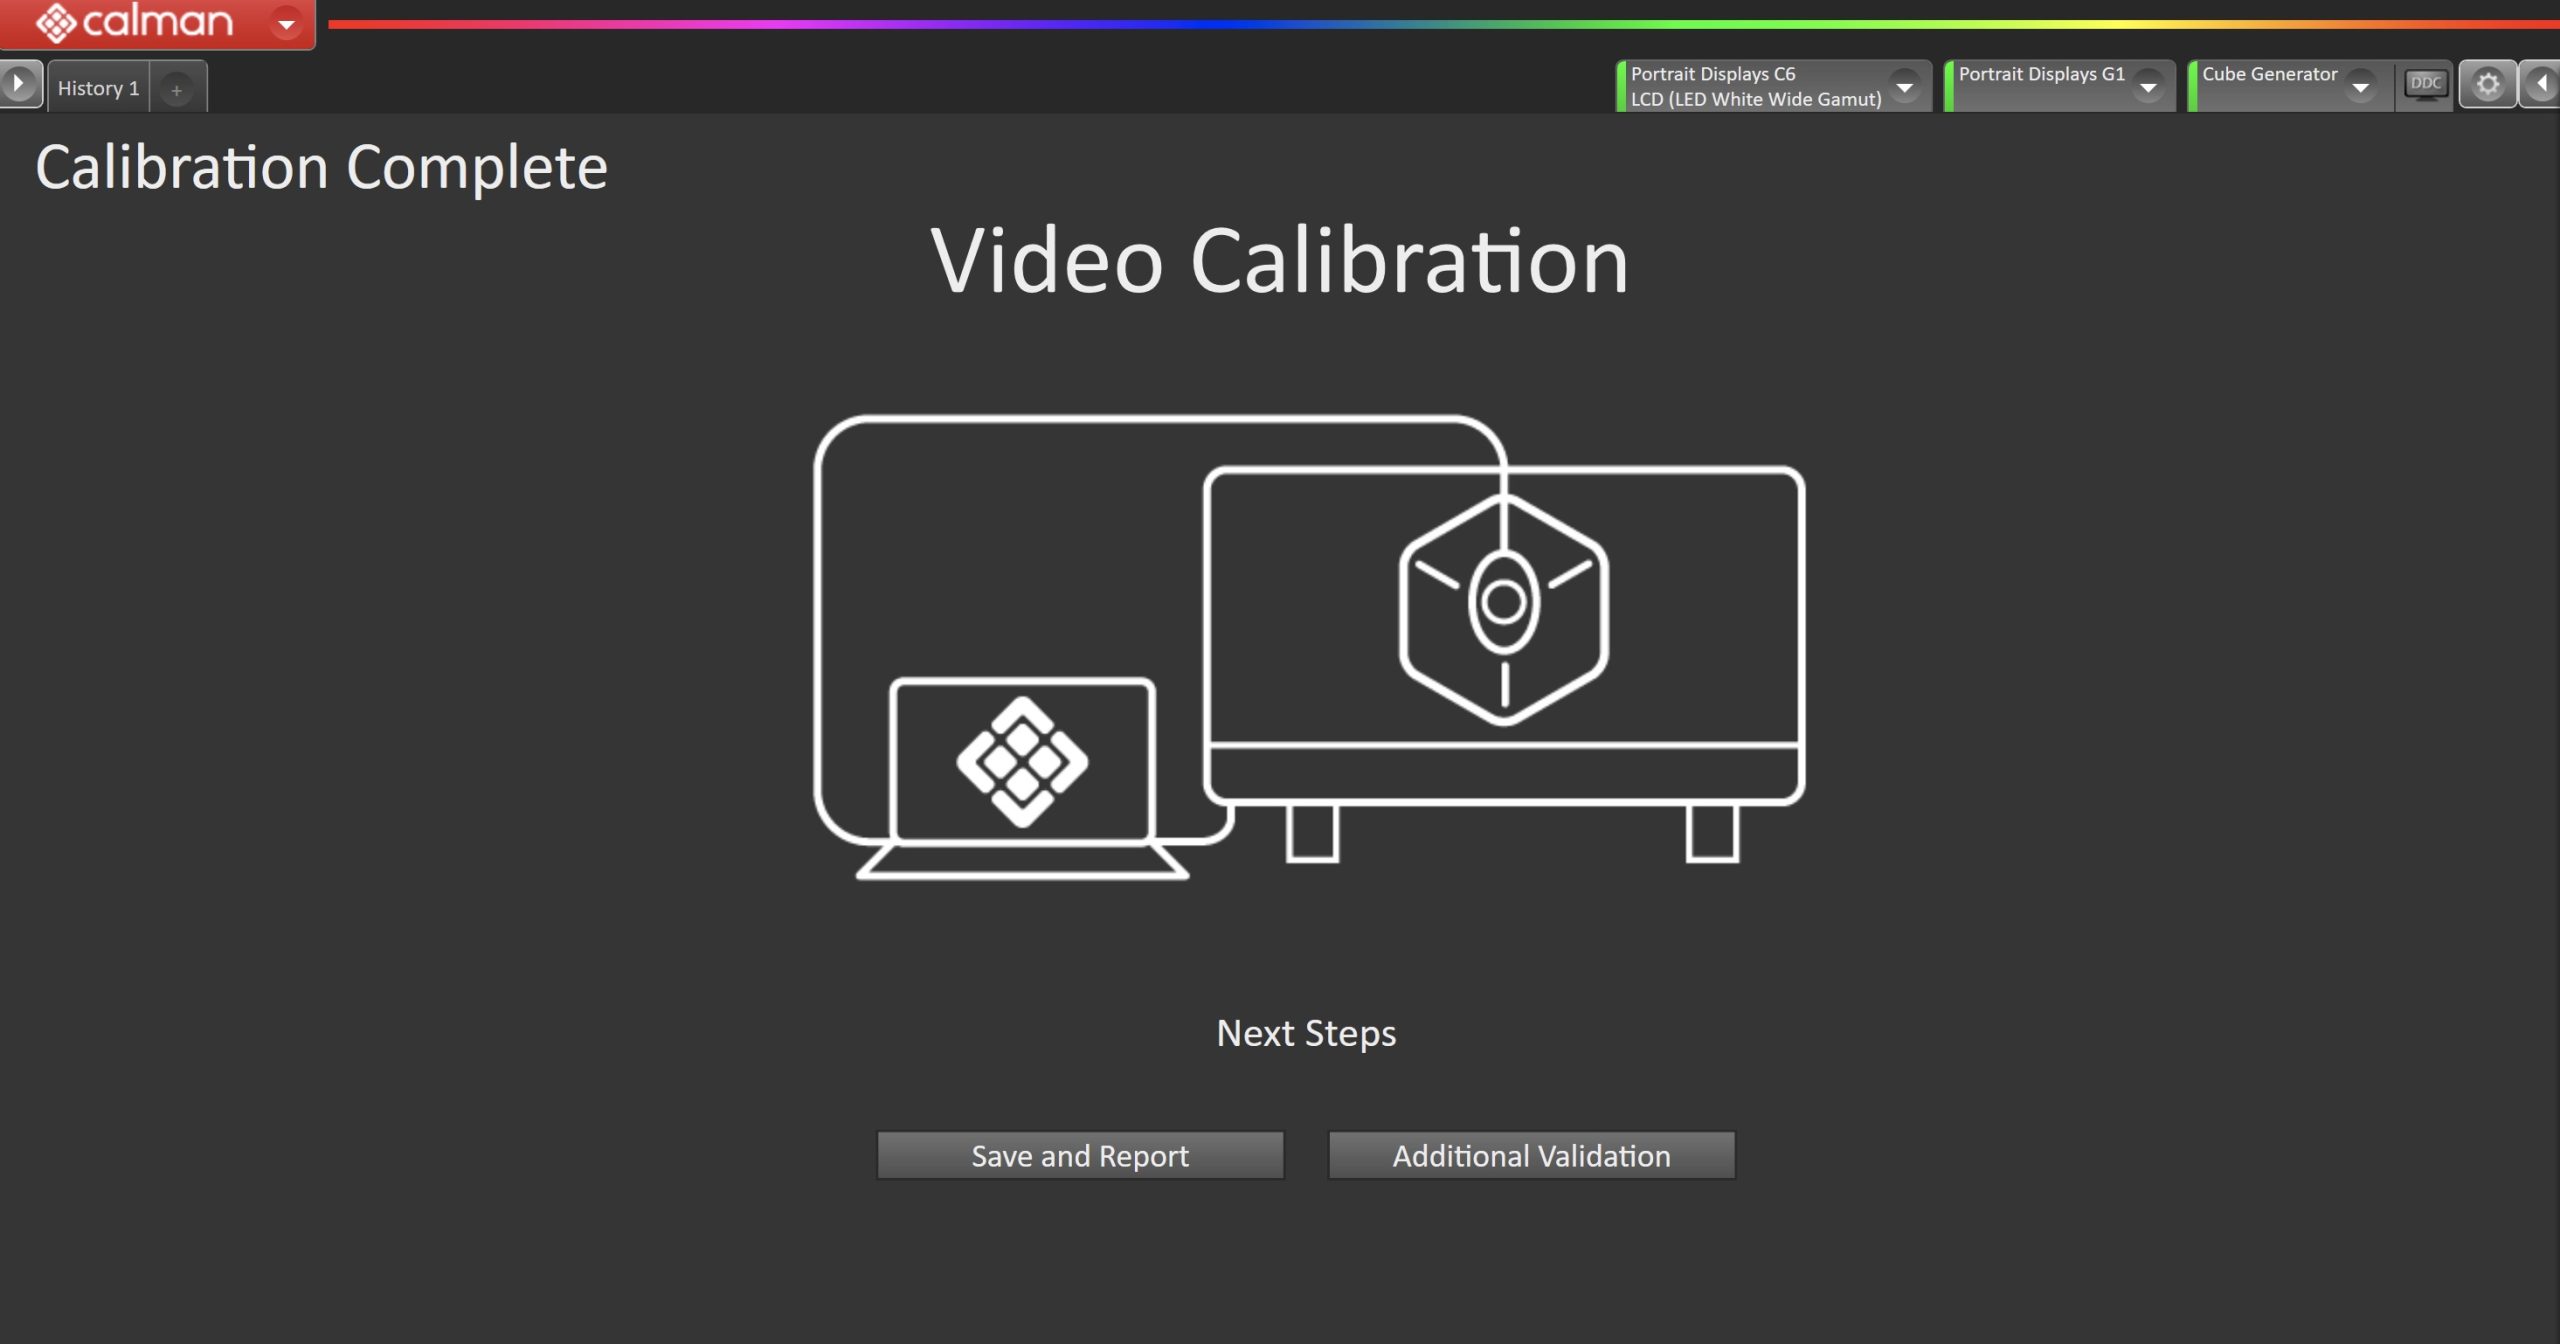
- On the Calibration Complete page, you can choose to…
- Save and Report
- Select Save and Report to generate the calibration report
- Additional Validation
- Allows measurement of the display using more thorough Saturation Sweeps and ColorChecker® patch sets
- Save and Report